buffet food

Chick Pea and Carrot Salad

DSC08424.jpg

Of course, of course we will be slicing apples and dipping them in honey on Rosh Hashanah. (which begins at sunset on September 29th).

But chickpeas are on the menu too. In his Encyclopedia of Jewish Food, the late rabbi and food authority Gil Marks wrote that “chickpeas are a traditional Rosh Hashanah food, a symbol of fertility, abundance and a wish for a well-rounded year to come.”

I usually make chickpeas into hummus, but sometimes I serve them whole, as a snack, roasted, the way my mother made them when I was growing up – a recipe called nahit. She coated the chickpeas with vegetable oil, sprinkled them with salt and paprika and baked them until crispy.

I changed her recipe somewhat -- I use olive oil, kosher salt and fresh thyme, or sometimes za’atar, as seasonings. Nahit is a delicious snack and a healthy one too: chickpeas are a good source of protein, minerals (including calcium) and fiber.

For this coming holiday though I’ll be making a chickpea and carrot salad to serve with dinner. Carrots are another symbolic ingredient of the holiday, so this recipe is a double-up of special ingredients of festive food for the holiday table. It’s a dish that can be made in advance, which makes it a good choice at such a busy time. And it is colorful too, fit for any celebration, including Break-the-Fast. 

Chick Pea and Carrot Salad

  • 1 15-ounce can chickpeas

  • 4 medium carrots, sliced thin

  • 1/2 chopped red onion

  • 1/4 cup chopped fresh parsley

  • 1/4 cup chopped fresh mint

  • 1 teaspoon ground cumin

  • 1/8 teaspoon cayenne pepper

  • 1/4 cup olive oil

  • 3 tablespoons lemon juice

  • salt to taste

Rinse the chickpeas under cold running water; let drain and place in a bowl. Add the carrots, onion, parsley, mint, cumin and cayenne pepper and toss to distribute the ingredients evenly. Pour in the olive oil and lemon juice. Toss to coat the ingredients evenly. Taste for seasoning and add salt to taste.

Makes 6 servings

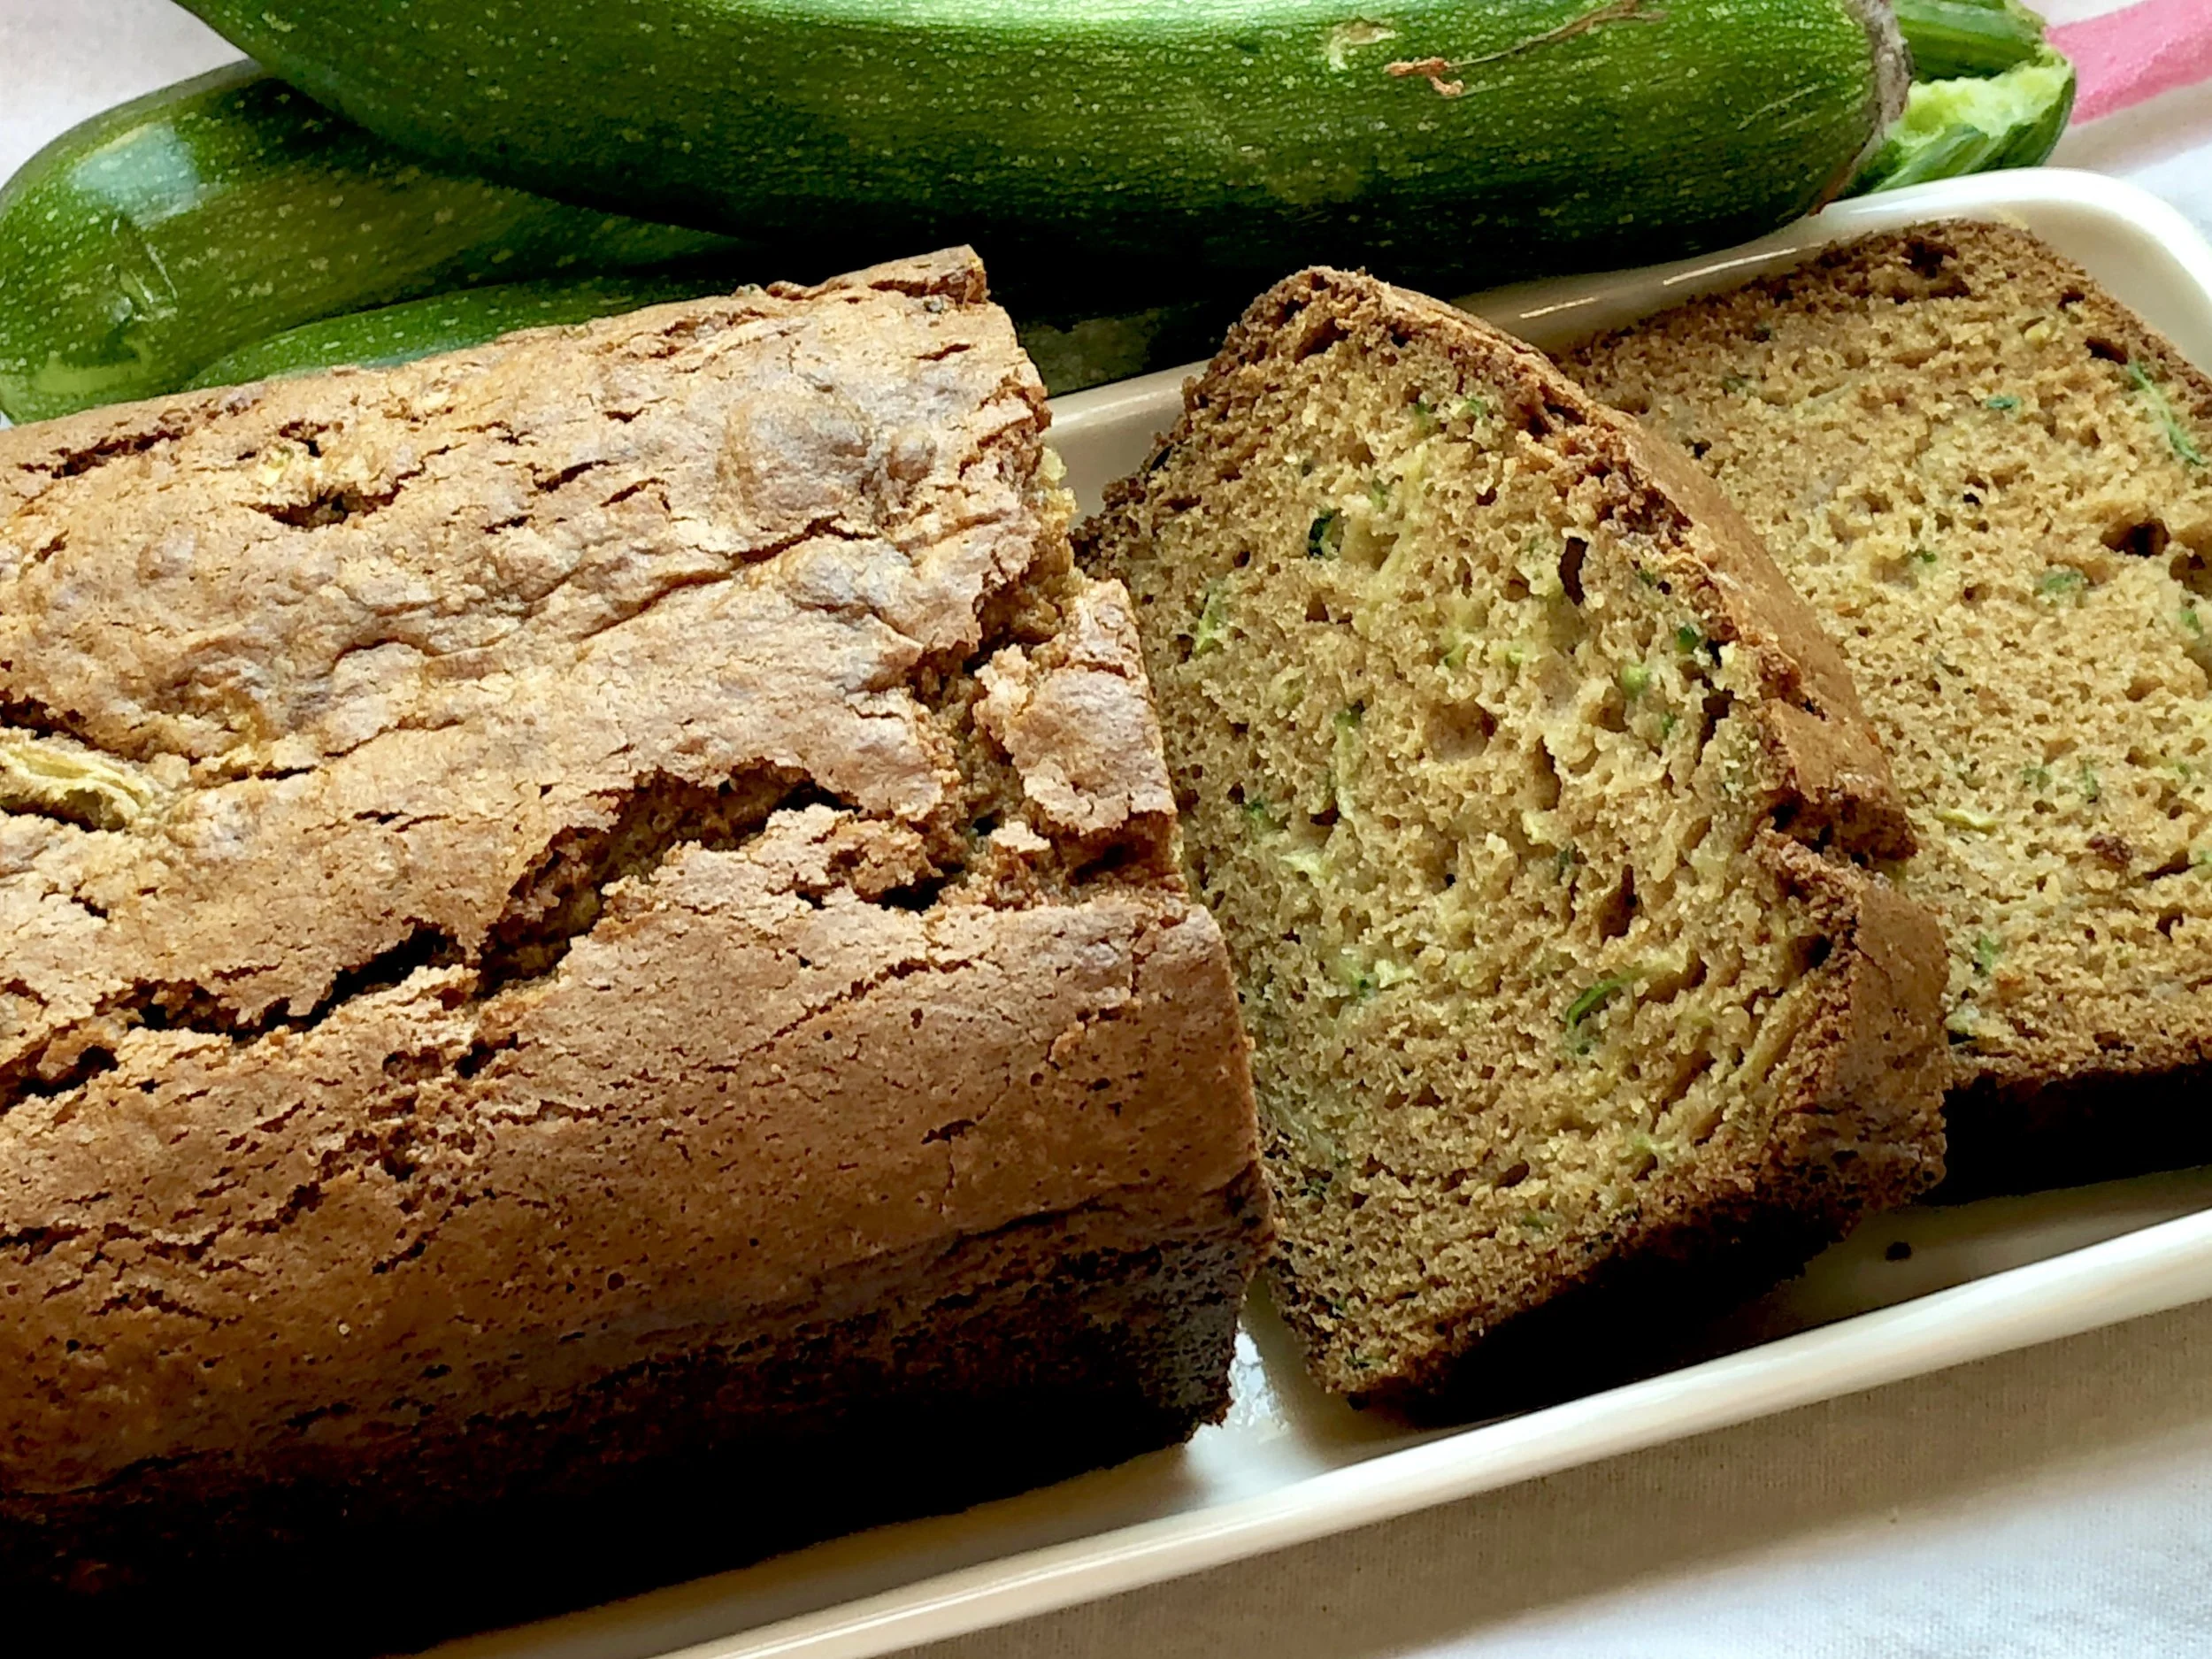
Zucchini Bread

fullsizeoutput_acf2.jpeg

When we were first married, Ed promised me 50 years. That was in 1969. We were young and 50 years seemed like a REALLY REALLY long time.

Grandparent stuff.

But here we are. A few months short of 50.

Wasn’t it yesterday that I fit into that long white dress?

We wanted to celebrate with two other couples, all close friends, who are also at 50.

But we didn’t want to have a big party. Not even an intimate dinner party for six. Although those are lovely, it seemed like the same-old, same-old. 50 years deserved something special.

So we decided to have a 150th Anniversary Afternoon Tea.

It was festive, fun and celebratory.

We started with champagne and tea sandwiches.

Then: scones, clotted cream and jams.

Finally, dessert: several kinds of cookies, Lemon Buttermilk Cake, Pumpkin Spice Cake and this: Zucchini Bread, (made with zucchinis from my garden!).

Just us 6. It was a good day.

We all talked about how amazing it is at how quickly 50 years go by.

Zucchini Bread

  • 2 cups all-purpose flour

  • 1/2 teaspoon cinnamon

  • 1/2 teaspoon nutmeg

  • 1-1/2 teaspoons baking soda

  • 3/4 teaspoon baking powder

  • 3/4 teaspoon salt

  • 3/4 cup brown sugar

  • 1/2 cup sugar

  • 2 large eggs

  • 1/2 cup applesauce

  • 1/4 cup vegetable oil

  • 1 teaspoon vanilla extract

  • 2 cups grated fresh zucchini

Preheat the oven to 350 degrees. Lightly grease a 9”x5”x3” loaf pan. Place the flour, cinnamon, nutmeg, baking soda, baking powder and salt in a bowl and whisk the ingredients until they are evenly distributed. Place the brown sugar, sugar, eggs, applesauce and vanilla extract in the bowl of an electric mixer (or use a hand mixer) and beat at medium speed for 2-3 minutes, until thoroughly blended. Add the flour mixture and stir just until blended. Fold in the zucchini. Spoon the batter into the prepared pan. Bake for 50-60 minutes or until golden brown and a cake tester inserted into the center comes out clean. Cool in the pan on a wire rack for 15 minutes. Invert the muffins onto the rack to cool completely.

Makes one loaf

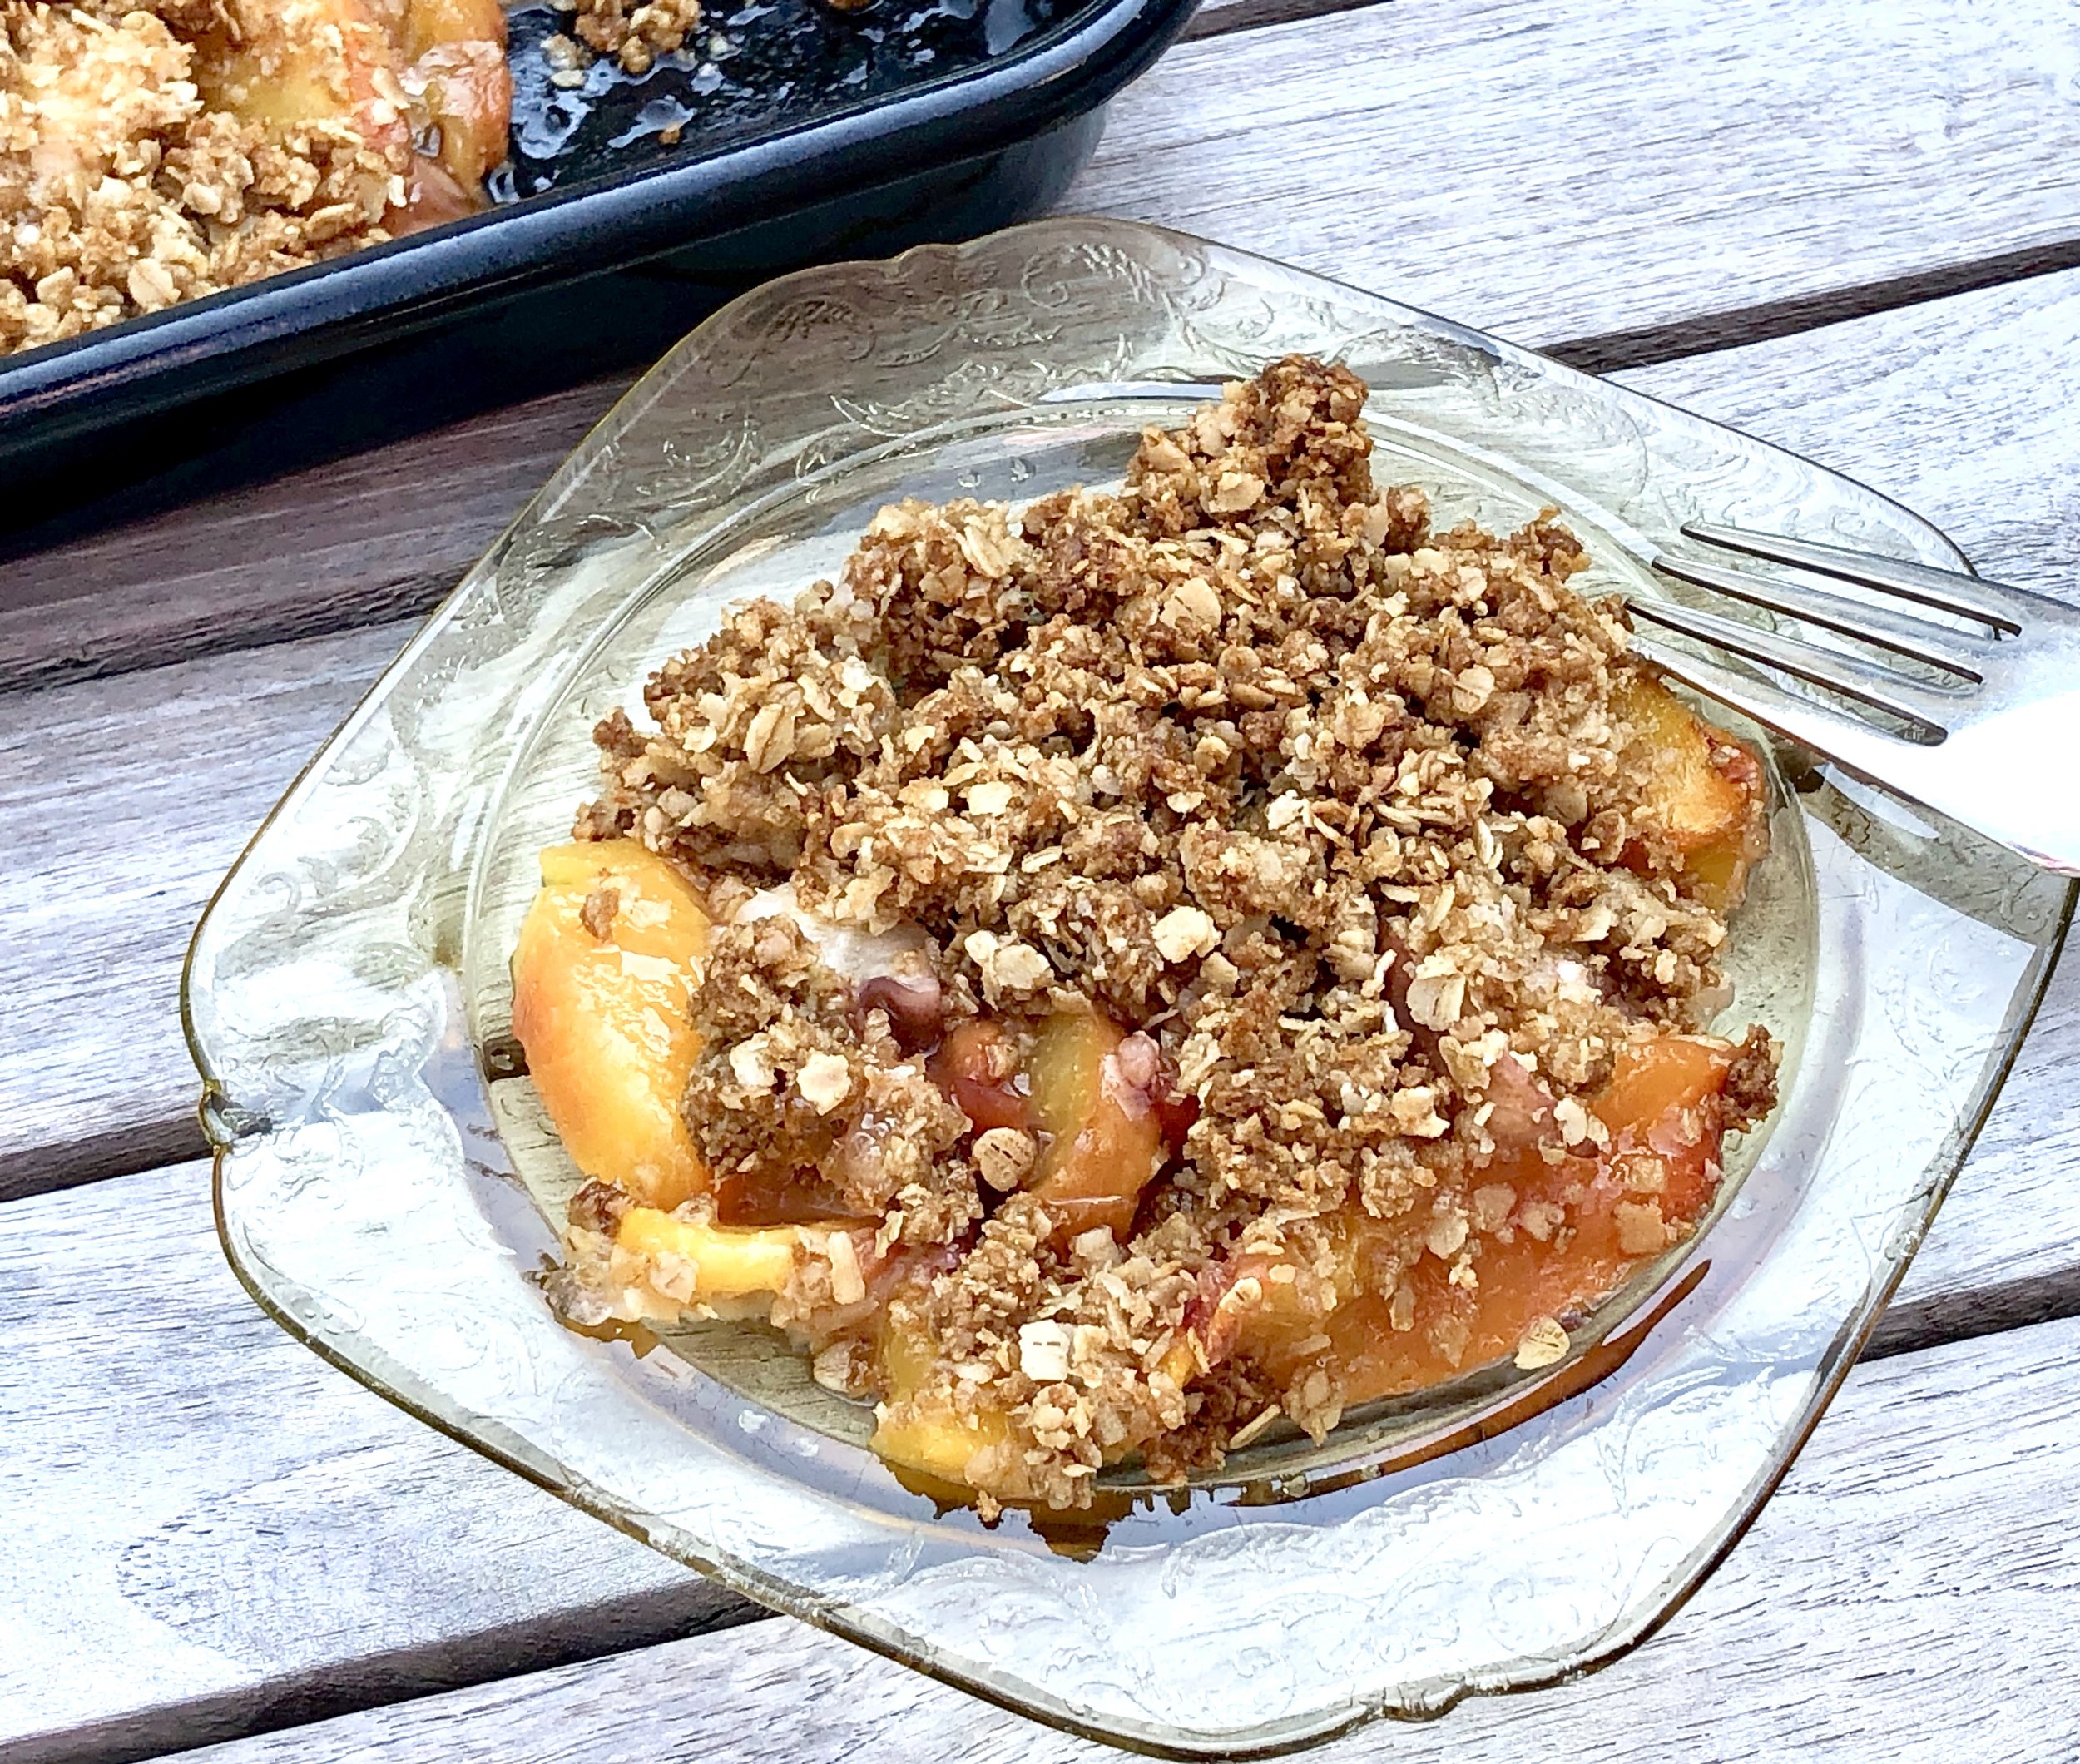
Gluten-Free Peach Crisp

fullsizeoutput_945d.jpeg

Some summers the peaches are glorious.

And then there’s this year. I haven’t had an excellent peach or nectarine yet.

I bought a bunch a few times and they tasted ok, but not really flavorful. Some were cottony and mealy.

I used the cottony/mealy ones to make sauce — like applesauce only made with peaches (with a bit of cinnamon and a squirt of lemon juice). It was very good. We ate some and I used the rest for quickbread.

I used the sort-of-tasty ones for this peach crisp. This was perfect. Baking — plus some other stuff — brought out the best of the fruit.

And look how easy this dessert is!

Plus, it’s gluten-free, in case you need…

Gluten-Free Peach Crisp

Filling:

  • 6 ripe medium peaches

  • 2 tablespoons sugar

  • 2 tablespoons minute tapioca

  • 1 tablespoon lemon juice

Crust:

  • 1-1/2 cups quick cooking oats

  • 2/3 cup brown sugar

  • 1 teaspoon ground cinnamon

  • 1/4 teaspoon salt

  • 6 tablespoons butter (margarine or solid coconut oil), cut into chunks

To make the filling: Lightly butter a baking dish. Preheat the oven to 400 degrees. Slice the peaches and place the pieces in the baking dish. Add the sugar, tapioca and lemon juice, toss the ingredients and let rest for 15-20 minutes. 

To make the crust: Mix the oats, brown sugar, cinnamon and salt in a bowl. Add the butter and work it into the dry ingredients until the mixture is crumbly. Place on top of the fruit. Bake for 30-35 minutes or until the crust is golden brown.

Makes 6 servings


Vegetable Salad

fullsizeoutput_a6ee.jpeg

Light, refreshing food. That’s what we want during the summer.

Also, easy to make. And as quick as possible.

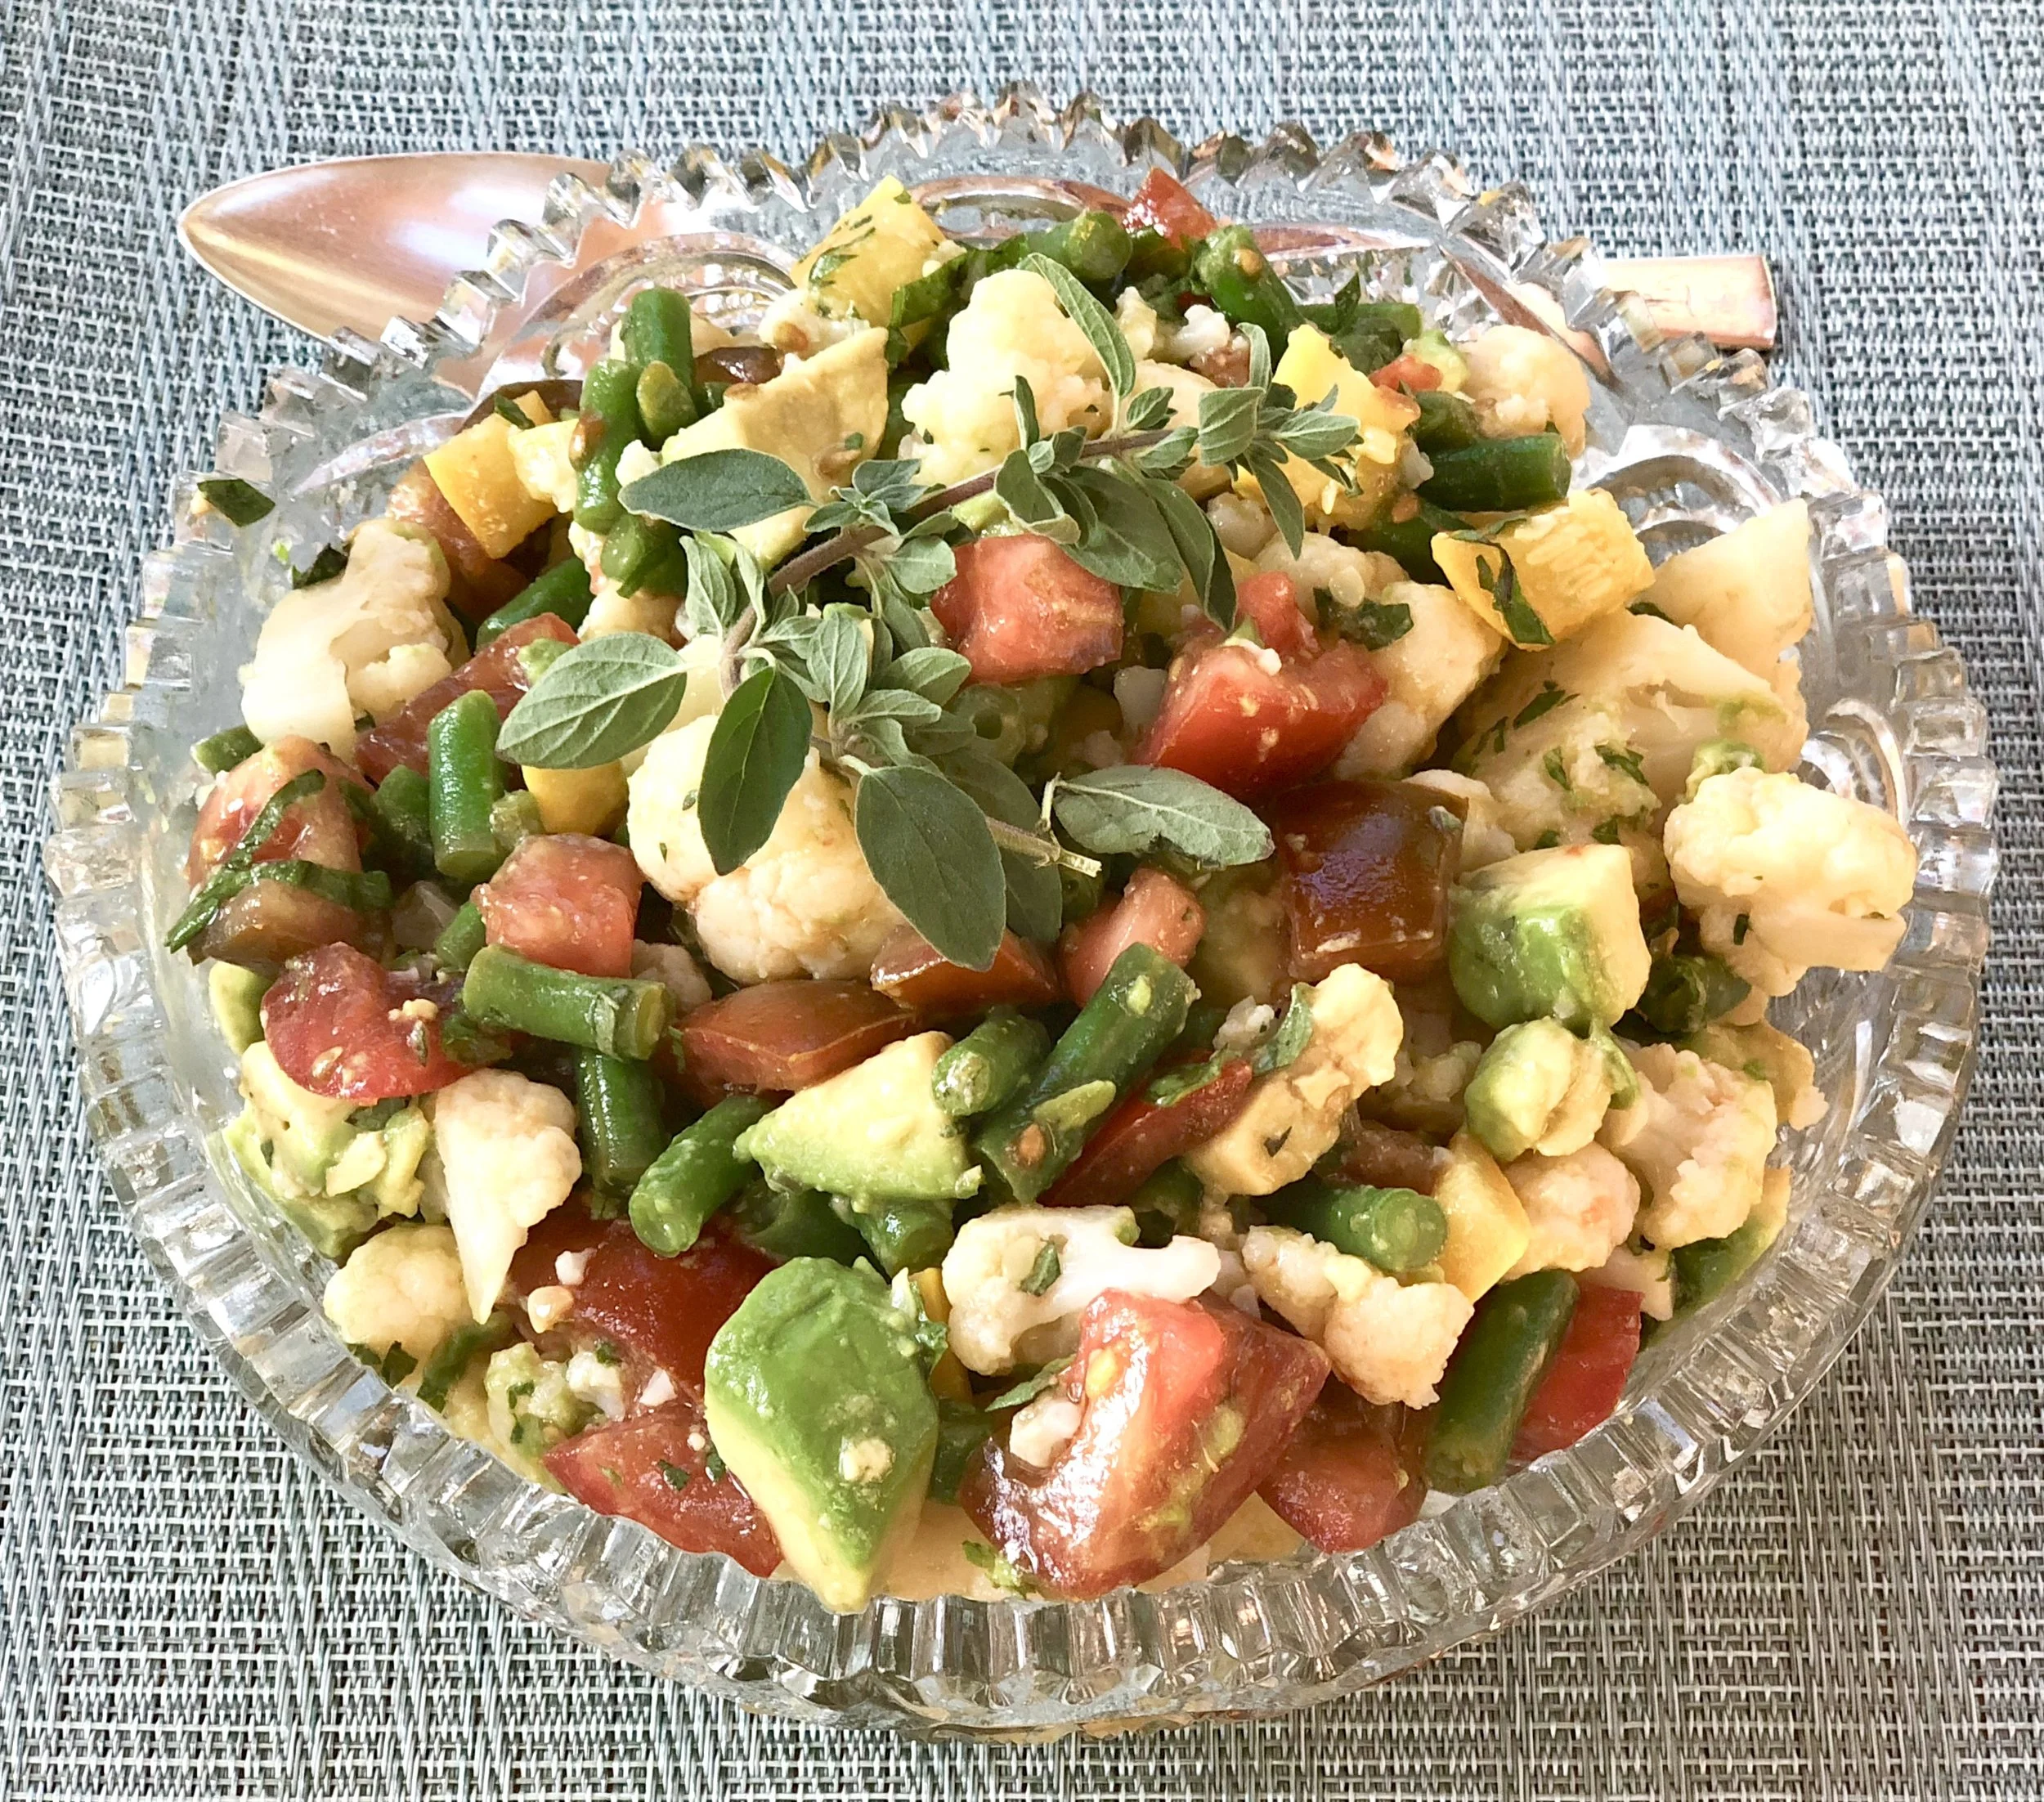
I made this vegetable salad using leftovers from the veggies we had over a couple of meals. Added some fresh tomatoes, an avocado and some herbs. Not only did I get to use up stuff from the fridge, the dish took less than 10 minutes to make.

It’s a side dish. But you can add some tofu, cheese or hard-cooked eggs and make it into a main course (or add leftover fish, meat or poultry).

Add crusty bread and it’s a sandwich filling.

Mix it into cooked penne or ziti and it becomes pasta primavera.

Use whatever vegetables you have in proportions suggested. There’s no magic here, no actual recipe that will fail if you don’t have one of the ingredients.

Vegetable Salad

  • 3 cups cooked cut up cauliflower

  • 1 cup cooked, cut up green beans

  • 1 cup cooked cut up yellow squash

  • 3-4 cut up small tomatoes

  • 1 avocado, cut into small chunks

  • 3 tablespoons chopped fresh basil

  • 2 teaspoons chopped fresh oregano

  • 2 tablespoons olive oil

  • 2-3 tablespoons fresh lemon juice (or use white wine vinegar)

  • salt and freshly ground black pepper to taste

Place the cauliflower, green beans, yellow squash, tomatoes, avocado, basil and oregano in a bowl and toss the ingredients to distribute them evenly. Pour the olive oil over the vegetables and toss again. Pour 2 tablespoons of the lemon juice over the vegetables and toss again. Taste for seasoning and add more lemon juice and salt and pepper to taste.

Makes 4-6 servings

Chopped Salad with Chick Peas, Feta Cheese and Zatar Vinaigrette

fullsizeoutput_96d0.jpeg

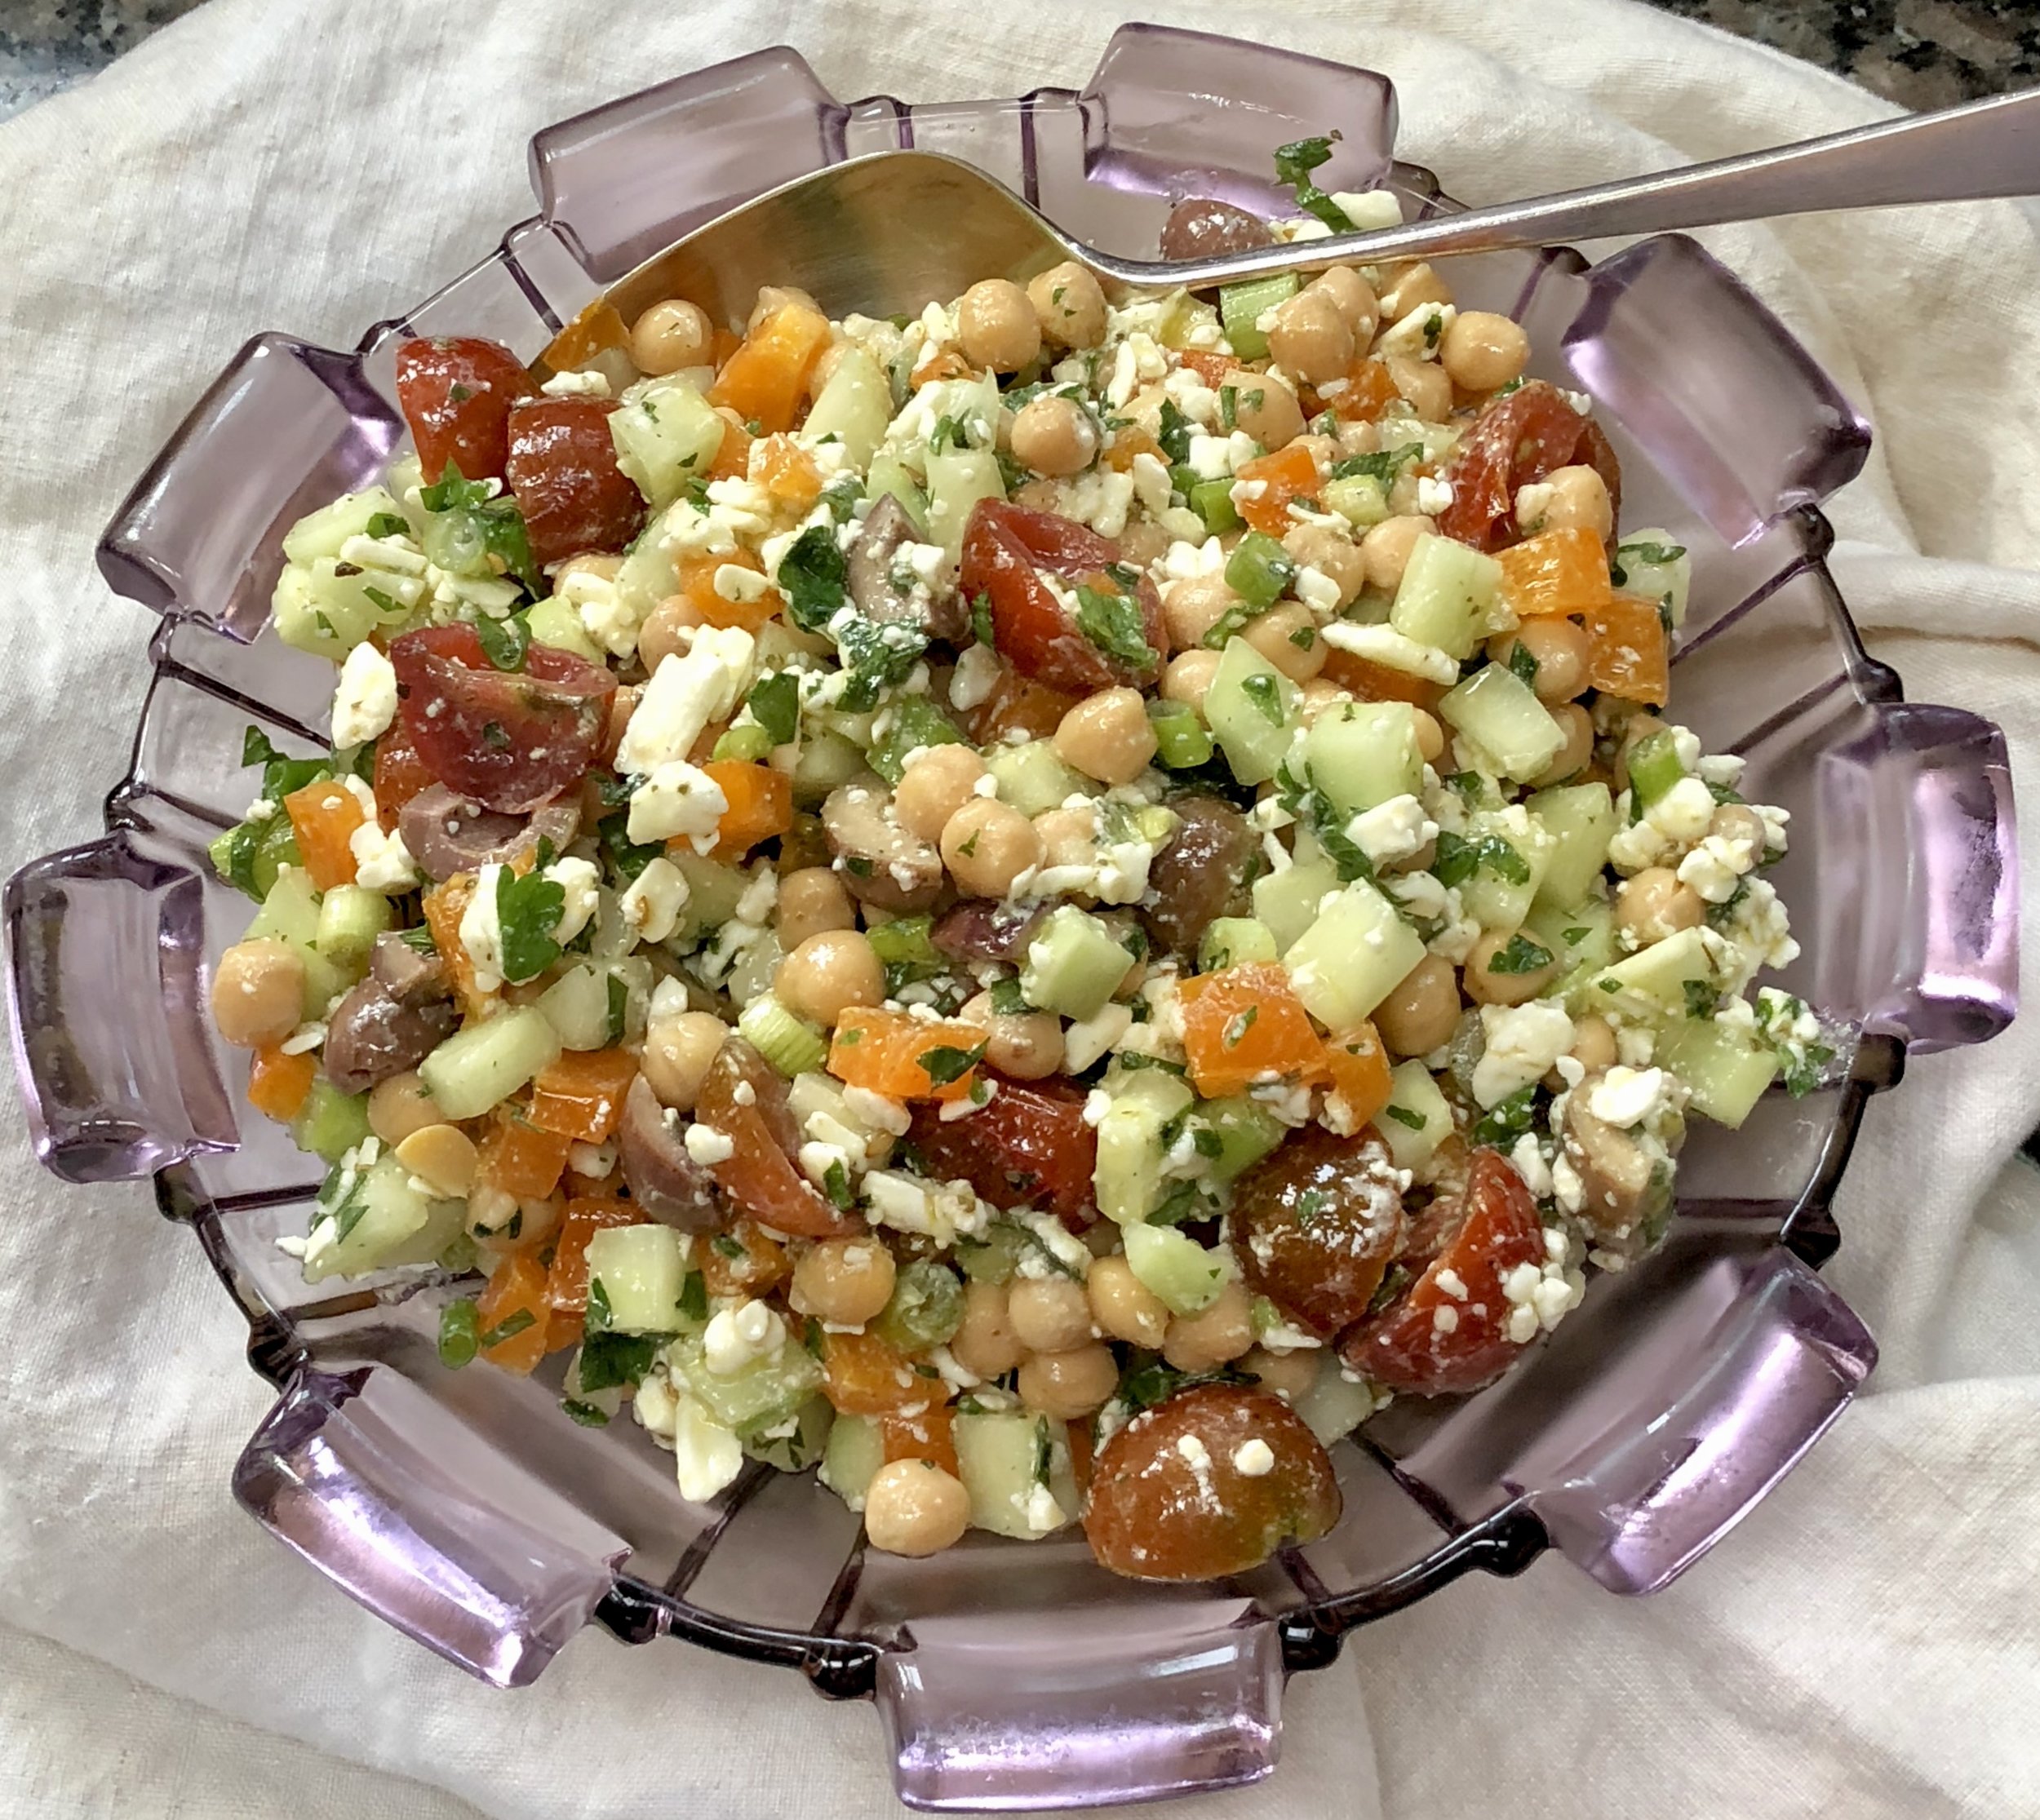
For us, summer means salad. Not just leafy greens and tomatoes for starters to a meal. We eat bulky filling salads for dinner. Like this chopped salad, which of course could be served with other salads or as a side dish to grilled fish. But it’s also satisfying on its own, just like this. Add a crust bread and some fabulous olive oil for dipping and that’s all you need (except for dessert of course).

Chopped Salad with Chickpeas, Feta Cheese and Zatar Vinaigrette

  • 1 large cucumber, peeled, deseeded, and chopped

  • 1 large red bell pepper, chopped

  • 2 large ripe tomatoes, chopped

  • 3–4 scallions, chopped

  • 1 (15-ounce) can chick peas, rinsed and drained

  • 1 cup crumbled feta cheese

  • 1/4 cup minced fresh parsley

  • 1/2 cup tangy black olives, pitted and halved

  • 3–4 tablespoons extra virgin olive oil

  • 2 tablespoons lemon juice

  • 1/2 teaspoon zatar

  • Salt and freshly ground black pepper to taste

  • Pita bread or crisps, optional

Place the cucumbers, bell pepper, tomatoes, scallions, chick peas, cheese, parsley, and olives in a bowl and toss ingredients gently. Just before serving, mix together the olive oil, lemon juice, and zatar. Pour over the salad. Season to taste with salt and pepper. Salad tastes good with Pita bread or crisps.

Makes 4 servings.


Food You Want

Cauliflower Crunch Tabouli from Food You Want by Nealy Fischer

Cauliflower Crunch Tabouli from Food You Want by Nealy Fischer

I don’t often write about cookbooks, but every once in a while I find one that I like so well that I want to spread the news. Agents and publishers do send me books for review from time to time but I only recommend the ones that I find truly useful. “Food You Want” by Nealy Fischer, The Flexible Chef (DaCapo 2019) is one of those.

Most of the time it’s the recipes that catch my eye and stimulate my taste buds. But I like “Food You Want” because it has much more than good recipes. It is more or less a book that helps any home cook — novice or experienced — become comfortable in the kitchen, be unafraid to cook, enjoy planning meals and preparing food.

That has always been one of my life’s goals. My Mom made me comfortable in the kitchen. I have passed the lessons on to my children, grandchildren and numerous students who have shown up over the years for cooking lessons.

Fischer’s book sets out several ways to make meals easier and to gear recipes to one’s particular tastes and lifestyle. Her goal is to make home cooks feel “unshackled” to recipes and to use one’s creativity to suit preferences and limitations. The recipes are gluten-free because that suits her diet, but of course, for those who can tolerate gluten, she tells you how to switch.

The “flexible flips” at the end of the recipes show various ways to add or leave out an ingredient or two — substitutions; changing a dish from dairy to parve; what to do with leftover ingredients, etc. “Nail this” tips offer strategies for cooking each recipe you choose — what can be done in advance; temperature guides; when to let food cool before storing; when to drizzle rather than smooth ingredients with a spoon, and so on.

There are lots of kitchen hacks, advice on pantry, fridge and freezer staples and even advice on essential kitchen gadgets.

There’s advice on how to make a plan so that cooking becomes less chore, more joyous. Recipes for side dishes that don’t require recipes! Quickie 10-minute dinners! How to make baking flops into successes!

Did you know you could substitute chopped green olives for capers?? The book is filled with stuff like that.

So many wonderful sounding recipes too. I especially love the salads, especially the Cauliflower-Crunch Tabouli, which is perfect for summer; Minted Pea Soup with Roasted Beetroot; Showstopping Herb-Crusted Salmon; Guiltless Zucchini Fritters; Date-Bar Bites.

All in all — this is a wonderful guide for how to enjoy cooking, how to become more creative, how to adapt recipes, how to find joy in preparing meals — plus some delicious recipes!

CAULIFLOWER-CRUNCH TABOULI

STEPS: CHOP, TOSS! / Serves 6

 There’s nothing ordinary about this stunning herb-specked, grain-free tabouli. Raw cauliflower and pine nuts take center stage and combine to add an unexpected and essential nuttiness and color that elevate the dish. This recipe takes just minutes to whip up and seconds to devour. It’s crunchy, fresh, and the very definition of craveable clean food that makes you want more. I really shouldn’t play favorites, but this salad may well be my favorite!

 Tools: Food processor (optional)


Ingredients:

·      1/2 head purple or white cauliflower, core removed

·      3 Persian cucumbers, chopped

·      2 medium tomatoes, chopped

·      1 cup loosely packed fresh mint leaves, chopped

·      1 cup loosely packed fresh parsley leaves, chopped

·      2 tablespoons finely diced red onion

·      3 tablespoons extra-virgin olive oil

·      3 tablespoons fresh lemon juice

·      1 garlic clove, pressed (optional)

·      Salt, to taste

·      Freshly ground black pepper, to taste

·      1/2 cup chopped pine nuts, toasted


Directions:

1.     In a food processor, chop the cauliflower into 1/4-inch pieces. Do not overprocess. Alternatively, chop it by hand.

2.     In a large bowl, stir together the cauliflower, cucumber, tomato, mint, parsley, and red onion.

3.     Toss the vegetables with the olive oil, lemon juice, and garlic (if desired). Season with salt and pepper to taste. Top with pine nuts just before serving.

4.     Serve immediately, or it may be made an hour ahead. If making in advance, toss the pine nuts in right before serving so they stay crunchy.


nail this:

·      Because the fresh, raw ingredients are the centerpiece here, only make this recipe when you have access to the freshest herbs and cauliflower.

·      Nuts are crucial. They add an essential favor and crunch that are unexpected and should be included.


flip it:

·      Use any color cauliflower you can find.

·      Substitute another nut for the pine nuts. Toasted would be yummiest.

Add chopped anything! Red bell peppers and olives are favorite flavor profiles.

Matbucha

fullsizeoutput_a219.jpeg

Spring has sprung and for me, that means more salad.

So I got to thinking about that word salad, which I realize means so many things that I was never able to fit all of my salad recipes into a file folder simply marked “salad.” I had to sub-categorize them into files such as “grain salads,” “tomato salads,” “fruit salads” and so on.

Over the years I’ve made salads of all sorts. Some based mostly on greens and some that had no greens at all.

I’ve made beet salads, dinner salads, fish salads and quinoa salads.

I could go on. But really, there is no one way to describe “salad,” even though a dictionary might say something like “a mixture of raw and cooked vegetables served with dressing.”

No.

Because recently I prepared some Matbucha, which is an entirely different salad category.

Matbucha is a “salade cuit” — that is, “cooked salad.” In fact the word Matbucha, is an Arabic word that means “cooked salad".”

Cooked salad may seem odd to Western thinking except for the fact that most of us actually eat lots of cooked salads, such as potato salad and egg salad too. We just don’t think of them as “cooked salads,” but that’s what they are.

Matbucha is a Moroccan dish, especially popular in the Moroccan Jewish community, which was once large and thriving in North Africa. When good numbers of Moroccan Jews migrated to Israel, they brought their love of this dish with them and it is now wildly popular in Israel too.

For good reason: Matbucha is vibrantly tasty, easy to cook and is ideal for Shabbat because, even though it’s cooked, you can serve it at room temperature. Use it as a salad course or as a side dish with dinner. I’ve always served it with hors d’oeuvre, as a topping for crackers or pita wedges (it works well with other Middle Eastern nibbles and dips such as hummus, raheb, baba ghanoush and so on).

You can make Matbucha 3-4 days ahead. That’s handy isn’t it?

Matbucha

  • 2 large red bell peppers

  • 3 tablespoons olive oil

  • 1 serrano pepper, deseeded and chopped

  • 2 large cloves garlic, finely chopped

  • 6 medium tomatoes peeled and finely chopped

  • 1-1/2 teaspoons paprika

  • 1 teaspoon sugar

  • 1/2 teaspoon salt or to taste

Preheat the broiler. Place the peppers under the broiler, about 4-6" away from the heat, and broil for 2-3 minutes, until the skin has blistered. Turn the peppers and repeat this process until the entire surface is blistered and lightly charred. Remove the peppers and place them in a paper bag. Let rest at least 10 minutes. Remove the peppers from the bag, peel off the skin and discard the stem and the seeds. Cut the peppers into pieces. Heat the olive oil in a large saucepan over medium heat. Add the peppers, serrano pepper and garlic and cook for 2-3 minutes. Add the tomatoes, paprika, sugar and salt. Bring to a simmer over medium-high heat. Cook for 30-35 minutes, until most of the liquid has evaporated and the mixture is thick.

 Makes 1-1/2 to 2 cups


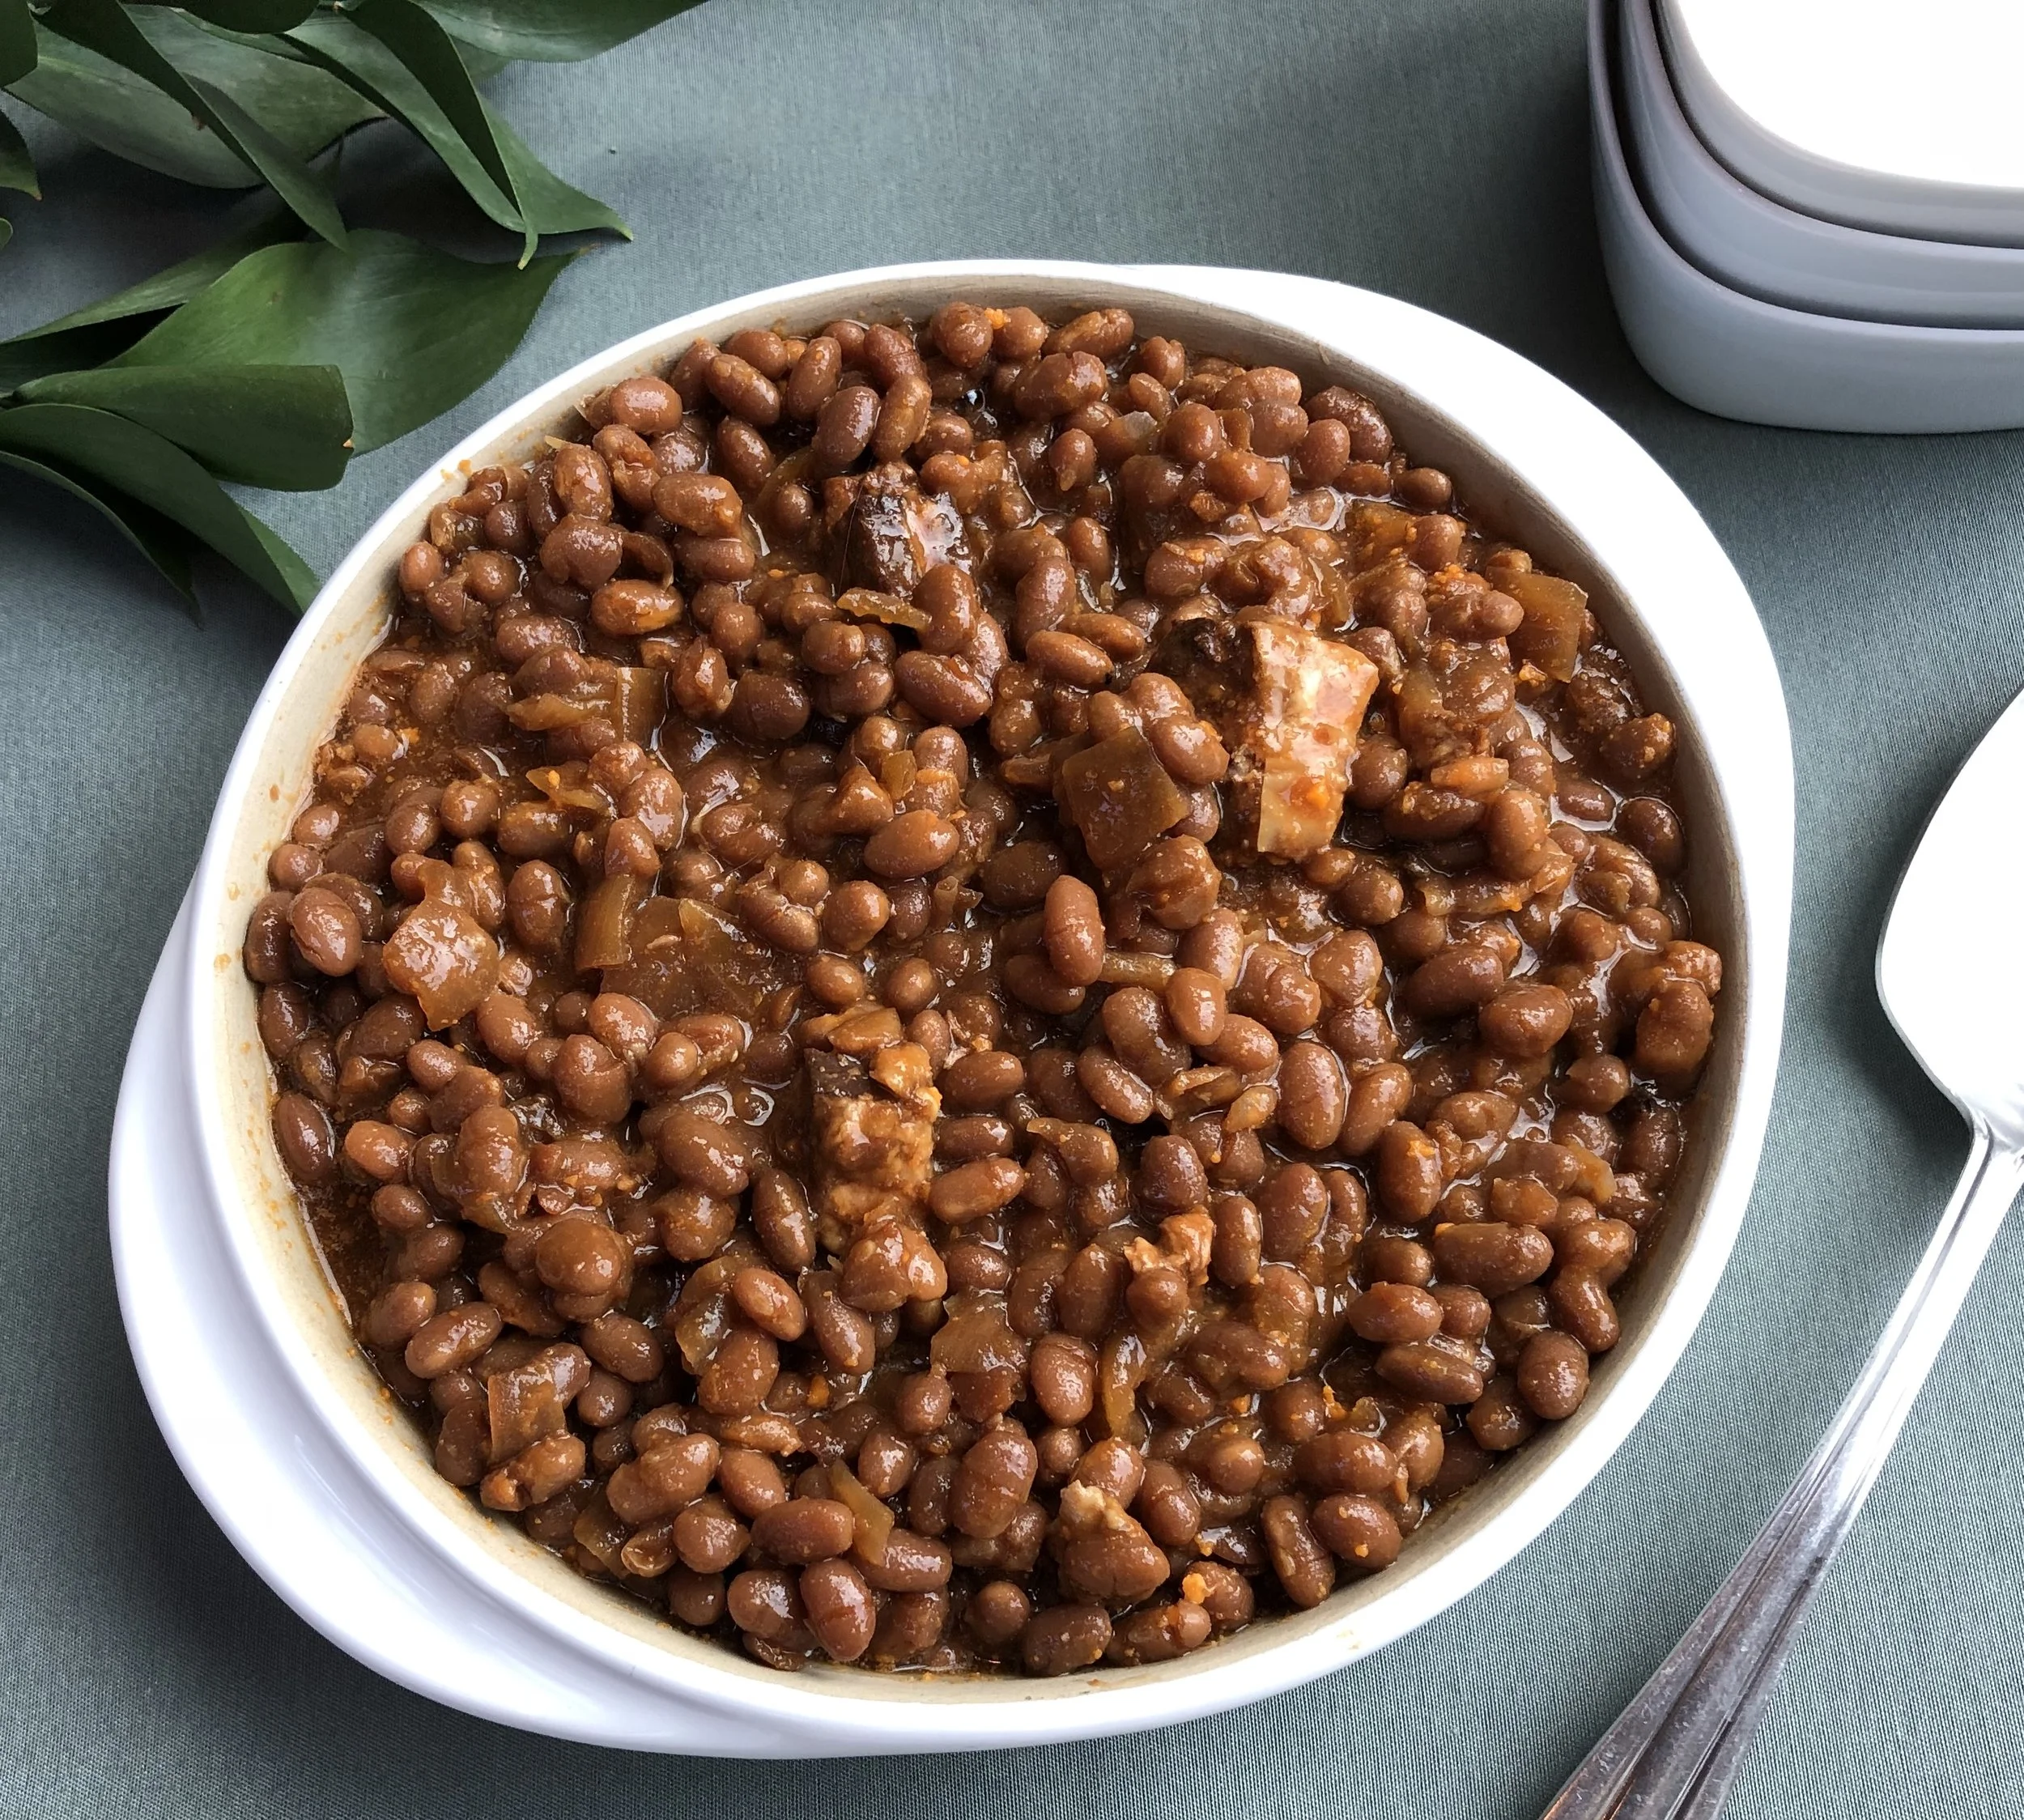
Kosher Baked Beans and "Bacon"

fullsizeoutput_9da4.jpeg

It’s really cold outside.

Really cold.

And yesterday there was a snow squall. Cold, snowy and blowy with no visibility for about a half hour.

I can’t complain though. It’s MUCH colder in the midwest.

Also my house is nice and warm and toasty.

And I have these baked beans for dinner. Real, authentic Boston baked beans with bacon. Ok, kosher bacon. There are many brands to choose from, but I used Abeles & Heymann’s newish chunk beef bacon because Seth Leavitt, A&H owner, gave me a piece of it a while ago. He said “go experiment.” Which I did. And out came these fabulous beans.

Dinner. Add a green vegetable.

Just like in Colonial times (minus the green vegetable).

Btw, this is a good dish for Superbowl parties — by itself, but it’s also a nice accompaniment to chicken wings.

Kosher Baked Beans and “Bacon”

  • 1 pound dried navy or great northern beans

  • water

  • 6 ounces kosher bacon, cut into chunks

  • 1 medium onion, chopped

  • 1/2 cup ketchup

  • 1/3 cup honey

  • 1/4 cup molasses

  • 4 whole cloves

  • 2 teaspoons powdered mustard

  • 1/2 teaspoon salt

Place the beans in a large saucepan and cover them with water. Bring the water to a boil over high heat. Lower the heat and cook for 2 minutes.  Remove the pan from the heat and let the beans soak for one hour. Drain the beans and return them to the pot. Cover the beans again with water and bring to a boil over high heat. Lower the heat and simmer for 45 minutes. (Alternatively, cover the beans with water and let them soak for at least 8 hours.) Drain. Place the beans in a casserole. Add the bacon, onion, ketchup, honey, molasses, cloves, mustard and salt and mix thoroughly to blend the ingredients. Stir in 3 cups water. Pour the mixture over the bean mixture. Cover the casserole and put it in the oven. Set the temperature at 300 degrees and cook the beans at least 4 hours, or until they are tender, stirring them occasionally and adding water, if necessary to keep the beans moist. 

 Makes 8 servings

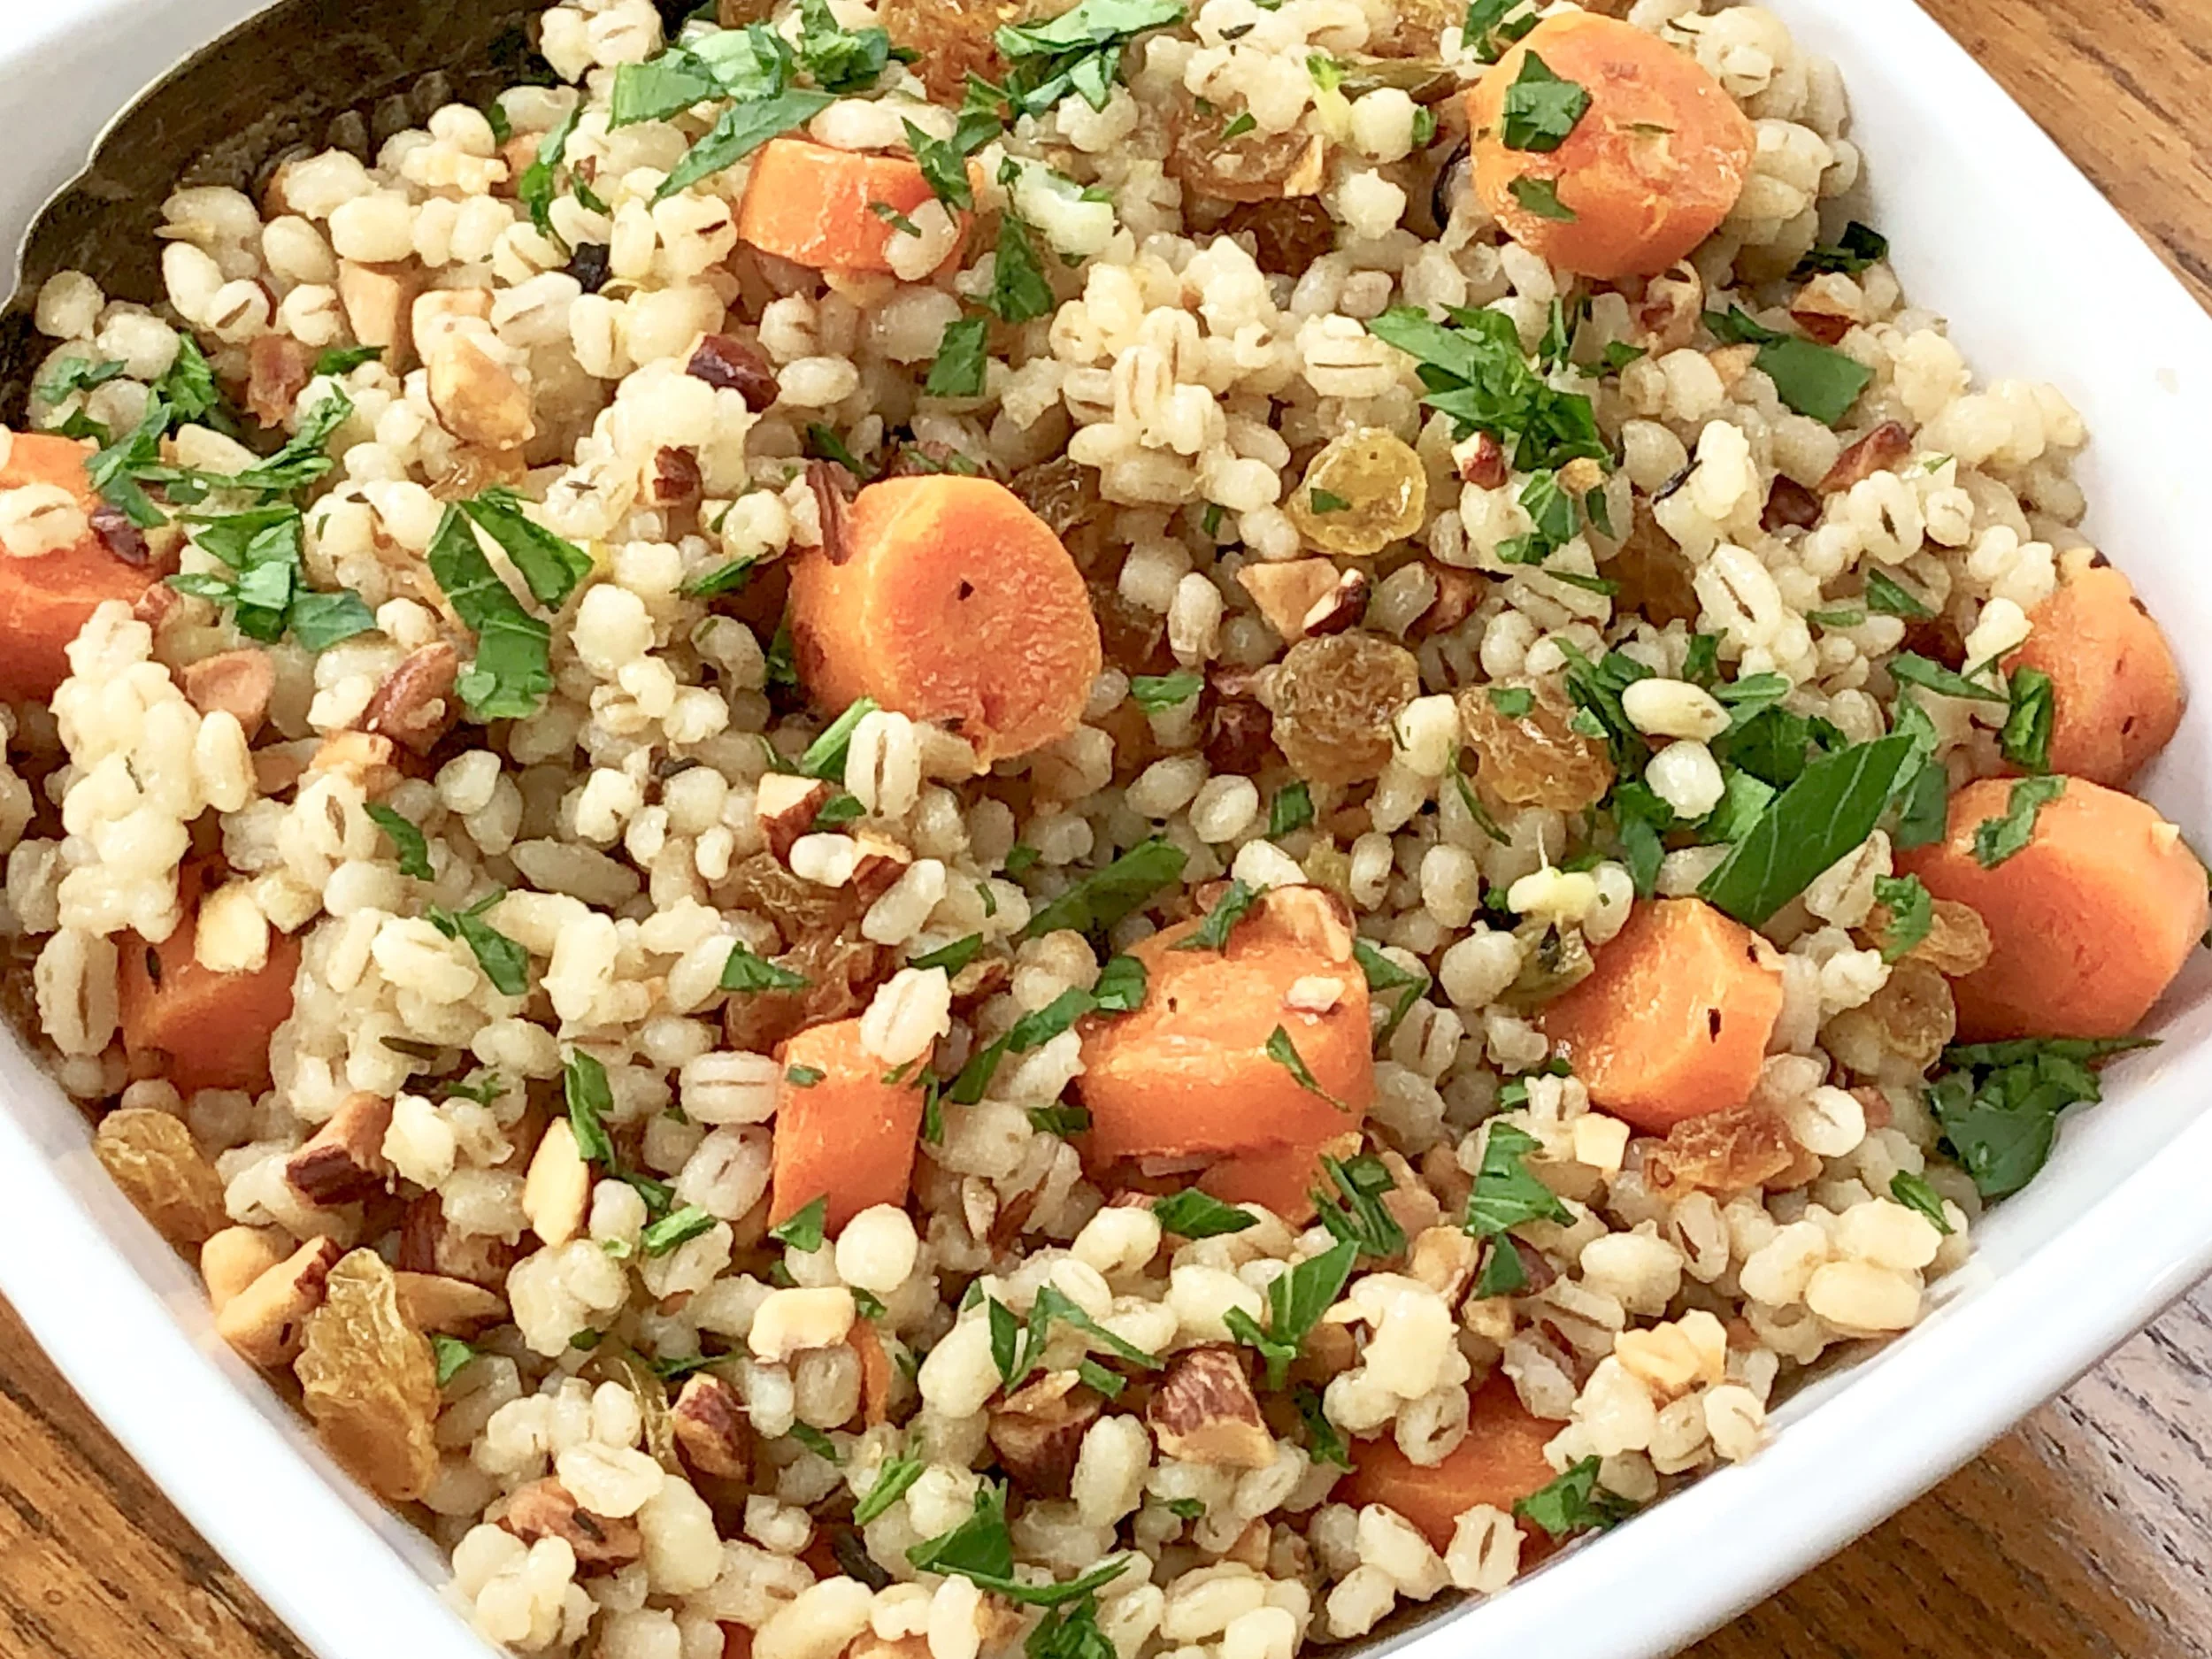
Barley with Carrots, Raisins and Almonds

fullsizeoutput_92d5.jpeg

For me, the appeal of winter foods is their ability make me feel warm and well-nourished. I don’t expect them to be gorgeous. When I look at dishes such as beef stew or a beloved chicken-and-soup, I don’t see art, I see safety and memory and the expectation of comfort.

This is why, when winter comes, I look for side dishes or desserts or an appetizer that can provide some color or add some beauty to the entree or the meal.

This barley casserole fits the bill. It’s a substantial side dish that works with meat, fish and poultry, with stews and hearty winter casseroles and for vegetarian meals too. It’s colorful and makes for an attractive addition to a winter dinner.

Barley with Carrots, Raisins and Almonds

  • 2 tablespoons olive oil

  • 2-3 carrots, sliced 1/2-inch thick

  • 3-4 scallions, chopped

  • 1 cup pearled barley

  • 2-1/2 cups vegetable stock

  • salt and freshly ground black pepper to taste

  • 1-1/2 teaspoons chopped fresh thyme

  • 1/2 cup golden raisins

  • 1/2 cup chopped toasted almonds

  • 2 tablespoons chopped fresh parsley

Heat the olive oil in a sauté pan over medium heat. Add the carrots and scallions and cook for about 2 minutes. Add the barley and cook for another 2 minutes, stirring often. Pour in the stock and add the salt, pepper and thyme. Stir, bring to a boil, lower the heat, cover the pan and simmer for about 50 minutes or until all the liquid has been absorbed. Stir in the raisins and almonds and toss gently to distribute the ingredients evenly. Cover the pan and let rest for 5 minutes. Spoon into a serving bowl and sprinkle with parsley.

Makes 6-8 servings


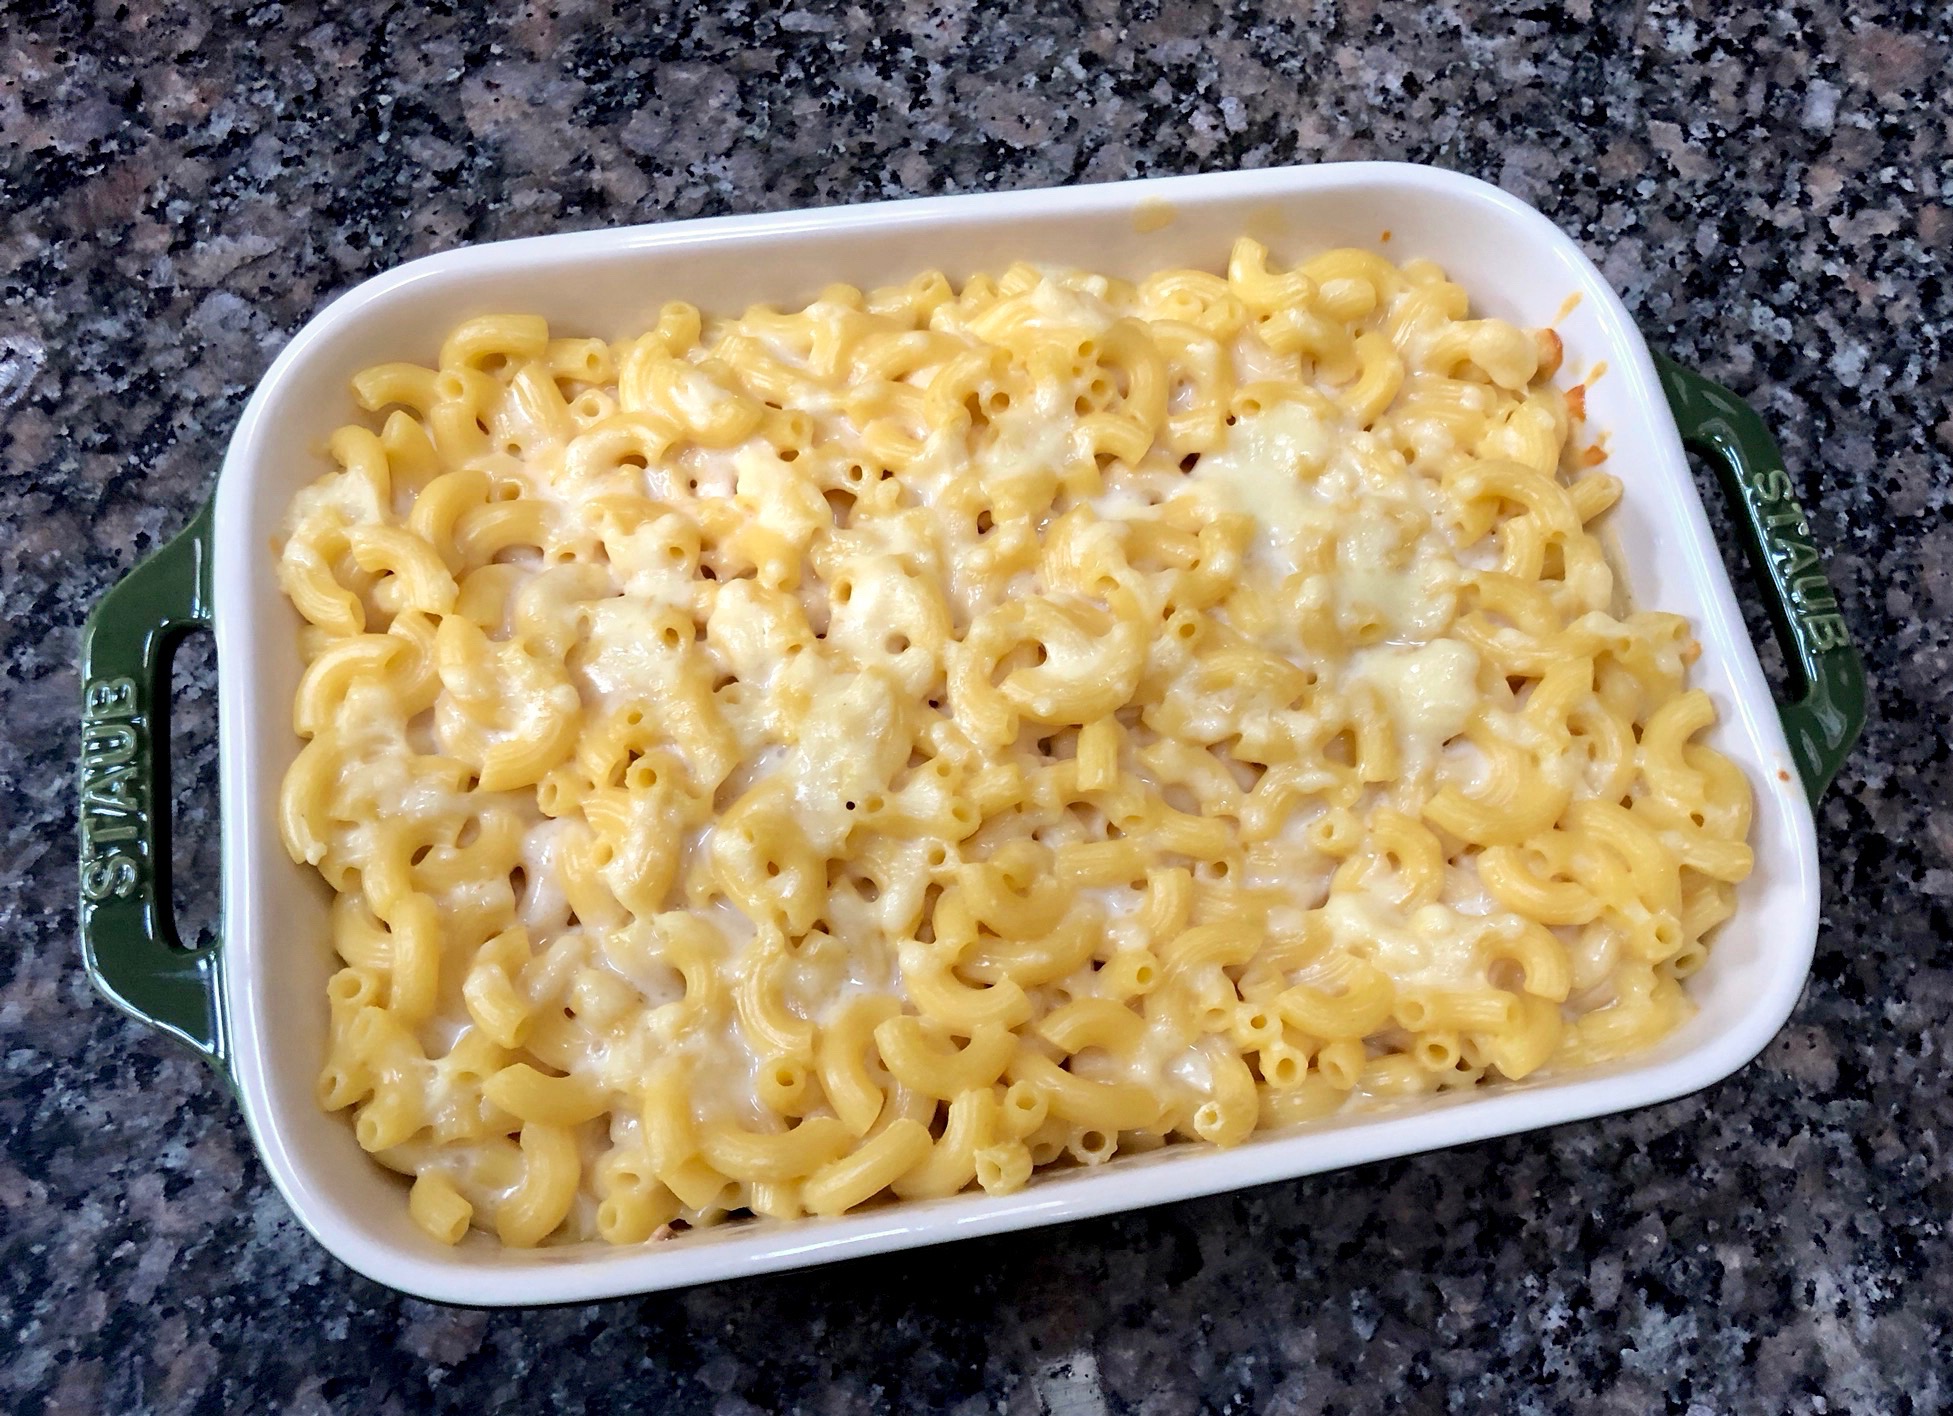
Grandma Mac and Cheese

FullSizeRender-1.jpeg

All of my grandchildren think that I make the absolute most wonderful, bestest, most delicious mac and cheese. And they expect at least one mac and cheese dinner when they come for a visit.

No worries. I always have one in my freezer, just in case there is ever a surprise knock on my door from one of them.

Of course I thought my grandma made the best mac and cheese too. Hers came out of a box and the cheese part were some granules that came in a separate foil package. She was supposed to mix the granules with milk and butter I think, but she never did. She just opened the package and sprinkled it on top of the cooked elbows. 

That's the way all of us grandchildren thought mac and cheese was supposed to taste. And of course, grandma made it best.

It's the way I made it for my kids. Because that was the best.

Somewhere along the way I tasted actual homemade macaroni and cheese. It was a revelation. It was wonderful. Which is NOT to say that grandma's wasn't good. It was just a whole different dish. I still think of it with fond memories. My daughters think of it with fond memories. And, btw, they also made the packaged kind and sprinkled the dry cheesy granules on top for their children. And their children love that too and probably will have fond memories of that dish.

But when they come to visit me, it's the other kind they expect and love. The from-scratch kind.

They're also pretty clear about how they like it too: moist but not overly sauced, with a combo of American and cheddar cheeses and a crispy top. No added things like tomato or cooked vegetables. No crust -- just maybe some extra grated cheese.

This is the one:


Grandma Macaroni and Cheese

  • 1 pound small pasta such as elbows

  • 3 tablespoons butter

  • 4 tablespoons all-purpose flour*

  • 3 cups milk (preferably whole milk)

  • 14-16 ounces mixed American and cheddar cheeses plus extra for garnish, shredded

  • salt to taste

Cook the pasta according to package directions, rinse under cold water, drain and set aside. In a saucepan, melt the butter over medium heat. When the butter has melted and looks foamy, turn the heat to low-medium, add the flour and cook, stirring with a whisk, for 2-3 minutes, but do not let the mixture become brown. Gradually add the milk, stirring with a whisk to keep the sauce smooth. Cook for 4-5 minutes or until the sauce has thickened slightly. Add most of the cheeses, leaving some to top the dish as garnish. Add some salt and continue to whisk the sauce until all the cheese has melted. Add the pasta and mix to coat all the pieces. Eat as is, sprinkled with extra cheese, OR place in a preheated 350 degree oven for about 15 minutes to crisp the top. 

Makes 6-8 servings

*sometimes, if the sauce seems to be too thin, I use an additional tablespoon of flour