appetizer

Chick Pea and Carrot Salad

DSC08424.jpg

Of course, of course we will be slicing apples and dipping them in honey on Rosh Hashanah. (which begins at sunset on September 29th).

But chickpeas are on the menu too. In his Encyclopedia of Jewish Food, the late rabbi and food authority Gil Marks wrote that “chickpeas are a traditional Rosh Hashanah food, a symbol of fertility, abundance and a wish for a well-rounded year to come.”

I usually make chickpeas into hummus, but sometimes I serve them whole, as a snack, roasted, the way my mother made them when I was growing up – a recipe called nahit. She coated the chickpeas with vegetable oil, sprinkled them with salt and paprika and baked them until crispy.

I changed her recipe somewhat -- I use olive oil, kosher salt and fresh thyme, or sometimes za’atar, as seasonings. Nahit is a delicious snack and a healthy one too: chickpeas are a good source of protein, minerals (including calcium) and fiber.

For this coming holiday though I’ll be making a chickpea and carrot salad to serve with dinner. Carrots are another symbolic ingredient of the holiday, so this recipe is a double-up of special ingredients of festive food for the holiday table. It’s a dish that can be made in advance, which makes it a good choice at such a busy time. And it is colorful too, fit for any celebration, including Break-the-Fast. 

Chick Pea and Carrot Salad

  • 1 15-ounce can chickpeas

  • 4 medium carrots, sliced thin

  • 1/2 chopped red onion

  • 1/4 cup chopped fresh parsley

  • 1/4 cup chopped fresh mint

  • 1 teaspoon ground cumin

  • 1/8 teaspoon cayenne pepper

  • 1/4 cup olive oil

  • 3 tablespoons lemon juice

  • salt to taste

Rinse the chickpeas under cold running water; let drain and place in a bowl. Add the carrots, onion, parsley, mint, cumin and cayenne pepper and toss to distribute the ingredients evenly. Pour in the olive oil and lemon juice. Toss to coat the ingredients evenly. Taste for seasoning and add salt to taste.

Makes 6 servings

Pomegranate Chicken Wings

IMG_5502.jpg
E22F1200-0325-4D94-BE34-A495A7FECEB3.jpg

I know that Labor Day is not the end of grilling season, but somehow it's a reminder that so much in our lives is about to change. In the month or so ahead, leaves turn to red and gold. School begins. There's a vague chill in the air at night. The sun sets earlier and nighttime comes sooner.

I also realize that many people continue to grill outdoors throughout the year.

I'm not one of them. If it's below 45 I don't feel like slaving over a hot grill in the cold night air.

So, knowing how way leads on to way, I am making the most of the grilltime that's left.

These wings will be on my menu soon, before I close up shop for the winter.

Fyi, you can use the glaze for other chicken parts and bake the pieces n the oven or broil them in an oven broiler. It’s also fine to use for basting a whole roasting chicken.


Pomegranate Wings

  • 2 pounds chicken wings

  • olive oil (about one tablespoon)

  • 1/2 cup pomegranate jelly

  • 2 tablespoons orange juice

  • 1 tablespoon cider vinegar

  • 1 tablespoon brown sugar

  • 1 teaspoon chopped fresh ginger

  • 2 cloves garlic, finely chopped

  • 2 scallions, chopped

  • pinch or two cayenne pepper

  • salt to taste

Preheat an outdoor grill or oven broiler. Wash and dry the wings and cut them into separate pieces. Brush with olive oil and grill, turning once, for 8-10 minutes or until lightly browned. While the wings are cooking, mix the pomegranate jelly, orange juice, cider vinegar, brown sugar, ginger, garlic, scallions cayenne pepper and salt to taste until well blended. Brush this glaze on the wings and cook for another 10-12 minutes, turning the wings occasionally and brushing with remaining glaze, until crispy and fully cooked.

Makes about 24

Blue Salad (with green): Berries and Cheese

I love blueberries and I love blue cheese, so I figured they might go together well.

They did!

In this light, refreshing summer salad.

Nice for a full lunch — add a crust of bread. Or as a first course for dinner.

I bought the blueberries and the cheese. But the greens? Right from my garden! What a joy!

Blue Salad (with green)

  • 1 head leaf lettuce or 6 cups mixed greens

  • 1 cup blueberries

  • 1 cup crumbled blue cheese

  • 3 tablespoons chopped chives or scallion tops

  • 1/3 cup olive oil (or use avocado oil)

  • 3-4 tablespoons Balsamic vinegar

  • 1/4 cup chopped toasted almonds, optional

Tear the lettuce into smaller pieces and place them in a salad bowl. Add the blueberries, cheese and chives and toss the ingredients. Pour in the olive oil and toss the ingredients again. Add 3 tablespoons of the Balsamic vinegar, toss and taste, add more Balsamic vinegar to taste. Serve and garnish with the toasted almonds if desired.

Makes 4-6 servings

Vegetable Salad

fullsizeoutput_a6ee.jpeg

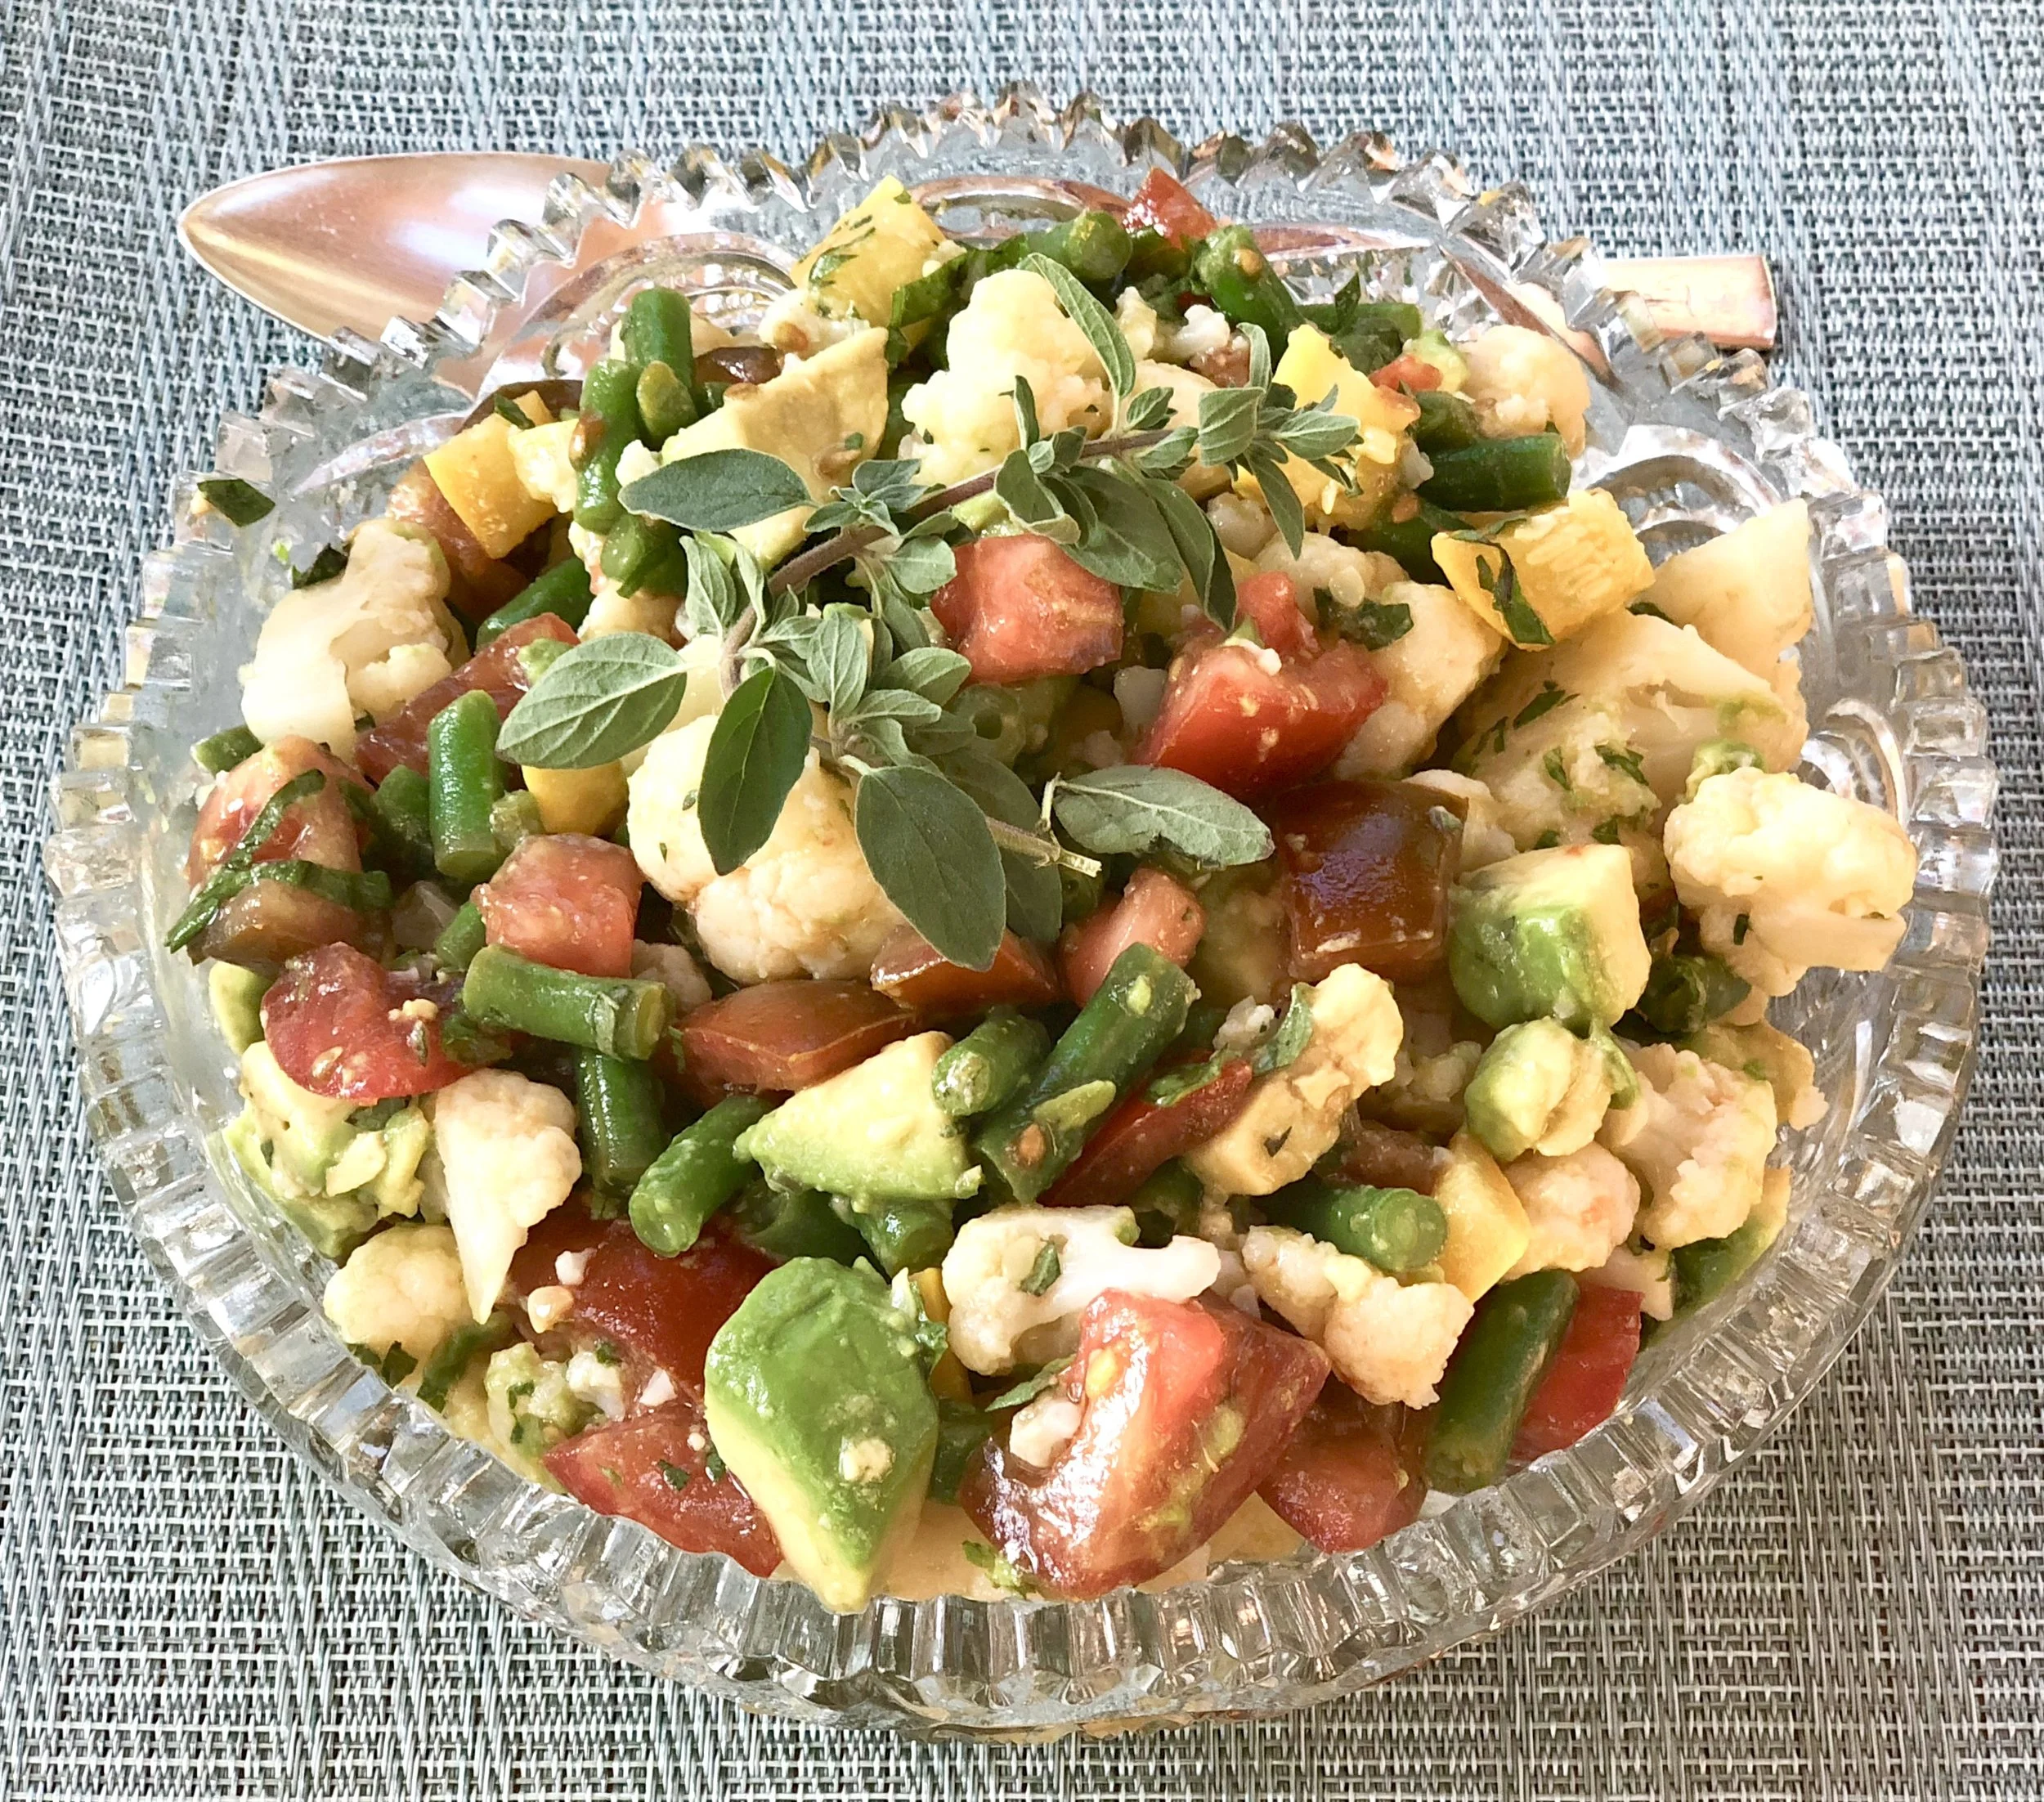
Light, refreshing food. That’s what we want during the summer.

Also, easy to make. And as quick as possible.

I made this vegetable salad using leftovers from the veggies we had over a couple of meals. Added some fresh tomatoes, an avocado and some herbs. Not only did I get to use up stuff from the fridge, the dish took less than 10 minutes to make.

It’s a side dish. But you can add some tofu, cheese or hard-cooked eggs and make it into a main course (or add leftover fish, meat or poultry).

Add crusty bread and it’s a sandwich filling.

Mix it into cooked penne or ziti and it becomes pasta primavera.

Use whatever vegetables you have in proportions suggested. There’s no magic here, no actual recipe that will fail if you don’t have one of the ingredients.

Vegetable Salad

  • 3 cups cooked cut up cauliflower

  • 1 cup cooked, cut up green beans

  • 1 cup cooked cut up yellow squash

  • 3-4 cut up small tomatoes

  • 1 avocado, cut into small chunks

  • 3 tablespoons chopped fresh basil

  • 2 teaspoons chopped fresh oregano

  • 2 tablespoons olive oil

  • 2-3 tablespoons fresh lemon juice (or use white wine vinegar)

  • salt and freshly ground black pepper to taste

Place the cauliflower, green beans, yellow squash, tomatoes, avocado, basil and oregano in a bowl and toss the ingredients to distribute them evenly. Pour the olive oil over the vegetables and toss again. Pour 2 tablespoons of the lemon juice over the vegetables and toss again. Taste for seasoning and add more lemon juice and salt and pepper to taste.

Makes 4-6 servings

Roasted Vegetable Galette

Roasted Vegetable Galette

Roasted Vegetable Galette

Everyone who knows me or has read a few Mother’s Day posts on my blog knows we don’t celebrate the usual way. We don’t go out to a restaurant or club.

We stay home and have a cookoff.

Yes, we cook and it’s work and a mess but we have the best time ever. Everyone participates (except that some years I am just in charge of the beverages).

We choose a theme, form into teams and each team chooses a recipe. I buy the ingredients a couple of days before and then, on Sunday, my two daughters, their husbands, my husband and my grandkids all get cooking.

Last year our theme was dips. I prepared a tropical salsa.

One year it was chocolate chip cookies.

We’ve done tomato sauce, eggs and so on.

This year we decided on PIE. Each team will make some sort of pie.

There are no rules. They interpret the word (pie) however they wish.

So — apple pie? Sure!

Pizza pie? Of course!

Pot pie? Yes!

The only limit: this will be a vegetarian/dairy meal. So, no beef pot pie.

But — quiche? Why not — it’s a type of open face pie, right?

How about a potato/olive/onion empanada? YUM!

Cabbage pastie? ok!

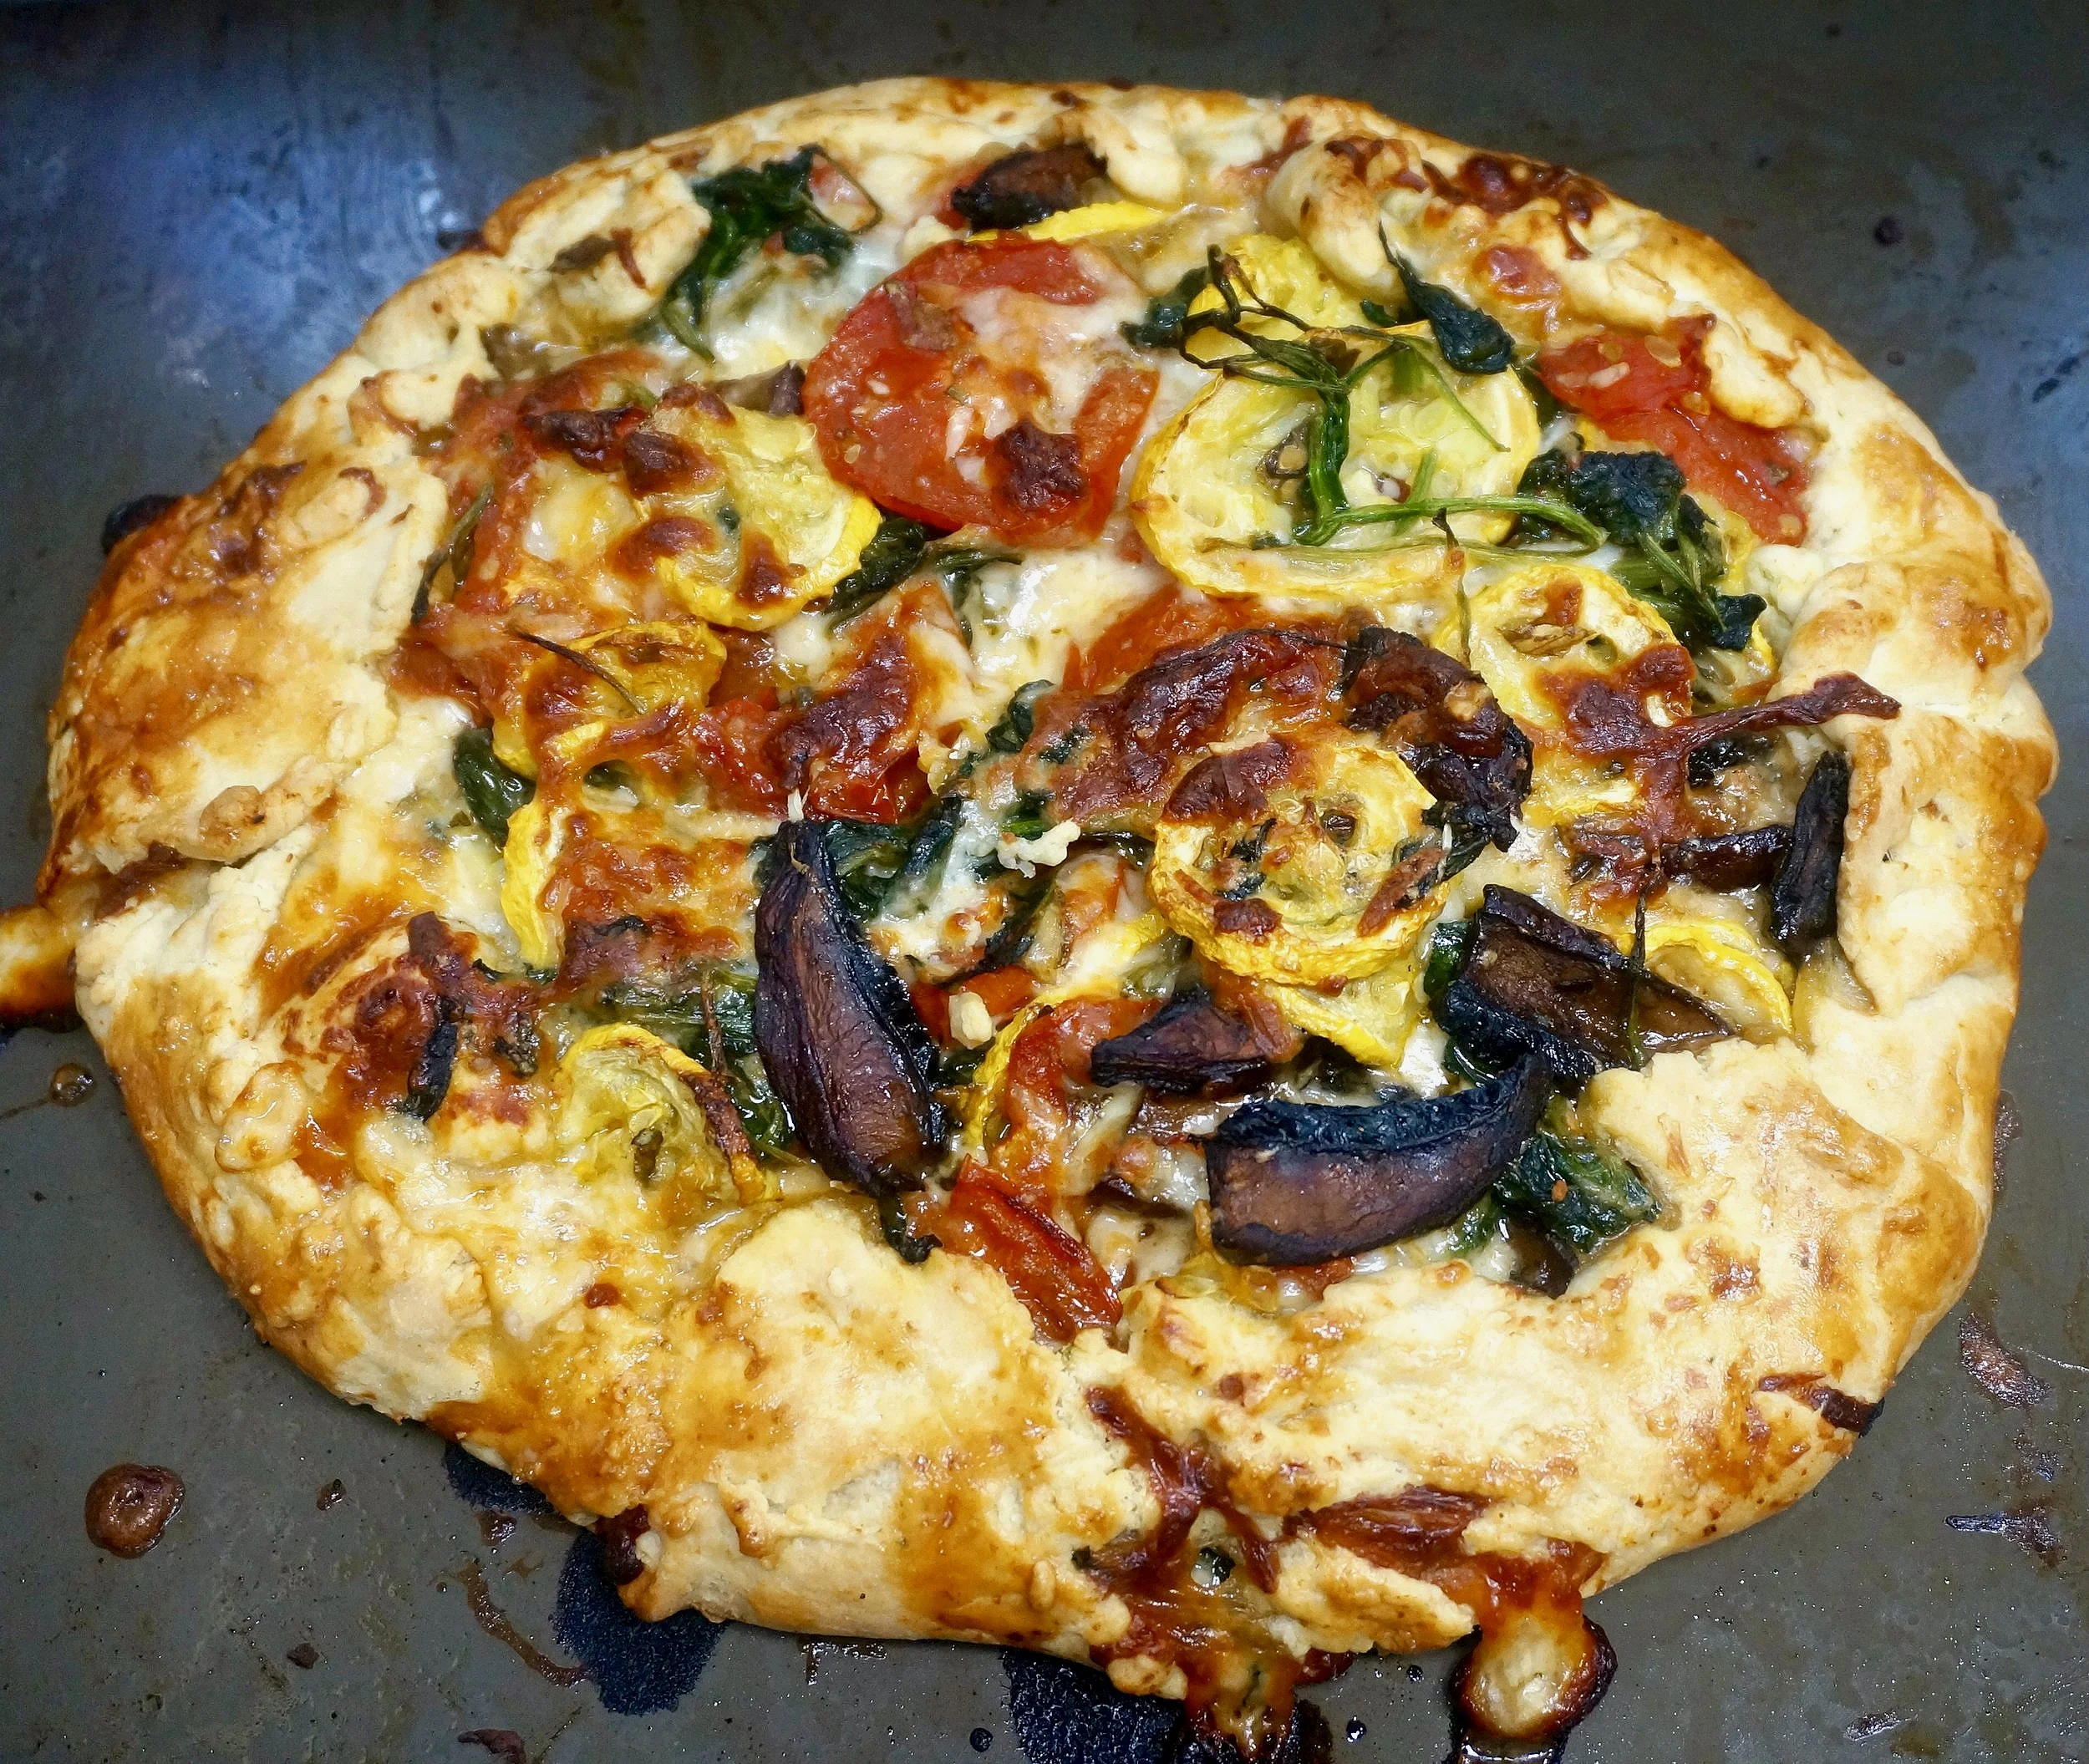
I am thinking of this though: roasted vegetable galette. I make it with pie dough so it qualifies, doesn’t it?

A good Meatless Monday (or any other day) choice.


Roasted Vegetable Galette

  • 1-1/2 cups all-purpose flour

  • 1/2 teaspoon salt

  • 1 tablespoon chopped chives or scallion tops

  • 6 tablespoons butter, cut into chunks

  • 2 tablespoons cold vegetable shortening

  • 3-4 tablespoons milk

  • 2 medium yellow squash, sliced

  • 4-5 plum tomatoes, sliced

  • 1 large Portobello mushroom, sliced

  • 4 tablespoons olive oil

  • salt to taste

  • 1 bunch spinach, washed and dried

  • 2 tablespoons chopped basil

  • 1-1/2 cups (6 ounces) shredded Mozzarella cheese

  • 2-3 tablespoons grated Parmesan cheese

  • 1 egg, beaten, optional

For the crust: mix the flour, salt and chives together in a bowl or food processor. Add the butter and shortening and cut the fat into the flour mixture with your hands or a pastry blender or by processing on pulse until the mixture looks like coarse crumbs. Gradually add 3 tablespoons milk and mix to form a soft dough, adding more milk as needed. Flatten the dough into a disk, wrap and let rest in the refrigerator for at least one hour. Line a large baking sheet with parchment paper. Roll the dough on a lightly floured board into a circle about 12-13 inches in diameter (about 1/8-inch thick) and transfer the circle to the prepared baking sheet.

For the filling: Preheat the oven to 425 degrees. Line a baking sheet with parchment paper. Place the squash, tomato and Portobello slices on the baking sheet and brush on both sides with 3 tablespoons of the olive oil. Roast for 20-22 minutes or until tender. Remove from the oven. Heat the remaining tablespoon olive oil in a sauté pan over medium heat. Add the spinach and cook for 2-3 minutes until softened. Drain any liquid, chop the spinach coarsely and set aside.

Reduce the oven heat to 400 degrees. Scatter the circle of dough with 1 cup of the mozzarella cheese, leaving a border of about 1-1/2 inches. Mix the vegetables together with the basil and place over the cheese. Scatter the remaining mozzarella cheese and the Parmesan cheese on top. Fold the dough over the vegetables but not completely; leave the center open, with 7-8 inches of the vegetables showing. Pleat the dough at the edge to give the galette a rustic look. Beat the egg and brush it onto the dough for a glazed look, if desired. Bake for 35-40 minutes or until the crust is golden brown.

Makes 8 servings

Matbucha

fullsizeoutput_a219.jpeg

Spring has sprung and for me, that means more salad.

So I got to thinking about that word salad, which I realize means so many things that I was never able to fit all of my salad recipes into a file folder simply marked “salad.” I had to sub-categorize them into files such as “grain salads,” “tomato salads,” “fruit salads” and so on.

Over the years I’ve made salads of all sorts. Some based mostly on greens and some that had no greens at all.

I’ve made beet salads, dinner salads, fish salads and quinoa salads.

I could go on. But really, there is no one way to describe “salad,” even though a dictionary might say something like “a mixture of raw and cooked vegetables served with dressing.”

No.

Because recently I prepared some Matbucha, which is an entirely different salad category.

Matbucha is a “salade cuit” — that is, “cooked salad.” In fact the word Matbucha, is an Arabic word that means “cooked salad".”

Cooked salad may seem odd to Western thinking except for the fact that most of us actually eat lots of cooked salads, such as potato salad and egg salad too. We just don’t think of them as “cooked salads,” but that’s what they are.

Matbucha is a Moroccan dish, especially popular in the Moroccan Jewish community, which was once large and thriving in North Africa. When good numbers of Moroccan Jews migrated to Israel, they brought their love of this dish with them and it is now wildly popular in Israel too.

For good reason: Matbucha is vibrantly tasty, easy to cook and is ideal for Shabbat because, even though it’s cooked, you can serve it at room temperature. Use it as a salad course or as a side dish with dinner. I’ve always served it with hors d’oeuvre, as a topping for crackers or pita wedges (it works well with other Middle Eastern nibbles and dips such as hummus, raheb, baba ghanoush and so on).

You can make Matbucha 3-4 days ahead. That’s handy isn’t it?

Matbucha

  • 2 large red bell peppers

  • 3 tablespoons olive oil

  • 1 serrano pepper, deseeded and chopped

  • 2 large cloves garlic, finely chopped

  • 6 medium tomatoes peeled and finely chopped

  • 1-1/2 teaspoons paprika

  • 1 teaspoon sugar

  • 1/2 teaspoon salt or to taste

Preheat the broiler. Place the peppers under the broiler, about 4-6" away from the heat, and broil for 2-3 minutes, until the skin has blistered. Turn the peppers and repeat this process until the entire surface is blistered and lightly charred. Remove the peppers and place them in a paper bag. Let rest at least 10 minutes. Remove the peppers from the bag, peel off the skin and discard the stem and the seeds. Cut the peppers into pieces. Heat the olive oil in a large saucepan over medium heat. Add the peppers, serrano pepper and garlic and cook for 2-3 minutes. Add the tomatoes, paprika, sugar and salt. Bring to a simmer over medium-high heat. Cook for 30-35 minutes, until most of the liquid has evaporated and the mixture is thick.

 Makes 1-1/2 to 2 cups


More Chicken Wings: Maple-Mustard

fullsizeoutput_85aa.jpg

In our family we don’t wait for Superbowl Sunday to feast on chicken wings. We eat them throughout the year, often.

In fact, I have an enormous file folder filled with recipes, maybe almost as many recipes for wings as for banana bread (and as everyone who reads this blog knows, I have a lot of recipes for banana bread!).

Here’s one of the latest versions. Eat anytime. Don’t wait.

Grilled Maple-Mustard Chicken Wings

  • 2 pounds chicken wings, separated into pieces

  • 1 tablespoon olive oil

  • 1/4 cup maple syrup

  • 3 tablespoons Dijon mustard

  • 2 tablespoons chopped chives or scallion

  • 2 teaspoons cider vinegar

  • 1 teaspoon soy sauce

  • 1 clove garlic, finely chopped

  • 1/8 teaspoon cayenne pepper

  • salt to taste

Preheat an outdoor grill or oven broiler. Wash and dry the wings and cut them into separate pieces. Brush with olive oil and grill, turning once, for 8-10 minutes or until lightly browned. While the wings are cooking, mix the maple syrup, mustard, chives, cider vinegar, soy sauce, garlic, cayenne pepper and salt to taste until well blended. Brush this glaze on the wings and cook for another 10-12 minutes, turning the wings occasionally and brushing with remaining glaze, until crispy and fully cooked.

Makes about 24


Tzatziki

fullsizeoutput_8956.jpeg

In my last post I mentioned that my New Year’s get-together is an all-day, all-hors d’oeuvre event. A dairy fest and, several hours later, a meat-fest followed, several hours later by dessert.

Some of the tidbits I serve are homemade, some not, some fancy, others plain, some elaborate, some easy.

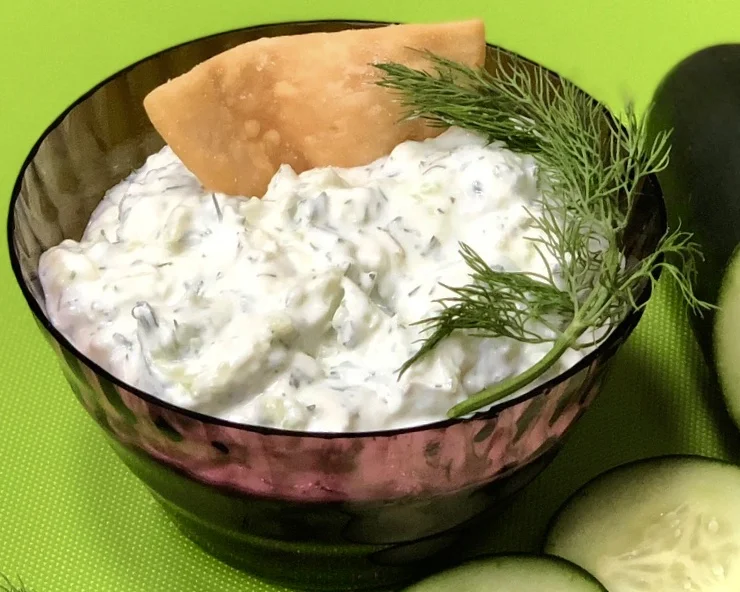
This one is amazingly easy and you can to make it ahead, in fact, you have to make it ahead. It’s refreshing, looks pretty and fits in perfectly with some of the other stuff I’m thinking of serving: Herbed Feta Cheese with Sundried Tomatoes and Olives, Smoked Salmon and Asparagus Rollups, Herb and Cheese Gougeres (Choux Puffs), Fresh Tomato Puff Pastry Pizzas.

Happy New Year everyone.

Tzatziki (Cacik)

  • 3 cups thick, Greek style non-fat yogurt

  • 3 medium cucumbers

  • 1 large clove garlic, minced

  • 3 tablespoons chopped fresh mint

  • 2 tablespoons chopped fresh dill

  • 1 teaspoon kosher salt

  • 3 tablespoons lemon juice

  • 1 tablespoons olive oil

Place a double layer of cheesecloth in a strainer. Spoon the yogurt into the lined strainer and set it over a bowl. Let rest in the refrigerator for 4 hours. Place the yogurt in a bowl (discard the liquid that has accumulated in the bowl). Peel the cucumbers and cut them in half lengthwise. Scoop and discard the seeds. Grate the cucumber in a food processor or by hand. Strain the cucumber through a sieve, pressing down to extract as much liquid as possible. When the yogurt is ready, stir in the cucumbers, garlic, mint, dill, salt, lemon juice and olive oil.  Stir to blend all the ingredients thoroughly. 

Makes about 4 cups, serving 10-12 people.


Beet Tarte Tatin

fullsizeoutput_889a.jpeg

Every New Year’s Eve my brother and sister-in-law come over for the day, my cousins sleep over for a couple of days. We start our celebration early with a round of drinks and hors d’oeuvre. A few hours later we have another round of drinks and hors d’oeuvre.

No dinner.

We have dessert much later, near midnight. The anticipation of something sweet helps keep us up so we can watch the ball drop and then go to bed.

Some of the hors d’oeuvre I serve are fancy, some plain; some homemade, some from a package (like the Spring Valley or Hebrew National franks-in-blankets that everyone loves).

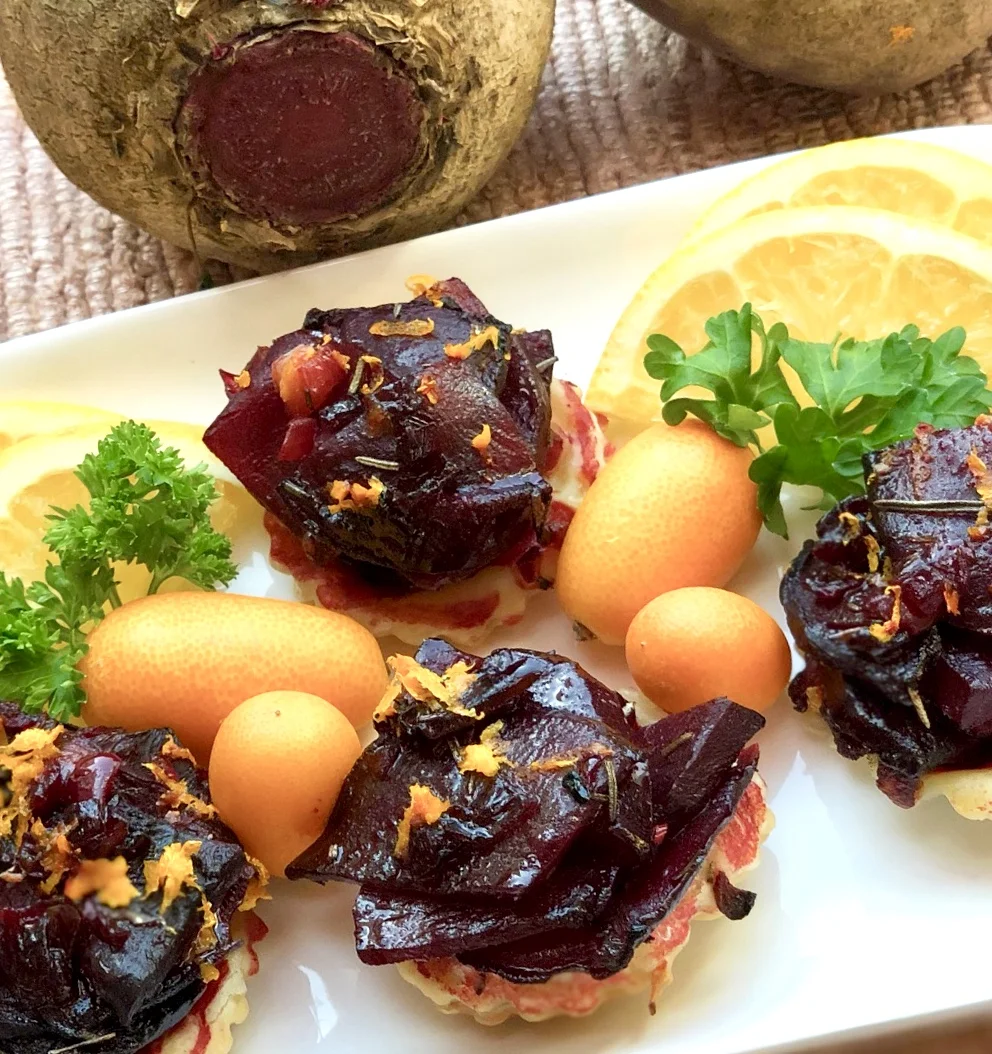
A while ago I read a blog post about Beet tarte tatins and was inspired to make some because they looked and sounded so appealing. I made up my own recipe, tried it a few times and decided that they would be perfect as one of the fancies at this year’s New Year get-together.

I wrote down whose blog it was, so I could credit her with the inspiration, but I can’t find the paper and forgot the name.

But — to that wonderfully creative person who alerted me to beet tarte tatin —- thank you.

Here’s my recipe.

Beet Tarte Tatins

  • 2 tablespoons olive oil

  • 1 large beet (8-10 ounces)

  • 2 small chopped shallots or 1/3 cup chopped red onion

  • 1 teaspoon Mirin (rice vinegar)

  • 1 teaspoon brown sugar

  • 1 teaspoon crushed, dried rosemary (or 2 teaspoons chopped fresh rosemary)

  • salt to taste

  • 1/2 pound puff pastry

  • 2 teaspoons grated fresh orange peel

Preheat the oven to 350 degrees. Use a small amount of the olive oil to brush the insides of 6 muffin tins. Peel the beet and cut it into thin slices, then cut the slice to make them small enough to fit inside the muffin tins. Place the cut beet slices in a bowl. Add the shallots and toss the ingredients. In another small bowl, whisk together the remaining olive oil, Mirin and brown sugar and pour the dressing over the beet mixture. Sprinkle with the rosemary and salt and spoon equal amounts of the beet mixture inside the muffin tins. Cover the filled tins with aluminum foil and bake for 30 minutes. Remove the tin from the oven. Raise the oven heat to 400 degrees. Cut out 6 circles from the puff pastry to cover the top of the muffin tins. Place over the beets. Bake for another 20 minutes or until the pastry is puffed and golden brown. Carefully spoon each beet mixture from the bottom and turn it over onto a dish so that the pastry is at the bottom. Spoon any remaining beets that do not come up and place them on the tarte tatins. Garnish with the orange peel and serve (may be served hot or at room temperature).

Makes 6

Roasted Bell Pepper Soup

fullsizeoutput_9534.jpeg

I’ve lived most of my life in Connecticut and so I am used to cold winters, snow and all that comes with it. I don’t mind really. I actually love the change of seasons and think it makes life more interesting.

But it’s those first days of chill that take some getting used to as we transition from summer’s heat and the gradual change of temperature when autumn comes..

Those are soup days.

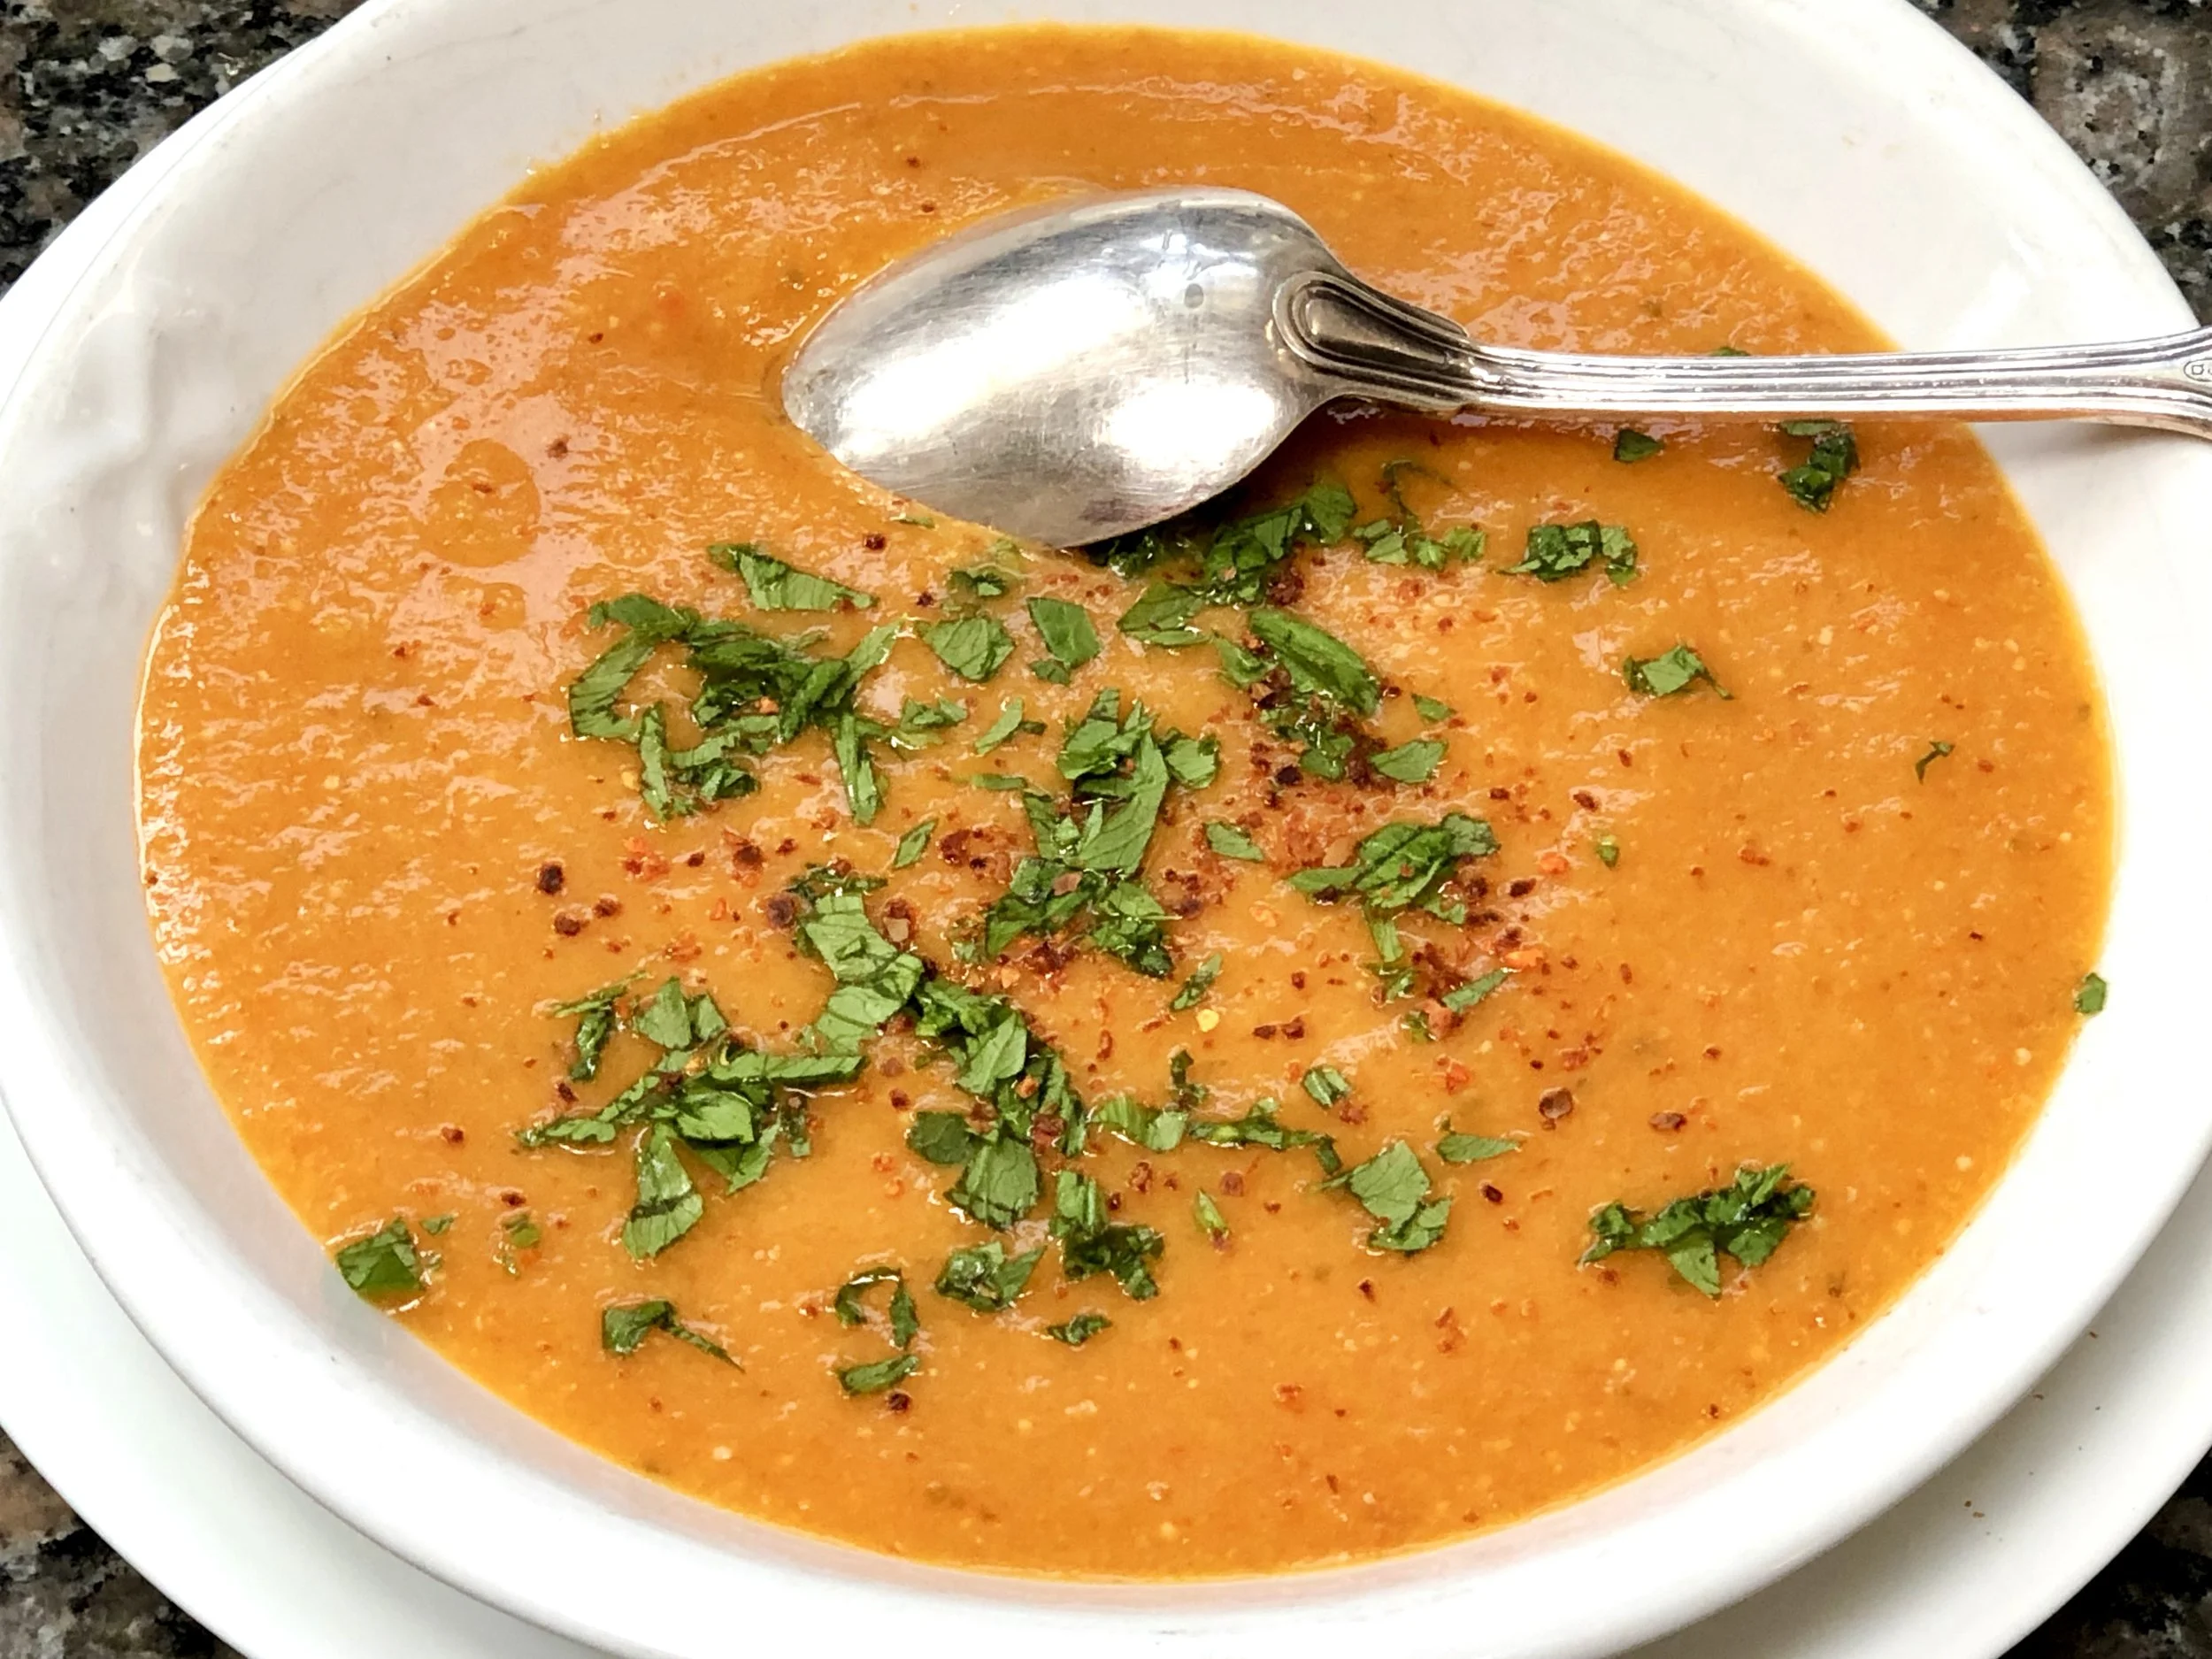
I recently made this Roasted Red Pepper soup. It’s exactly what’s needed when the weather turns.

Also makes a good first course for Thanksgiving dinner.

Roasted Red Pepper Soup

  • 5-6 sweet red, orange and/or yellow bell peppers

  • 2 tablespoons olive oil

  • 1 small onion, chopped

  • 1 carrot, chopped

  • 1 stalk celery, chopped

  • 1 tablespoon freshly minced parsley plus more for garnish if desired

  • 1/3 cup raw white rice

  • 5 cups vegetable stock (or chicken stock)

  • 1-1/2 teaspoon salt or to taste

  • freshly ground black pepper

Preheat the broiler. Place the peppers under the broiler, about 4-6" away from the heat. Broil for 2-3 minutes, until the skin has blistered. Turn the peppers and repeat this process until the entire surface is blistered and lightly charred. Remove the peppers and place them in a paper bag. Let rest at least 10 minutes. Remove the peppers from the bag, peel off the skin and discard the stem and the seeds. Cut the peppers into pieces. 

Heat the olive oil in a large saucepan over medium heat. Add the onion, carrot, celery and parsley. Cook, stirring occasionally for 3-4 minutes or until the vegetables have softened. Stir in the rice. Add the peppers and stock. Season to taste with salt and pepper. Bring the mixture to a boil, lower the heat and cook at a simmer for 25 minutes. Puree in a food processor or blender.

Makes 6 servings