Jewish Holiday

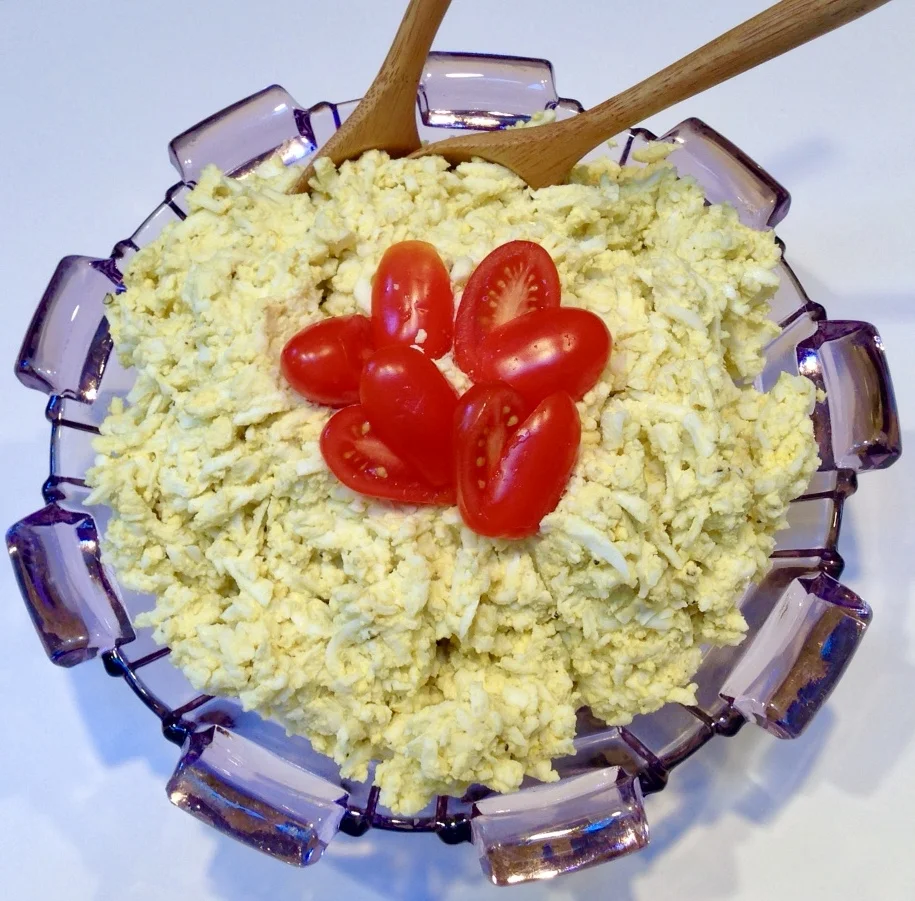
Egg Salad — My Go-To Staple

fullsizeoutput_867d.jpeg

Egg Salad — My Go-To Staple

The kids are coming for the holiday weekend, so I’ve just made some egg salad. There’s always egg salad in my fridge. It’s like having salt and pepper in the cabinet, a no-brainer nibble. I make egg salad because everyone eats it. On a sandwich or crackers or cucumber slices or just plain on the plate. For lunch or as a snack or even for breakfast. 

Egg salad is my all-purpose go-to dish.

My son-in-law Jesse teases me about it. He rolls his eyes when he sees the fresh batch in the fridge. But then he takes it out and has some. If there weren’t any egg salad there he’d be upset that something was wrong.

I’ve tasted all sorts of egg salad over the years. My mother made it with onion and sometimes cooked potato. That was delicious. I’ve tasted egg salad with fresh dill. That’s good too. And there have been tastes of egg salad with olive, tuna, salmon, cooked peas and carrots and so on.

All good. But not plain old egg salad. I am an egg salad purist. I like it plain and always make it the same way. People say they like it because it’s dry, not overly loaded with mayonnaise — I use a microplane to crush the hard cooked eggs (you use less mayo that way). The only thing I change is the dish I serve it in. 

Everyone loves my egg salad, which is basically this: 

Egg Salad

  • 8 hard cooked eggs
  • 2-1/2 to 3 tablespoons mayonnaise
  • salt and freshly ground black pepper to taste
  • 1-2 teaspoons Dijon mustard if you must

Crush the eggs using the finest grater possible (microplane is best) into a bowl. Add 2-1/2 tablespoons mayonnaise, season with salt, pepper (and mustard if you like it) and mix with a fork. Add slightly more mayonnaise if the egg crumbles don’t hold together.

Makes 4 servings

Passover Birthday Cake

Passover Birthday CakeMy daughter Meredith’s birthday sometimes falls during Passover, which means that in certain years she isn’t able to have a “traditional” birthday cake.Which didn’t bother her one bit when she was a kid because she absolutely l…

Passover Birthday Cake

My daughter Meredith’s birthday sometimes falls during Passover, which means that in certain years she isn’t able to have a “traditional” birthday cake.

Which didn’t bother her one bit when she was a kid because she absolutely loved the flourless chocolate jelly roll cake I made for her and for years this is what she asked me to bake even when it wasn’t Passover. I always thought it was an interesting and glamorous choice considering her age.

Guess it all comes down to how it tastes. Mer was never one to pick something just because it was “the thing” or because someone else liked or wanted it. She liked how this chocolate roll tasted and I don’t blame her. It’s de-lish. Passover-friendly too. But you can make this any old time.

Here’s the recipe.


Flourless Chocolate Jelly Roll Cake


6 ounces semisweet chocolate

3 tablespoons cooled coffee (or brandy or rum)

5 large eggs 

1 cup sugar

1-1/2 cups heavy cream

1-1/2 teaspoons vanilla extract

1 pint strawberries, sliced

cocoa powder or (Passover) confectioner’s sugar


Preheat the oven to 350 degrees. Butter a 15-1/2”x10-1/2” jelly roll pan. Line the pan with parchment paper, leaving several inches hanging over each of the short edges. Butter the portion of the paper that fits inside the pan. 

Melt the chocolate and coffee together in the top part of a double boiler set over barely simmering water. Mix the ingredients well and remove the top part of the pan from the heat. Let cool. In the bowl of an electric mixer set at medium speed (or use a hand mixer), beat the egg yolks and all but 2 teaspoons of the sugar together for 3-4 minutes or until thick and pale. Add the cooled chocolate mixture and blend it in thoroughly. In another bowl, beat the egg whites until they stand in stiff peaks. Mix about 1/4 of the beaten whites into the chocolate mixture. Fold the remaining whites into the chocolate mixture. Spoon the batter into the prepared pan, smoothing it to make it even. Bake for about 10 minutes or until “set.” Remove the cake from the oven. Cover it with a slightly dampened kitchen towel. Let cool.

Loosen the cake by pulling the overlapping ends of parchment paper. Invert the cake onto a clean sheet of parchment paper or kitchen towel and roll it up starting with one of the long sides. Set aside. 

Whip the cream and remaining 2 teaspoons sugar and vanilla extract until thick (use an electric mixer or hand mixer). Unroll the cake and spread the whipped cream on top of the cake, leaving about 1-inch at the edges. Top with the strawberries. Roll the cake starting on the long side. Place on a serving platter, seam side down. Dust (using a strainer) with cocoa or confectioner’s sugar.

Makes 10-12 servings

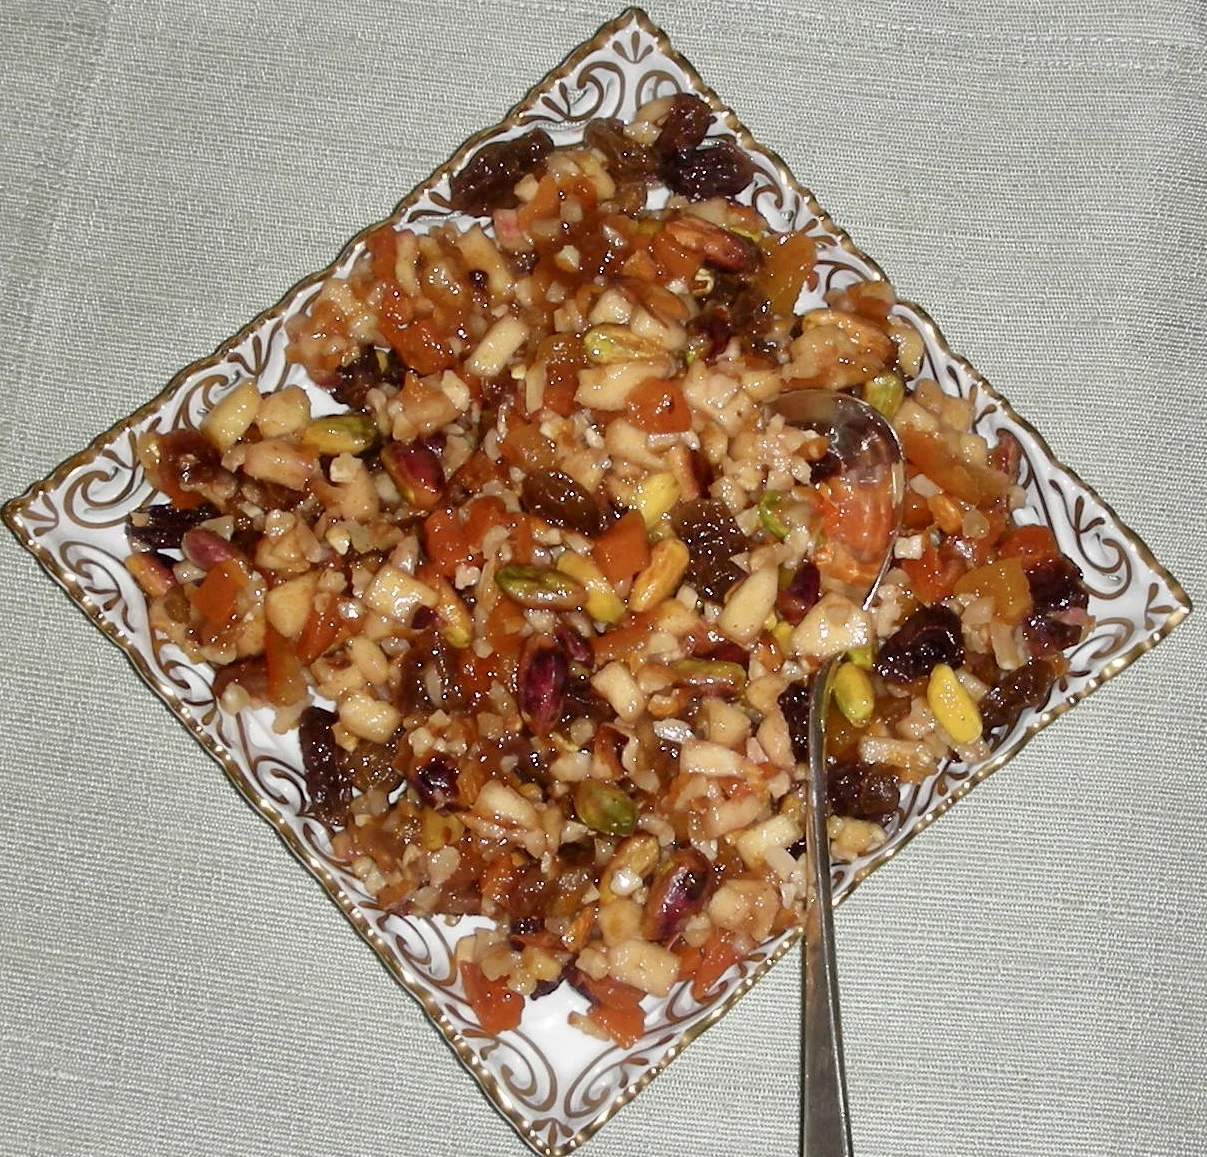
Haroset with Pistachios and Pepper

fullsizeoutput_a305.jpeg

Charoset (Haroset) is more than a blob of stuff that sits on the Passover Seder plate. Sure, we talk about it during the Haggadah reading. It’s there to symbolize the mortar used between the bricks that Jewish slaves used to build the pyramids for the ancient Egyptian pharaoh.

But it’s also food. In our family, another fabulous side dish, more like a relish, that we eat plenty of during the meal.

None of us ever really loved the old fashioned apple-wine mixture that most of us Ashkenazi Jews of Eastern European descent grew up with. It always tasted a bit sour and it got brown and ugly and besides, my daughter Gillian can’t eat walnuts and somehow almonds didn’t taste right in the mixture.

So, years ago I experimented with lots of recipes and found one I liked. It was a “Persian” recipe that I changed over and over until I got it the way I liked. At first my kids refused to eat it saying they would rather eat real mortar than this new charoset. But over the years they gradually came to love it and now insist they always did or at least can’t remember when they didn’t.

I double the recipe I am going to post here because it’s so good we eat a lot of it and besides, this relish lasts a while in the fridge so you can keep on having it all during Passover.

Haroset with Pistachios and Pepper

  • 1 cup chopped dried apricots

  • 1 cup chopped dates

  • 1/2 cup raisins

  • 1 cup shelled pistachio nuts

  • 1 cup chopped almonds

  • 2 tart apples, peeled, cored and chopped

  • 2/3 cup sweet red Passover wine

  • 1/4 cup apple cider vinegar

  • 2 teaspoons grated fresh orange peel

  • 2 teaspoons finely chopped fresh ginger

  • 3/4 teaspoon ground cinnamon

  • 1/2 teaspoon cayenne pepper

  • 1/2 cup orange marmalade

    Combine the apricots, dates, raisins, pistachio nuts and almonds in a bowl and toss ingredients to distribute them evenly. (You can prepare this much a week ahead). Add the apples, wine, vinegar, orange peel, ginger, cinnamon, cayenne and marmalade and mix ingredients. Let rest at least 4 hours before serving. May be made 3 days ahead.

Makes about 6 cups.

Imam Bayildi with Onions

Passover will feel a little strange for me this year. I’m used to having lots of grownups and a bunch of kid cousins, a crowded dining room with tables that spill into the entryway, a ton of food, crayon-friendly placemats for the little ones, plus puppets and other props we use to keep the children occupied and interested during the Haggadah reading.

But families get bigger as the years go by and people move and somehow — it seems this happens to so many people — the time comes when families separate and have their own Seders. That’s what’s happening to me this year.

It’s been my gig for more than 25 years. In the early days when my generation were the young ones with children, there were a couple of times when my sister-in-law Barbara had a Seder. And two or three times we went to my brother Jeff’s house for Passover. And once we even had a Seder at a restaurant with extended family. I hated that.

My Mom had the Seders before I took over. Now I understand how she felt when my aunt Min called one year before Passover and told her that their family had become so big (4 children had married and had kids) they couldn’t burden my Mom anymore and would have their own.

But we’ll still celebrate. Still read the Haggadah. Still have the Seder plate and sing the songs and hide the afikomen and pour the cup of wine for Elijah. Passover is a joyous holiday. A time to be happy that so many of us are still together, celebrating together, appreciating our lives and being grateful for what we have. Isn’t that what the Haggadah really tells us? To read about the journey to freedom and be thankful for it?

A Thanksgiving of sorts. 

In fact, when my son-in-law Jesse asks what I’m serving and I tell him “turkey” he answers, “oh, Thanksgiving.”

Sort of. My Passover menu always centers around turkey. My mother made turkey. My grandmother made turkey. There’s also cranberry sauce. But that’s where the Thanksgiving comparison ends. Obviously there won’t be pie or bread stuffing!

Of course there will still be a ton of other food. Like most families, we will repeat our favorite menu, although I can’t help but add a few things here and there and experiment with a few dishes so we always wind up with days worth of leftovers.

One of the constant dishes in my menu is Imam Bayildi, which is braised eggplant with tomatoes. It’s a good side dish and you can make it a day or so ahead. Also, it’s the kind of dish you can eat hot, warm or at room temperature. If there’s a vegetarian in your life, this dish is also a winner.

So, smaller Seder or whatever, we are going to celebrate and wish everyone a Happy Passover.

Here’s the recipe:

Imam Bayildi

  • 1 medium eggplant
  • salt
  • 1/2 cup olive oil
  • 2 medium onions, chopped
  • 2 large cloves garlic, chopped
  • 3 large tomatoes, deseeded and chopped
  • 3 tablespoons chopped fresh parsley
  • 1 teaspoon sugar
  • 1 teaspoon salt or to taste
  • 3 tablespoons fresh lemon juice
  • 1/3 cup water

Cut the eggplant into slices about 3/8-inch thick. Sprinkle with salt and let rest for 30 minutes. Wipe the eggplant slices dry with paper towels. Preheat the oven to 350 degrees. Heat one tablespoon olive oil in a saute pan over medium heat. Cook the eggplant slices a few at a time for 2-3 minutes per side or until slightly wilted. Add more olive oil to the pan as needed to prevent scorching (use 4-5 tablespoons more if needed). Place the cooked eggplant into a baking dish (cut it into smaller pieces if you wish). Add 2 tablespoons olive oil to the pan. Add the onions and cook for 3 minutes. Add the garlic and cook for another minute. Add the tomatoes, parsley, sugar, salt and lemon juice. Cook for one minute, stirring frequently. Spoon the vegetables on top of the eggplant. Drizzle with any remaining olive oil and the water. Cover the pan and bake for 45 minutes. Serve hot, warm or at room temperature.

Makes 6-8 servings
Carrot and Parsnip Fries

fullsizeoutput_867f.jpeg

Man and woman does not live by french fries alone, although sometimes that’s all I think I want for dinner.

But french fries aren’t the healthiest thing and besides they can be messy to make if you cook them from scratch.

Long ago I tried to find an alternative because I realized I would never be able to eat as many french fries as I’d like to. Nothing really comes close. I’ve tried the baked fries, but really, they’re awful unless you put a whole lot of olive oil on them and then, what’s the point?

On the other hand, if you don’t use potatoes your expectations aren’t the same. When you make carrot “fries” or green bean “fries” you don’t expect them to taste like regular french fries so you don’t make the comparison in the first place. You can even bake them rather than fry them and it’s okay because your mind is not thinking the usual.

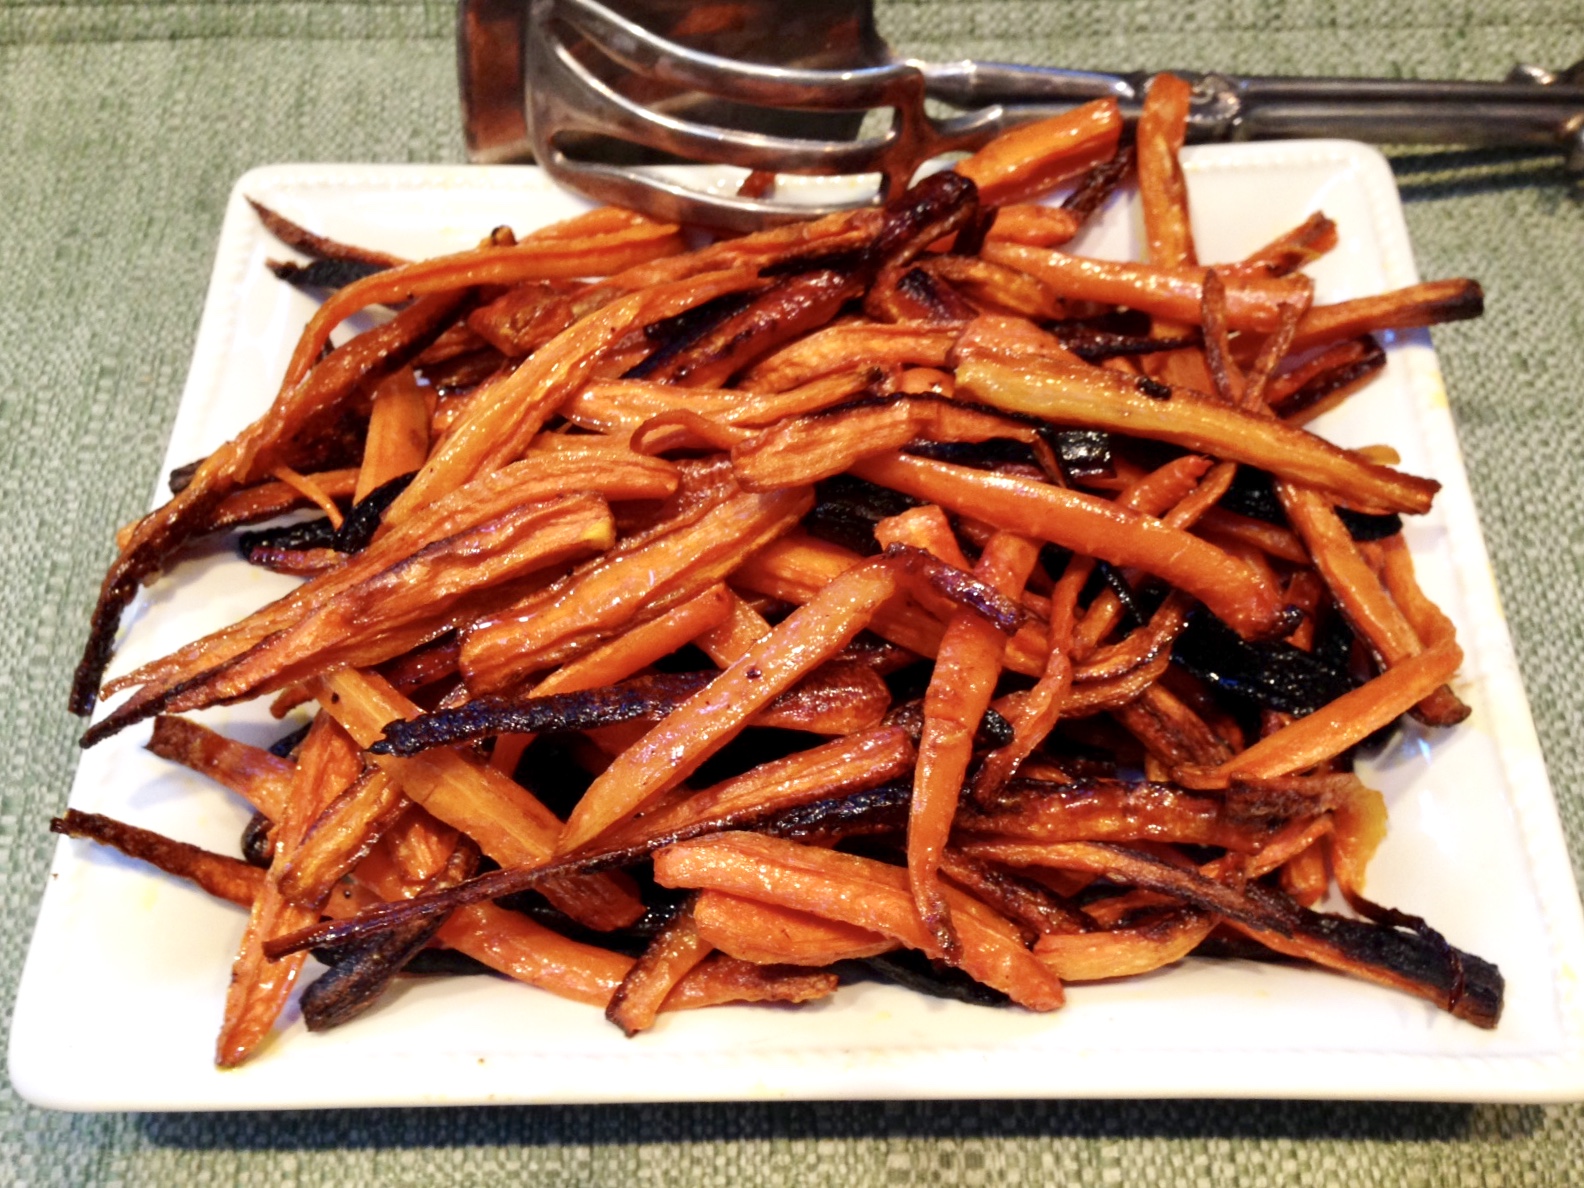
I make carrot and parsnip fries at least once a week. They’re roasted. It’s one of the vegetables that I DOUBLE at dinner because everyone, I mean, everyone who eats dinner at my house, loves these things.

They’re not french fries. But they’re really really good.

Try some. This is from my book, Hip Kosher.

Carrot and Parsnip Fries

  • 1 pound carrots
  • 1 pound parsnips
  • 3 tablespoons extra virgin olive oil
  • salt to taste
  • 3 tablespoons chopped mixed fresh herbs, optional

Preheat the oven to 450 degrees. Peel the carrots and parsnips and cut them into strips about 4-inches long, 1/2-inch wide and place them on a baking sheet. Pour the olive oil over the vegetables and toss them to coat each piece. Sprinkle with salt and the optional herbs. Roast for about 20 minutes, turning them once or twice, or until the vegetables are tender and lightly crispy.

Makes 4 servings

Old Fashioned Stuffed Cabbage

For me, Stuffed Cabbage is like hot dogs, blooming onions and caramel corn. Foods I love to eat but don’t, except for once a year because once I take that first bite I over indulge and stuff myself and then feel awful the next day.

Right now is Stuffed Cabbage time.

I never actually tasted stuffed cabbage until after I was married. It was something the women in my husband Ed’s family would cook. My grandmother made Stuffed Grape Leaves, which are similar, but the leaves are tangier and her sauce more sour than the typical one for Stuffed Cabbage.

Over the years I tried to develop a recipe that Ed would like and later, would appeal to my sons-in-law, who like the dish sweeter than I was used to. This year I got it right, according to everyone in the extended family, and that’s saying a lot because we are an opinionated bunch.

Here’s the recipe:

Stuffed Cabbage

  • 1 large head of green cabbage
  • 2 pounds ground beef
  • 1 medium onion, grated
  • 1 large egg
  • 1/4 cup raw white rice
  • 2 tablespoons matzo meal or plain bread crumbs
  • salt and freshly ground black pepper to taste
  • 2 tablespoons vegetable oil
  • 1 large onion, finely chopped
  • 1 cup brown sugar
  • 1 12-ounce bottle chili sauce
  • 1/2 cup fresh lemon juice
  • 1/2 cup raisins

Preheat the oven to 350 degrees F. Bring a large pot half filled with water to a boil. Cut out the hard center cabbage core. Remove the large cabbage leaves. Place the cabbage leaves plus the smaller remaining cabbage in the boiling water. Cook the cabbage leaves for about 3 minutes, or until they wilt. Cook the remaining cabbage core for 3-5 more minutes, or until you can easily remove the leaves. Cut off the hard stem portions from the large leaves so that they can be rolled easily. Set the leaves aside.

ALTERNATELY: if you plan ahead you can freeze the entire head of cabbage for 24 hours (or more). Thaw the cabbage and the leaves will already be wilted and you can avoid cooking them.

In a large bowl, mix the ground beef, grated onion, egg, rice, matzo meal and salt and pepper to taste. Place a mound of this mixture in the center of each leaf (more on the larger leaves of course). Enclose the meat by wrapping the cabbage leaves, envelope style. Place the stuffed cabbage leaves, seam side down, in deep baking dishes. (I separate the large rolls and smaller ones.)

Heat the vegetable oil in a saute pan over medium heat. Add the onion and cook for 4-5 minutes or until softened. Stir in the brown sugar, chili sauce, lemon juice and raisins and cook for 3-4 minutes. Pour the sauce over the cabbage rolls. Cover the pan. Bake for 2 hours (or, to cook ahead, bake for one hour, freeze, thaw and bake for an additional hour).

Makes 18-24

Soggy Cheesecake Crust

static1.squarespace-1.jpg

Hi Leslie - sorry that your cheesecake crust comes out soggy. It may be that water leaks into the seams of the springform pan. You can line the bottom with tin foil (overhang it), then attach the side, then take the overhanging part and crumple it to try to seal all the edges. That may help.

On the other hand — it may be the recipe. It’s important to bake the crust for at least 10 minutes in a preheated 350 degree oven. Then let it cool. Then fill it.

Another trick you can try — add some ground nuts to the crumbs. Nuts always crisp up nicely and stay crispy better than crumbs do.

Another tip: bake the crust for 10 minutes, brush it with an egg wash (beat an egg with a small amount of water) and bake for another 3-4 minutes.

And another: let the crust cool, then layer on a thin layer of melted chocolate, jam, lemon curd or the like. This adds a flavor dimension of course, but it also helps keep the crust crispy.

After sitting in the fridge, even after all that, eventually cheesecake crust will become soggy just from the moisture in the cheese. But the tips above will help get you a better crust at least at the beginning.