Break-the-Fast

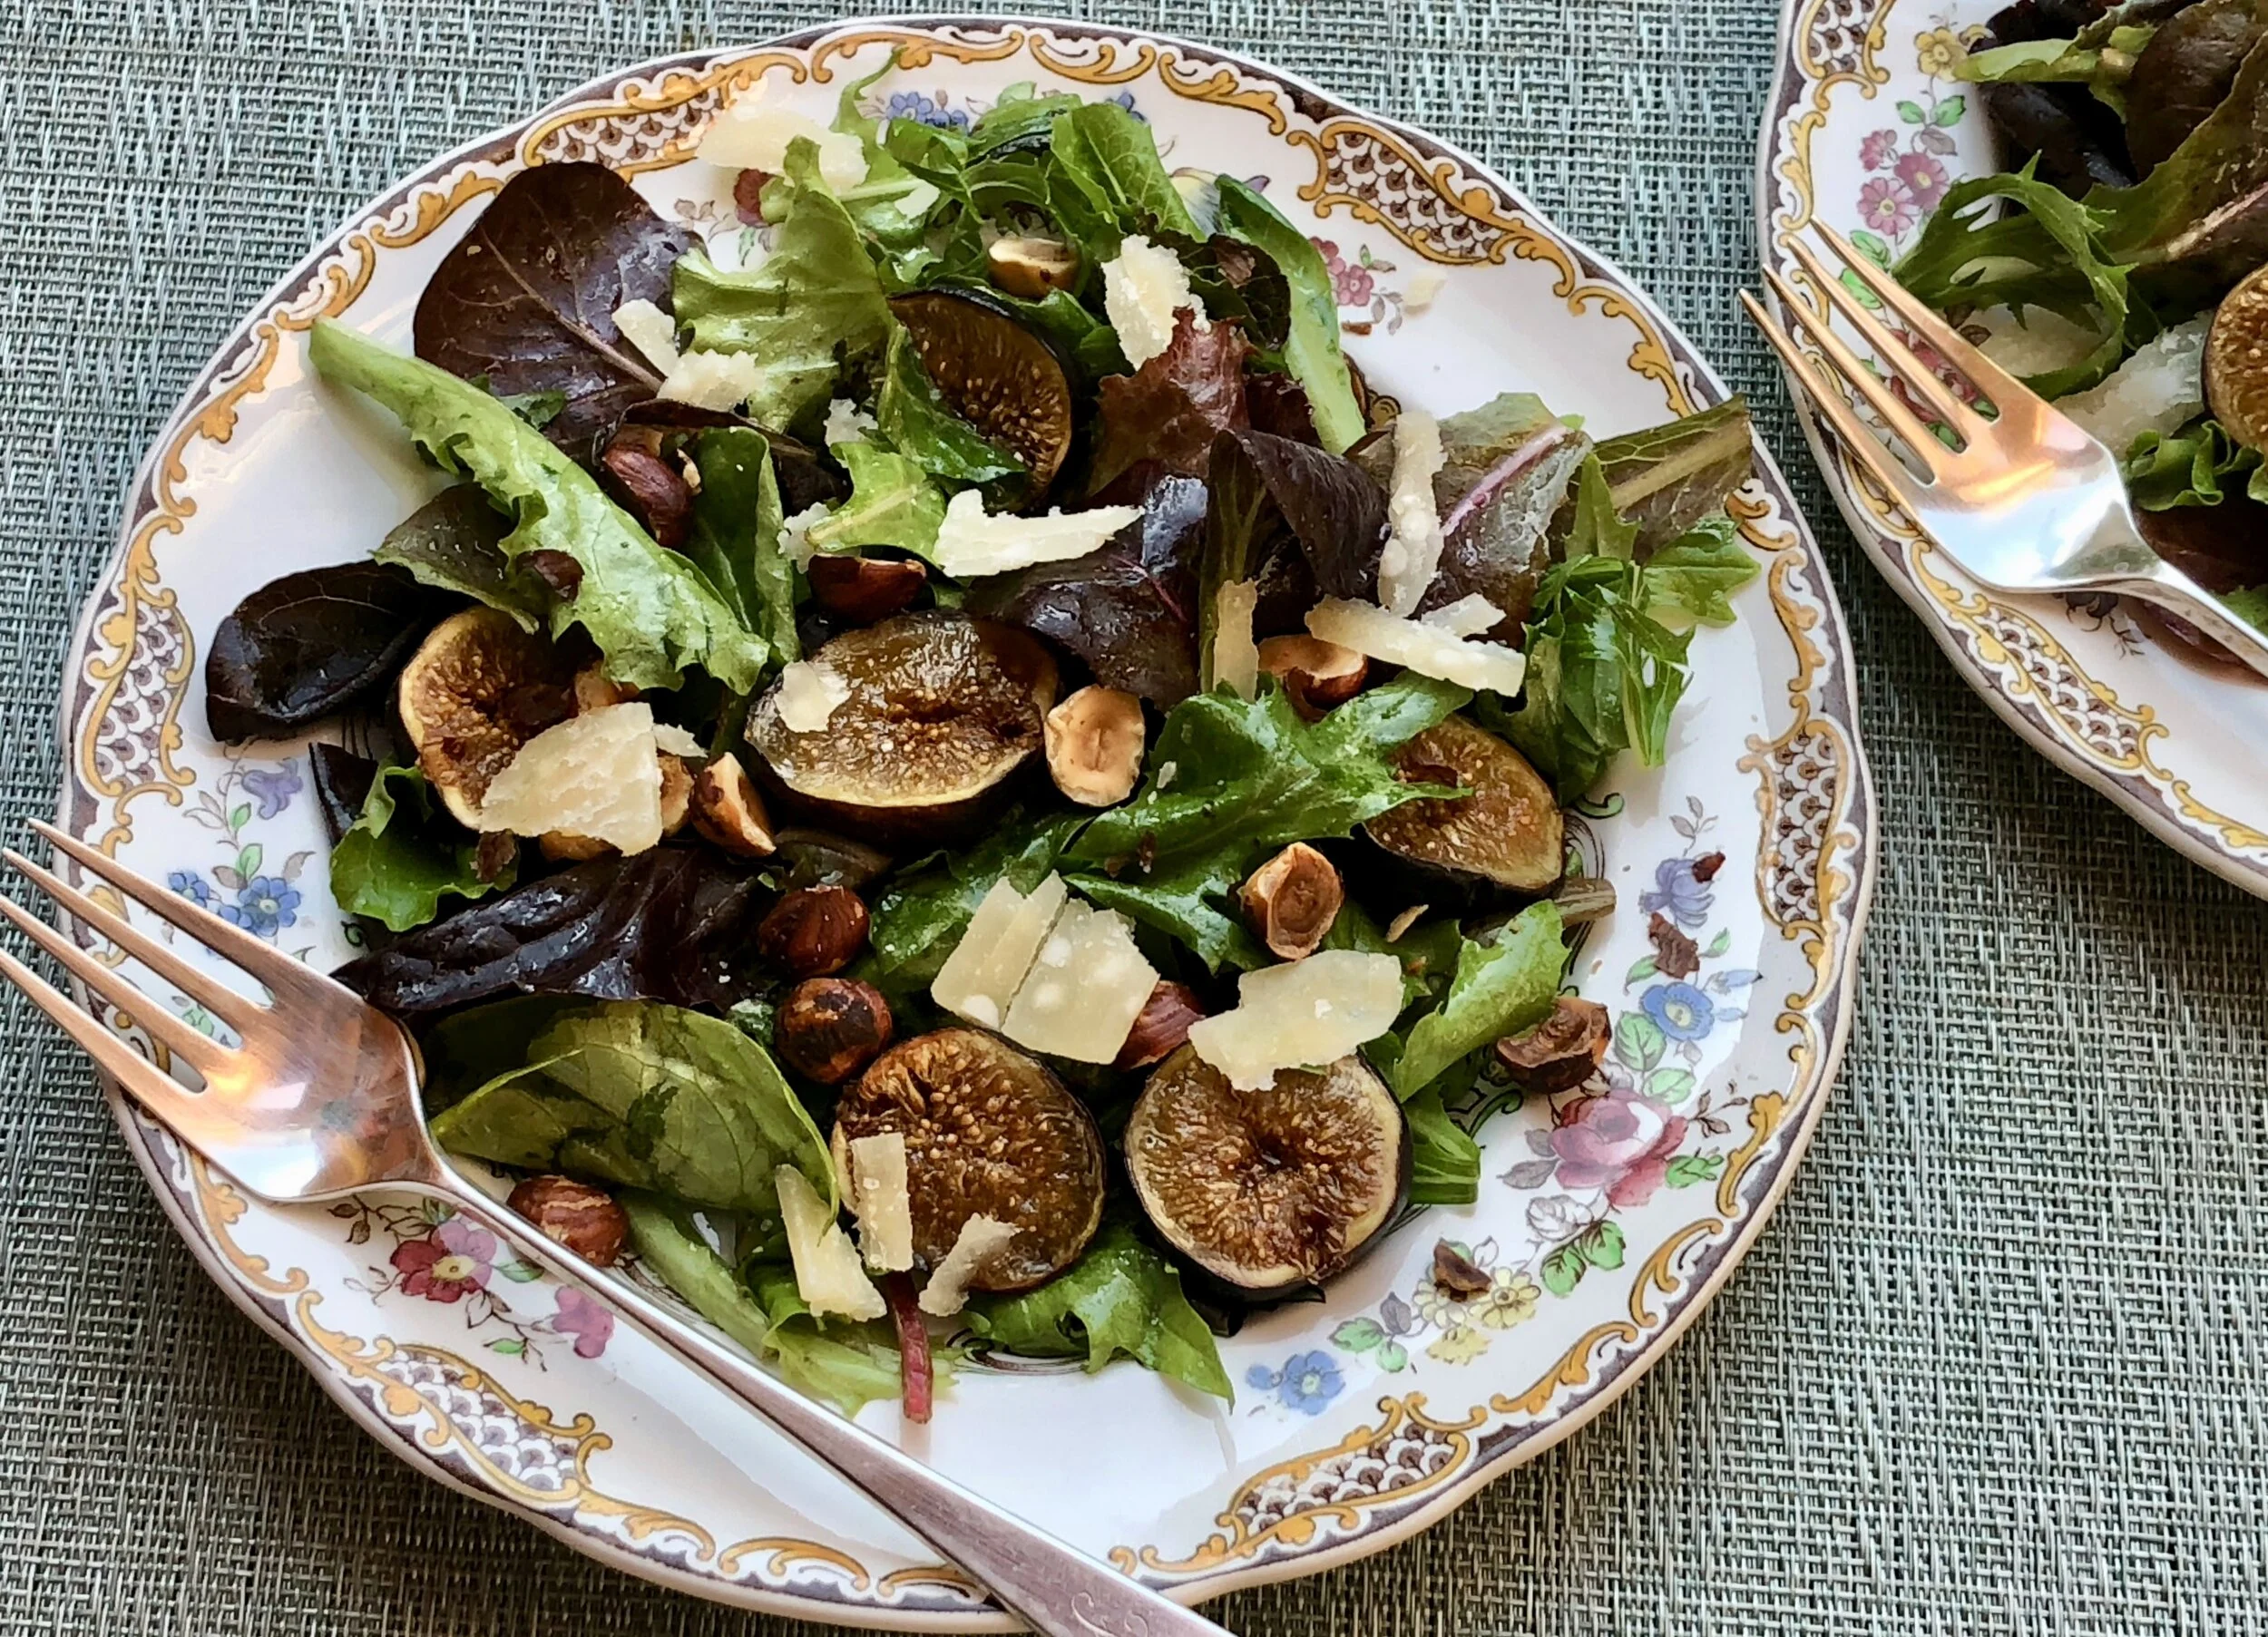
Greens with Figs and Roasted Hazelnuts

fullsizeoutput_b2cd.jpeg

I find it incredibly sad that Ed and I will not be able to host our annual Break-the-Fast. Our group has been gathering together for what seems like forever, and unlike all the other holidays which we celebrate with family, our Yom Kippur break-the-fast included friends from our synagogue and community, people who got together, just for this occasion.

I can’t even remember when we started.

Decades ago.

Not everyone who came had fasted, but we had all done something — skipped breakfast or not had carbs or not had coffee — that reminded us to be mindful about the joy and meaning behind celebrating the new year as well as looking back on what had happened the year before, who we needed to be better to, what we needed to be better at. The Break-the-fast marked a real beginning.

But now we can’t begin because the end of what has brought us to this place doesn’t seem anywhere in sight.

Virtual break-the-fast just doesn’t cut it for me.

I will miss the food too. Our meal is always vegetarian/dairy. No fish because my daughter is allergic. Our must-haves have always been mujadarah, eggplant-mashed potato gratin, my friend Susan’s kugel, a giant challah. And much more, with some changes over the years.

Dessert of course.

But this year it’s just the two of us, so dinner will be salad and roasted salmon.

But ——— even with all the trials and tribulations of the past year as well as the health concerns and social unrest that continue into 5781, I try to be grateful. For my family, friends, my life.

As for food? It will be different this one year. Fortunately, fresh figs are now available! (But only for a short time — one of those get-them-while-you-can items.) Ed and I both love them and I’ve already made several recipes using both green and black figs.

But this salad is the fig dish I’ll be serving post Yom Kippur. It’s easy, festive enough for a holiday meal and easy on the stomach after not eating for a while.

Greens with Figs and Roasted Hazelnuts

  • 6 fresh figs

  • 2 tablespoons olive oil plus extra for coating the figs

  • 3 tablespoons coarsely chopped hazelnuts

  • 3 packed cups mixed soft greens such as spinach, frisee, Bibb lettuce, washed and dried

  • 2-3 teaspoons white wine vinegar

  • salt and freshly ground black pepper

  • Parmesan cheese

Preheat an outdoor grill or oven broiler. Brush the figs with a thin film of olive oil and cut them in half. Place them, flesh side down, on a parchment lined baking sheet. Broil for about 5 minutes or until lightly browned. Remove the figs and set them aside. OR: grill them on an outdoor grill. Place the hazelnuts on the baking sheet and broil them for a minute or two to toast them lightly (or bake in a preheated 400 degree oven for 5-6 minutes). Remove the nuts and set aside. Place the greens in a bowl. Pour in the 2 tablespoons olive oil and toss to coat the leaves. Add 2 teaspoons wine vinegar and toss, taste and add the additional vinegar if desired. Add the figs and nuts, toss, taste and add salt and pepper to taste. Grate or shave Parmesan cheese over the greens and serve.

Makes 2 servings


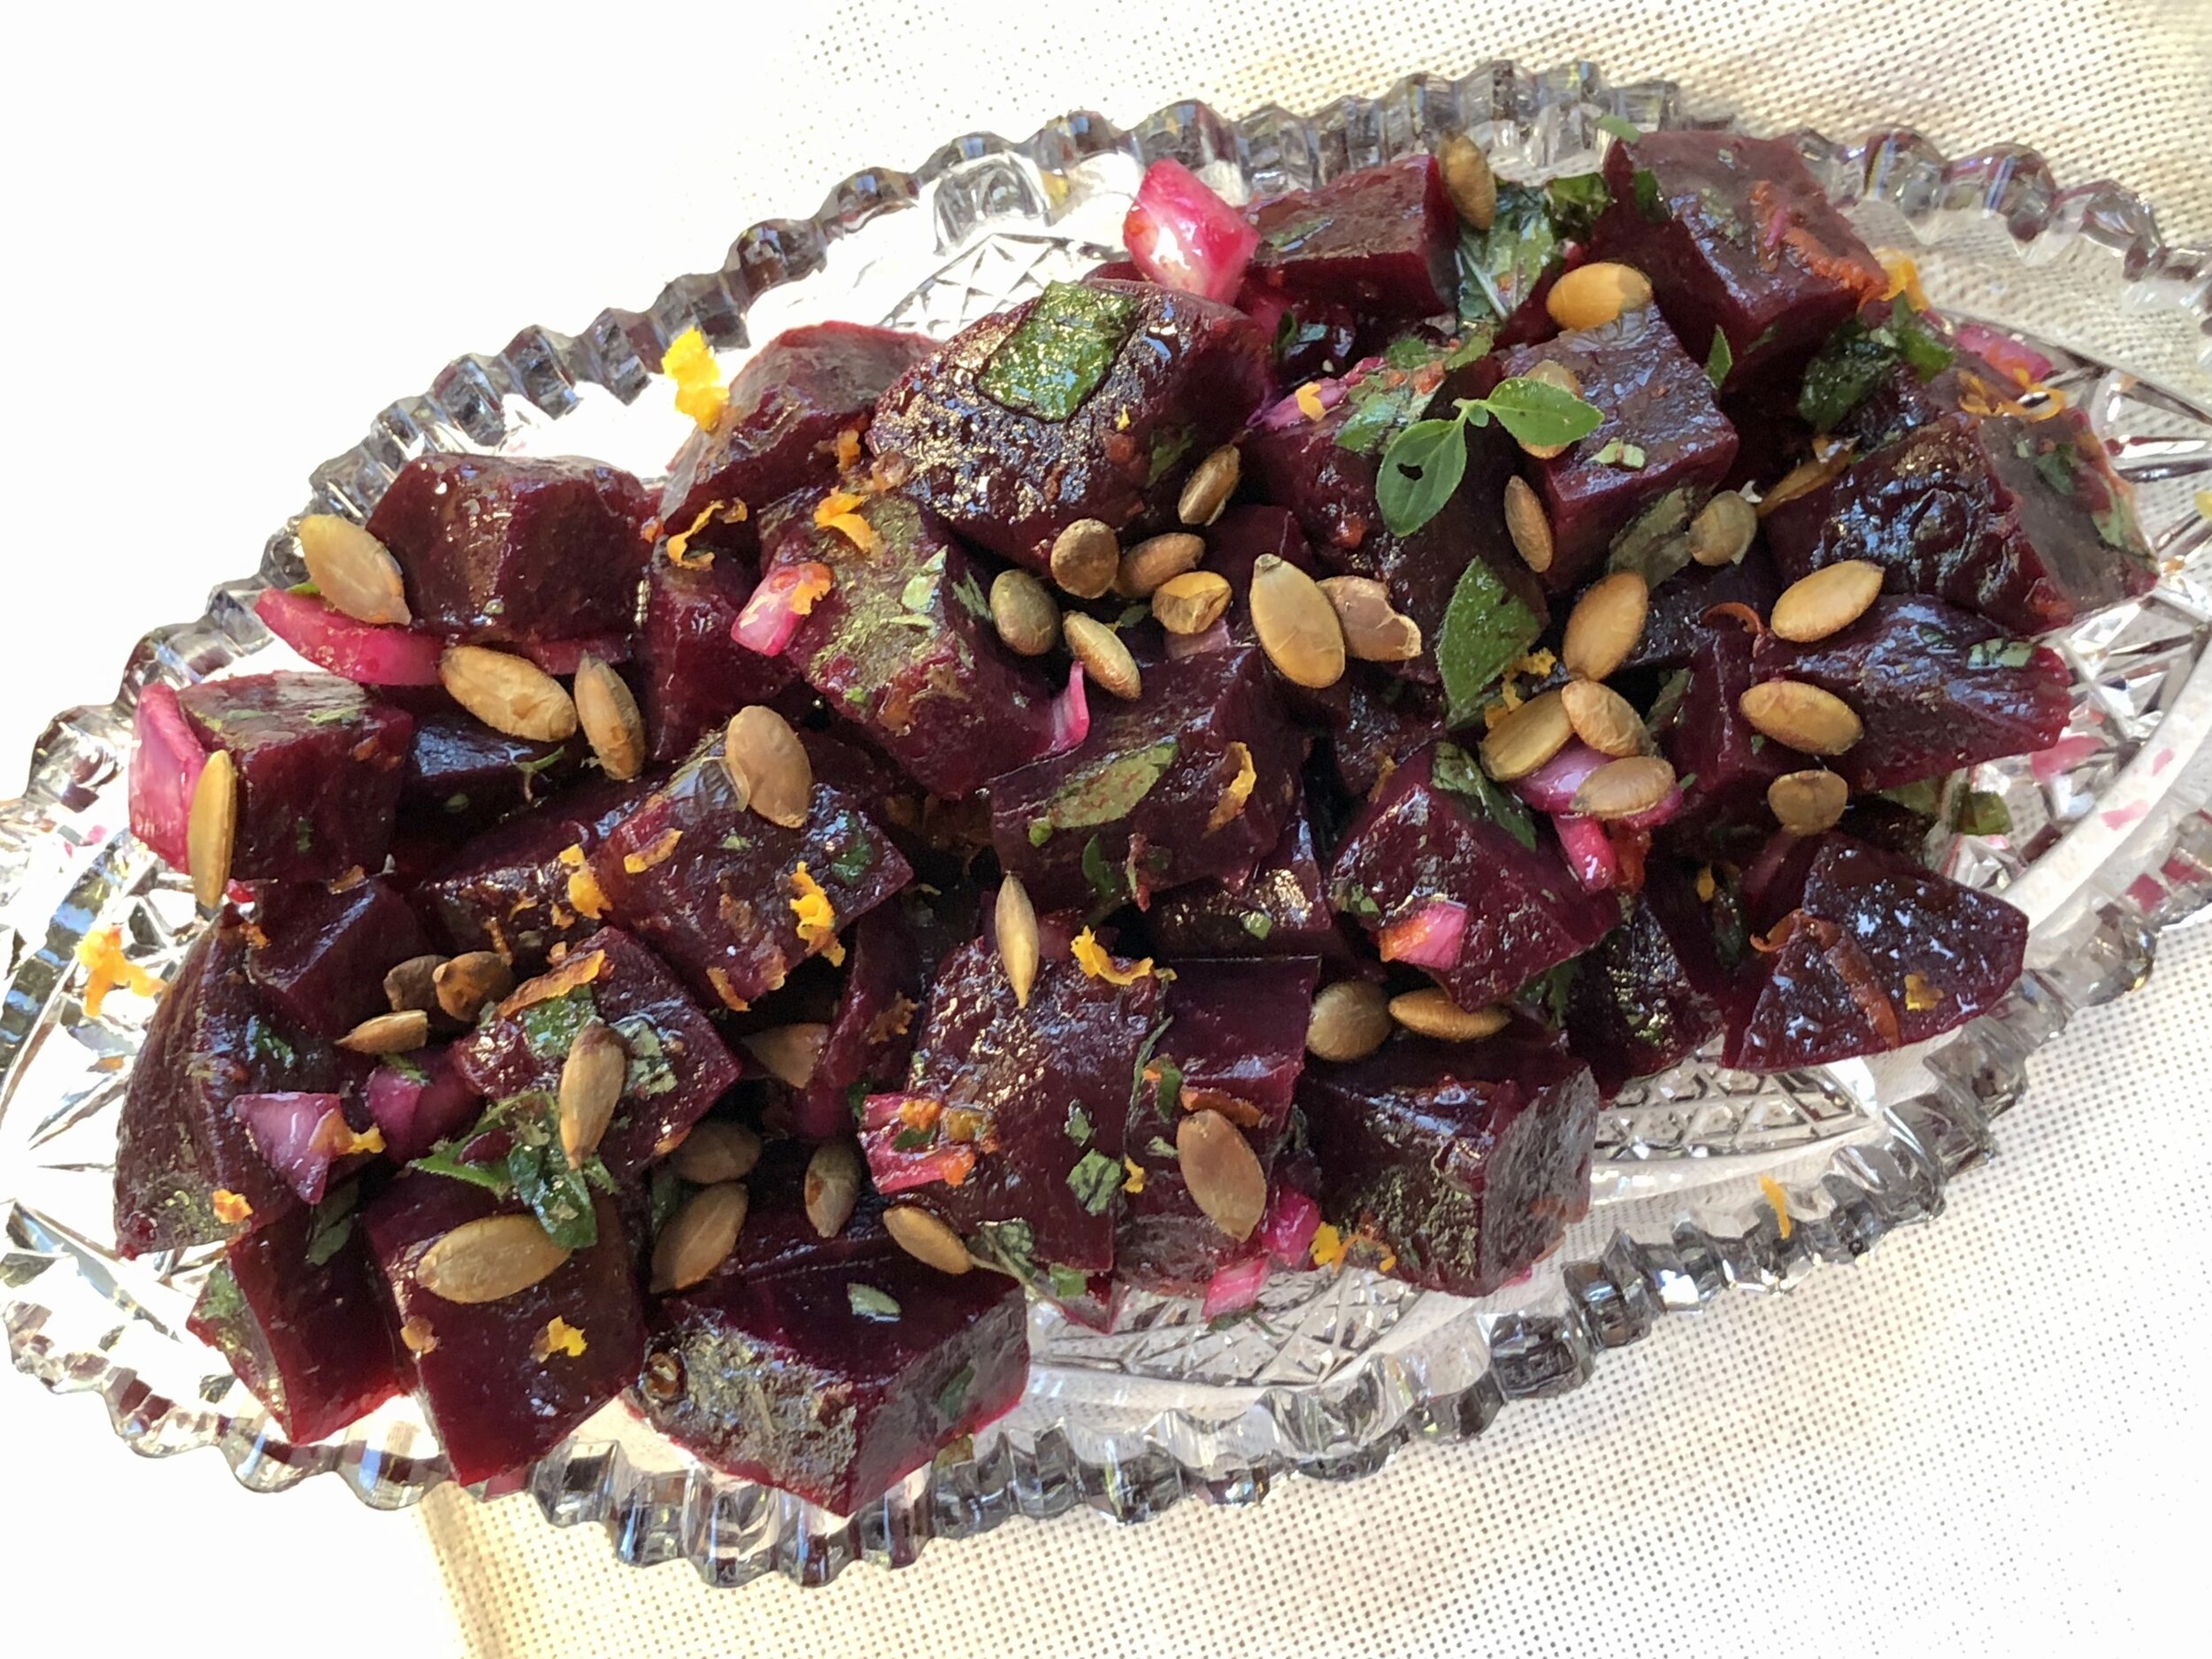
Beet Salad with Pepitas

fullsizeoutput_b38f.jpeg

Lucky me!

My entire Rosh Hashanah celebration has changed for the better. I thought it would just be Ed and me, attending Zoom services and sharing a meal for two.

But my kids and grandkids are coming too! We will watch outdoors on the patio. And be together —- sort of — for a meal! Each family will have a separate place to eat.

I can’t tell you how thrilled I am, even though it won’t be normal and we can’t hug and kiss. But it’s something. And I am grateful.

Instead of the chicken dish I was planning to make, it’s going to be food for a family, not just the two of us: brisket (I was finally able to get one) and a turkey breast plus several sides, including this beet salad, which I can make in advance and scatter with seeds at the last minute.

This is better than the original plan. For sure.

Beet Salad with Pepitas

  • 3 large beets, trimmed

  • 3 scallions, chopped (or one large shallot or 1/3-1/2 cup chopped red onion)

  • 2 tablespoons olive oil

  • 3 tablespoons orange juice

  • 2 tablespoons chopped fresh mint

  • 1 teaspoon grated fresh orange peel

  • salt to taste

  • 2 tablespoons toasted pepitas

Preheat the oven to 425 degrees. Scrub the beets and wrap them tightly in aluminum foil. Roast until tender, about 45-75 minutes, depending on size. Unwrap the beets and when they are cool enough to handle, peel them. Cut the beets into bite size pieces. Place the beet chunks in a bowl. Add the scallions, olive oil, orange juice, mint and orange peel. Toss ingredients. Sprinkle with salt. Let rest for at least 15 minutes before serving. Sprinkle with pepitas. Serve at room temperature. 

Makes 4-6 servings


Back to School? Maybe. But there’s always Milk and Cookies, right?

592CAF6A-ADE6-4D4F-96AB-9D0739F7EB94_1_201_a.jpeg

Back in the day, when I was a young girl, I walked home from school and before I did any homework or piano practice I had a snack. My Mother was a cookie baker so invariably, the snack was milk and cookies. We didn’t have little bags of chips or puffs or granola bars back then.

I remember one time my mother veered away from her usual Fannies, peanut butter cookies and kichels. That was the day I brought my friend Joseph Lieberman (no, not that Joseph Lieberman) home to do homework together. I was happy my Mom had baked something new because Joseph had been to the house several times and maybe he was bored with the same old stuff. I had asked her if, sometime, she could bake something else. And so she did.

She made sugar cookies.

They were a great success. She made them occasionally after that but usually went back to the old favorites.

I’ve made my Mom’s recipe a few times over the years. Depending on the time of year I cut them into different shapes with cookie cutters (Hearts for Valentine’s Day usually).

This isn’t my Mom’s recipe though. I fiddled with it because hers included butter and I wanted to make it non-dairy. Also, I just bought some new jars of date honey (silan) and wanted to use that instead of the regular honey. She also added citrus peel and I didn’t.

But it is more or less her recipe.

Whether or not our children actually go back to school this season, milk and cookies is always a good treat.

In addition, these cookies, with the traditional holiday dates and honey, are a delicious choice for Rosh Hashanah (whether you use old fashioned honey or silan).

Shanah Tovah.

Date Honey Sugar Cookies

  • 1/2 cup vegetable shortening

  • 1/2 cup solid coconut oil

  • 3/4 cup sugar

  • 1/4 cup date honey

  • 2 teaspoons vanilla extract

  • 1 large egg

  • 1 large egg yolk

  • 3 cups all-purpose flour

  • 2 teaspoons baking powder

  • 1-1/2 teaspoons cornstarch

  • 1/2 teaspoon salt

  • 1/2 teaspoon ground cinnamon

  • Confectioners’ sugar

Preheat the oven to 350 degrees. Line a cookie sheet with parchment paper. Combine the shortening, coconut oil, sugar, honey and vanilla extract and beat at medium speed for 3-4 minutes or until light and fluffy. Add the egg and egg yolk and beat at medium speed for 1-2 minutes or until well blended. In a separate bowl combine the flour, baking powder, cornstarch, salt and cinnamon. Add the dry ingredients to the honey mixture and beat at medium speed until a soft dough forms. Roll the dough on a floured surface to 1/8-inch thickness. Cut out shapes with 2-inch round or heart-shaped cookie cutters. Place the cookies prepared cookie sheet. Bake for about 12 minutes or until the edges are lightly brown. Let cool. Sprinkle with confectioners’ sugar.

Makes about 36

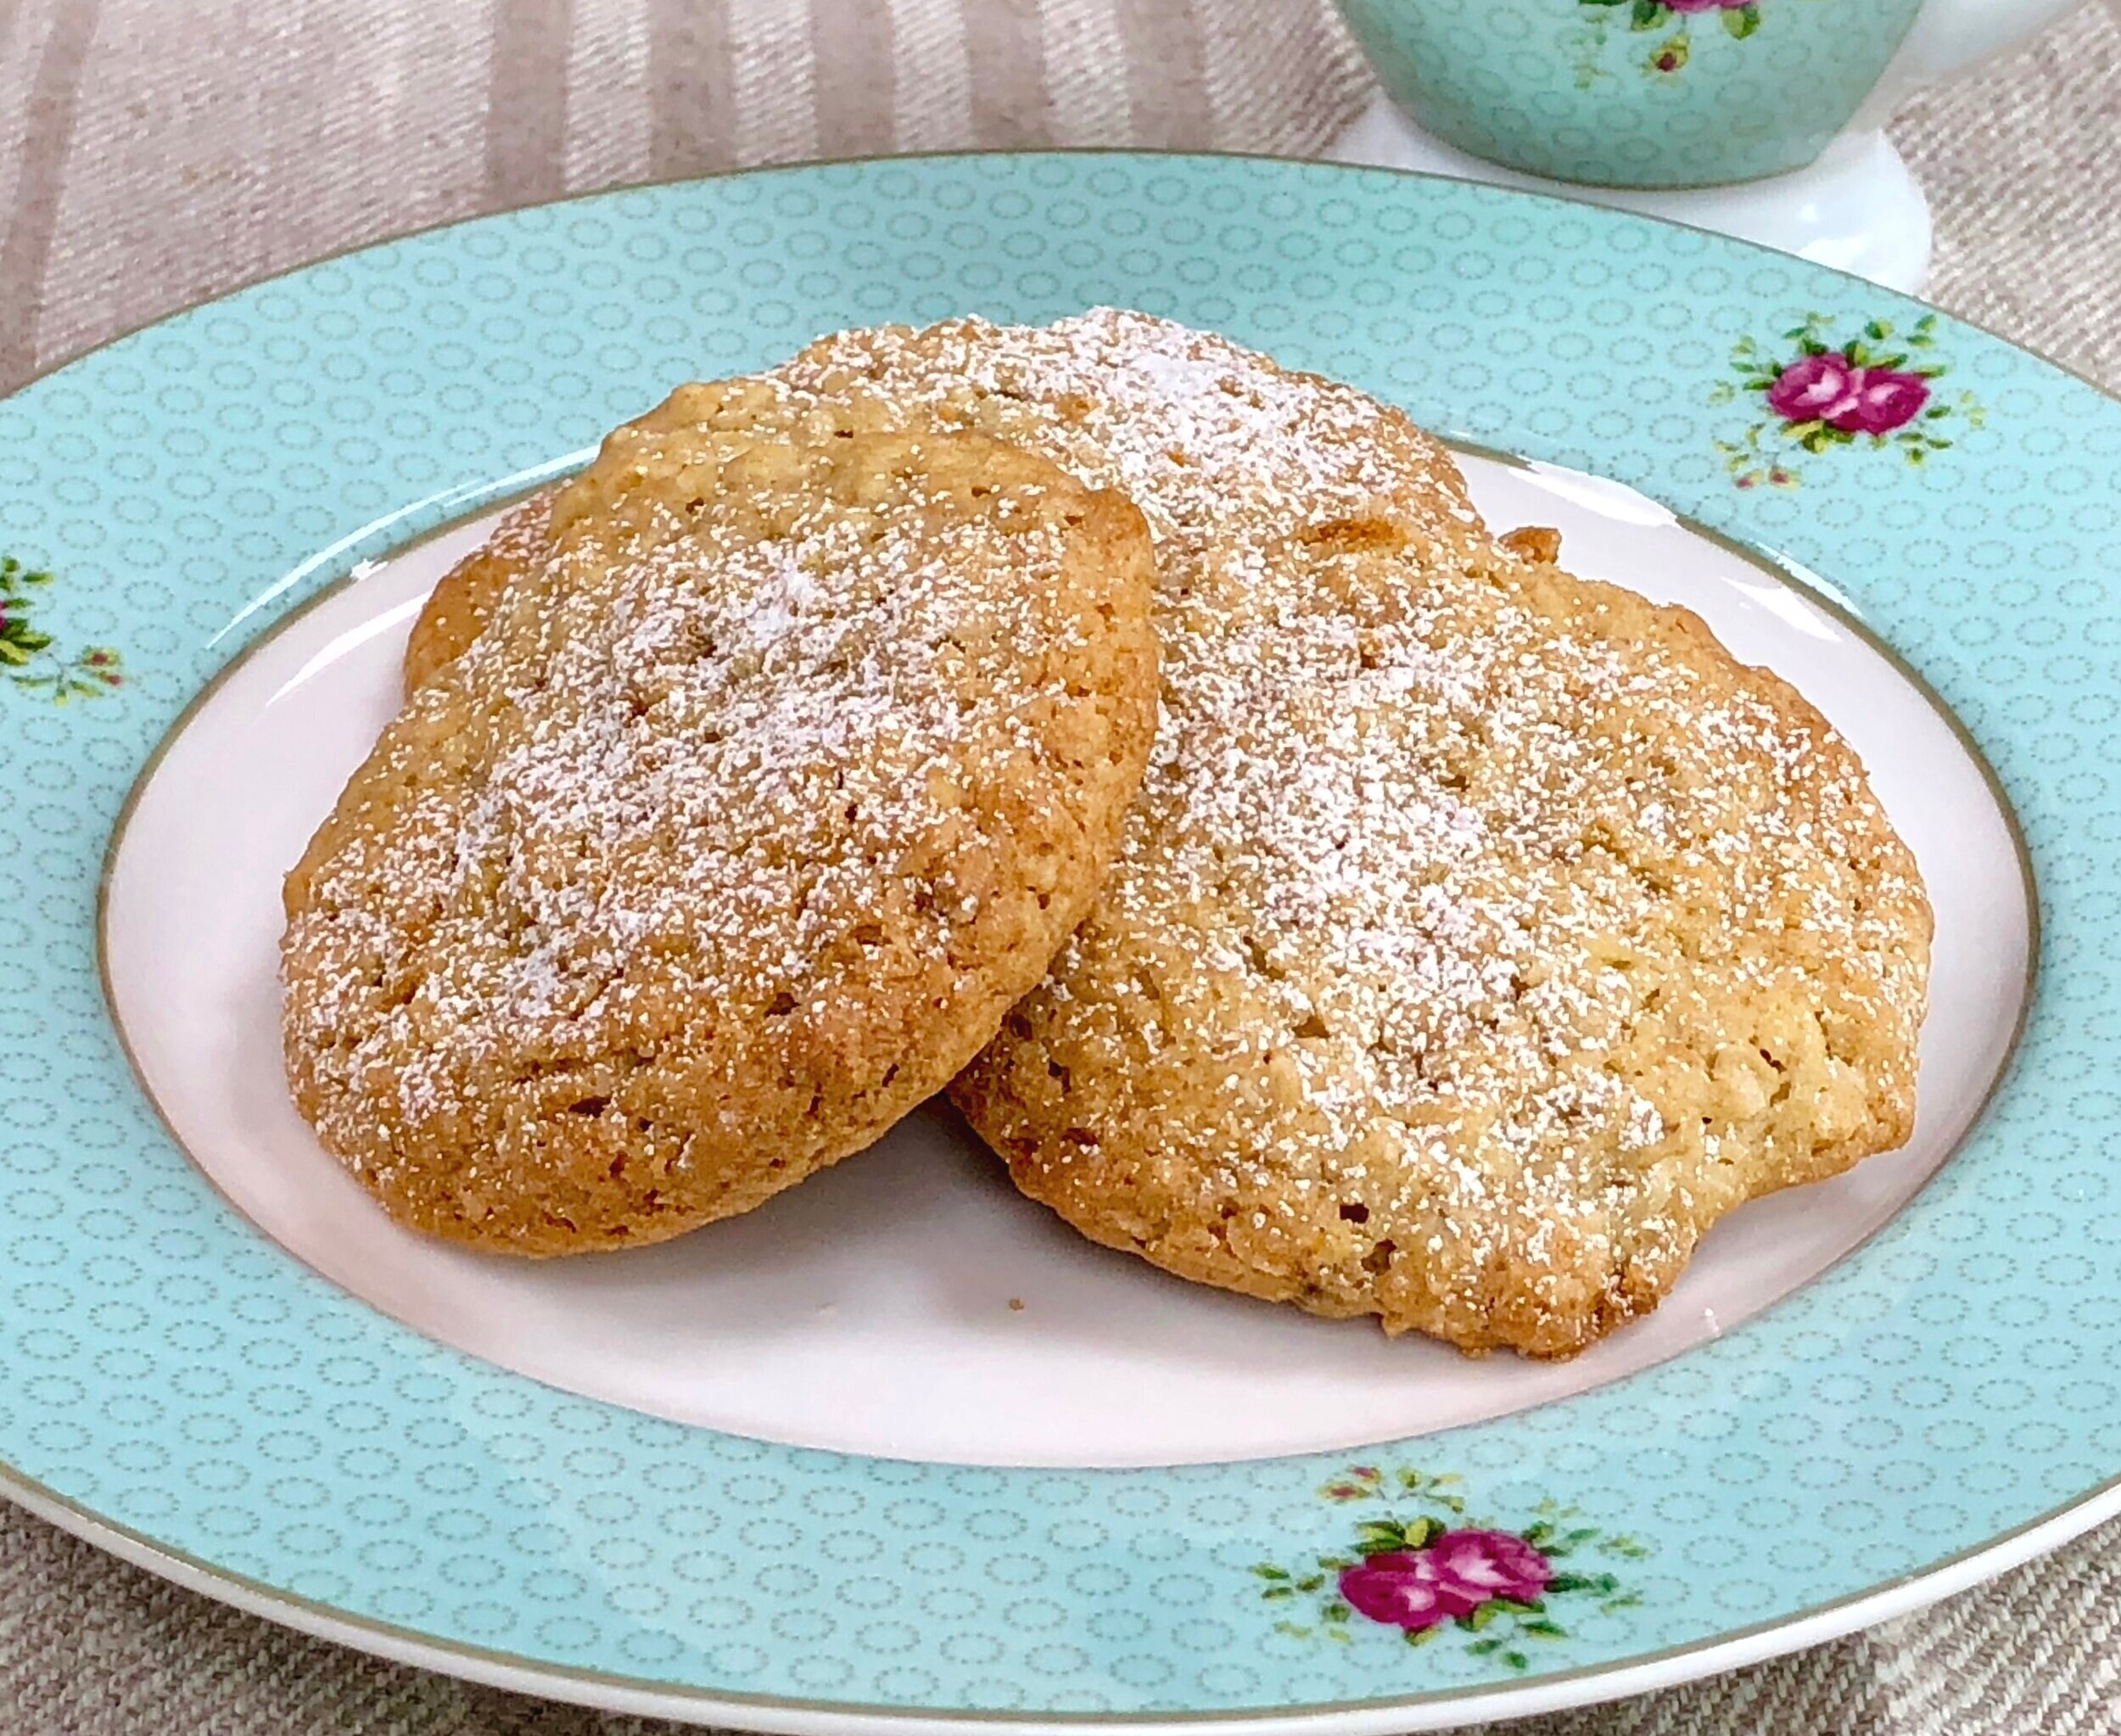
Coconut Cookies

fullsizeoutput_bf9f.jpg

Almost everyone I know is baking more these days.

Me too.

Also, everyone I know is complaining about gaining weight from all the stuff they are baking.

Me too.

But, okay, this Covid thing will be over one day and I can go on a diet then.

In the meantime I am baking more.

Because of all the extra baking I needed to branch out a little. I was overloaded with my usual Grand Finale cookies, Fanny cookies and peanut butter cookies. It’s like watching Casablanca or Tree Grows in Brooklyn again. I love those movies and have seen them a zillion times and will watch them again. But enough is enough — for a while anyway.

So I decided on coconut cookies. These are really really good. One of the grandkids said they are better than all the others.

That is a huge endorsement!

The recipe calls for shredded coconut but I actually used Bob’s Red Mill coconut flakes instead, because I happened to have some. But I’ve made them with shredded coconut too. Good either way.

Glass of milk — iced tea — iced coffee. Your choice.

Coconut Cookies

  • 1 cup butter

  • 3/4 cup sugar

  • 3/4 cup brown sugar

  • 2 large eggs

  • 1 teaspoon vanilla extract

  • 2 cups all-purpose flour

  • 1 cup quick cooking oats

  • 1 cup shredded coconut

  • 1 teaspoon baking powder

  • 1 teaspoon baking soda

  • 1/2 teaspoon salt

  • confectioners’ sugar, optional

Preheat the oven to 350 degrees. Place the butter, sugar and brown sugar in the bowl of an electric mixer. Beat at medium speed for 2-3 minutes or until thoroughly blended. Add the eggs and vanilla extract and beat for another minute or until well blended. In a separate bowl, mix the flour, oats, coconut, baking powder, baking soda and salt until the ingredients are evenly distributed. Add this mixture to the butter mixture and beat for about 2 minutes or until well blended. Place blobs of dough about 1-inch in diameter (heaping tablespoon) on ungreased cookie sheets, leaving space between dough for the cookies to spread. Gently tap the tops of the dough blobs to flatten them slightly. Bake for about 12 minutes or until lightly browned. Let cool and decorate with sifted confectioners’ sugar if desired.

Makes about 30

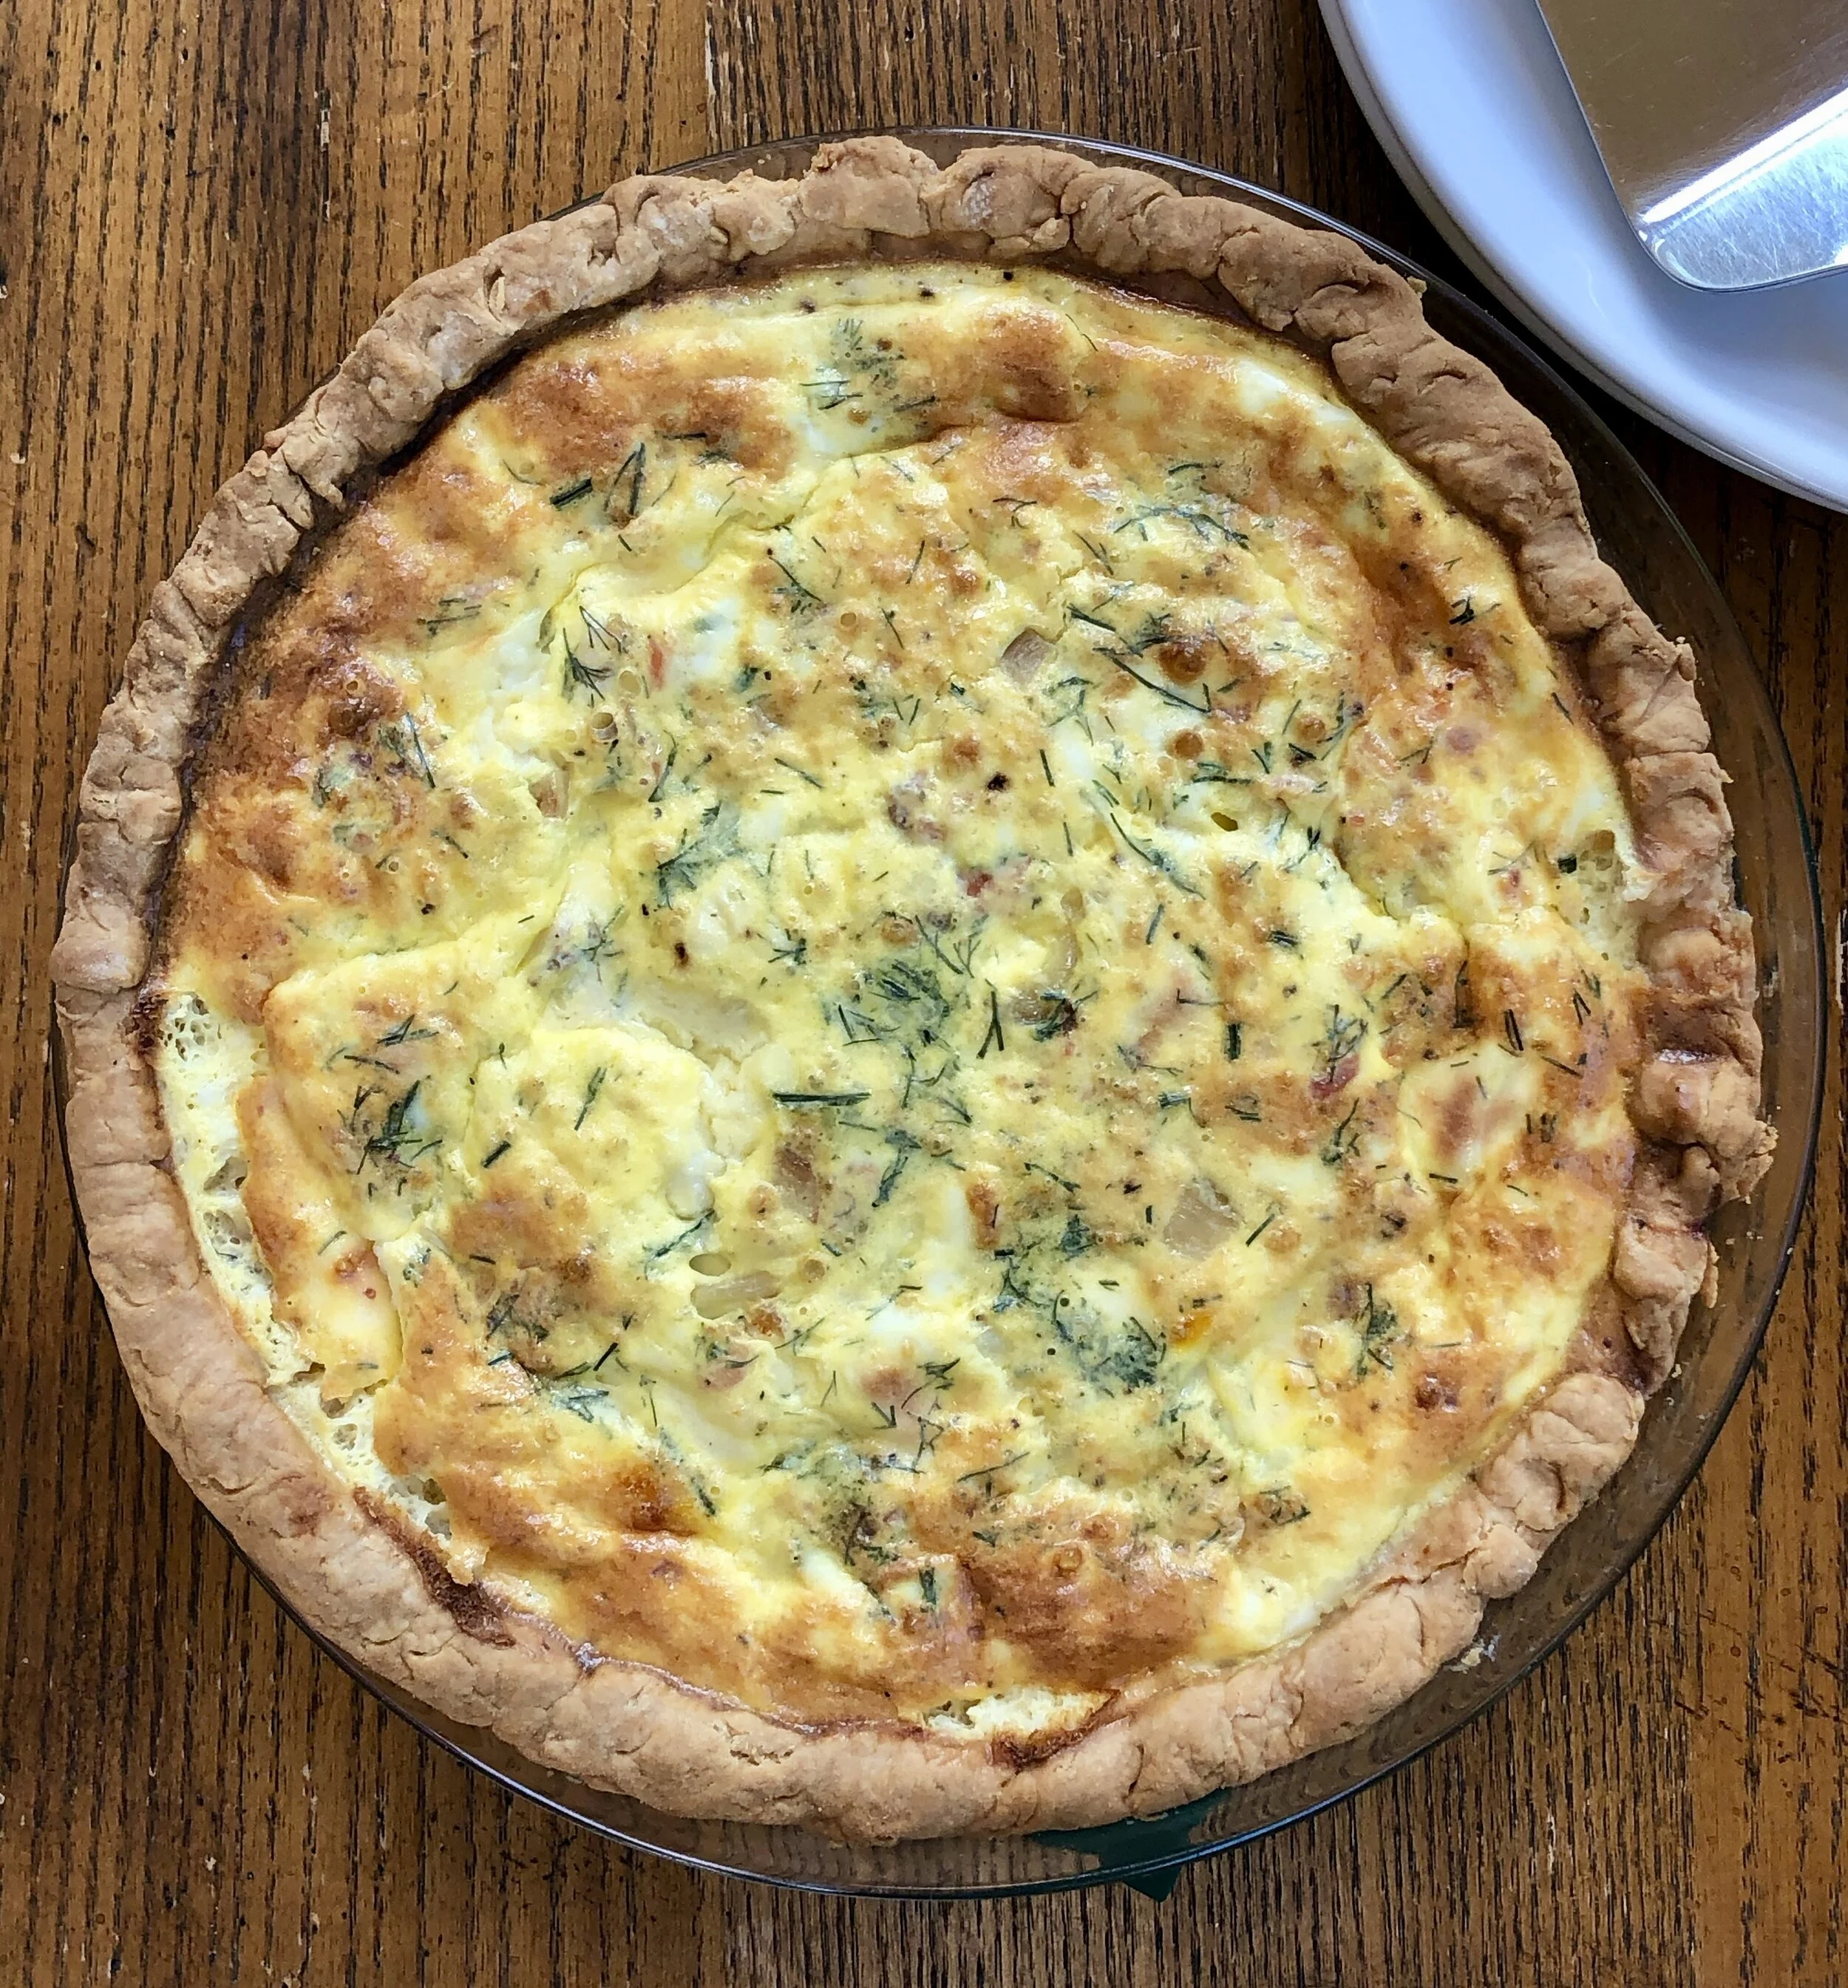
Smoked Salmon and Cottage Cheese Pie

fullsizeoutput_bee6.jpeg

Last week I made the ideal dish.

By that I mean it is light and easy to eat during the scorching days of summer.

It’s meatless, so perfect for the Nine Days and any other time we don’t want to eat the usual meat-two-veggie or salad dinner.

I got to use up leftovers and bits of this and that (smoked salmon, cottage cheese, cream cheese).

It served as dinner and also as hors d’oeuvre — I rewarmed the leftover portion and cut it into bite-size pieces for some socially distanced company.

You can use any leftover fish. I happened to have smoked salmon, so that’s what I used.

Smoked Salmon and Cottage Cheese Pie

  • 1 tablespoon butter

  • 1 large shallot, chopped

  • 1 partially baked pie crust

  • 3-4 ounces smoked salmon, chopped

  • 2 tablespoons cream cheese

  • 4 large eggs

  • 1 cup cottage cheese

  • 1 cup half and half

  • 2 tablespoons chopped fresh dill

  • 1/2 teaspoon salt or to taste

Preheat the oven to 375 degrees. Heat the butter in a small frying pan over medium heat. When the butter has melted and looks bubbly, add the shallot and cook for 3-4 minutes or until softened. Spoon the shallot onto the bottom of the partially baked pie crust. Scatter the salmon pieces on top. Cut the cream cheese into small pieces and scatter them on top. In a bowl, beat the eggs, cottage cheese, half and half, dill and salt together until well mixed. Pour into the pie crust. Bake the pie for about 45 minutes or until the top is nicely browned and the custard has set.

Makes 4-6 servings

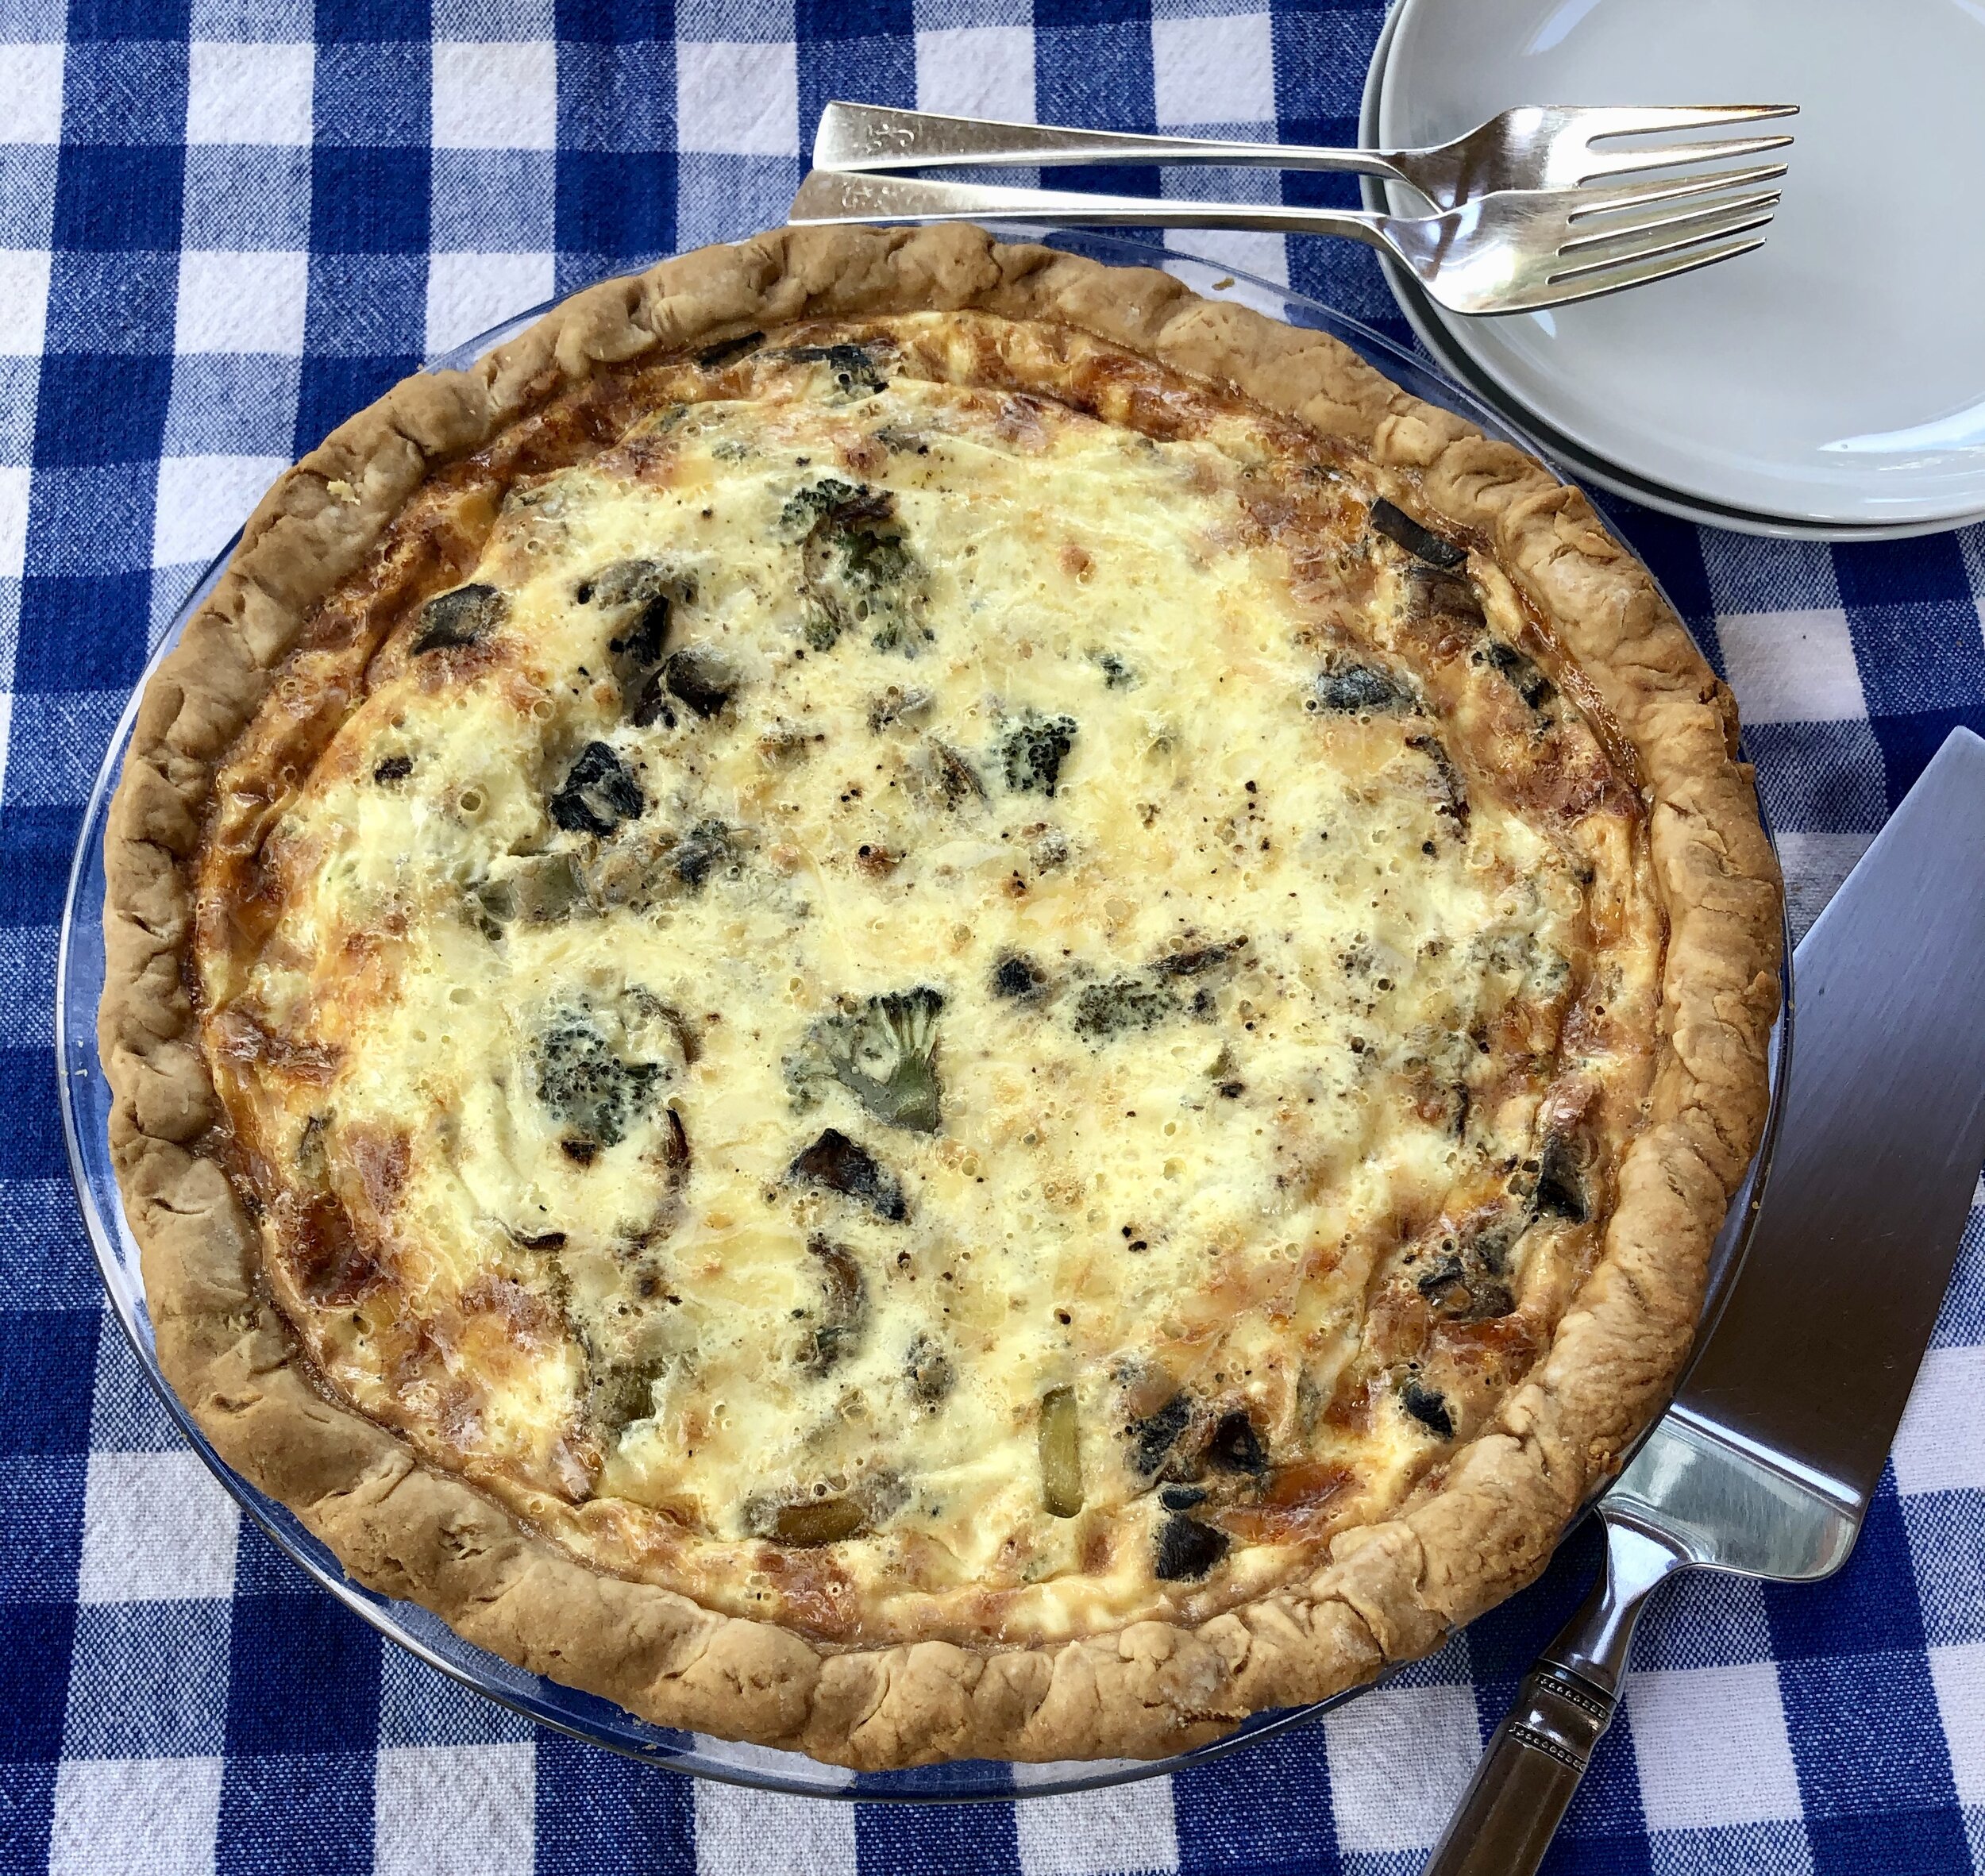
Vegetable Pie

fullsizeoutput_be3e.jpeg

Everyone who knows me or reads my blog or articles knows that I can’t stand wasting food. I make it my mission to at least try to use everything wisely, including all leftovers.

These days, during a global pandemic when certain items are scarce and it’s also difficult to shop, I’m feeling even more committed.

Fortunately I have a willing and supportive husband, who loves the idea and applauds everything I make and tells me how wonderful and creative it all is.

Last week I had an overabundance of vegetables and an extra quart of half and half. I always have cheese in the fridge.

And so, I gathered up all the leftover veggies and made a vegetable pie for dinner. We had a salad with it.

It was filling and tasted wonderful and we were both happy for a day off meat.

Bonus: this recipe is extremely versatile and easy to prepare: you can use whatever vegetables you have and if you wish, a store-bought pie crust. If you prefer to make your own crust, you can find a recipe here (it makes enough dough for a two-crust pie, but you can freeze half).

Besides all that — this is a good dairy lunch or dinner during Shavuot, which begins tonight at sundown (May 28, 2020).

Vegetable Pie

  •  1 tablespoon butter

  • 1 tablespoon olive oil

  • 1 large shallot, chopped (or use one small onion or 2-3 scallions)

  • 1 medium portobello mushroom cap, cut into bite-size pieces (2 cups coarsely chopped mushrooms)

  • 1 cup chopped cooked vegetable (broccoli, string beans, carrots, etc.)

  • 1 partially baked 9-inch pie crust

  • 3 ounces grated meltable cheese (Swiss, cheddar, mozzarella, Jarslberg, etc.)

  • 4 large eggs

  • 2 cups half and half cream

  • salt and pepper to taste


Preheat the oven to 375 degrees. Heat the butter and olive oil in a sauté pan over medium heat. When the butter has melted and looks foamy, add the shallot and mushroom pieces and cook for 4-5 minutes or until the vegetables have softened. Add the cooked vegetable, mix the ingredients and place them in the pie crust. Sprinkle the cheese on top. Beat the eggs and cream together with salt and pepper to taste. Pour over the ingredients in the pie crust. Bake for 40-45 minutes or until golden brown and set.

Makes 4 servings

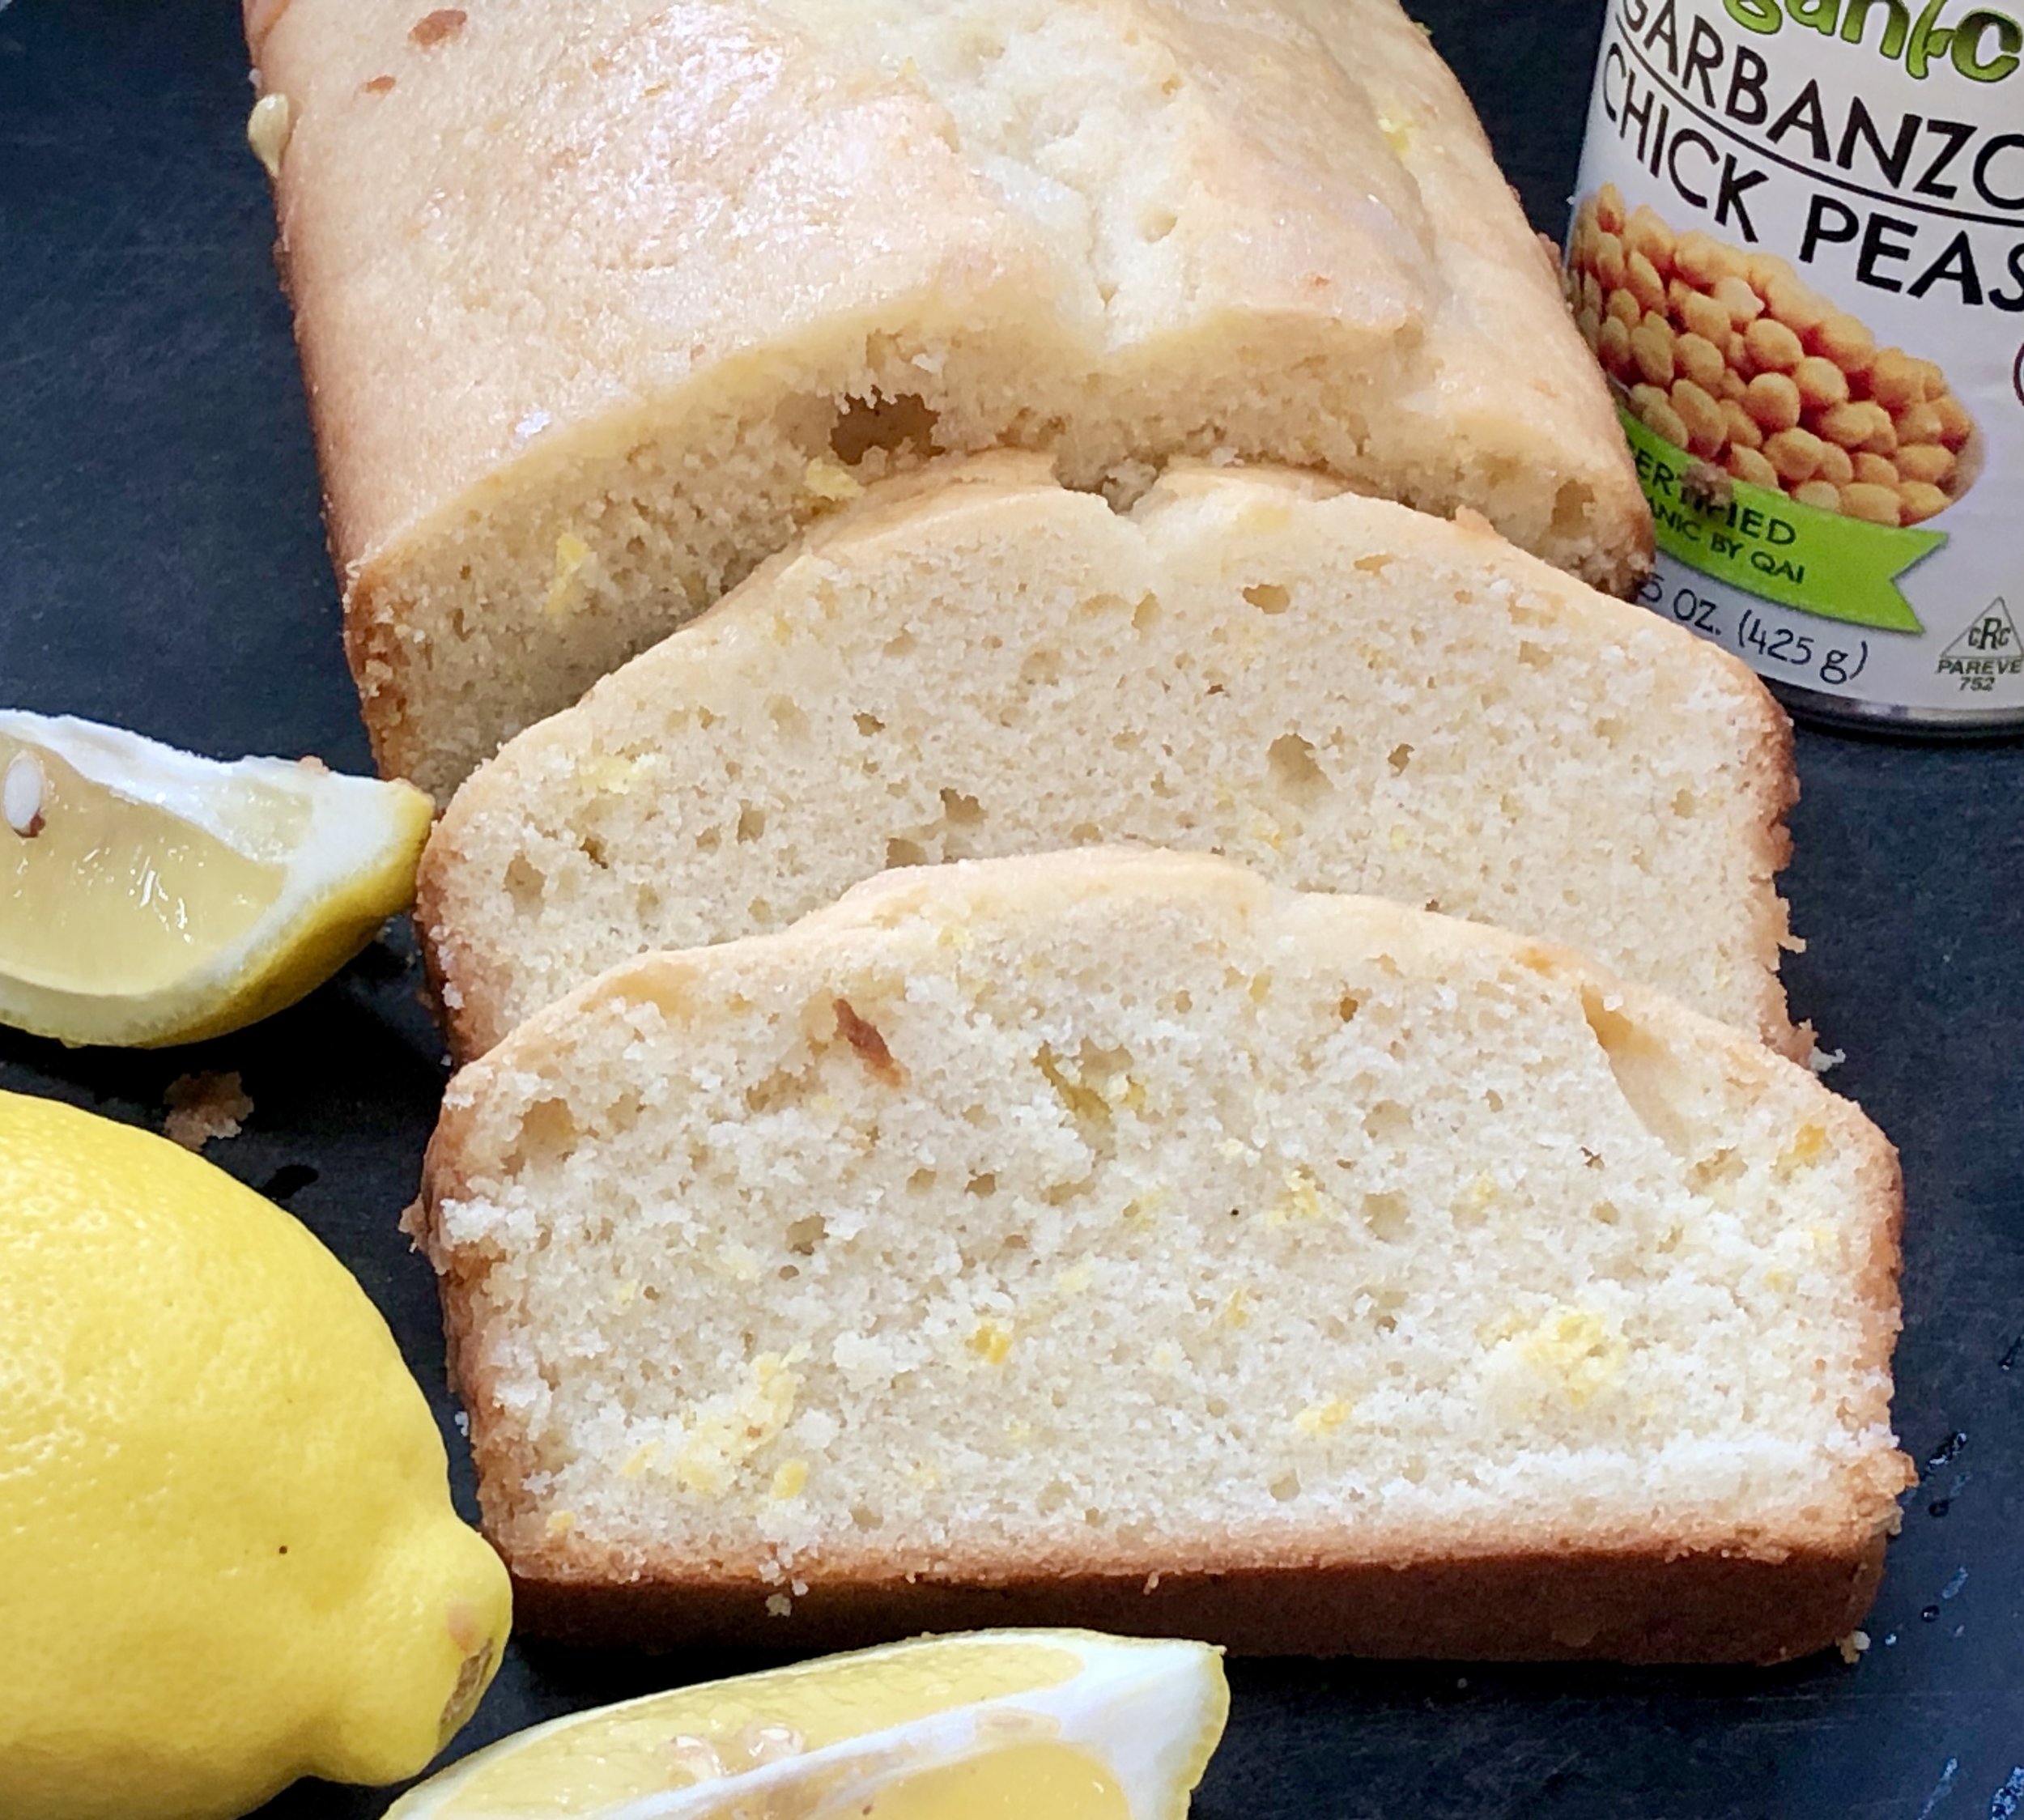
Lemon Aquafaba Bread

fullsizeoutput_9516.jpeg

At this particular time, when we are going through a world-wide crisis, a terrifying pandemic, it can be therapeutic for many of us to cook and bake.

I am one of those people.

I have plenty of ingredients to cook with because over the years I’ve learned to keep shelf-stable foods on hand in case I can’t shop: ingredients such as canned beans, rice, frozen veggies, dried fruit, canned or packaged milk, and so on.

Equally important for me is — don’t waste food (I’ve talked about that often). I believe that it is important to use all resources — “food forage” as my colleague Susan Barocas calls it. Don’t throw out any ingredient that’s useable, including leftovers.

With all this in mind I offer this lemon bread.

I have lots of lemons in my crisper because of an article I am writing. I’ve developed the recipe for that, so I need to make use of the extra lemons.

I also needed to do something with the liquid leftover from a can of chick peas that I opened for a salad. Chick pea liquid is incredibly useful.

In case you aren’t familiar with this leftover liquid (also from canned beans), it is called aquafaba and it can be used in place of eggs. That makes it an ideal ingredient for vegans and anyone who is allergic to or otherwise can’t eat eggs.

When you beat chick pea liquid with a whisk, it traps air like eggs do, so baked goods have both structure and also a light, tender crumb.

I am trying not to use too many fresh eggs that I might need for meals, so I used the aquafaba instead to make this lemon bread.

Dee-lish!

To get the most out of the liquid in a can of chick peas, be sure to scrape the residue at the bottom of the can. For best results, reduce the liquid slowly over medium-low heat until it becomes the consistency of egg white. Use about 3 tablespoons of the liquid in place of each egg. 

For another delicious recipe (carrot bread) using aquafaba, click here.

Lemon Aquafaba Bread

  • 6 tablespoons aquafaba

  • 4 tablespoons coconut oil

  • 3/4 cup sugar

  • 1 tablespoon finely grated fresh lemon peel

  • 2 cups all-purpose flour

  • 2-1/2 teaspoons baking powder

  • 3/4 teaspoon salt

  • 1 cup coconut milk

  • 1/4 cup fresh lemon juice

  • 1-1/2 tablespoons sugar

Preheat the oven to 350 degrees. Grease a 9”x5”x3” loaf pan. If the aquafaba seems thin, boil it for a few minutes to thicken slightly to the consistency of egg white. Set aside to cool. In the bowl of an electric mixer, beat the coconut oil and 3/4 cup sugar at medium speed for 1-2 minutes or until well combined. Add the lemon peel and aquafaba and blend them in. Mix the flour, baking powder and salt in a small bowl. Add the dry ingredients to the creamed mixture in thirds, alternating with the coconut milk. Beat to blend the ingredients to a smooth, even batter. Spoon the batter into the prepared pan. Bake for 50-55 minutes or until a cake tester inserted into the center comes out clean. While the bread is baking, combine the lemon juice and 1-1/2 tablespoons sugar in a small saucepan and cook over medium heat for 1-2 minutes or until the sugar has dissolved. When the bread comes out of the oven, pour the lemon juice mixture on top. Cool the bread in the pan for 10 minutes. Invert onto a cake rack to cool completely.

Makes one bread

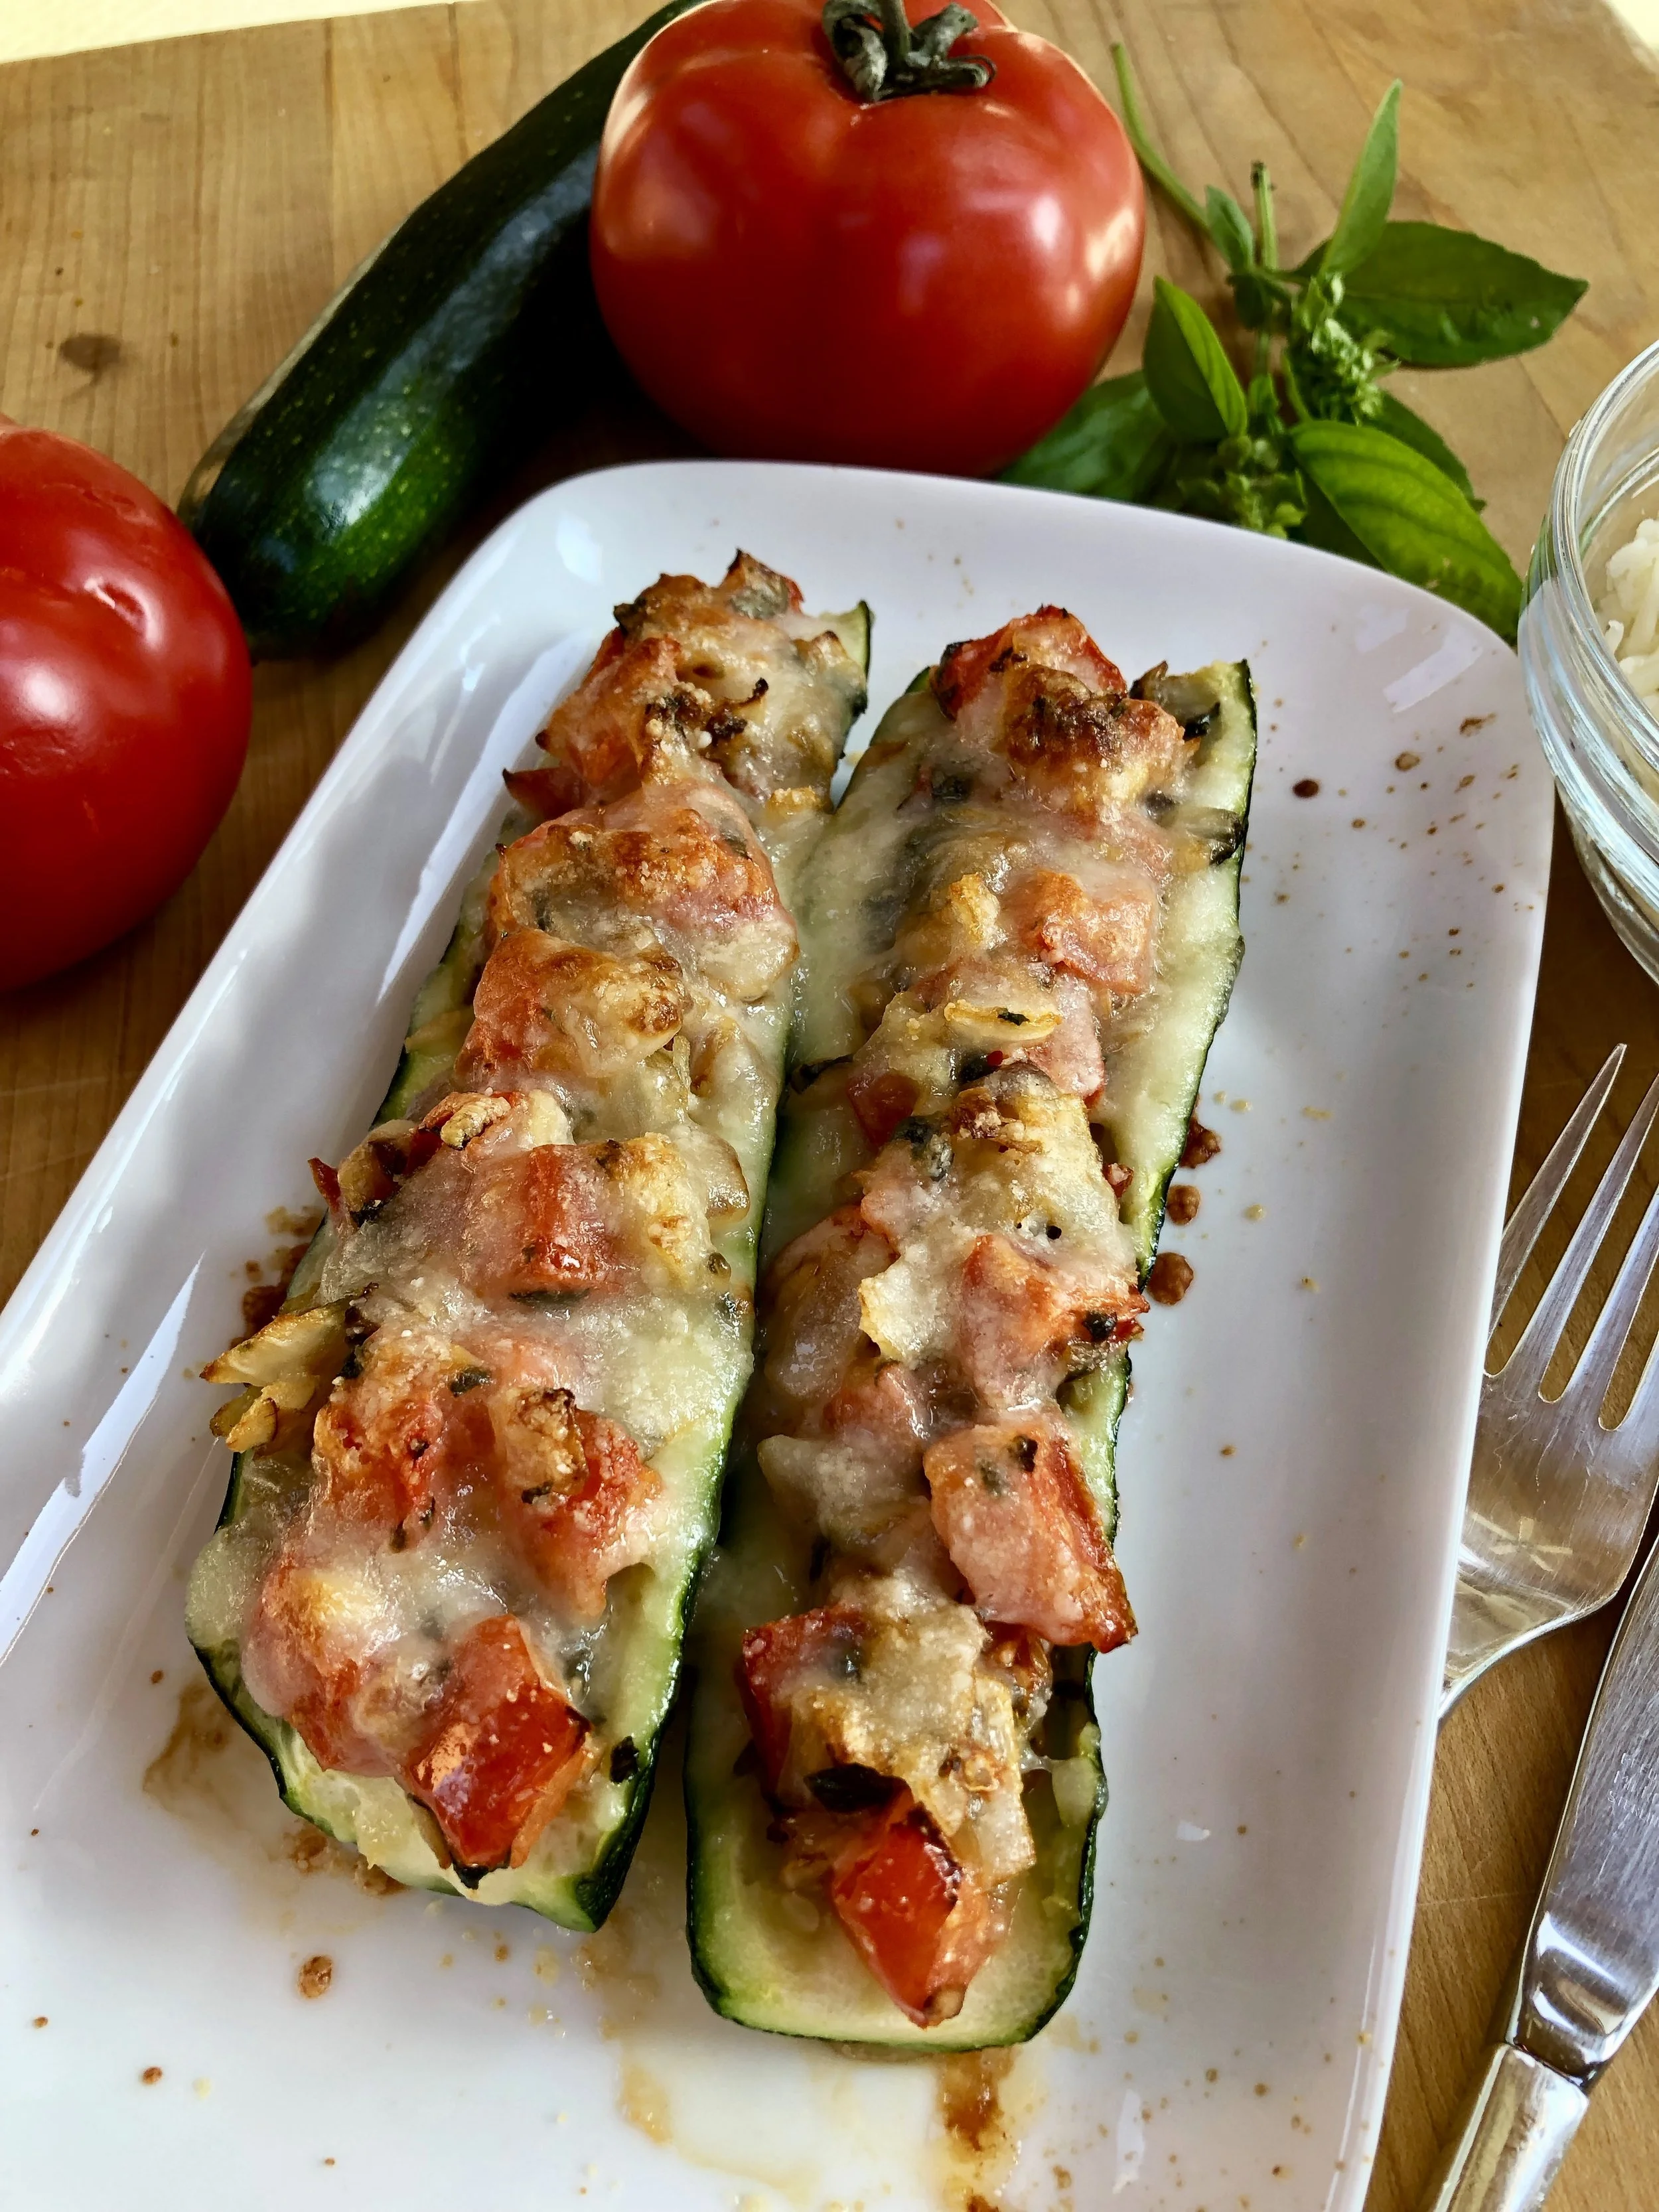
Stuffed Zucchini Boats

fullsizeoutput_ac92.jpeg

There’s no particular food associated with the holiday of Simchat Torah, which begins on Sunday night (October 20, 2019), but lots of people make food that resemble torah scrolls.

Stuffed cabbage is a classic. But when I used up the last of my home garden zucchini and stuffed it with tomatoes and cheese I thought these look somewhat like torah scrolls too!

So, for me: Stuffed Zucchini boats are the order of the day for the holiday (or any other time).

Stuffed Zucchini Boats 

  • 2 medium zucchini

  • 2 tablespoons olive oil

  • 1 medium onion, chopped

  • 1 large clove garlic, chopped

  • 2 tomatoes, chopped

  • 2 tablespoons chopped fresh basil

  • 6-8 tablespoons shredded mozzarella

  • 2 tablespoons grated Parmesan

Preheat the oven to 400 degrees. Cut the zucchini in half lengthwise. Scoop out the seeds and part of the flesh, leaving a wall of at least ¼-inch next to the skin. Coat the outside surface of the zucchinis with a film of olive oil. Place them in a baking dish and bake for 15-20 minutes, depending on size, or until barely tender (use the tip of a sharp knife to test tenderness). While the zucchini boats are baking, pour the remaining olive oil in a saute pan over medium heat. Add the onion and garlic and cook, stirring occasionally, for 2-3 minutes, to soften the vegetables slightly. Add the tomatoes and basil, stir and remove the pan from the heat to cool slightly. When the zucchini boats are ready, remove them from the oven and fill the cavities with the tomato mixture. Sprinkle the mozzarella cheese evenly over the filling. Sprinkle the Parmesan cheese evenly over the filling. Bake for 12-15 minutes or until the cheese has melted and is beginning to brown.     

 Makes 4 servings

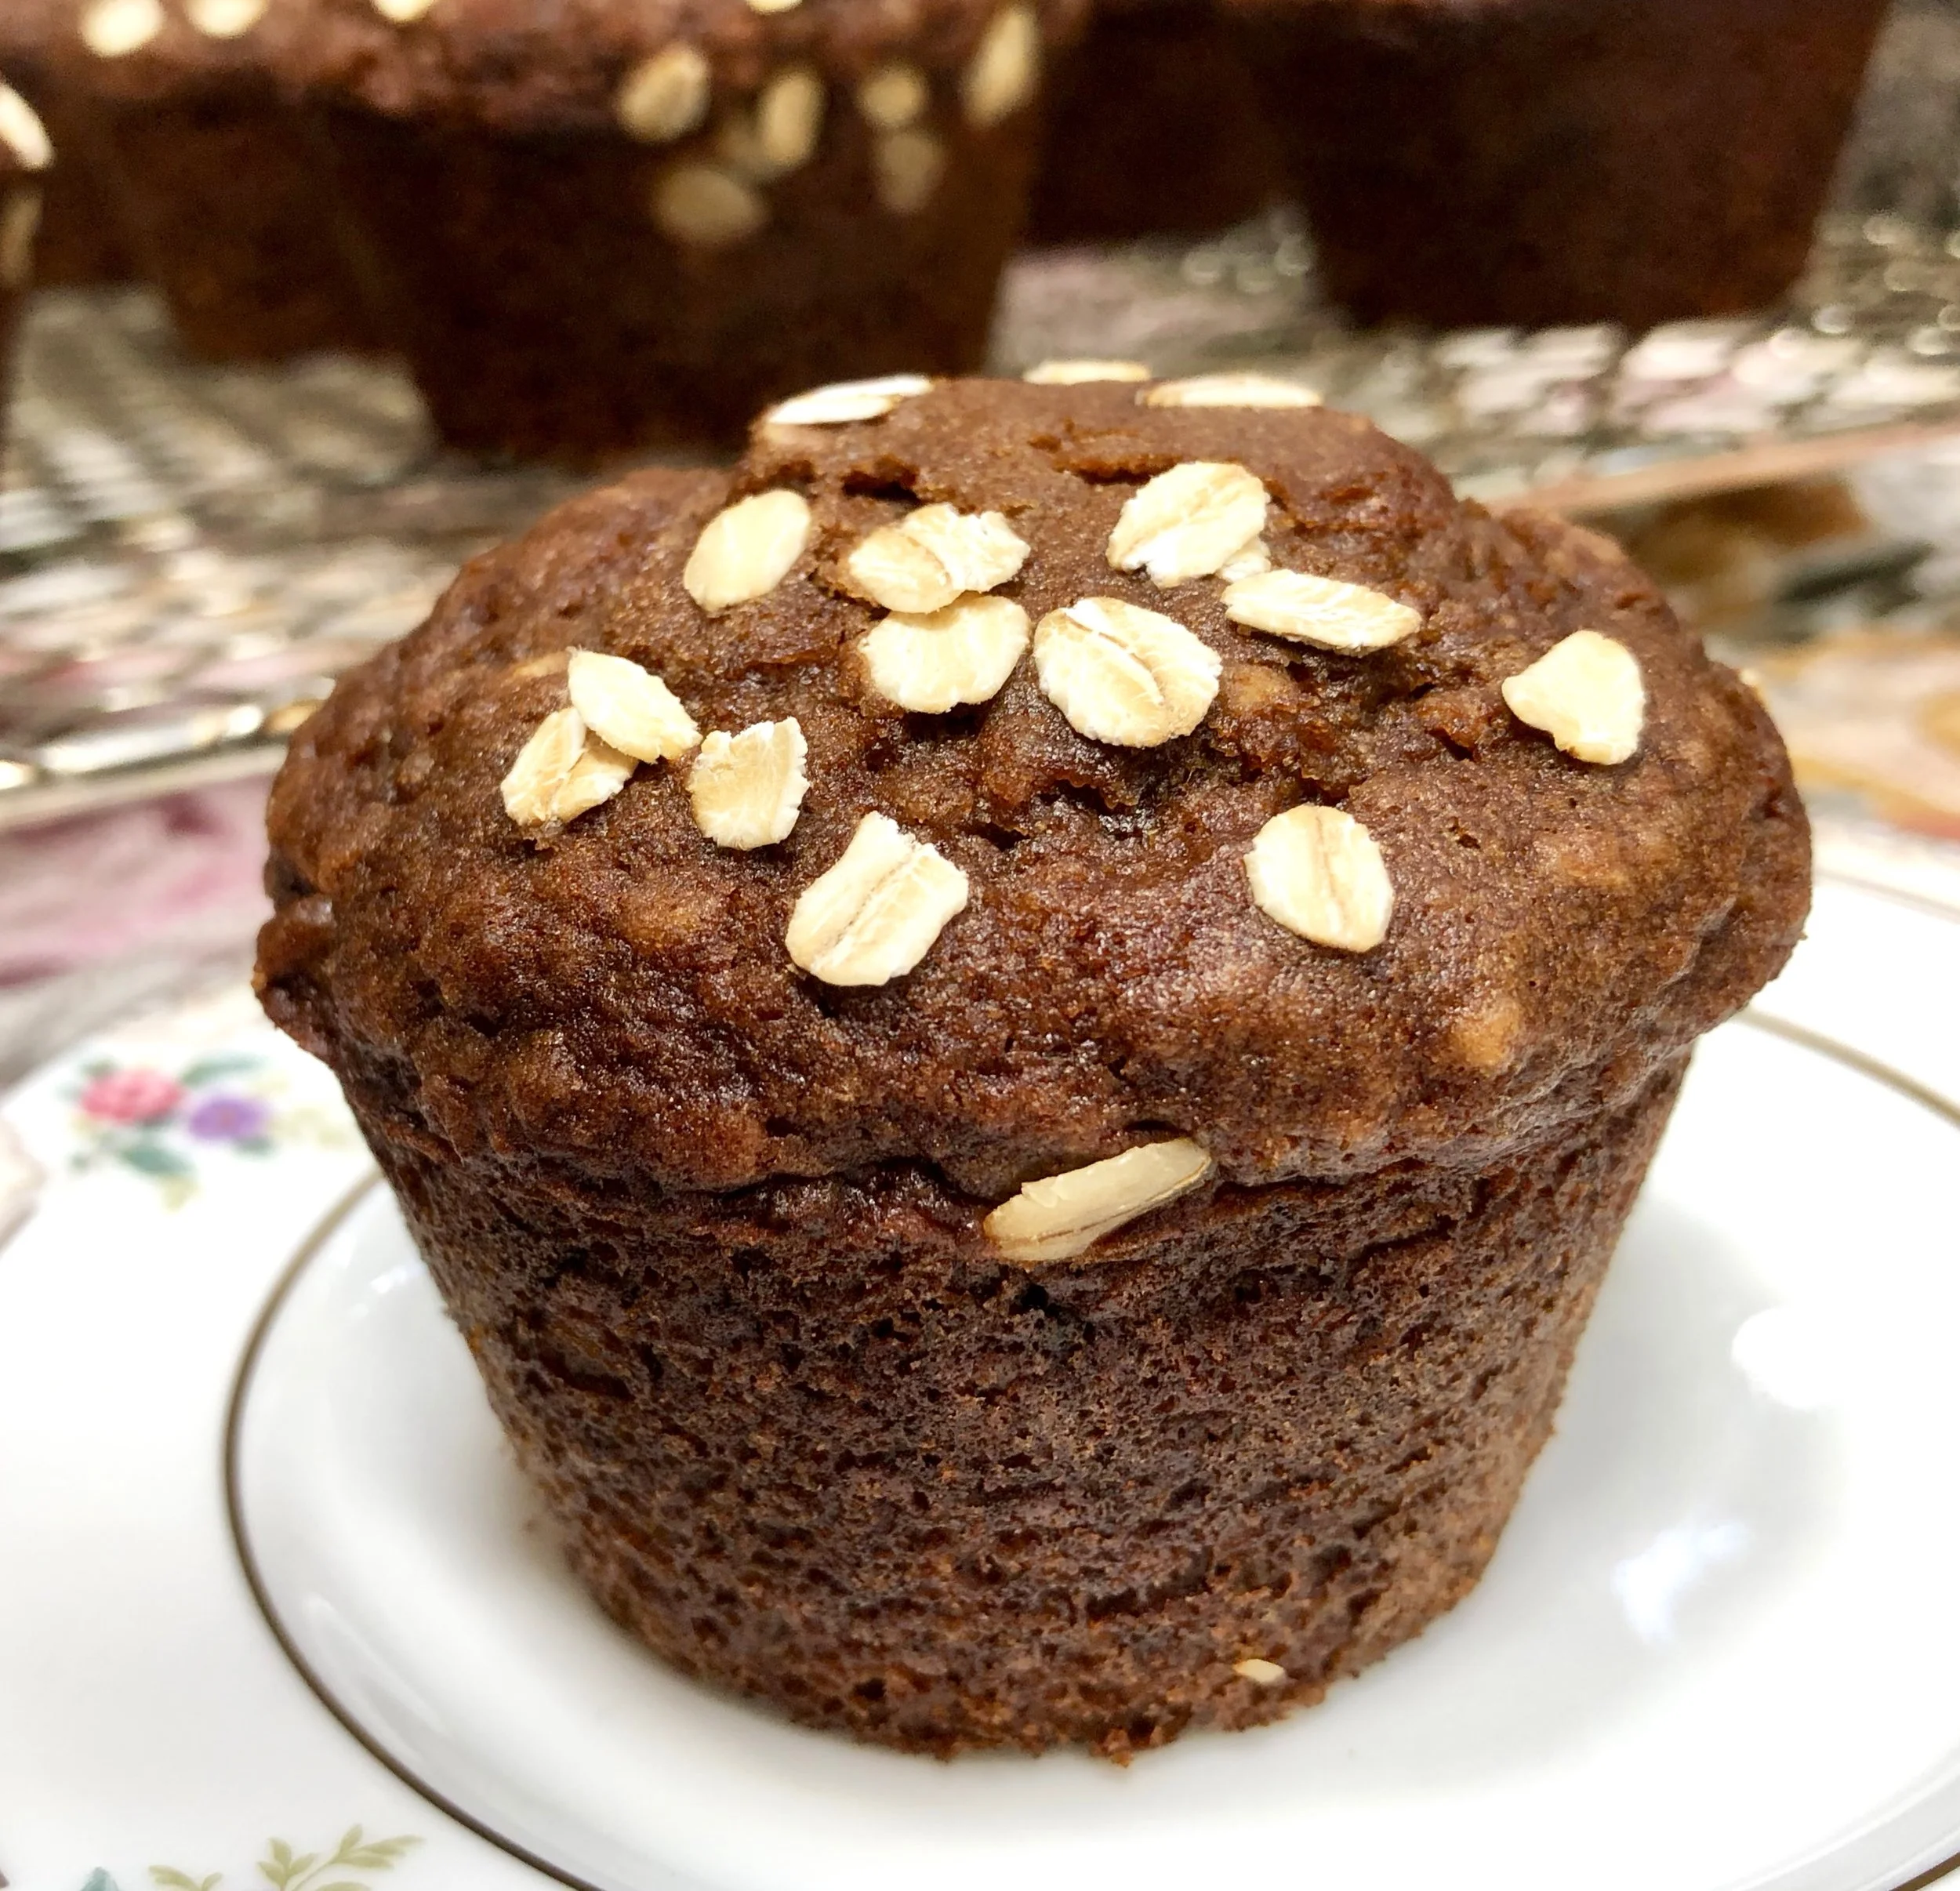
Honey Cake Muffins

fullsizeoutput_9422.jpeg

I make honey cake every year for Rosh Hashanah, using my Aunt Belle’s family-famous recipe.

Every once in a while I change the recipe — a different honey, an additional spice (or less seasoning), and so on, just to see if we like it better or I should just stick to the original. I’ve even adapted the recipe to make it with date honey.

They’re all delicious. I love honey cake and I look forward to it every year as a special holiday treat.

Last year I decided to make honey cake into muffins. So — breakfast or afternoon snack instead of for dessert. They are sweet — it is honey “cake” after all — but not as sweet as the recipe I use for dessert. The muffins are also mellowed a bit with oats.

During the year I made these muffins again, several times, using several different spice blends. The recipe below is the more traditional Rosh Hashanah flavor, but you could delete the cinnamon and nutmeg and use one teaspoon Hawaij spice instead. They’re a convenient riff on honey cake; freezable too.

Honey Cake Muffins

  • 1-1/3 cups all-purpose flour

  • 2/3 cup quick oats

  • 2 teaspoons baking powder

  • 1-1/2 teaspoons baking soda

  • 1/2 teaspoon salt

  • 2 teaspoon grated fresh orange peel

  • 1/2 teaspoon cinnamon

  • 1/2 teaspoon grated nutmeg

  • 3/4 cup honey

  • 1/2 cup cold coffee

  • 6 tablespoons vegetable oil

  • 2 large eggs

  • old fashioned oats, optional (or use chopped nuts)

Preheat the oven to 375 degrees. Grease 10 muffin tins. In a bowl, mix the flour, oats, baking powder, baking soda, salt, orange peel, cinnamon and nutmeg together until uniform in color. Heat the honey and coffee together over low heat briefly, so that they are easy to blend with a whisk. Add the vegetable oil and eggs and whisk the ingredients until they are uniform in color. Stir in the flour mixture and mix until thoroughly combined. Spoon the batter into the greased muffin tins. Top, if desired, with old fashioned oats or chopped nuts. Bake for about 18 minutes or until a cake tester inserted into the center comes out clean.

Makes 10


Chick Pea and Carrot Salad

DSC08424.jpg

Of course, of course we will be slicing apples and dipping them in honey on Rosh Hashanah. (which begins at sunset on September 29th).

But chickpeas are on the menu too. In his Encyclopedia of Jewish Food, the late rabbi and food authority Gil Marks wrote that “chickpeas are a traditional Rosh Hashanah food, a symbol of fertility, abundance and a wish for a well-rounded year to come.”

I usually make chickpeas into hummus, but sometimes I serve them whole, as a snack, roasted, the way my mother made them when I was growing up – a recipe called nahit. She coated the chickpeas with vegetable oil, sprinkled them with salt and paprika and baked them until crispy.

I changed her recipe somewhat -- I use olive oil, kosher salt and fresh thyme, or sometimes za’atar, as seasonings. Nahit is a delicious snack and a healthy one too: chickpeas are a good source of protein, minerals (including calcium) and fiber.

For this coming holiday though I’ll be making a chickpea and carrot salad to serve with dinner. Carrots are another symbolic ingredient of the holiday, so this recipe is a double-up of special ingredients of festive food for the holiday table. It’s a dish that can be made in advance, which makes it a good choice at such a busy time. And it is colorful too, fit for any celebration, including Break-the-Fast. 

Chick Pea and Carrot Salad

  • 1 15-ounce can chickpeas

  • 4 medium carrots, sliced thin

  • 1/2 chopped red onion

  • 1/4 cup chopped fresh parsley

  • 1/4 cup chopped fresh mint

  • 1 teaspoon ground cumin

  • 1/8 teaspoon cayenne pepper

  • 1/4 cup olive oil

  • 3 tablespoons lemon juice

  • salt to taste

Rinse the chickpeas under cold running water; let drain and place in a bowl. Add the carrots, onion, parsley, mint, cumin and cayenne pepper and toss to distribute the ingredients evenly. Pour in the olive oil and lemon juice. Toss to coat the ingredients evenly. Taste for seasoning and add salt to taste.

Makes 6 servings