kosher

Stuff It: Matzo Stuffing

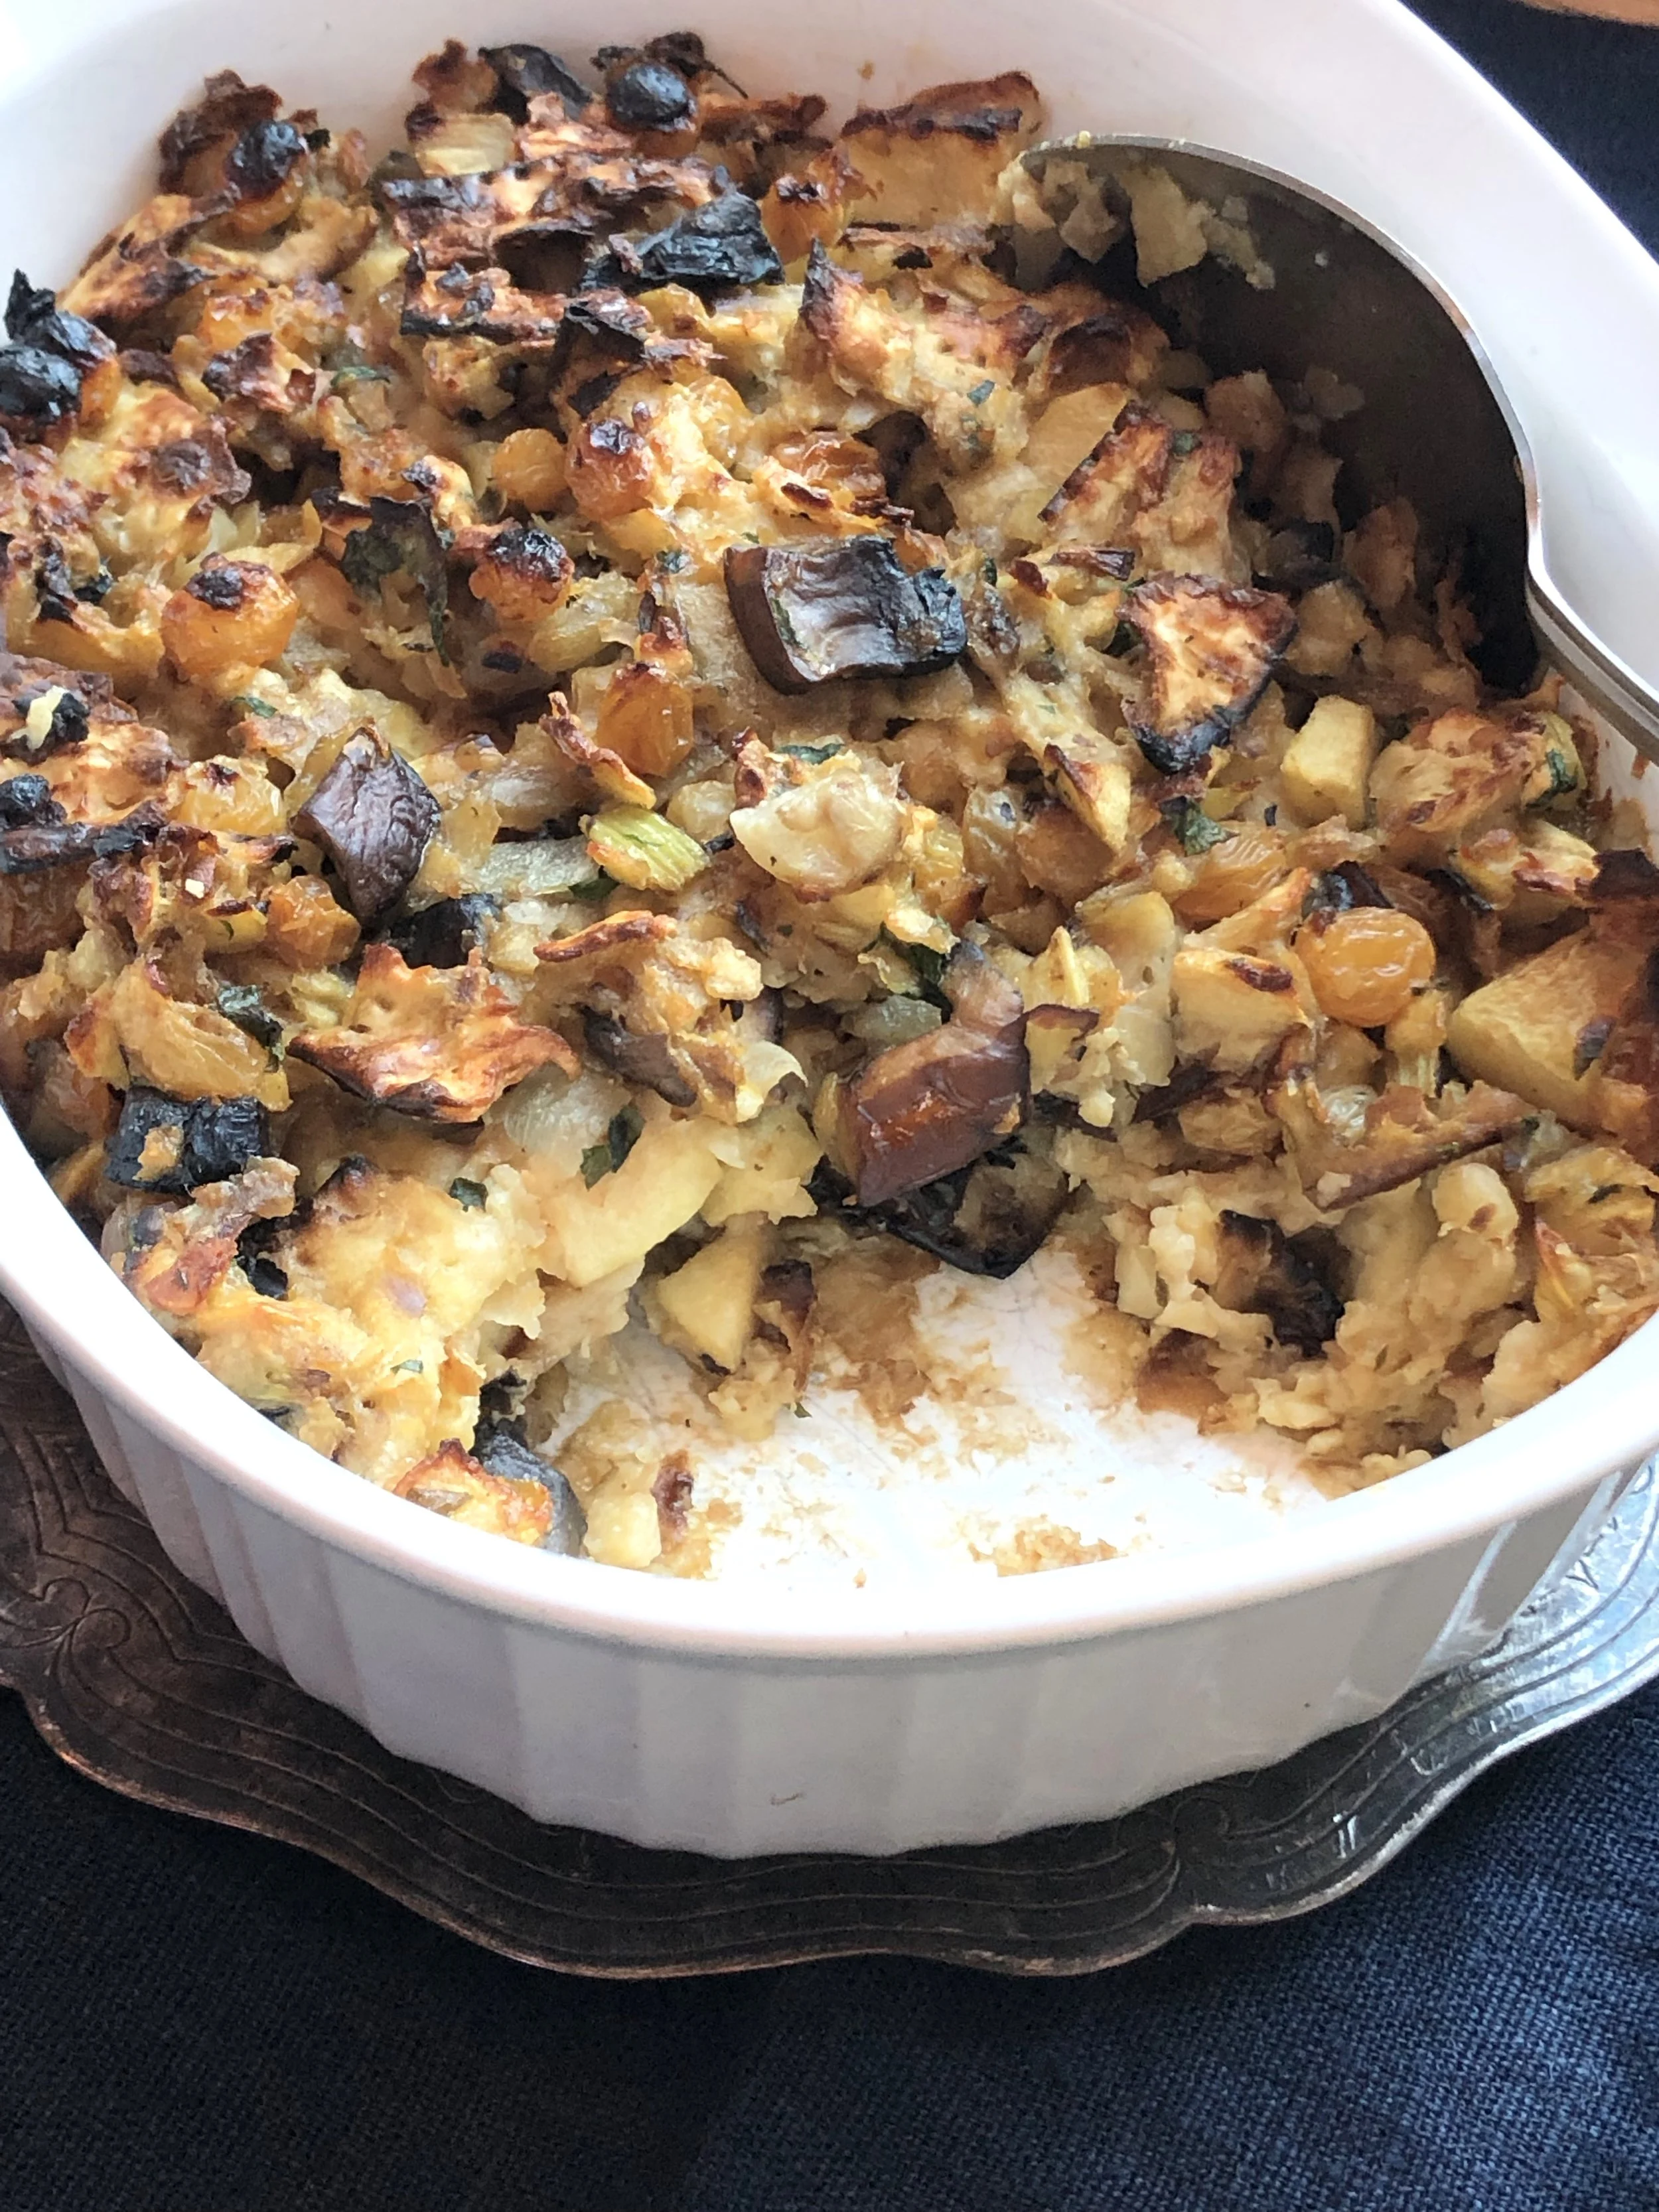
Matzo Stuffing with Apples and Portobello Mushrooms

Matzo Stuffing with Apples and Portobello Mushrooms

Almost everyone I know makes brisket for the first Seder.

But my grandma, and then my mother — for all the years that I remember — served turkey. So, so do I.

I may also make a brisket, depending on how many people are coming to celebrate with us. Or, I may make brisket for the second night. Depends.

But there’s always a turkey. And that means stuffing.

And so, the chosen stuffing for this year: crushed matzo with apples and portobello mushrooms. It’s easy and can be prepared in advance; just pop it in the oven to cook about 40 minutes before serving time. Sometimes I add thyme to this dish, sometimes I don’t, depending on the crowd. It’s delicious either way, although of course, the fresh herb gives it a bit more flavor.

Matzo Stuffing with Apples and Portobello Mushrooms

  • 6 pieces of matzo, broken up into little pieces

  • 1-1/2 cups chicken or turkey stock (or vegetable stock)

  • 3 tablespoons vegetable oil

  • 1 large onion, chopped

  • 1 large stalk celery, chopped

  • 2 large Portobello mushroom caps, chopped

  • 2 tart apples, peeled and chopped

  • 1/2 cup golden raisins

  • 3 tablespoons chopped fresh parsley

  • 2 teaspoons fresh thyme leaves, optional

  • salt and freshly ground black pepper to taste

  • 2 large eggs, beaten

Preheat the oven to 375 degrees. Place the matzot in a bowl and pour the stock over them. Let soak for 5-6 minutes or until liquid has been absorbed. Set aside. While the matzot are soaking, heat the vegetable oil in a saute pan over medium heat. Add the onion and celery and cook for 1-2 minutes. Add the mushrooms and cook for 3-4 minutes. Add the apples, raisins, parsley and thyme, if used, and cook for another minute. Spoon the contents of the pan into the bowl with the matzot. Sprinkle with salt and pepper. Toss ingredients to distribute them evenly. Add the eggs, mix the ingredients thoroughly. Spoon the ingredients into a baking dish. Bake for about 40 minutes or until the top is crispy.

Makes 6-8 servings
 

Matbucha

fullsizeoutput_a219.jpeg

Spring has sprung and for me, that means more salad.

So I got to thinking about that word salad, which I realize means so many things that I was never able to fit all of my salad recipes into a file folder simply marked “salad.” I had to sub-categorize them into files such as “grain salads,” “tomato salads,” “fruit salads” and so on.

Over the years I’ve made salads of all sorts. Some based mostly on greens and some that had no greens at all.

I’ve made beet salads, dinner salads, fish salads and quinoa salads.

I could go on. But really, there is no one way to describe “salad,” even though a dictionary might say something like “a mixture of raw and cooked vegetables served with dressing.”

No.

Because recently I prepared some Matbucha, which is an entirely different salad category.

Matbucha is a “salade cuit” — that is, “cooked salad.” In fact the word Matbucha, is an Arabic word that means “cooked salad".”

Cooked salad may seem odd to Western thinking except for the fact that most of us actually eat lots of cooked salads, such as potato salad and egg salad too. We just don’t think of them as “cooked salads,” but that’s what they are.

Matbucha is a Moroccan dish, especially popular in the Moroccan Jewish community, which was once large and thriving in North Africa. When good numbers of Moroccan Jews migrated to Israel, they brought their love of this dish with them and it is now wildly popular in Israel too.

For good reason: Matbucha is vibrantly tasty, easy to cook and is ideal for Shabbat because, even though it’s cooked, you can serve it at room temperature. Use it as a salad course or as a side dish with dinner. I’ve always served it with hors d’oeuvre, as a topping for crackers or pita wedges (it works well with other Middle Eastern nibbles and dips such as hummus, raheb, baba ghanoush and so on).

You can make Matbucha 3-4 days ahead. That’s handy isn’t it?

Matbucha

  • 2 large red bell peppers

  • 3 tablespoons olive oil

  • 1 serrano pepper, deseeded and chopped

  • 2 large cloves garlic, finely chopped

  • 6 medium tomatoes peeled and finely chopped

  • 1-1/2 teaspoons paprika

  • 1 teaspoon sugar

  • 1/2 teaspoon salt or to taste

Preheat the broiler. Place the peppers under the broiler, about 4-6" away from the heat, and broil for 2-3 minutes, until the skin has blistered. Turn the peppers and repeat this process until the entire surface is blistered and lightly charred. Remove the peppers and place them in a paper bag. Let rest at least 10 minutes. Remove the peppers from the bag, peel off the skin and discard the stem and the seeds. Cut the peppers into pieces. Heat the olive oil in a large saucepan over medium heat. Add the peppers, serrano pepper and garlic and cook for 2-3 minutes. Add the tomatoes, paprika, sugar and salt. Bring to a simmer over medium-high heat. Cook for 30-35 minutes, until most of the liquid has evaporated and the mixture is thick.

 Makes 1-1/2 to 2 cups


Wine-Poached Pears

fullsizeoutput_a0f0.jpeg

Purim is a loud, raucous, festive, hilarious holiday. Although its origins are somber - Haman’s attempt to annihilate the Jews of ancient Persia - it didn’t end so well for him. But it did for us and, in keeping with the victory we celebrate!

It’s been one of the traditions of Purim for adults to, let’s say, make merry by imbibing in more alcohol than usual. In fact, some say, we are told to become intoxicated with wine, based on a statement in the Talmud by Rava, a fourth century rabbi, who said:

”A person is obligated to become intoxicated with wine on Purim until he is so intoxicated that he does not know how to distinguish between cursed is Haman and blessed is Mordecai.”

And so, on Purim, count on the fact that wine will be on the menu somewhere.

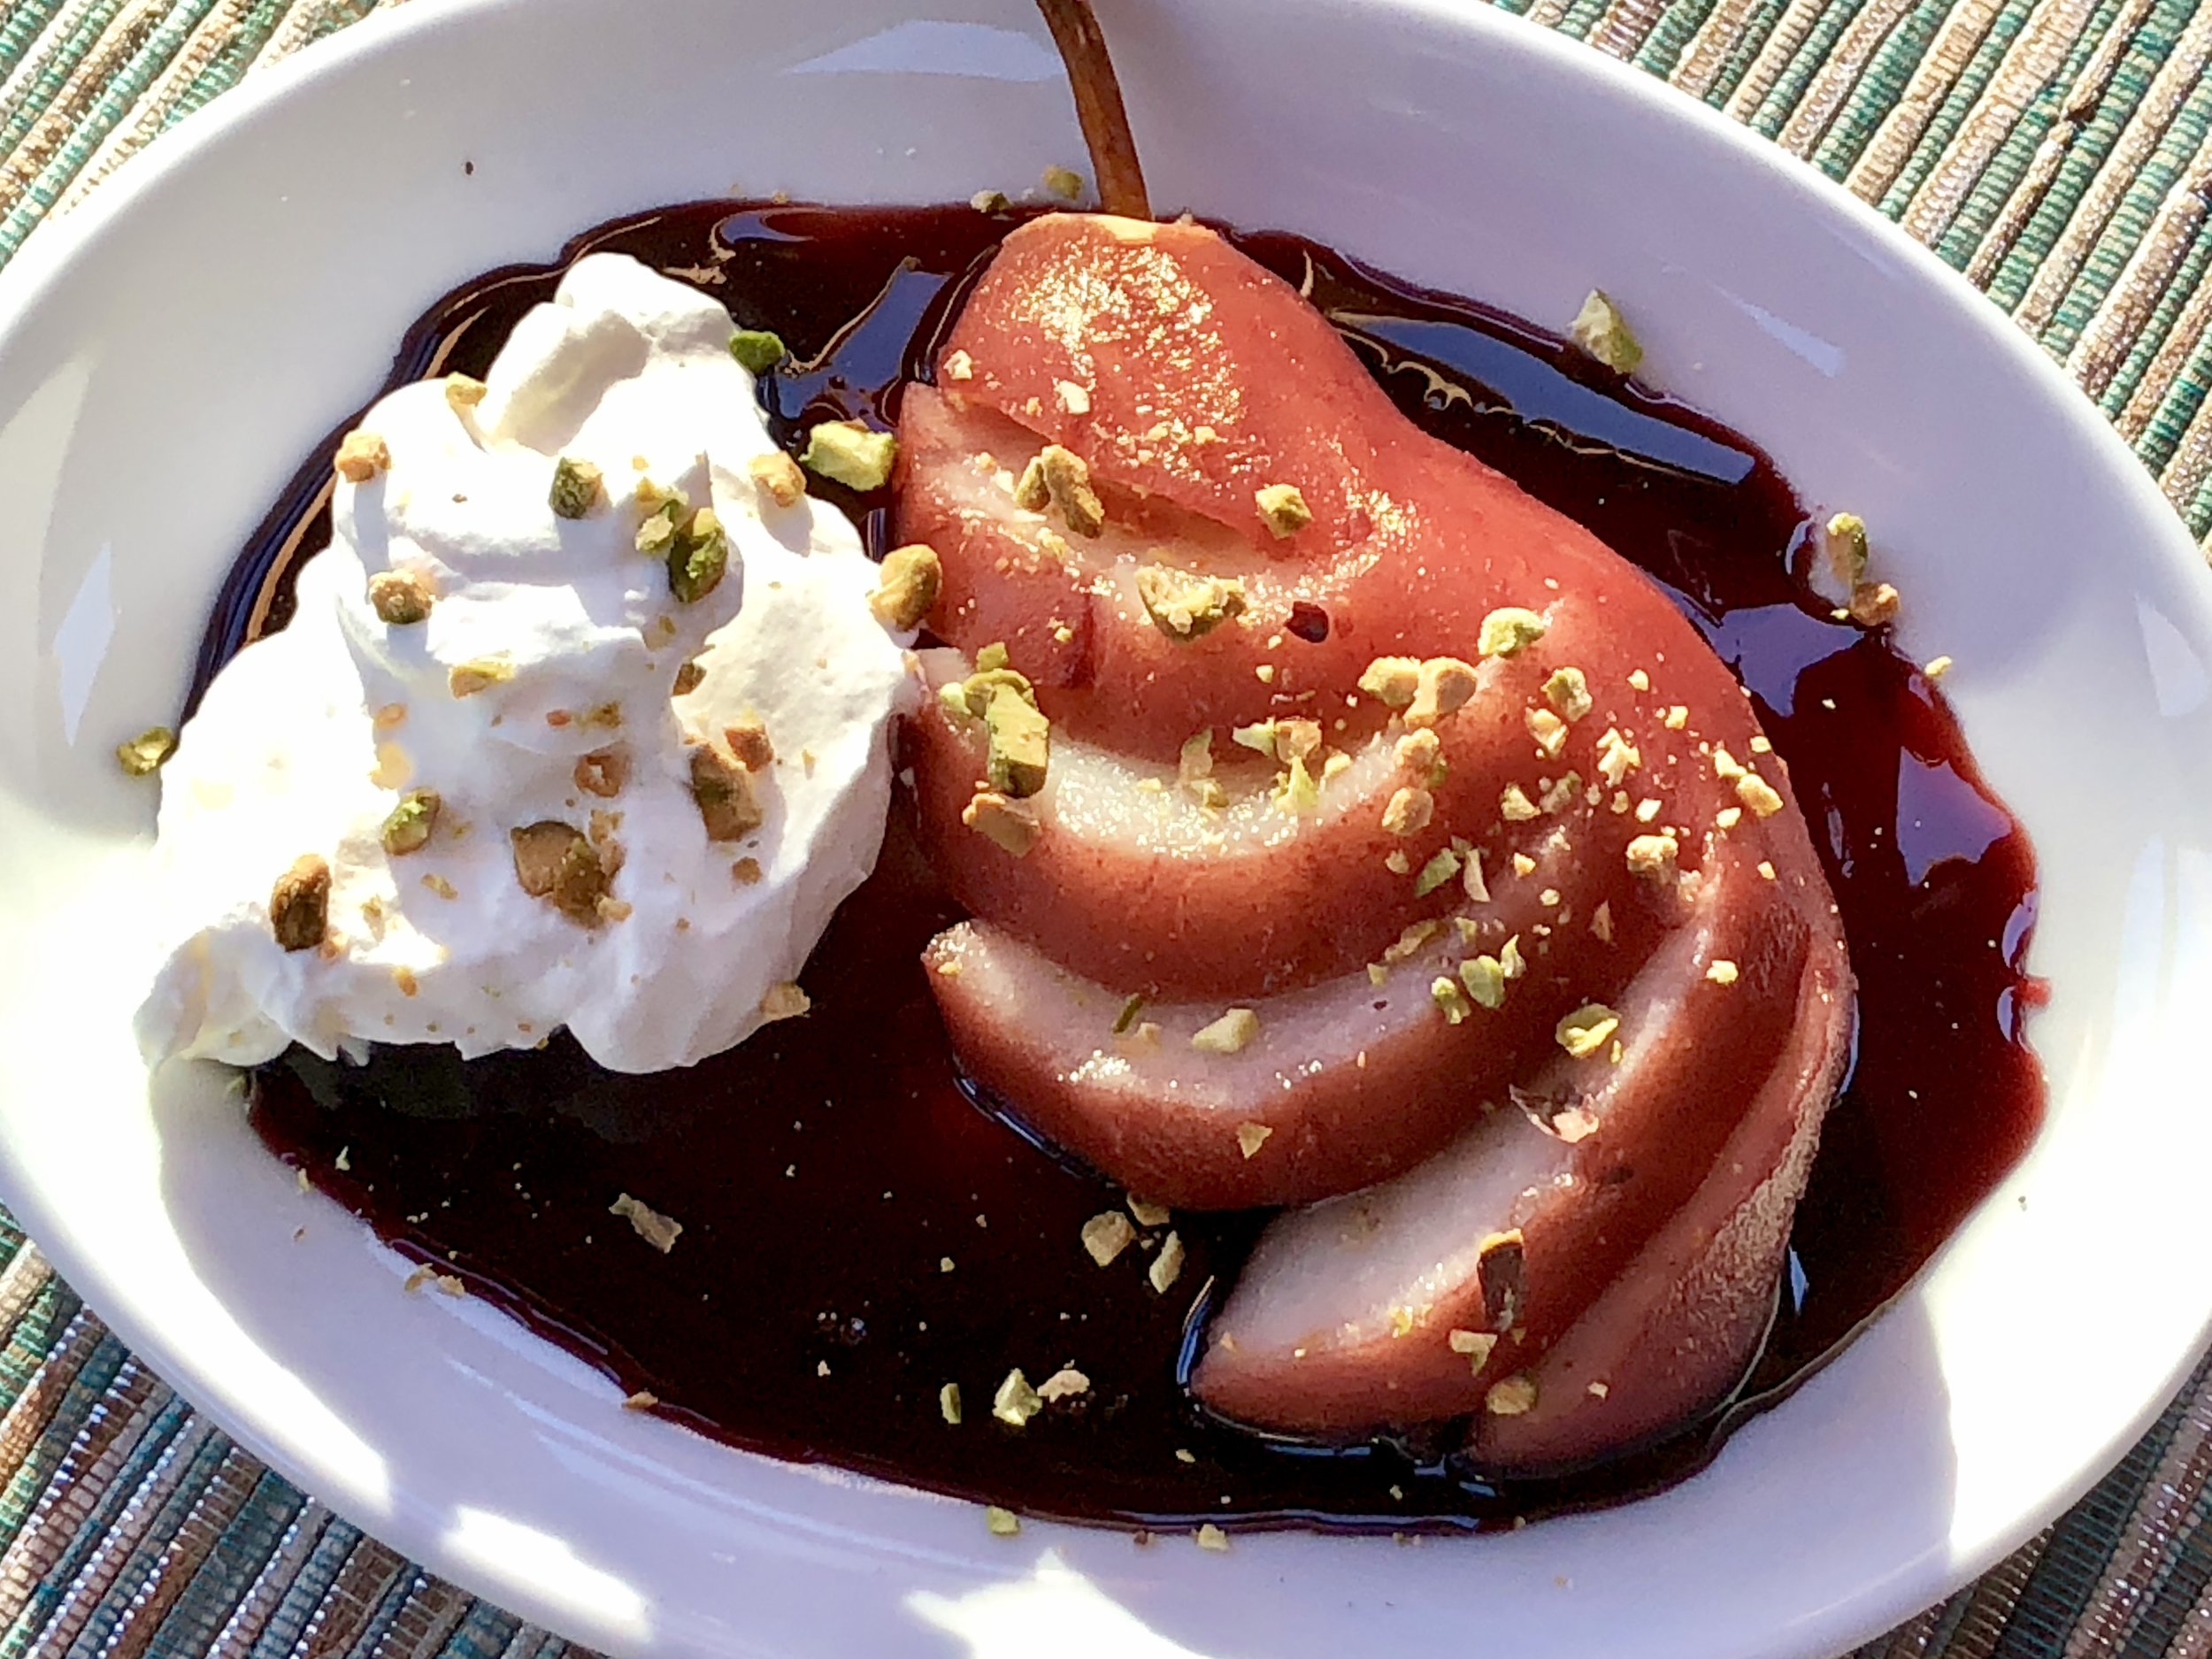
This year I decided that wine would appear on my dessert menu. I’ll poach some seasonal pears (I prefer comice or bartlett) in a hearty, aromatic wine-based sauce. I’ve made this dessert many times (tastes different each time of course because I use a different wine).

You can make it a day or so ahead; store everything in the fridge. Serve it with the sauce, strained and boiled down to a velvety finish, and maybe a garnish of whipped cream, ice cream or sorbet. Or just by itself.

Wine- Poached Pears

  • 2-1/2 cups red wine

  • 1-1/2 cups water

  • 1 cup sugar

  • peel from one orange

  • 2 2-inch strips of lemon peel

  • 1 cinnamon stick, about 4" long

  • 12 whole allspice

  • 4 cardamom pods, slightly crushed (or use 2 tablespoons chopped crystallized ginger)

  • 3-4 pears, preferably comice or bartletts

  •  whipped cream, optional

  • crushed pistachio nuts for garnish (or use toasted coconut or fresh chopped mint), optional

Combine the wine, water, sugar, orange peel, lemon peel, cinnamon stick, allspice and cardamom pods in a stainless steel, pyrex, enamel or other non-reactive saucepan. Bring the mixture to a boil, then lower the heat and simmer the ingredients for 5-6 minutes. While the sauce is cooking, peel the pears and cut them in half. Remove the core and seeds. When the sauce has simmered for 5 minutes, immerse the pear halves and cook them for about 4-5 minutes or until they are barely tender. Remove the pan from the heat; let the pears cool in the liquid. Remove the pears. Strain the poaching liquid and return the plain liquid to the saucepan. Boil the liquid over high heat for several minutes until it has reduced to a syrupy consistency.  Let the liquid cool. When ready to serve, spoon some of the syrup on dessert plates and top each with a pear half. Serve with whipped cream, if desired, and garnish with a sprinkle of crushed pistachio nuts.

Makes 6-8 servings

Roasted Cauliflower with Crumbs

Roasted Cauliflower with Crumbs

Roasted Cauliflower with Crumbs

I recently read Mark Twain’s novel “The Tragedy of Puddin’head Wilson,” a story about what happens after two babies are switched and their real identities are lost almost forever.

In addition to being a good read, filled with humor and irony, this book also includes a character who keeps a diary where he writes wise sayings.

I always wondered where this famous Twain quote came from: “Cauliflower is nothing but cabbage with a college education.” Now I know.

I recommend the book. Also recommend this cauliflower dish, which is so easy to prepare you don’t need a college eduction to make it.

Roasted Cauliflower with Crumbs

  • 3/4 cup Panko

  • 1 large clove garlic, finely chopped

  • 2 tablespoons chopped fresh dill

  • 1/4 cup olive oil

  • 2 teaspoons Dijon mustard

  • 1 large head cauliflower, cut into florets

Preheat the oven to 425 degrees. Mix the Panko, garlic and dill together and set aside. In a large bowl, mix the olive oil and mustard together until thoroughly blended. Place the cauliflower in the mustard-oil bowl and toss to coat the pieces on all sides. Place the coated pieces on a baking sheet. Scatter the Panko over the pieces and toss to coat the pieces lightly. Roast for about 15 minutes or until crispy and tender, turning the pieces once or twice. Most of the crumbs will separate from the cauliflower. Place the cauliflower in a serving dish, scatter the crumbs on top.

Makes 6 servings

Frozen Dough Hamantashen

fullsizeoutput_a16e.jpeg

I’ve made all sorts of hamantashen over the years. Cake dough. Cookie dough. Pie dough. With all sorts of fillings from old fashioned apricot, prune and poppy seed to nouveau halvah and chocolate mousse/chocolate chip.

I’ve experimented with savory goat-cheese and chili fillings and also barbecued brisket. I even created a recipe for lamb-in-phyllo hamantashen with lemon-tahini sauce. That recipe won an award in a contest sponsored by Soom Foods.

But, to be honest, I like traditional, sweet, mostly apricot or prune hamantashen the best. And this year I read about frozen-dough hamantashen in a post by Melissa Wilkenfeld whose blog, Little Kosher Lunch features kosher lunch-box meals for school kids (I also follow her on Instagram).

So I used her recipe to bake a pile of hamantashen, which were so good it hurt to give any away. But I actually always give food away to my usual “tasters” — all of whom gave high marks to these.

I don’t have enough left for Purim so I will have to make some more. Which I will, because these are awesome.

I asked Melissa for permission to post her recipe. She agreed, also telling me she got the recipe from a friend (Patti Golden).

So, ladies, thank you both for this recipe. A keeper. I’ve changed the language to conform to the way I write recipes, but otherwise, it is yours. Mazal tov.

Happy Purim.

Frozen Dough Hamantashen

  • 8 ounces cream cheese, at room temperature

  • 1/2 pound unsalted butter, at room temperature

  • 1/2 teaspoon salt

  • 2 -1/4 cups flour, sifted

  • milk, water or egg white for sealing

  • Lekvar or jam 

Beat cream cheese, butter and salt in an electric mixer set at medium speed for 3-4 minutes or until smooth and thoroughly blended (or in the food processor with the plastic blade attachment). Gradually mix in the flour on low speed until the dough is a uniform color and pulls together into a ball. 

Form dough into 4 balls, wrap in plastic wrap and refrigerate until firm, about 3 or 4 hours, or overnight. 

Remove one ball of dough and roll out on a floured surface until thin, about 1/8 inch thick.

Cut out circles with a cookie cutter (or use the floured rim of a drinking glass or jam jar). 

Place about one teaspoon of lekvar or jam in the center of each round.

Moisten the edge of the circle with milk, water or egg white.

Fold up three edges of the circle to form a triangular base, pinching at the corners to secure.

Place the filled hamantashen on an ungreased cookie sheet. Reroll scraps of dough to make more hamantashen. Repeat with all balls of dough.

Refrigerate the hamentaschen until ready to bake, at least 30 minutes after shaping.

Preheat the oven to 350 degrees.

Bake for 25-30 minutes or until delicately browned.

Cool on racks.

Makes about 4 dozen 

Hawaij Chicken

fullsizeoutput_a0d6.jpeg

People send me all sorts of press releases about different foods and ingredients. But one that recently caught my attention was about Pereg’s new Hawaij spice combos. I was intrigued enough to say “yes” when samples were offered. I love trying out new spice blends and experimenting with them in recipes.

Of course Hawaij is not new — just new to me. It is a traditional Yemenite seasoning, the word in Arabic translates as “mixture.”

In fact there are two such mixtures: savory Hawaij for soups, meats, vegetables and so on, and sweet Hawaij for coffee. The Pereg savory blend includes ground cumin, turmeric, coriander, black pepper, cardamom and cloves, a flavorful combination of warmth and spice, an aroma that’s magical. The coffee-blend contains ginger, cinnamon, cloves and cardamom.

The company sent me both, so — I got cooking.

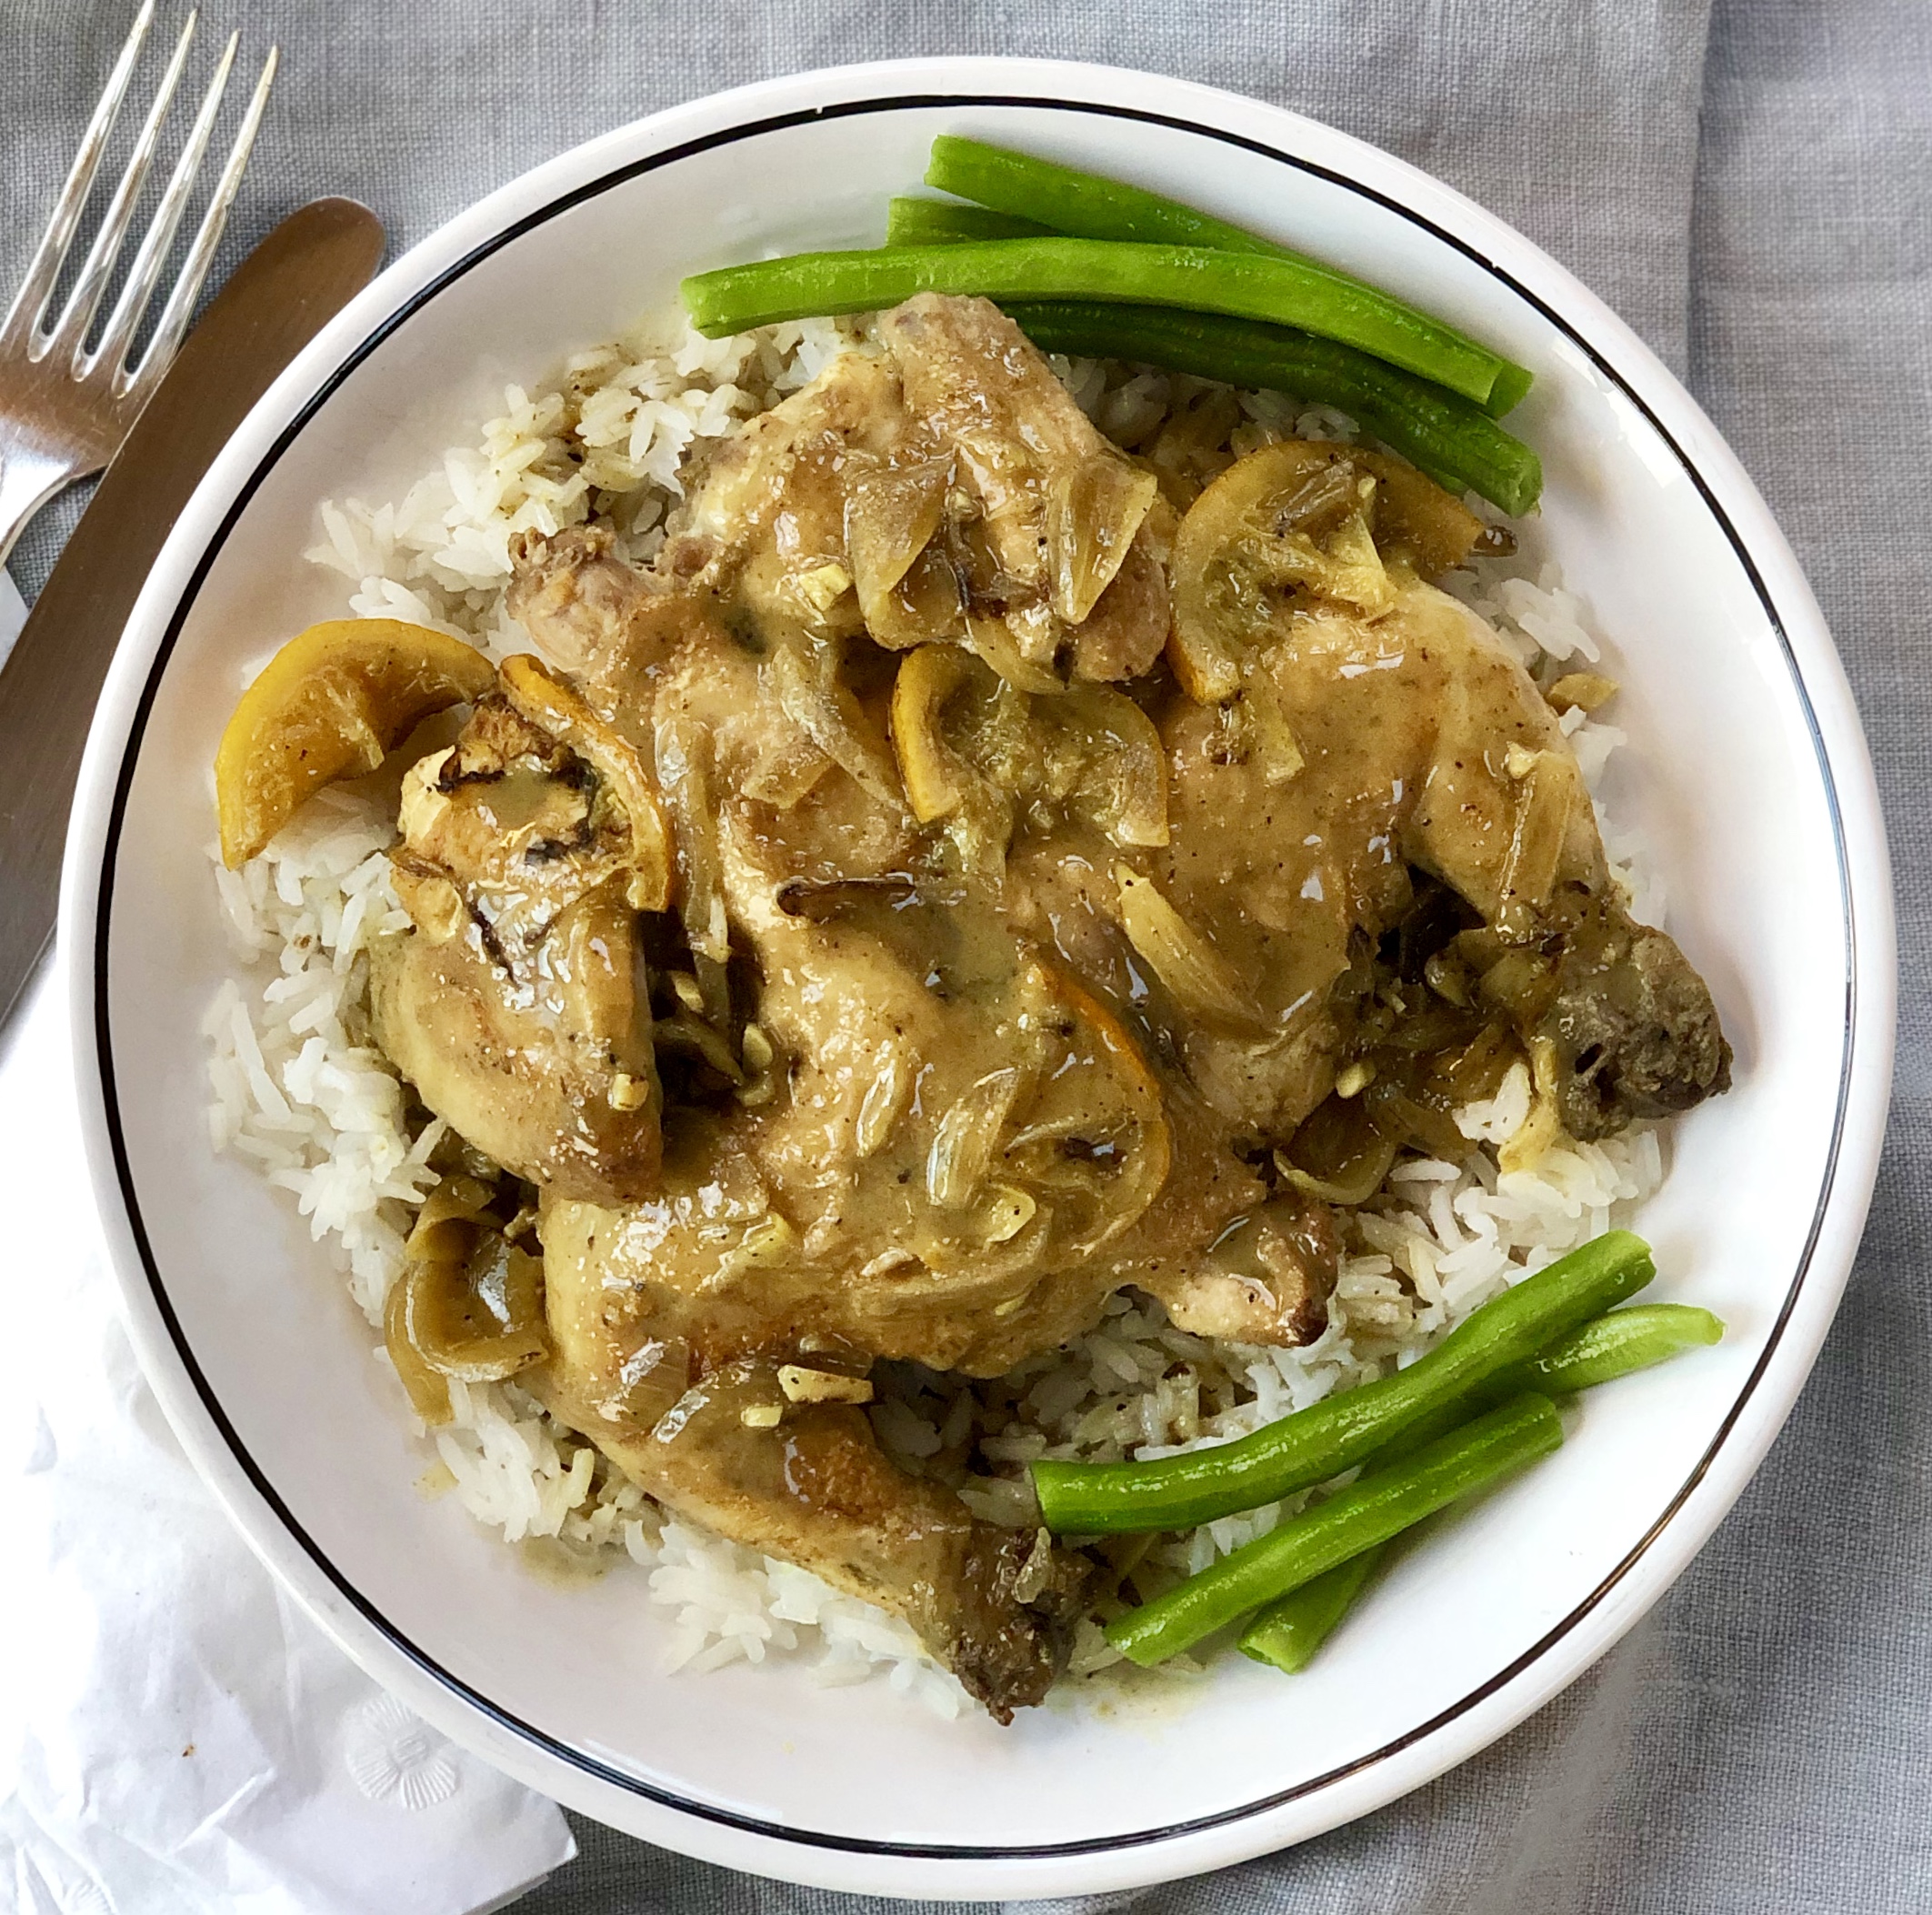
The first recipe was so good I have made it several times already: braised Cornish hens in a coconut milk based curry-type sauce, served with cooked rice and a green vegetable. I have since made this recipe a few more times using chicken wings and bone-in chicken breasts.

The coffee spice? I used it to season homemade honey muffins. I added some to my afternoon coffee (a middle-eastern counterpart to American pumpkin-spice latte). And I couldn’t leave it at that so I made some Hawaij-coffee-spice ice cream.

I see more to come in the future of this fabulous spice blend.

Chicken or Cornish Hen with Hawaij Spice

  • 2 tablespoons olive oil

  • 2 cornish hens, split down the back or 4 large pieces of chicken

  • 1 large onion, chopped

  • 1/2 lemon, sliced

  • 3 cloves garlic, chopped

  • 1-1/2 teaspoons hawaij

  • salt and freshly ground black pepper to taste

  • 1-1/2 cups coconut milk

  • 3 cups cooked rice

Preheat the oven to 375 degrees. Heat the olive oil in a saute pan over medium heat. Dry the surface of the hens or chicken, place them in the pan and cook them for 4-5 minutes, turning once or twice, to brown the surface. Remove the pieces to a dish and set aside. Add the onion, lemon slices and garlic to the pan. Sprinkle with hawaij and salt and pepper to taste. Stir to coat the ingredients evenly. Return the hens/chicken to the pan, spoon some of the onion mixture on top. Pour in the coconut milk and stir to blend it in. Cover the pan. Place the pan in the oven and cook for 30-35 minutes or until the meat is tender and cooked through. Place the rice on a serving platter. Remove the hen/chicken pieces from the oven and place them on top of the rice. Keep the platter warm in the oven. Place the saute pan over high heat on the cooktop. Bring to a boil, then simmer the pan juices for about 4 minutes or until slightly thickened. Pour over the hen/chicken and serve.

Makes 4 servings

Rack of Lamb with Mustard, Apricot and Rosemary

fullsizeoutput_a0d7.jpeg

We never eat out on Valentine’s Day. Restaurants are too crowded, the service is usually awful and the food not worth leaving the comforts of home.

Besides, there’s always the next day. My taste buds don’t know and don’t care if it’s February 14th or 15th. Valentine’s Day is an “extra” that, for us, doesn’t need the same kind of clock-like precision of Rosh Hashanah or Passover.

But I do always make a lovely dinner and serve on lovely plates with lovely utensils.

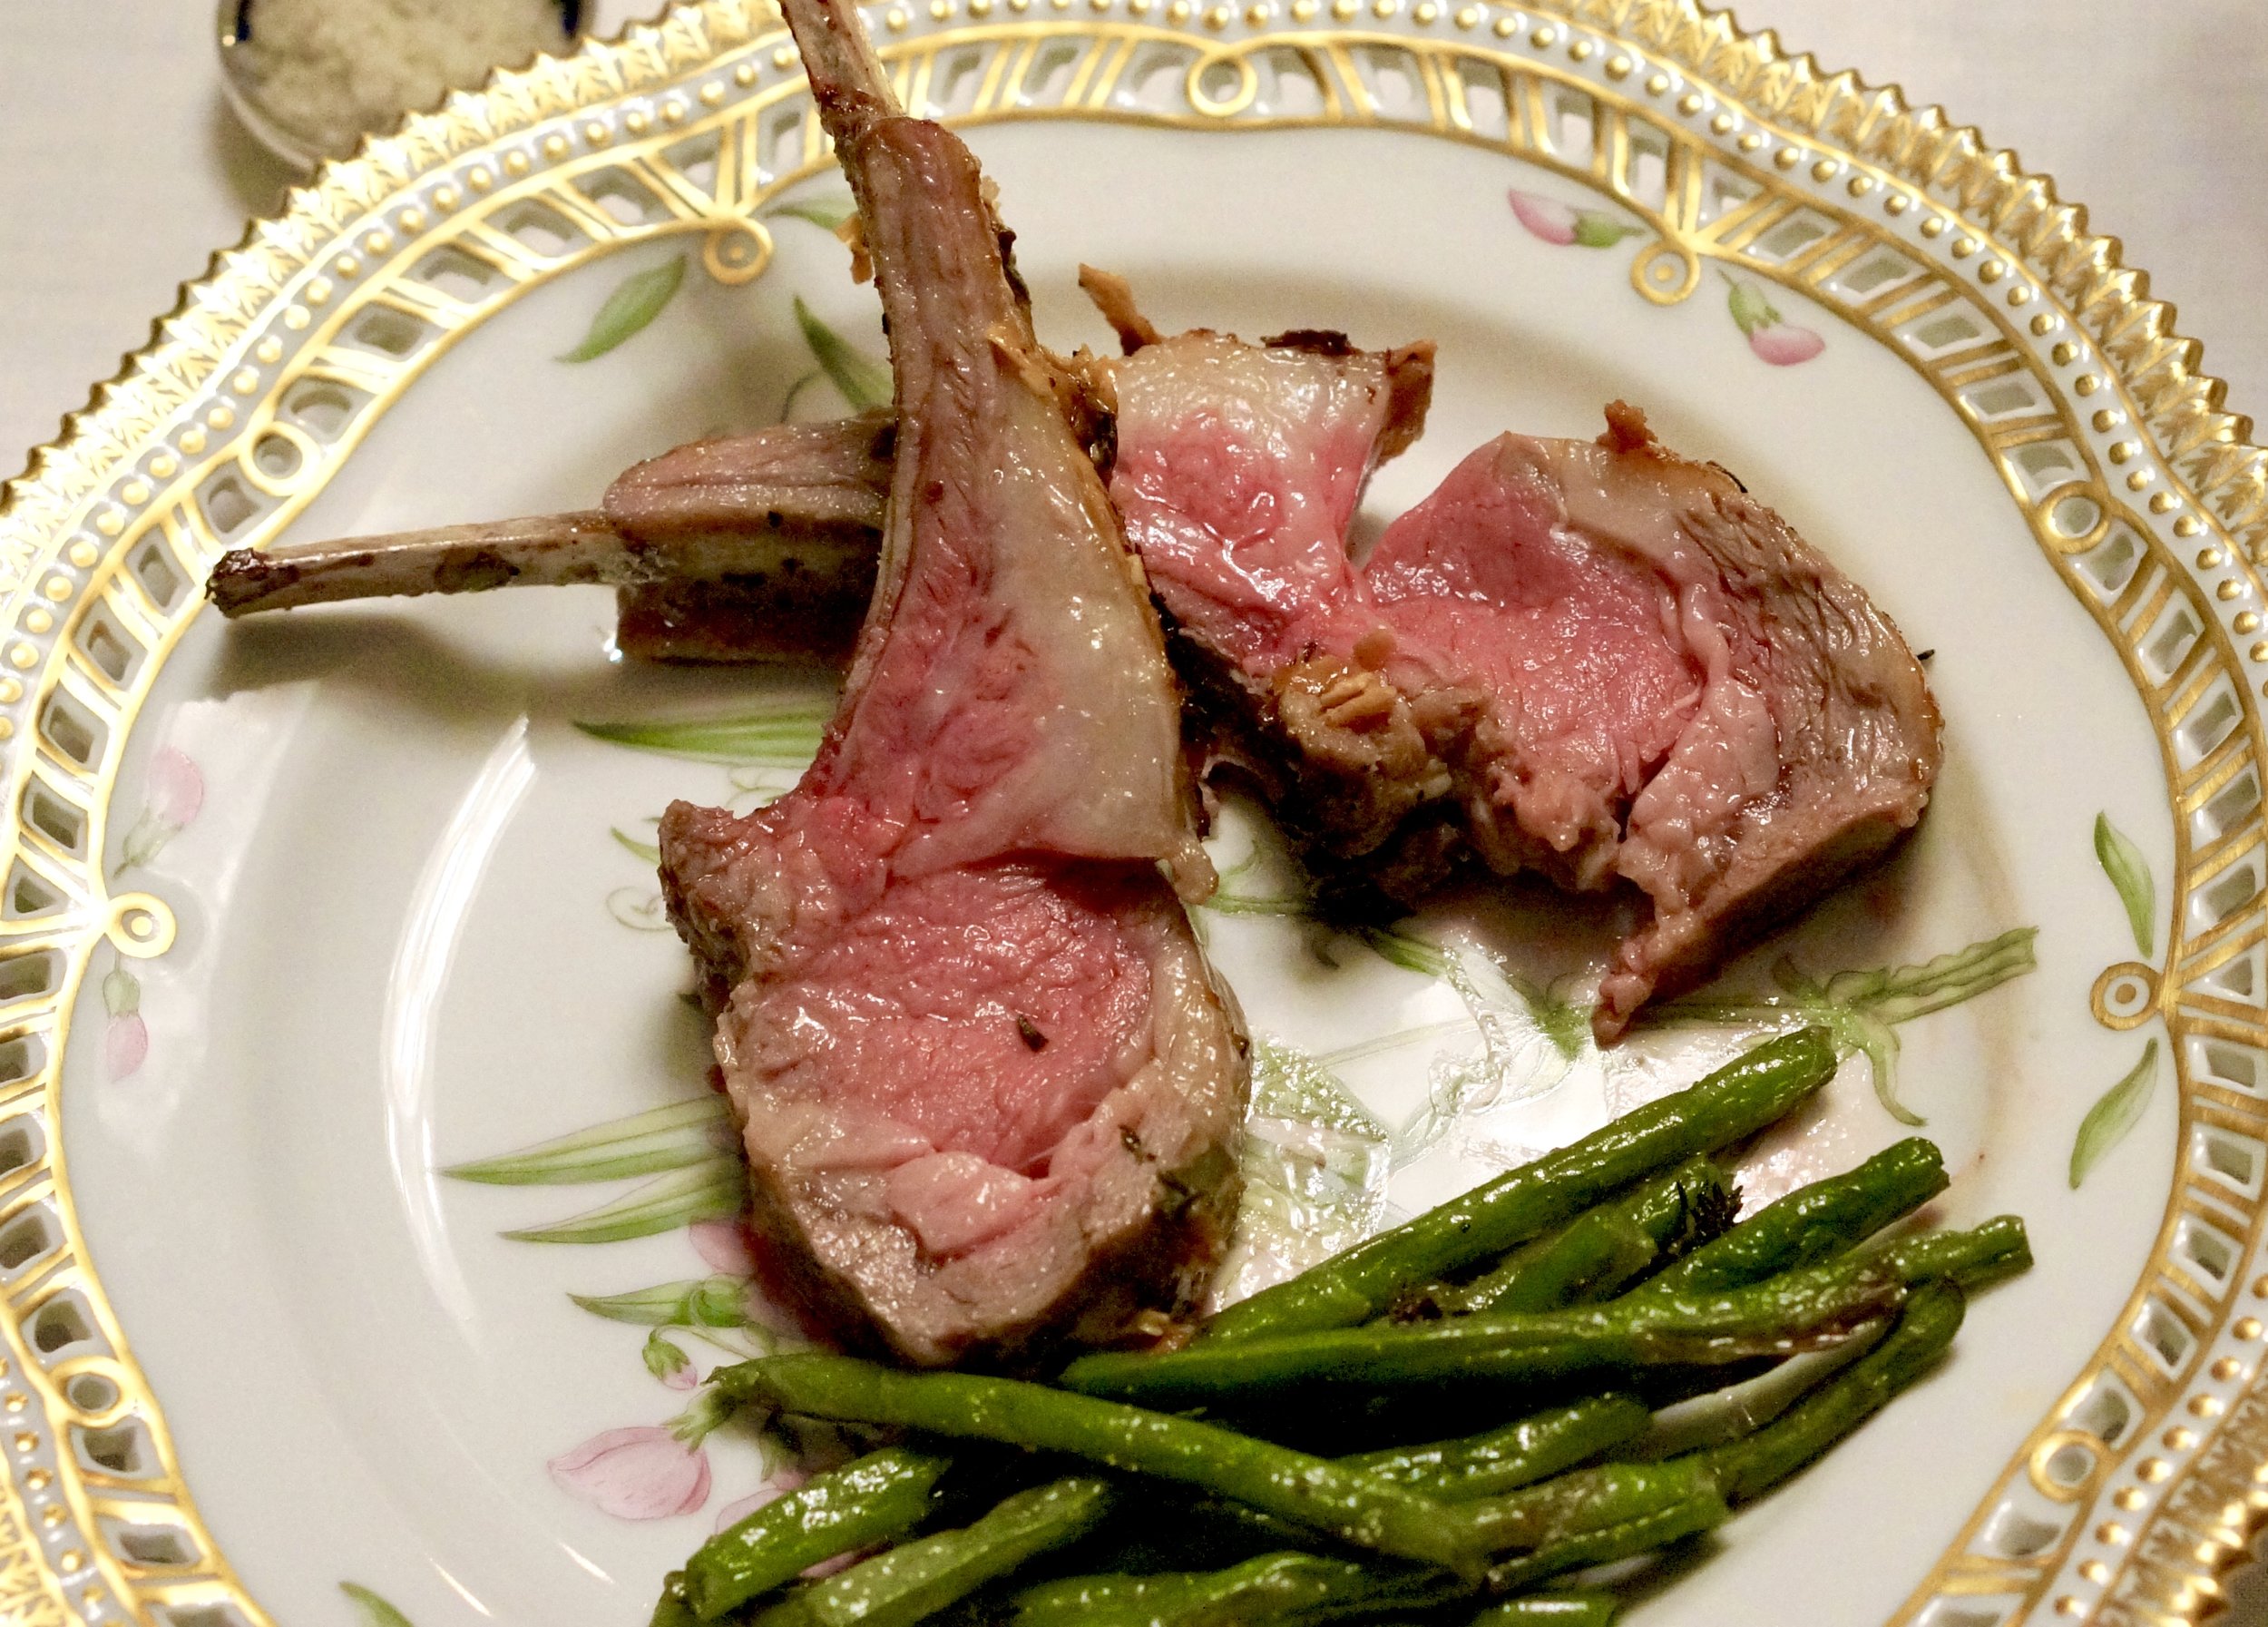
Ed would prefer Chinese food, but that’s too much of a fuss for the evening. So: rack of lamb. It’s easy. Simple. No fuss at all. An indulgence, but we deserve it, don’t we?

Roast Rack of Lamb with Mustard, Apricot and Rosemary

  •  1 whole rack of lamb

  • 1 tablespoon Dijon mustard

  • 1 tablespoon apricot preserves

  • salt and freshly ground black pepper to taste

  • 1 teaspoon chopped fresh rosemary (or use 1/2 teaspoon dried, crushed rosemary)

Preheat the oven to 450 degrees. Place the meat in a roasting pan. Mix the mustard and preserves and spread on the top surface. Sprinkle with salt, pepper and rosemary. Roast for 20-35 minutes, depending on degree of doneness desired (a meat thermometer should register between 120-140 degrees). Let the meat rest a few minutes before carving.


Makes 2-3 servings


Crispy Roasted Duck Legs with Hoisin-Orange Glaze

The one consistent thing my husband wants for his birthday, year after year, is Chinese food. Forget the gifts, don’t bother with cake. Just give him Chinese food and he’s happy.

So this is on the menu this week, for his birthday, which just happens to coincide with Chinese new year.

CRISPY ROASTED DUCK LEGS WITH HOISIN-ORANGE GLAZE

  • 4 duck legs

  • olive oil

  • 1 cup orange juice

  • 1/4 cup hoisin sauce

  • 3 tablespoons honey

  • 2 teaspoons grated fresh orange peel

  • 1 teaspoon grated fresh ginger

  • 2 cloves garlic, finely chopped

  • salt and freshly ground black pepper to taste

Preheat the oven to 425 degrees. Rinse and dry the duck legs and rub them with a light film of olive oil. Place them in a roasting pan, flat side up. Roast for 15 minutes. While the duck is roasting, combine the orange juice, hoisin sauce, honey, orange peel. ginger and garlic in a small saucepan and cook over medium heat briefly, stirring just until the honey has become blended in the liquid.. Set aside. When the 15 minutes are done, turn the legs round side up. Pour the orange juice mixture over the meat, cover the pan and roast for 30 minutes. Remove the cover. Reduce the heat to 350 degrees. Baste and bake for another 15 minutes or until the ducks are cooked through and the skin is crispy. 

Makes 4 servings


Kosher Baked Beans and "Bacon"

fullsizeoutput_9da4.jpeg

It’s really cold outside.

Really cold.

And yesterday there was a snow squall. Cold, snowy and blowy with no visibility for about a half hour.

I can’t complain though. It’s MUCH colder in the midwest.

Also my house is nice and warm and toasty.

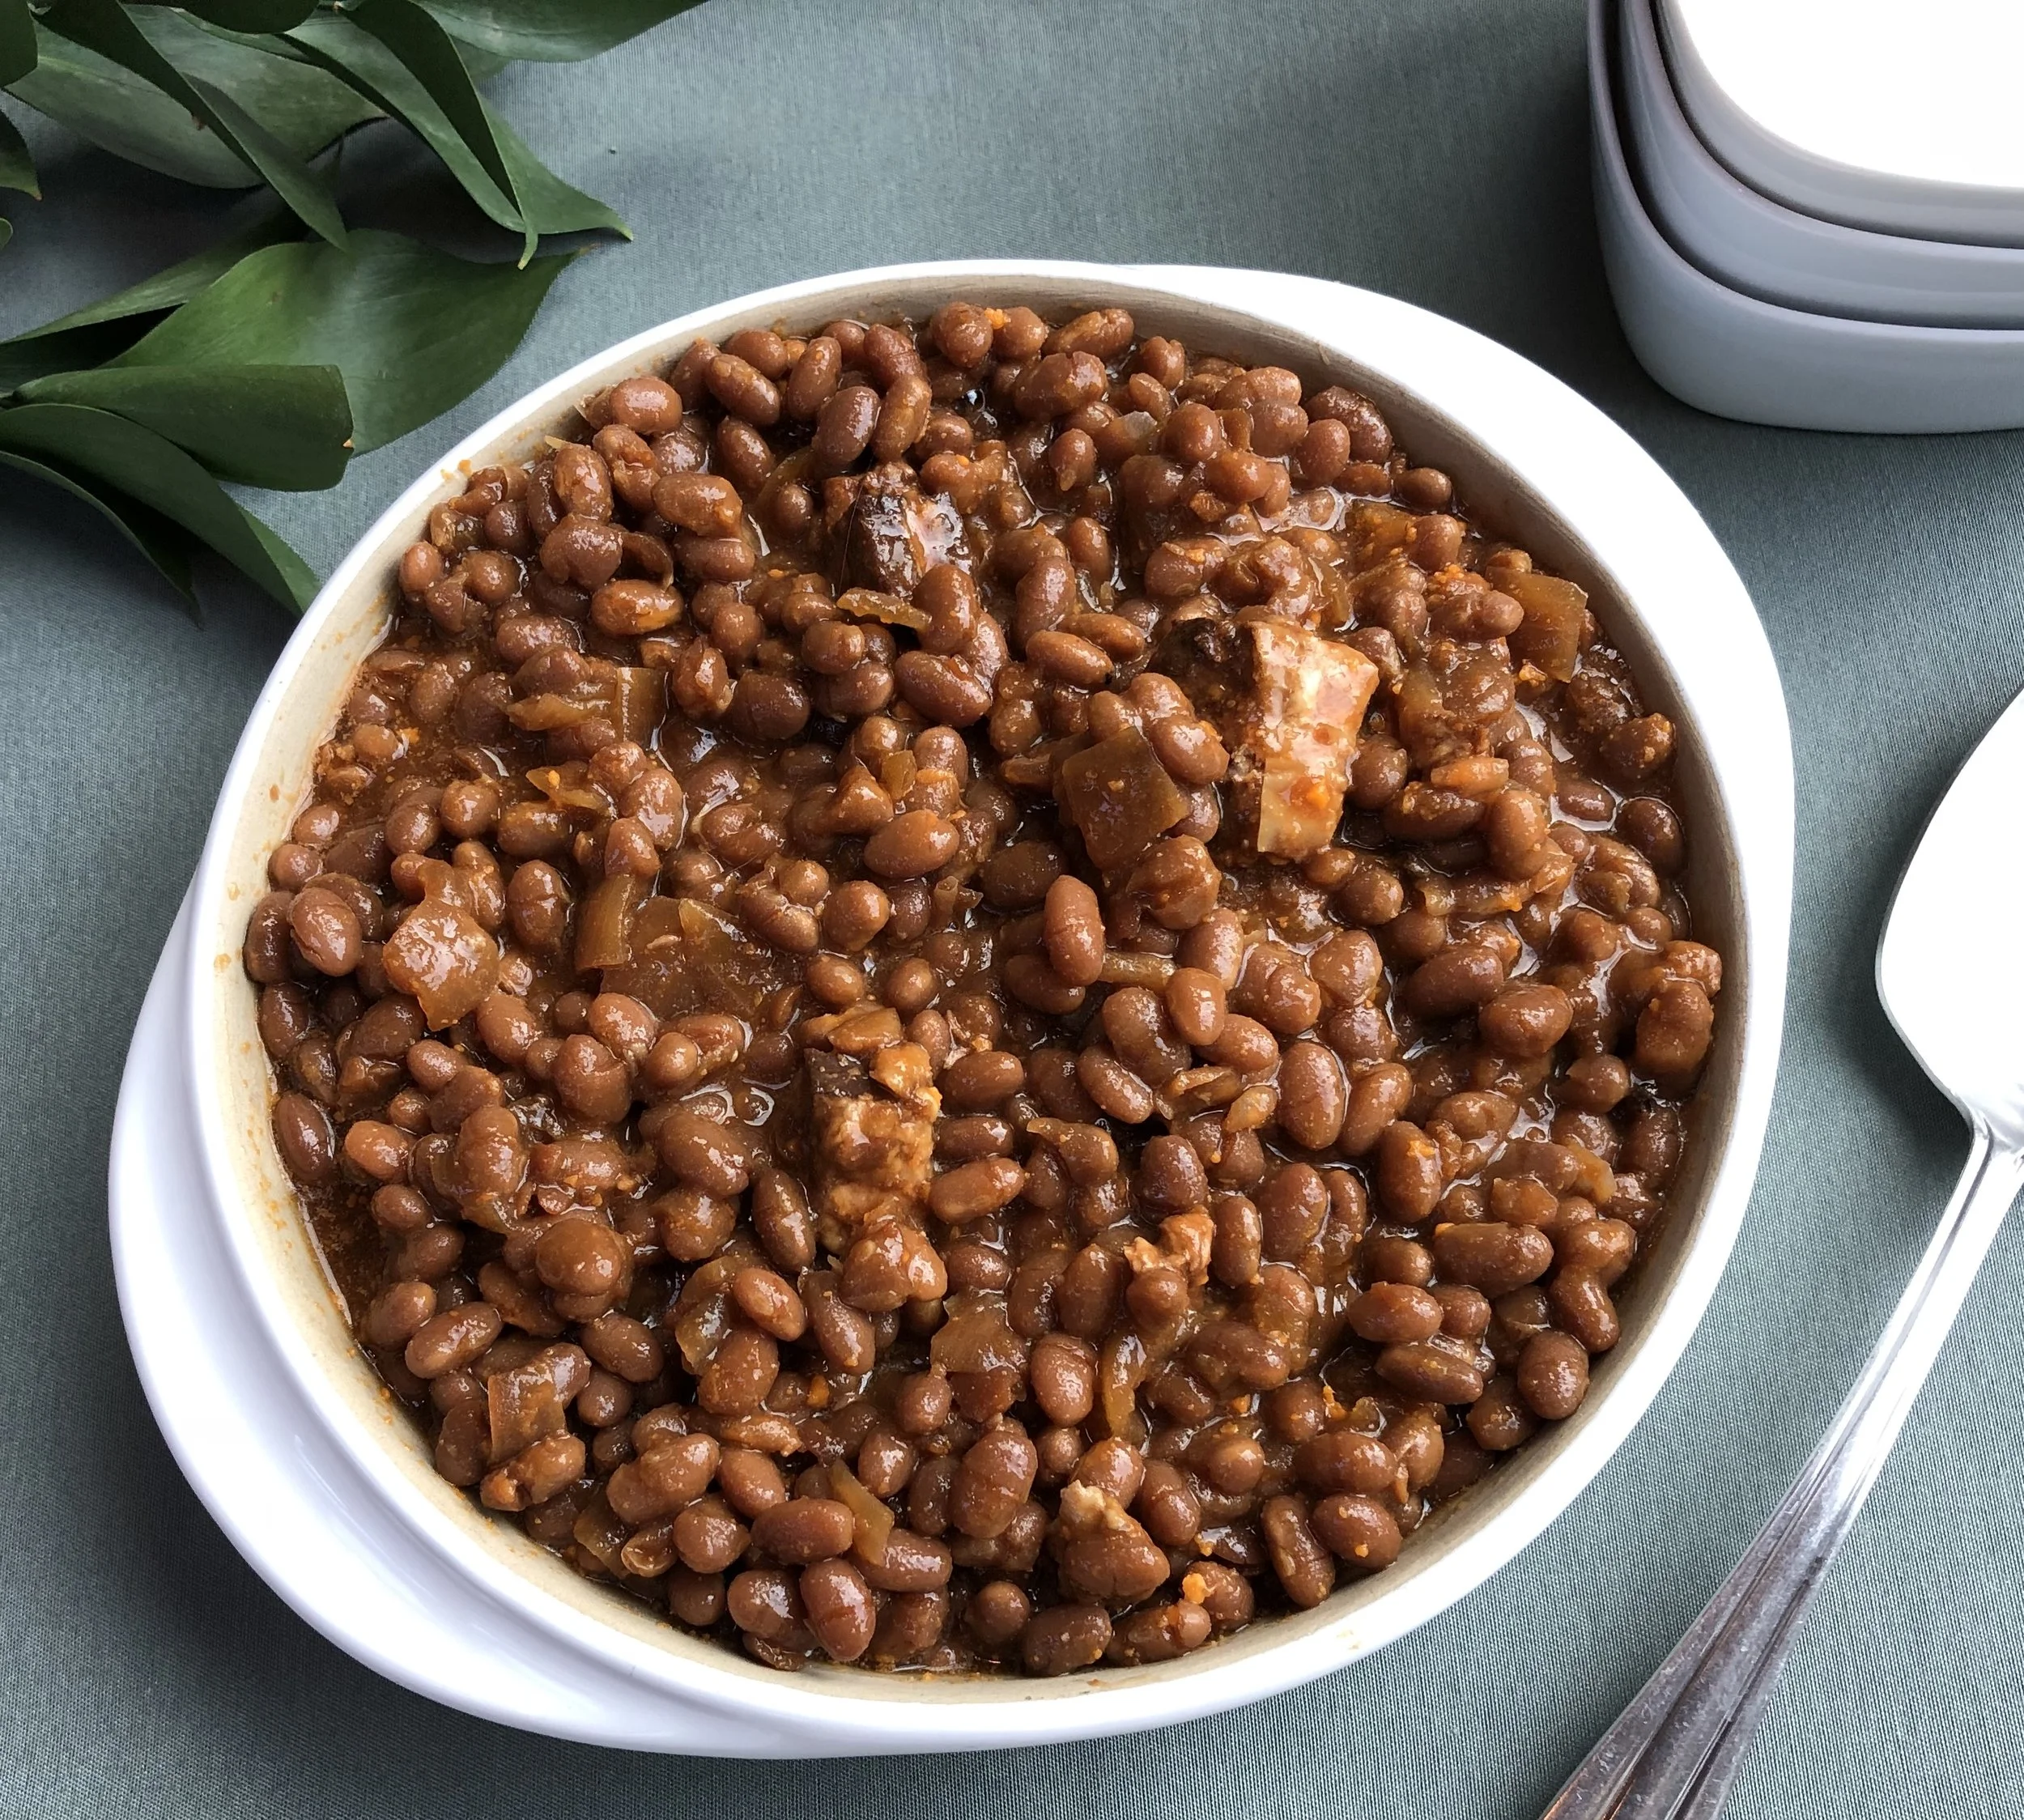
And I have these baked beans for dinner. Real, authentic Boston baked beans with bacon. Ok, kosher bacon. There are many brands to choose from, but I used Abeles & Heymann’s newish chunk beef bacon because Seth Leavitt, A&H owner, gave me a piece of it a while ago. He said “go experiment.” Which I did. And out came these fabulous beans.

Dinner. Add a green vegetable.

Just like in Colonial times (minus the green vegetable).

Btw, this is a good dish for Superbowl parties — by itself, but it’s also a nice accompaniment to chicken wings.

Kosher Baked Beans and “Bacon”

  • 1 pound dried navy or great northern beans

  • water

  • 6 ounces kosher bacon, cut into chunks

  • 1 medium onion, chopped

  • 1/2 cup ketchup

  • 1/3 cup honey

  • 1/4 cup molasses

  • 4 whole cloves

  • 2 teaspoons powdered mustard

  • 1/2 teaspoon salt

Place the beans in a large saucepan and cover them with water. Bring the water to a boil over high heat. Lower the heat and cook for 2 minutes.  Remove the pan from the heat and let the beans soak for one hour. Drain the beans and return them to the pot. Cover the beans again with water and bring to a boil over high heat. Lower the heat and simmer for 45 minutes. (Alternatively, cover the beans with water and let them soak for at least 8 hours.) Drain. Place the beans in a casserole. Add the bacon, onion, ketchup, honey, molasses, cloves, mustard and salt and mix thoroughly to blend the ingredients. Stir in 3 cups water. Pour the mixture over the bean mixture. Cover the casserole and put it in the oven. Set the temperature at 300 degrees and cook the beans at least 4 hours, or until they are tender, stirring them occasionally and adding water, if necessary to keep the beans moist. 

 Makes 8 servings

More Chicken Wings: Maple-Mustard

fullsizeoutput_85aa.jpg

In our family we don’t wait for Superbowl Sunday to feast on chicken wings. We eat them throughout the year, often.

In fact, I have an enormous file folder filled with recipes, maybe almost as many recipes for wings as for banana bread (and as everyone who reads this blog knows, I have a lot of recipes for banana bread!).

Here’s one of the latest versions. Eat anytime. Don’t wait.

Grilled Maple-Mustard Chicken Wings

  • 2 pounds chicken wings, separated into pieces

  • 1 tablespoon olive oil

  • 1/4 cup maple syrup

  • 3 tablespoons Dijon mustard

  • 2 tablespoons chopped chives or scallion

  • 2 teaspoons cider vinegar

  • 1 teaspoon soy sauce

  • 1 clove garlic, finely chopped

  • 1/8 teaspoon cayenne pepper

  • salt to taste

Preheat an outdoor grill or oven broiler. Wash and dry the wings and cut them into separate pieces. Brush with olive oil and grill, turning once, for 8-10 minutes or until lightly browned. While the wings are cooking, mix the maple syrup, mustard, chives, cider vinegar, soy sauce, garlic, cayenne pepper and salt to taste until well blended. Brush this glaze on the wings and cook for another 10-12 minutes, turning the wings occasionally and brushing with remaining glaze, until crispy and fully cooked.

Makes about 24