Jewish food

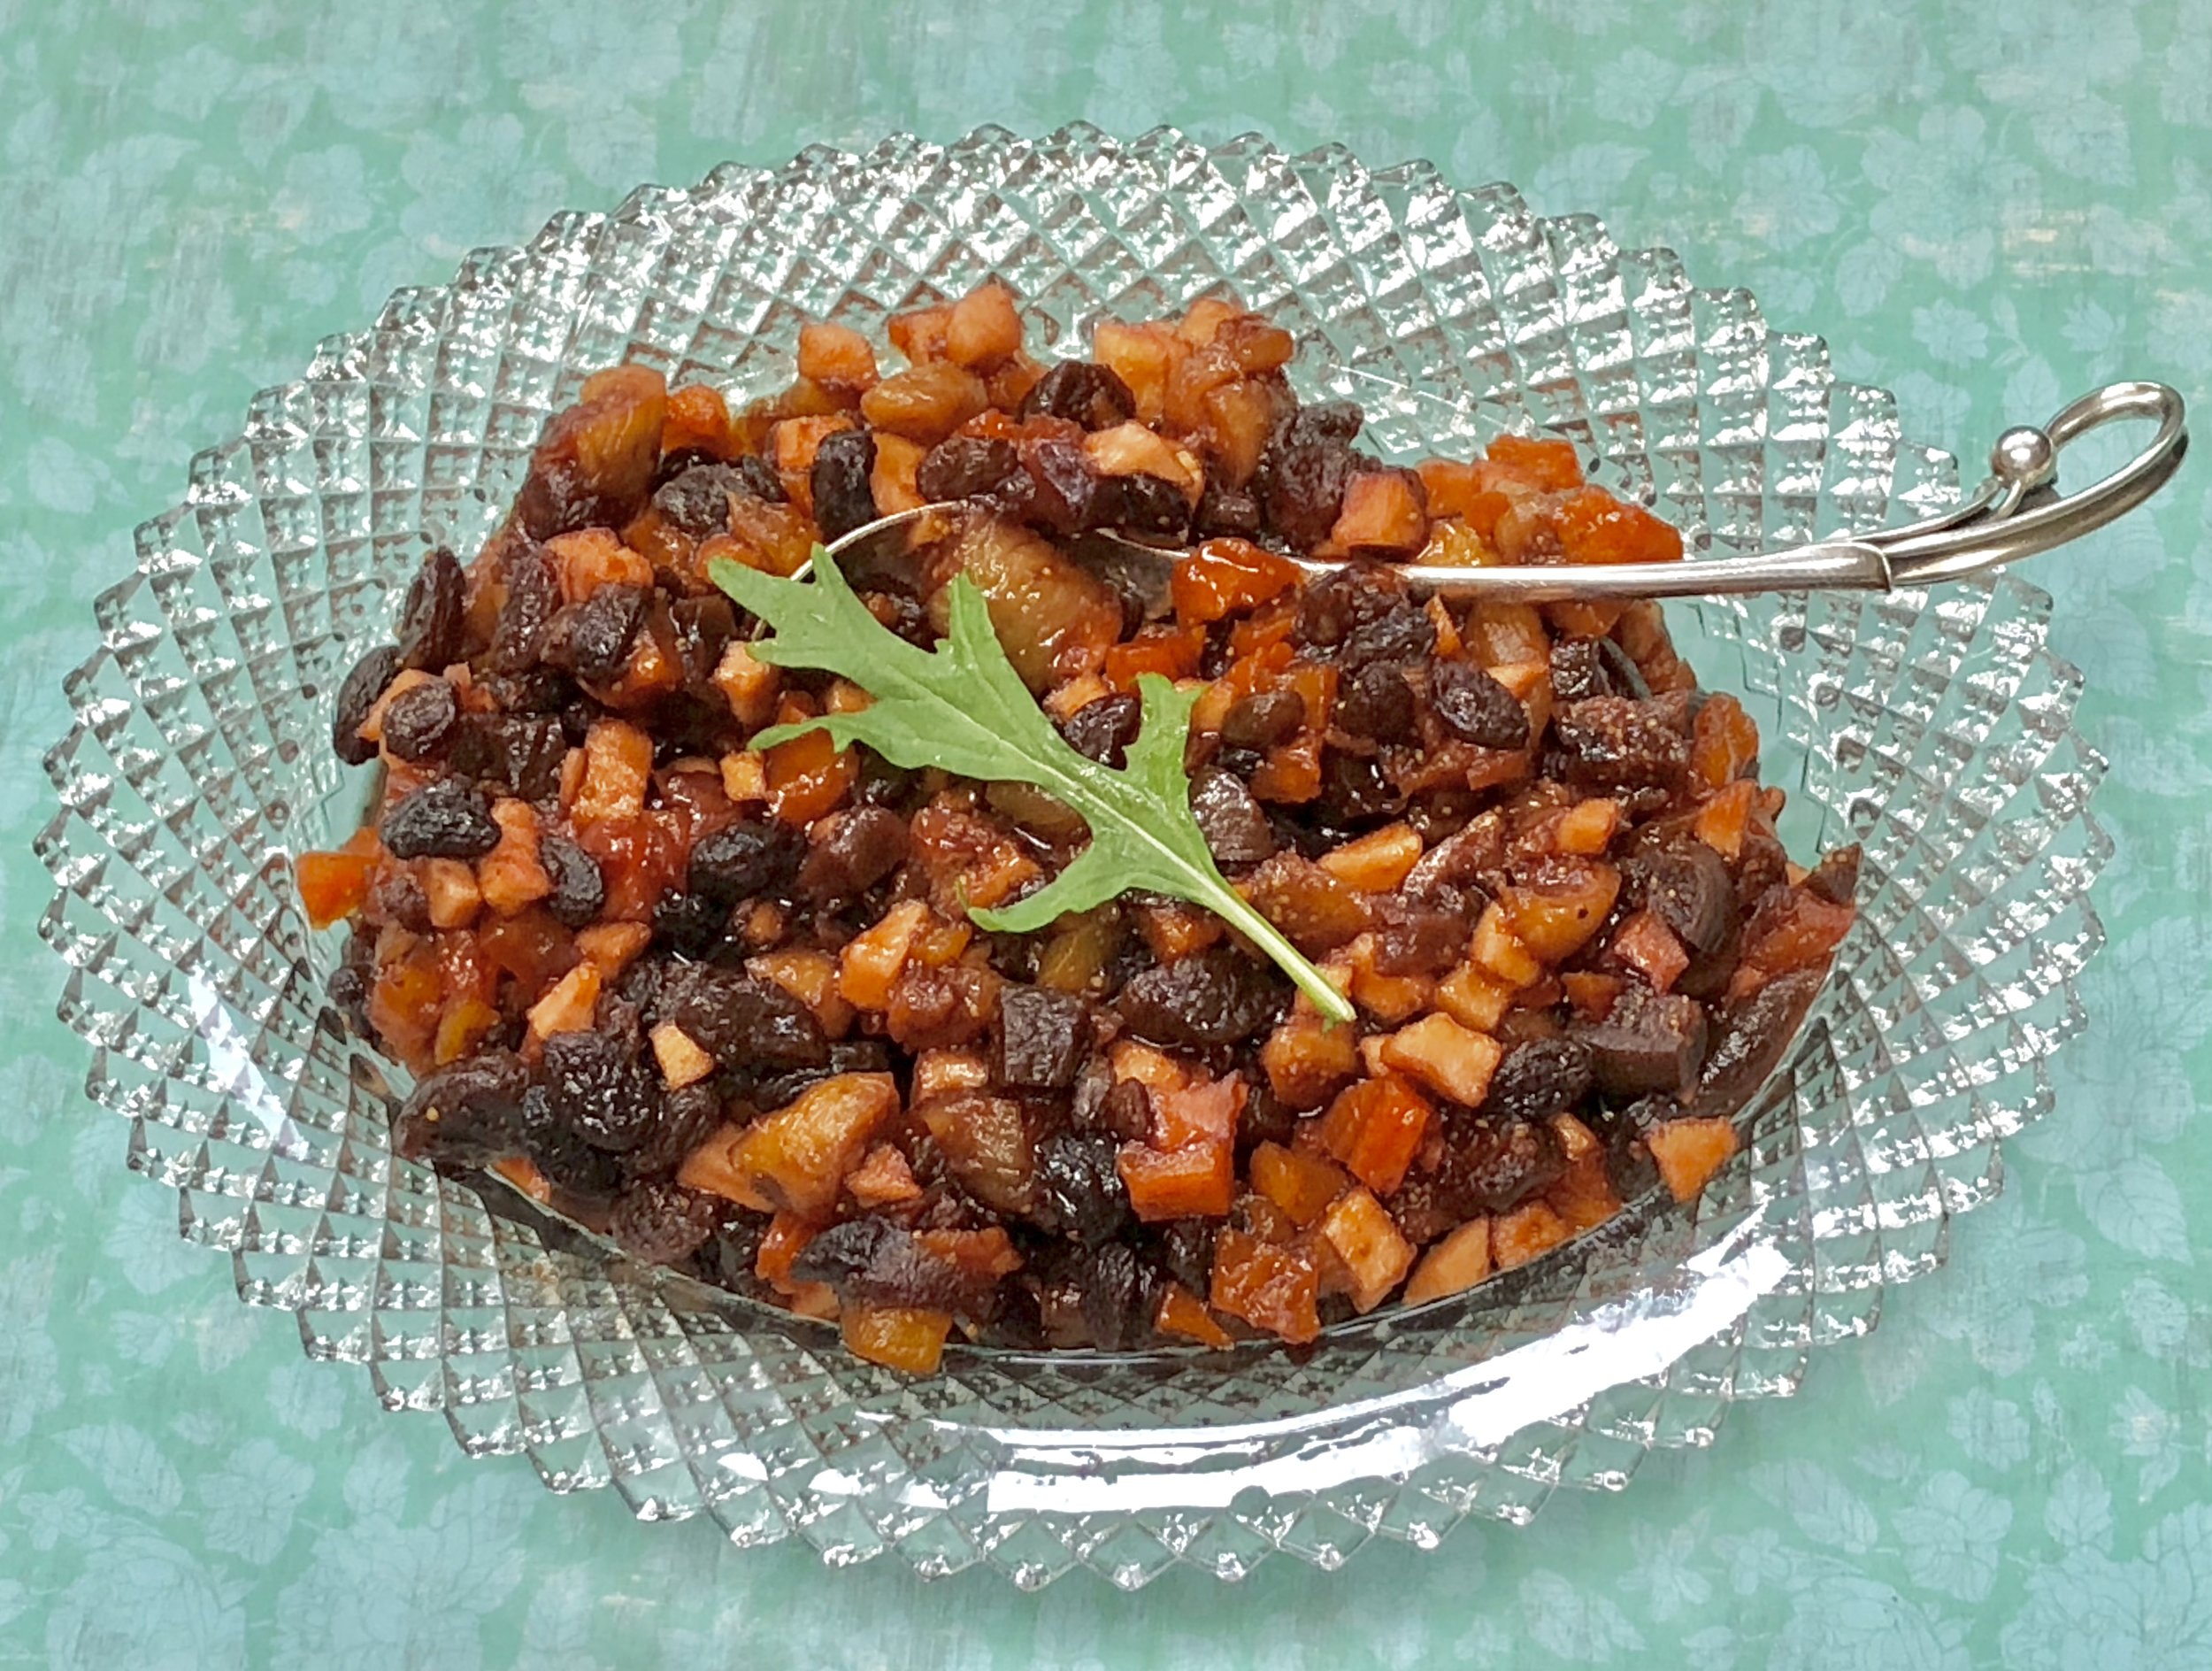
Quarantine Charoset or Pantry Charoset or Completely Made-up Charoset

fullsizeoutput_a458.jpeg

When I was growing up the Seder charoset was used symbolically only. My grandmother, and in later years my mother, would grate an apple or two, mix it with some walnuts and Manischewitz concord grape wine and that was that. It always turned brown and didn’t look very appetizing and we ate it only as commanded during the reading of the Haggadah.

Then, several years ago, charoset became a big deal. It was now expected to taste good, look good and be eaten like a side dish, the way we eat cranberry sauce or apple sauce.

And so, I stopped making the apple mush. Instead, over the years, I’ve made Persian versions, nut-free versions, coconut charosets and all sorts of others, based on different ethnicities.

This year I am making my special COVID19 jumble, made with what I have on hand in the way of dried fruit (plus an orange, which I always have in the fridge.

Should I call it Quarantine Charoset, Pantry Charoset or simply Completely Made Up Charoset?

I don’t use any nuts because of allergies, but you can add 1/3-1/2 cup of chopped nuts (any kind) to this recipe if you have some in your pantry.

Quarantine Charoset or Pantry Charoset or Completely Made-up Charoset

  • 1-1/2 cups chopped dates

  • 1 cup chop dried figs

  • 1 cup chopped dried apricots

  • 1/2 cup raisins

  • 1 fresh apple, peeled and chopped

  • 1/2 cup pomegranate jam (or any jam you have)

  • 1/3 cup Passover wine (preferably Concord grape)

  • 1/4 cup orange juice

  • 1 teaspoon grated fresh orange peel

Place the dates, figs, apricots, raisins and apple in a bowl and toss the fruit to distribute the pieces evenly. Add the pomegranate jam and stir to coat the fruit. Pour in the wine and orange juice; add the orange peel. Toss the ingredients. Let rest for at least one hour before serving.

Makes about 5 cups
Potato and Cheese Kreplach

fullsizeoutput_baff.jpeg
fullsizeoutput_b9ac.jpeg
fullsizeoutput_b9ad.jpeg
fullsizeoutput_b9ae.jpeg
fullsizeoutput_b969.jpeg

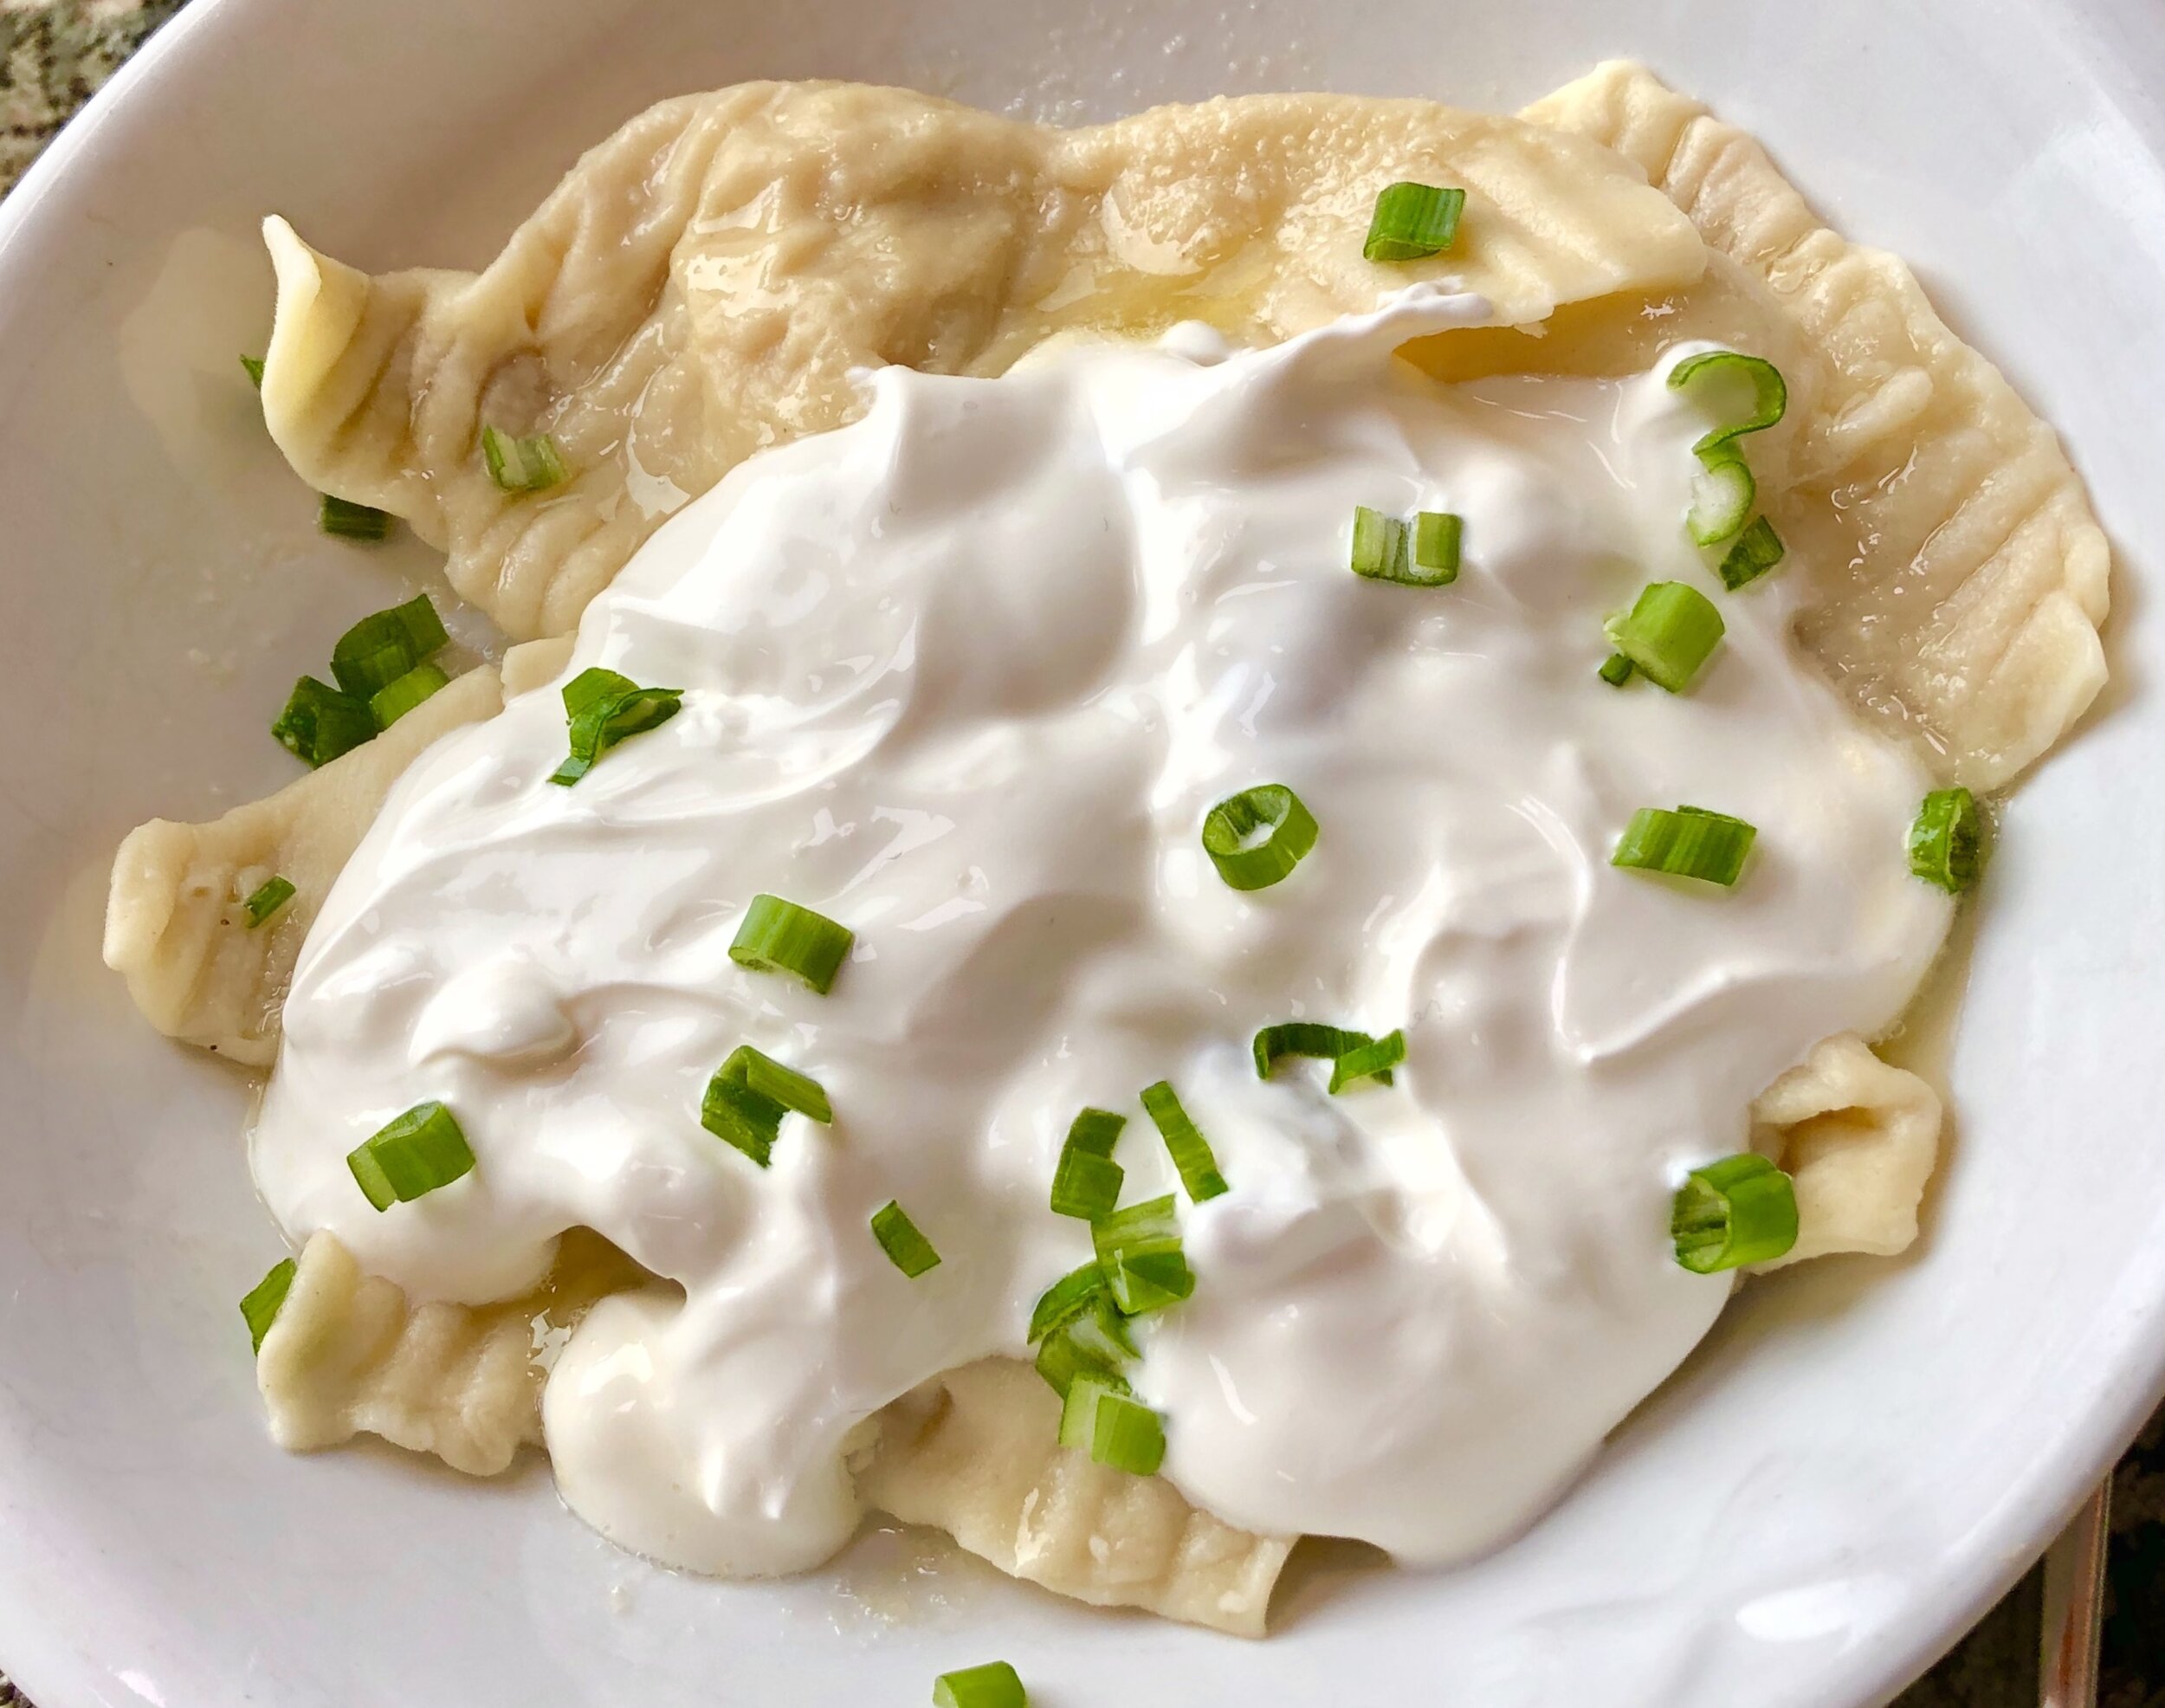
If I knew that the world was going to end or that it was my last day on earth, I would want potato-and-cheese kreplach with sour cream for dinner before I go.

For me, this simple, rustic, peasant dish is the ultimate.

I hadn’t had any for ages and ages and then, one day Ed and I were in Bratislava, Slovakia, perusing the menu at Houdini, a small restaurant conveniently located in our hotel.

They had potato-cheese pierogi!

Oh my.

There was no question about what I would order for dinner. I don’t even remember what else I could have chosen.

All I know is that the pierogies — the best I had ever eaten — came laden with sour cream and topped with chopped fresh chives.

I would go back to Bratislava just to have some more.

And I have been fantasizing about those things ever since.

However, because a trip to Slovakia is not in my immediate future, I decided to make some at home, but I made them kreplach shape in celebration of Purim, when it is customary to eat triangular shaped foods. These would be just perfect whether you make triangles or half moons.

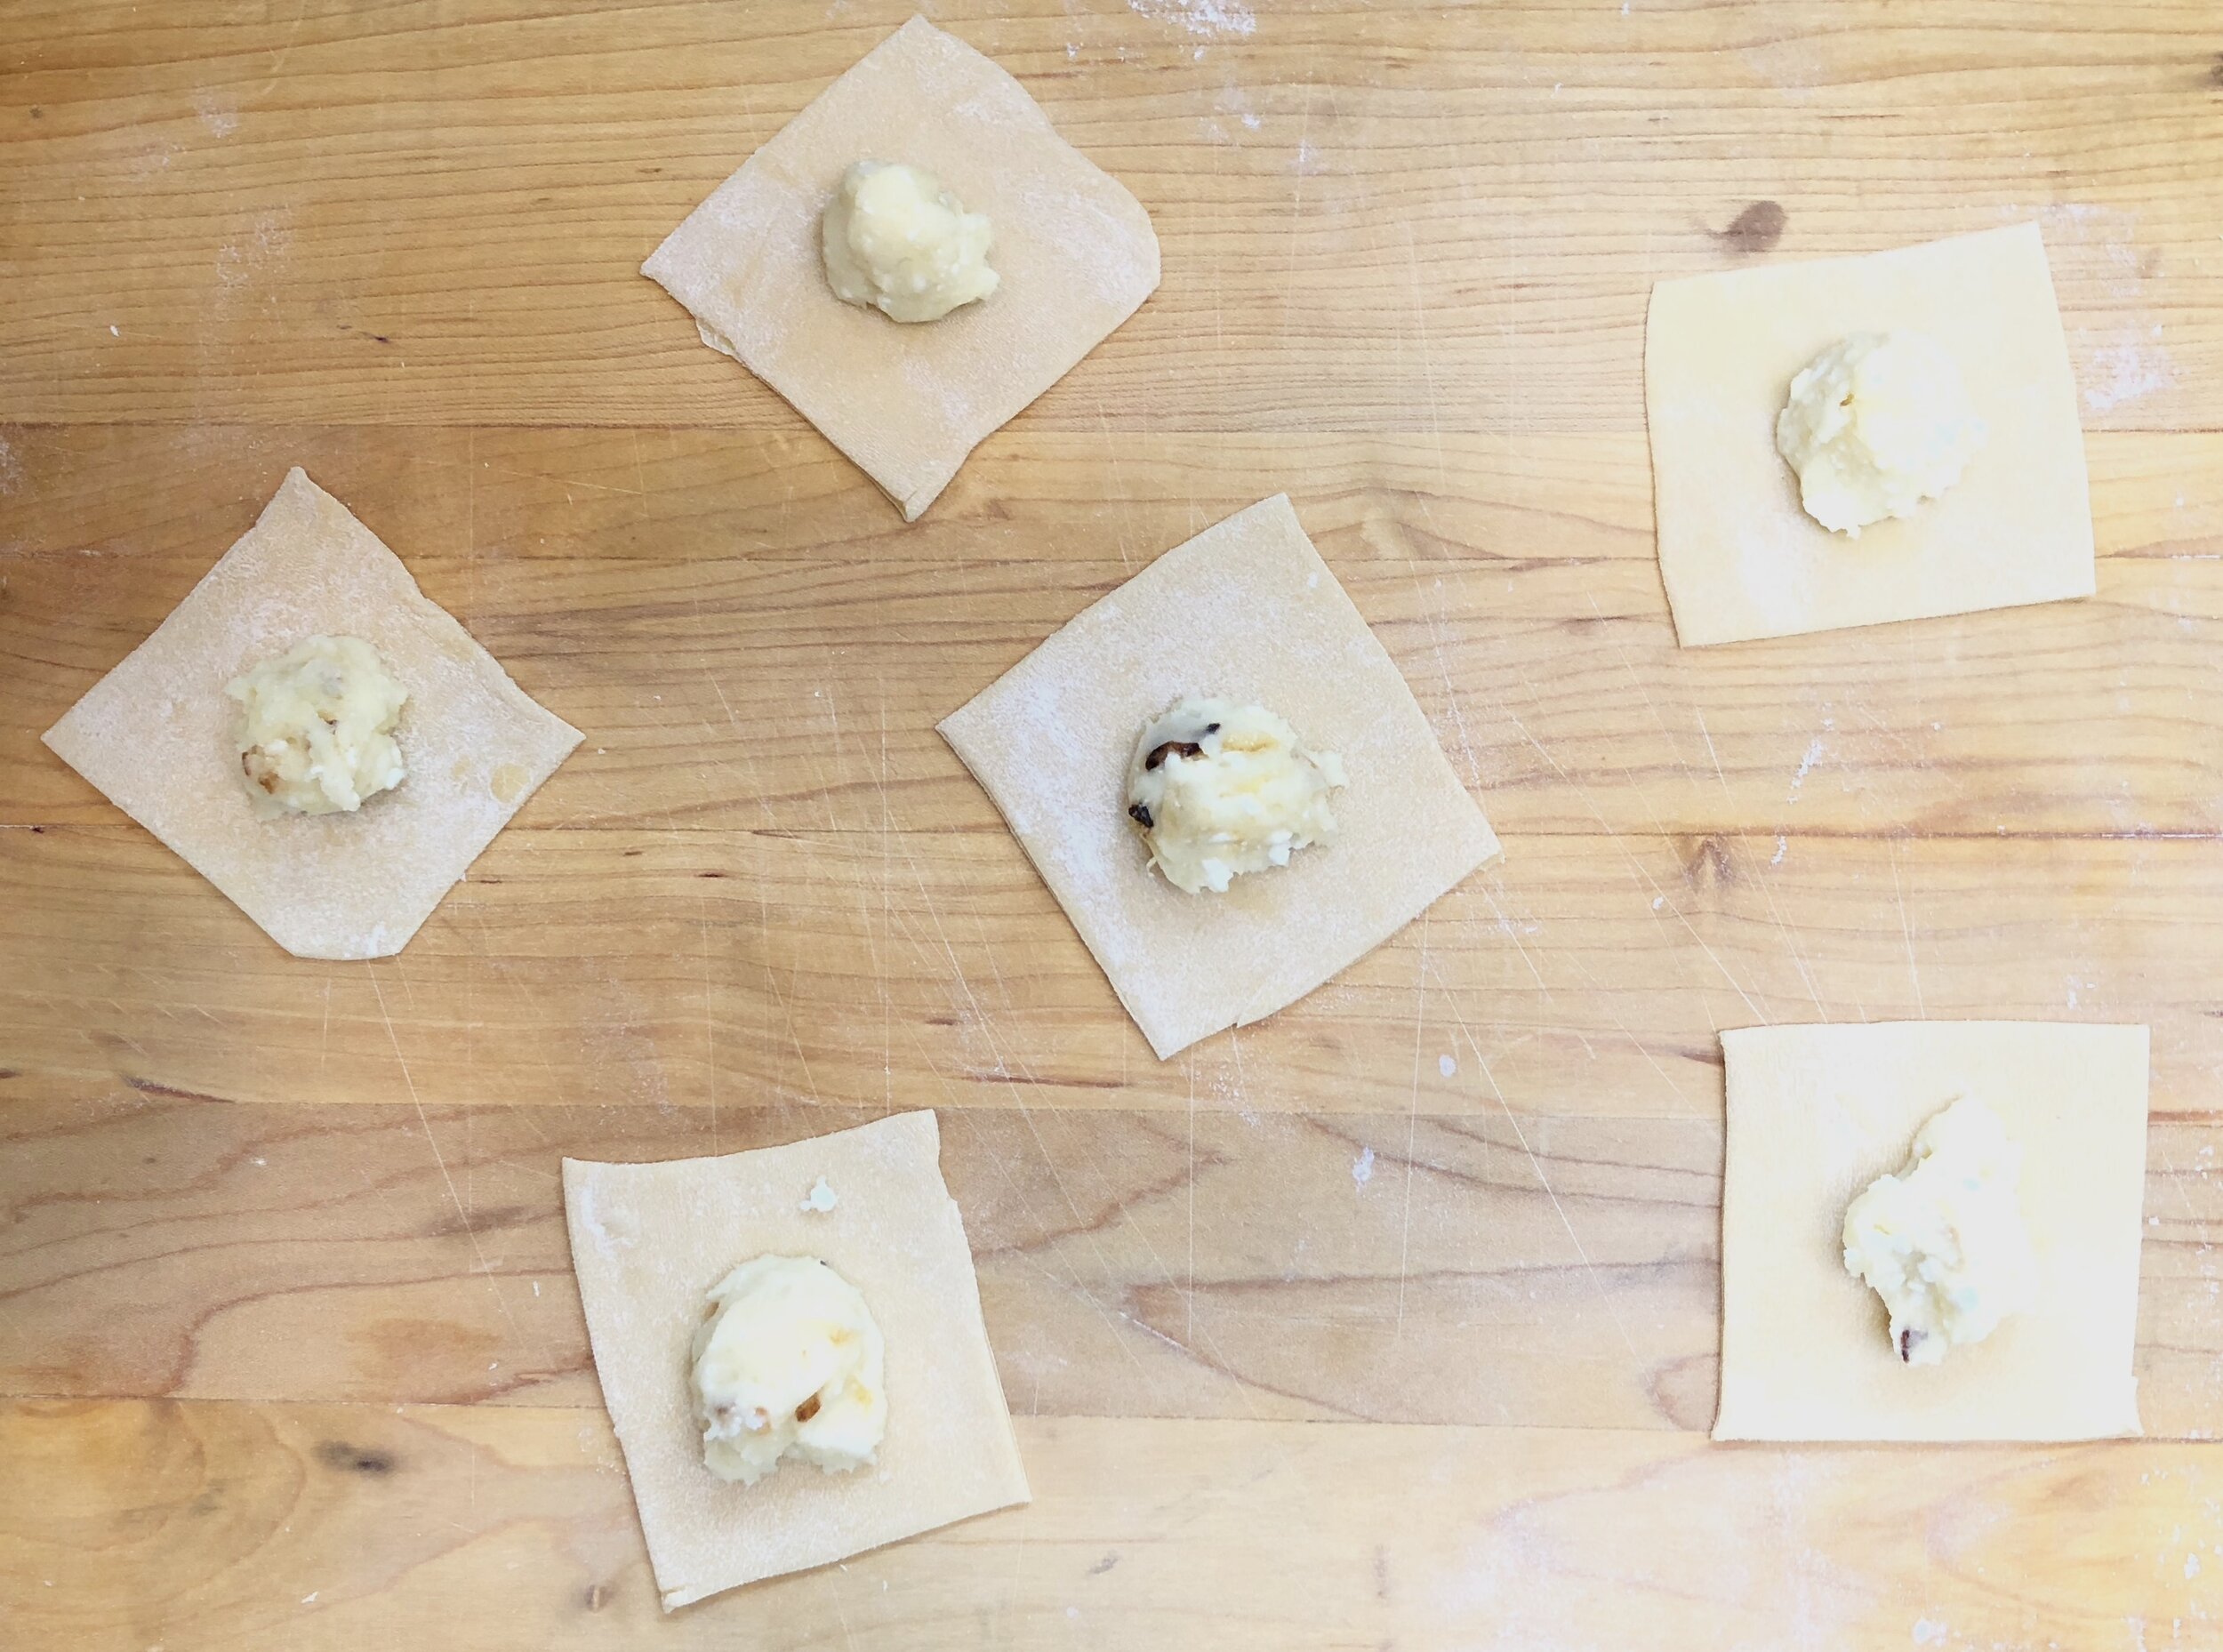
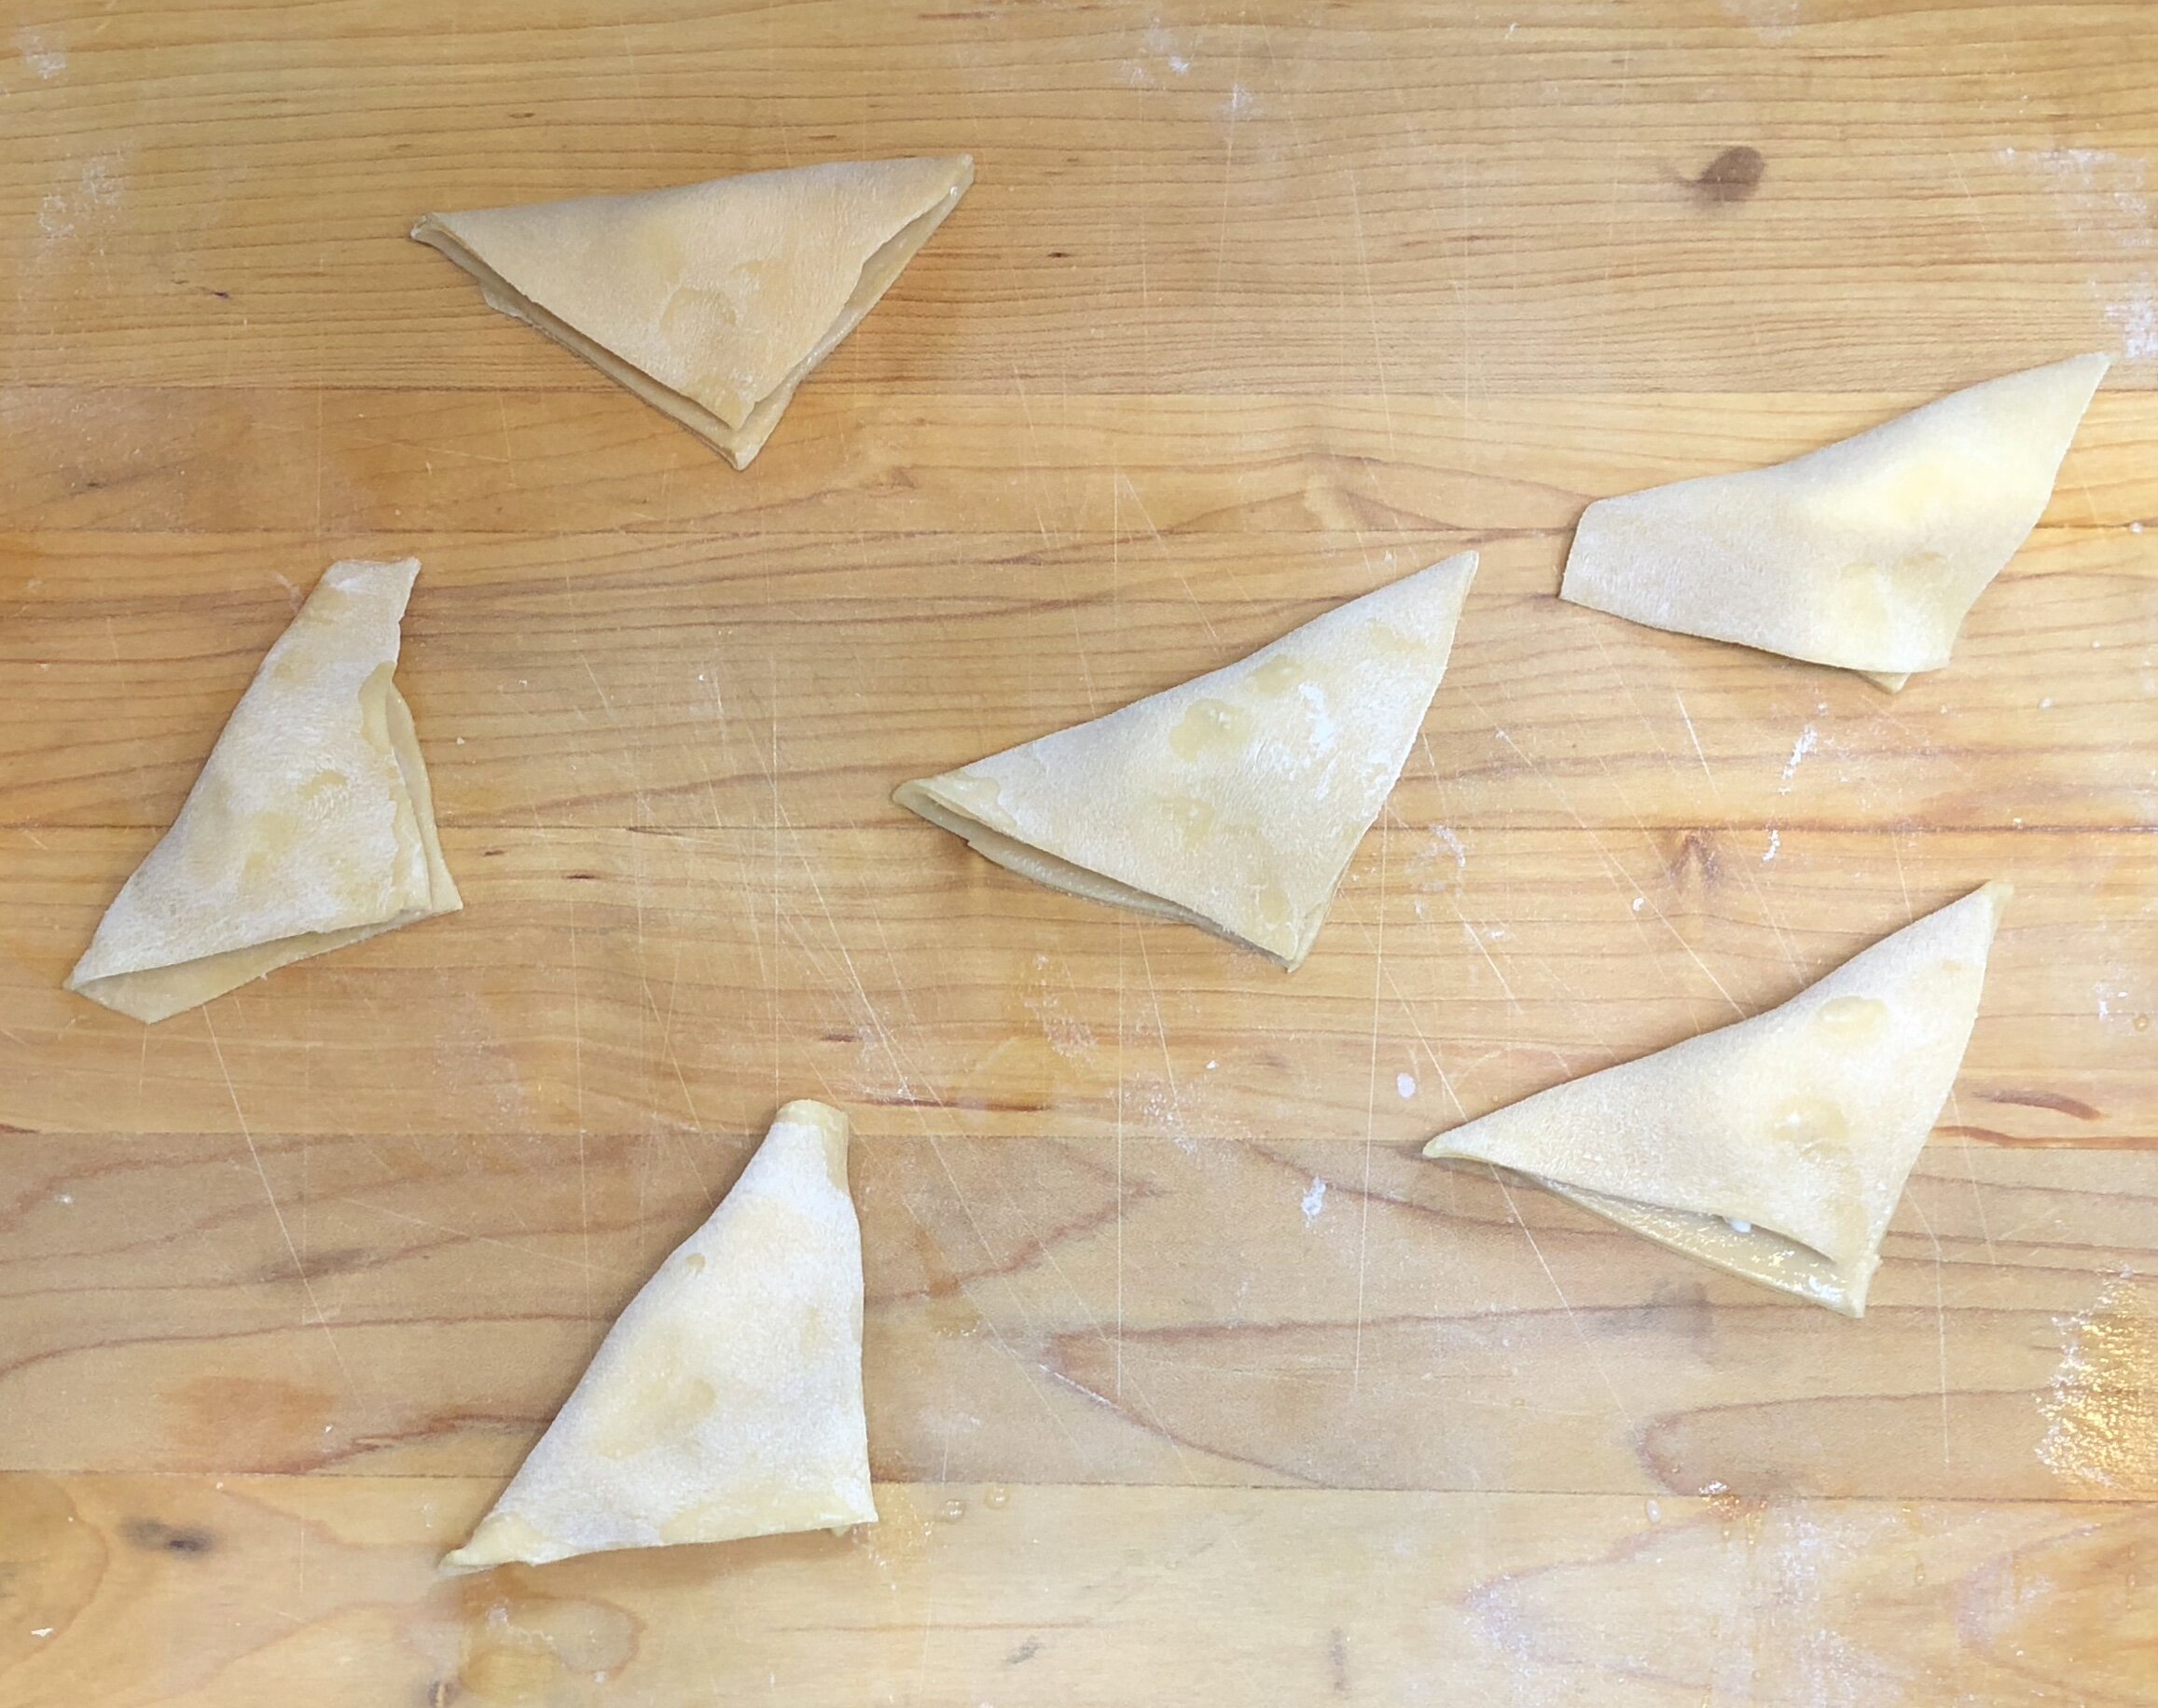
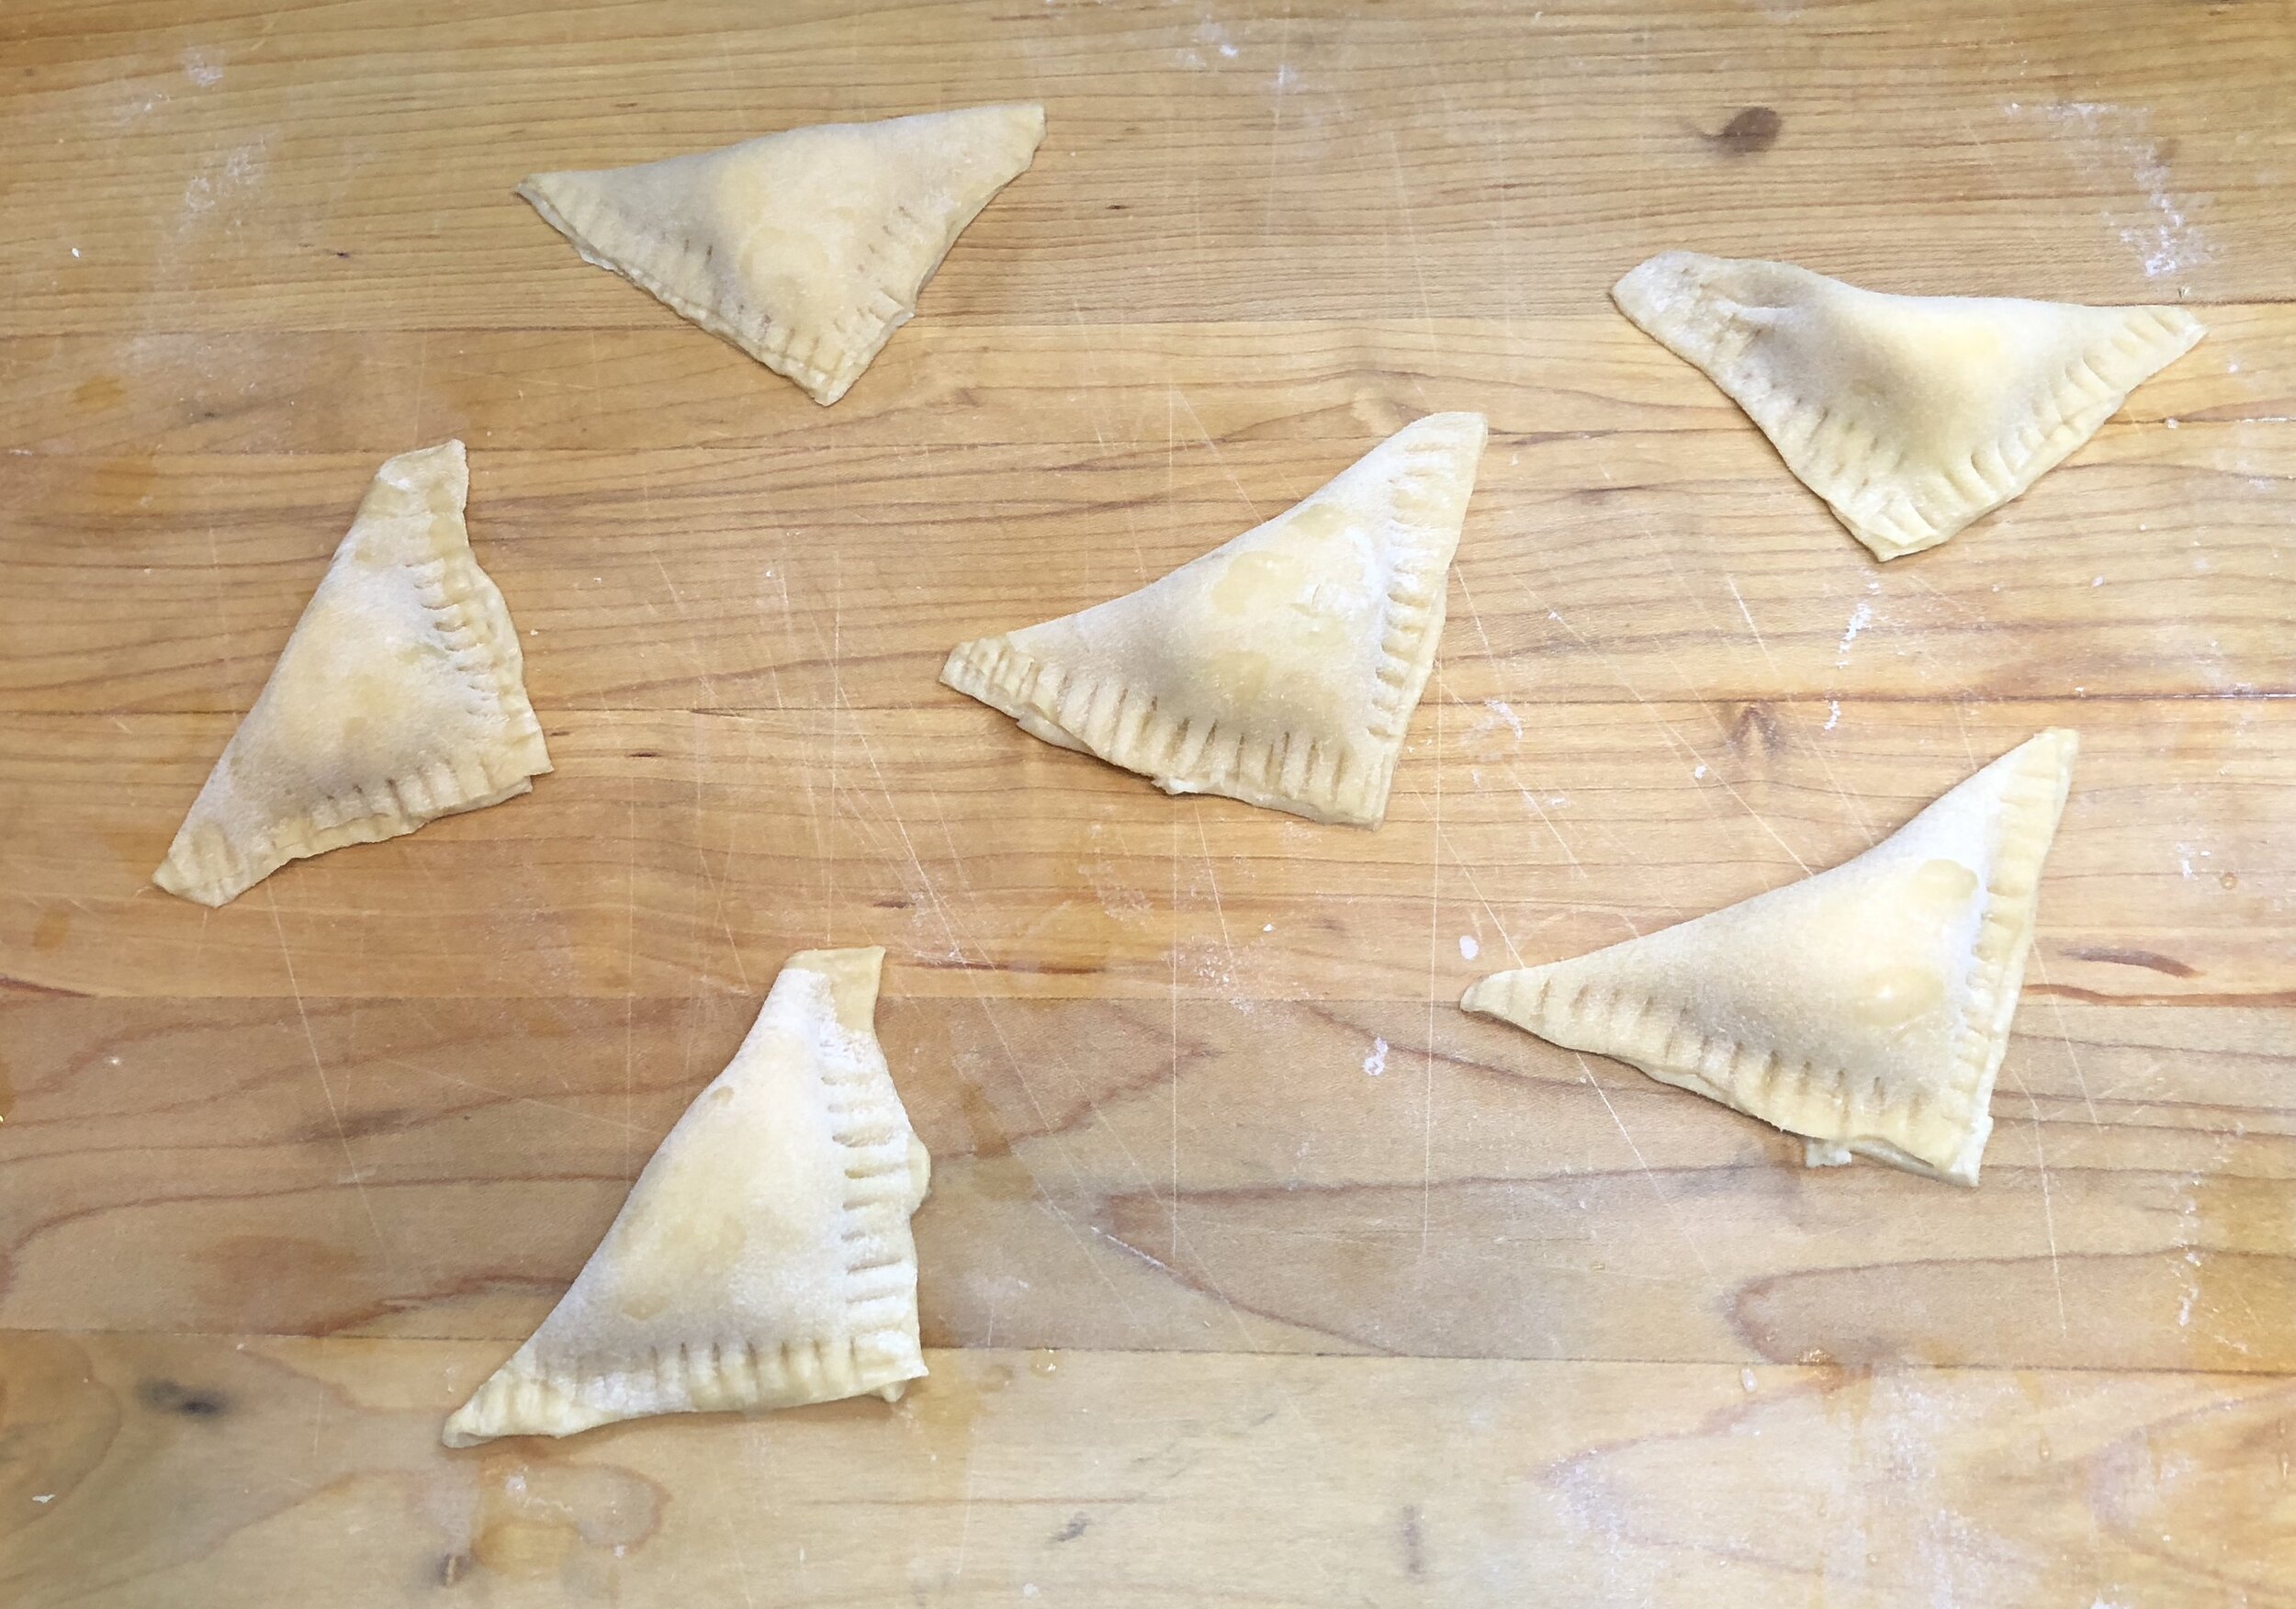
If you’d like to make some, follow the recipe and look at the photos to see how the triangles are cut, filled and folded.

This is truly good food. Last day on earth worthy.

Potato Cheese Kreplach

FillinG:

  • 3 large Yukon Gold potatoes (about one pound), peeled, cut into chunks (about 3 cups mashed potatoes)

  • 2 tablespoons butter

  • 1 large onion, chopped

  • 1 cup farmer cheese

  • salt and freshly ground black pepper to taste

Place the potato chunks in a large saucepan, cover with water and bring to a boil. Lower the heat to a simmer and cook for about 15 minutes or until the potatoes are tender. Drain the potatoes and spoon into a bowl. While the potatoes are cooking, heat the butter in a sauté pan over medium heat. When the butter has melted and looks foamy, add the onions and cook, stirring occasionally, for 12-15 minutes or until soft and golden brown. Add the onions to the potatoes. Add the farmer cheese, sprinkle with salt and pepper and mix the ingredients until well blended. Set aside to cool before filling the dough.

DougH: 

  • 3-1/2 cups all-purpose flour

  • 1/2 teaspoon salt

  • 1/4 cup butter, cut into chunks

  • 2/3 cup water, approximately

  • 1 cup dairy sour cream

Place the flour and salt in a large bowl. Add the butter and work it into the dough until the mixture is crumbly. Add 1/2 cup of the water and the sour cream and mix the dough until it is smooth, soft and well blended. If the dough seems too dry, add more water. (You can do this in a food processor.) Let the dough rest for at least 30 minutes. Using portions of the dough, roll the dough on a floured surface to 1/8-inch thick. Cut the dough into 3-3-1/2” squares. Place about one tablespoon of the filling onto each square. Slightly wet 2 sides of the square along the border. Fold the dough over the filling to make a triangle, pressing down onto the moist strips to seal the dough. Use the back of a fork to press the edges. Bring a large pot of water to a boil. Add the filled kreplach, 8-10 at a time, and simmer for about 15 minutes or until they are tender. Remove the kreplach with a slotted spoon and set aside; repeat.

Serve with sour cream and chopped chives or scallion tops.

Makes about 30


Banana Cake with Dates and Orange

fullsizeoutput_b58f.jpeg

Tu B’shevat is not one of the more well-known Jewish holidays, but it certainly is one of the more delicious ones. It’s known as “new year of the trees” and although it comes in mid-winter it’s a reminder that tree fruit is forming, that winter is nearly over, that warmer weather and new crops will be here soon.

And so, on Tu B’shevat we eat fruit. Our meals typically include some or all of the 7 species mentioned in the Torah: wheat, barley, grapes, figs, pomegranates, olives, and dates.

What a perfect occasion for banana cake studded with sweet, dried dates! I use medjool dates, but any variety will do. Or, you could substitute dried figs or raisins (dried grapes, right?)

Banana Cake with Dates and Orange

  • 2-1/2 cups flour

  • 1 teaspoon salt

  • 1 teaspoon freshly grated orange peel

  • 1 teaspoon baking soda

  • 1 teaspoon baking powder

  • 1/2 cup butter, margarine or vegetable shortening

  • 1 cup sugar

  • 1/4 cup date syrup (silan)

  • 3 very ripe bananas, mashed

  • 3 large eggs, slightly beaten

  • 1 cup chopped dates

Preheat the oven to 350 degrees. Grease and flour a (10-inch) 8-cup bundt pan. Mix the flour, salt, orange peel, baking soda and baking powder together in a bowl and set aside. In the bowl of an electric mixer set at medium speed, beat the butter and sugar until well blended. Add the date syrup and bananas and blend them in thoroughly. Add the eggs and beat well. Add the flour mixture and beat until batter is well blended. Fold in the dates. Pour into the prepared pan and bake for about 45-50 minutes or until a cake tester inserted into the center comes out clean. Remove from the oven and let cool in the pan for 10 minutes. Remove to a cake rack to cool completely.

Makes one cake serving 12-16


Handmade Potato Chips with Smoked Salmon Tartare

image.jpg

Potato latkes for Hanukkah? Of course!

But homemade potato chips also satisfy the holiday requirement of crispy potato.

And SO MUCH EASIER! And HEALTHIER. Because the chips in my recipe are baked, not fried (you could fry them if you wish though). They are so crispy they crunch as if they were fried.

And of course a homemade potato chip topped with smoked salmon tartare is perfect for my New Year’s celebration.

If you’ve never tasted homemade potato chips you have missed something spectacular in life. Do try this soon, with or without the salmon. You could serve them plain or with sour cream or applesauce, just like latkes. If you want to get fancy, make a dip by mixing some chopped fresh herbs into creme fraiche or mascarpone cheese.

Potato Chips with Smoked Salmon Tartare 

  • One large Russet baking potato

  • Vegetable oil

  • salt

  • 1/4 pound smoked salmon pieces

  • 2 tablespoons finely chopped red onion

  • 1-2 tablespoons chopped fresh dill

  • a few drops of olive oil

  • few drops of lemon juice

  • cream cheese, dairy sour cream, crème fraiche or mascarpone cheese, optional

Preheat the oven to 425 degrees. Peel the potato and slice 1/8-inch thick slices. Wipe the slices with paper towels. Brush the slices on both sides with vegetable oil. Sprinkle lightly with salt. Place on a cookie sheet and bake for 9 minutes. Turn the slices over and bake for another 8-9 minutes or until golden brown. Remove from the oven and set aside. Chop the smoked salmon. Add the red onion and dill and mix thoroughly. Sprinkle in a few drops of olive oil and lemon juice and mix. For a dairy hors d'oeuvre, spread the chips with cream cheese, sour cream, crème fraiche or mascarpone cheese. Top with some of the salmon mixture. For a parve hors d'oeuvre, place the salmon mixture directly on the potato chips

Makes 16-24

Mini Salmon Latkes

fullsizeoutput_9bea.jpeg
fullsizeoutput_8536.jpeg

I’m thinking ahead to Hanukkah and the New Year’s Eve weekend. For the first, of course latkes! For New Year’s? Hors d’oeuvre.

Here’s a recipe that works for either or both.

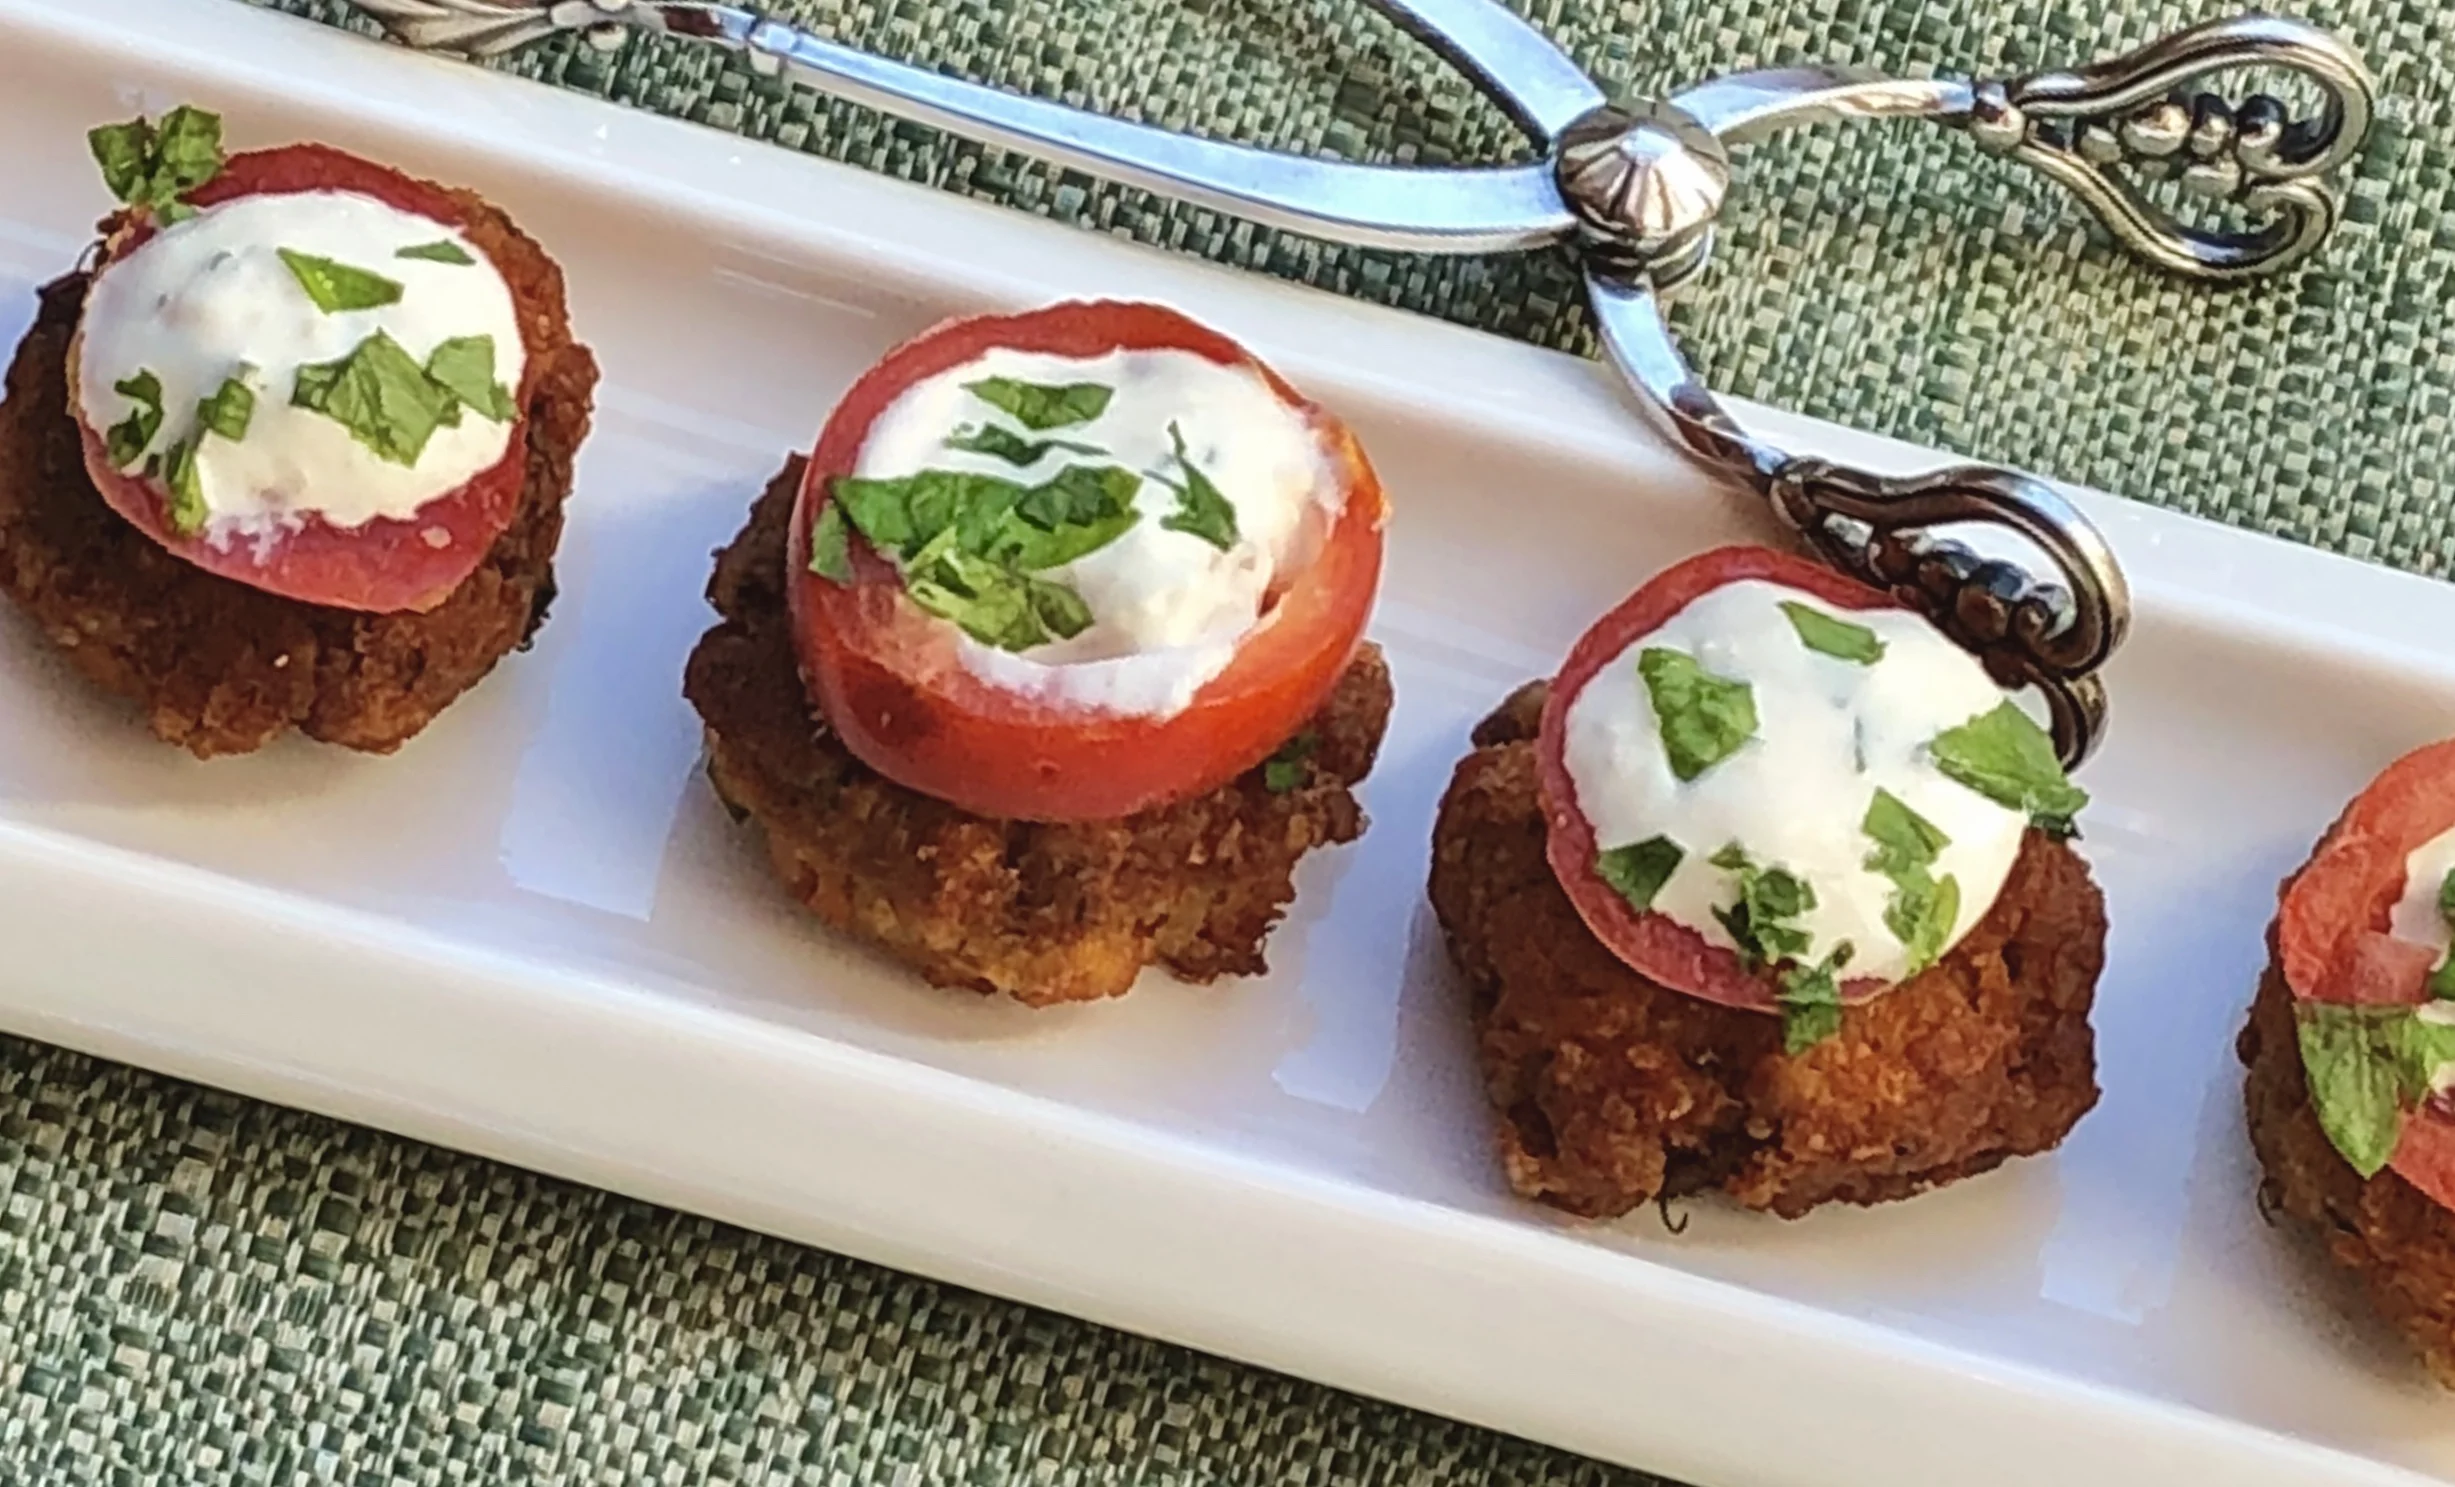
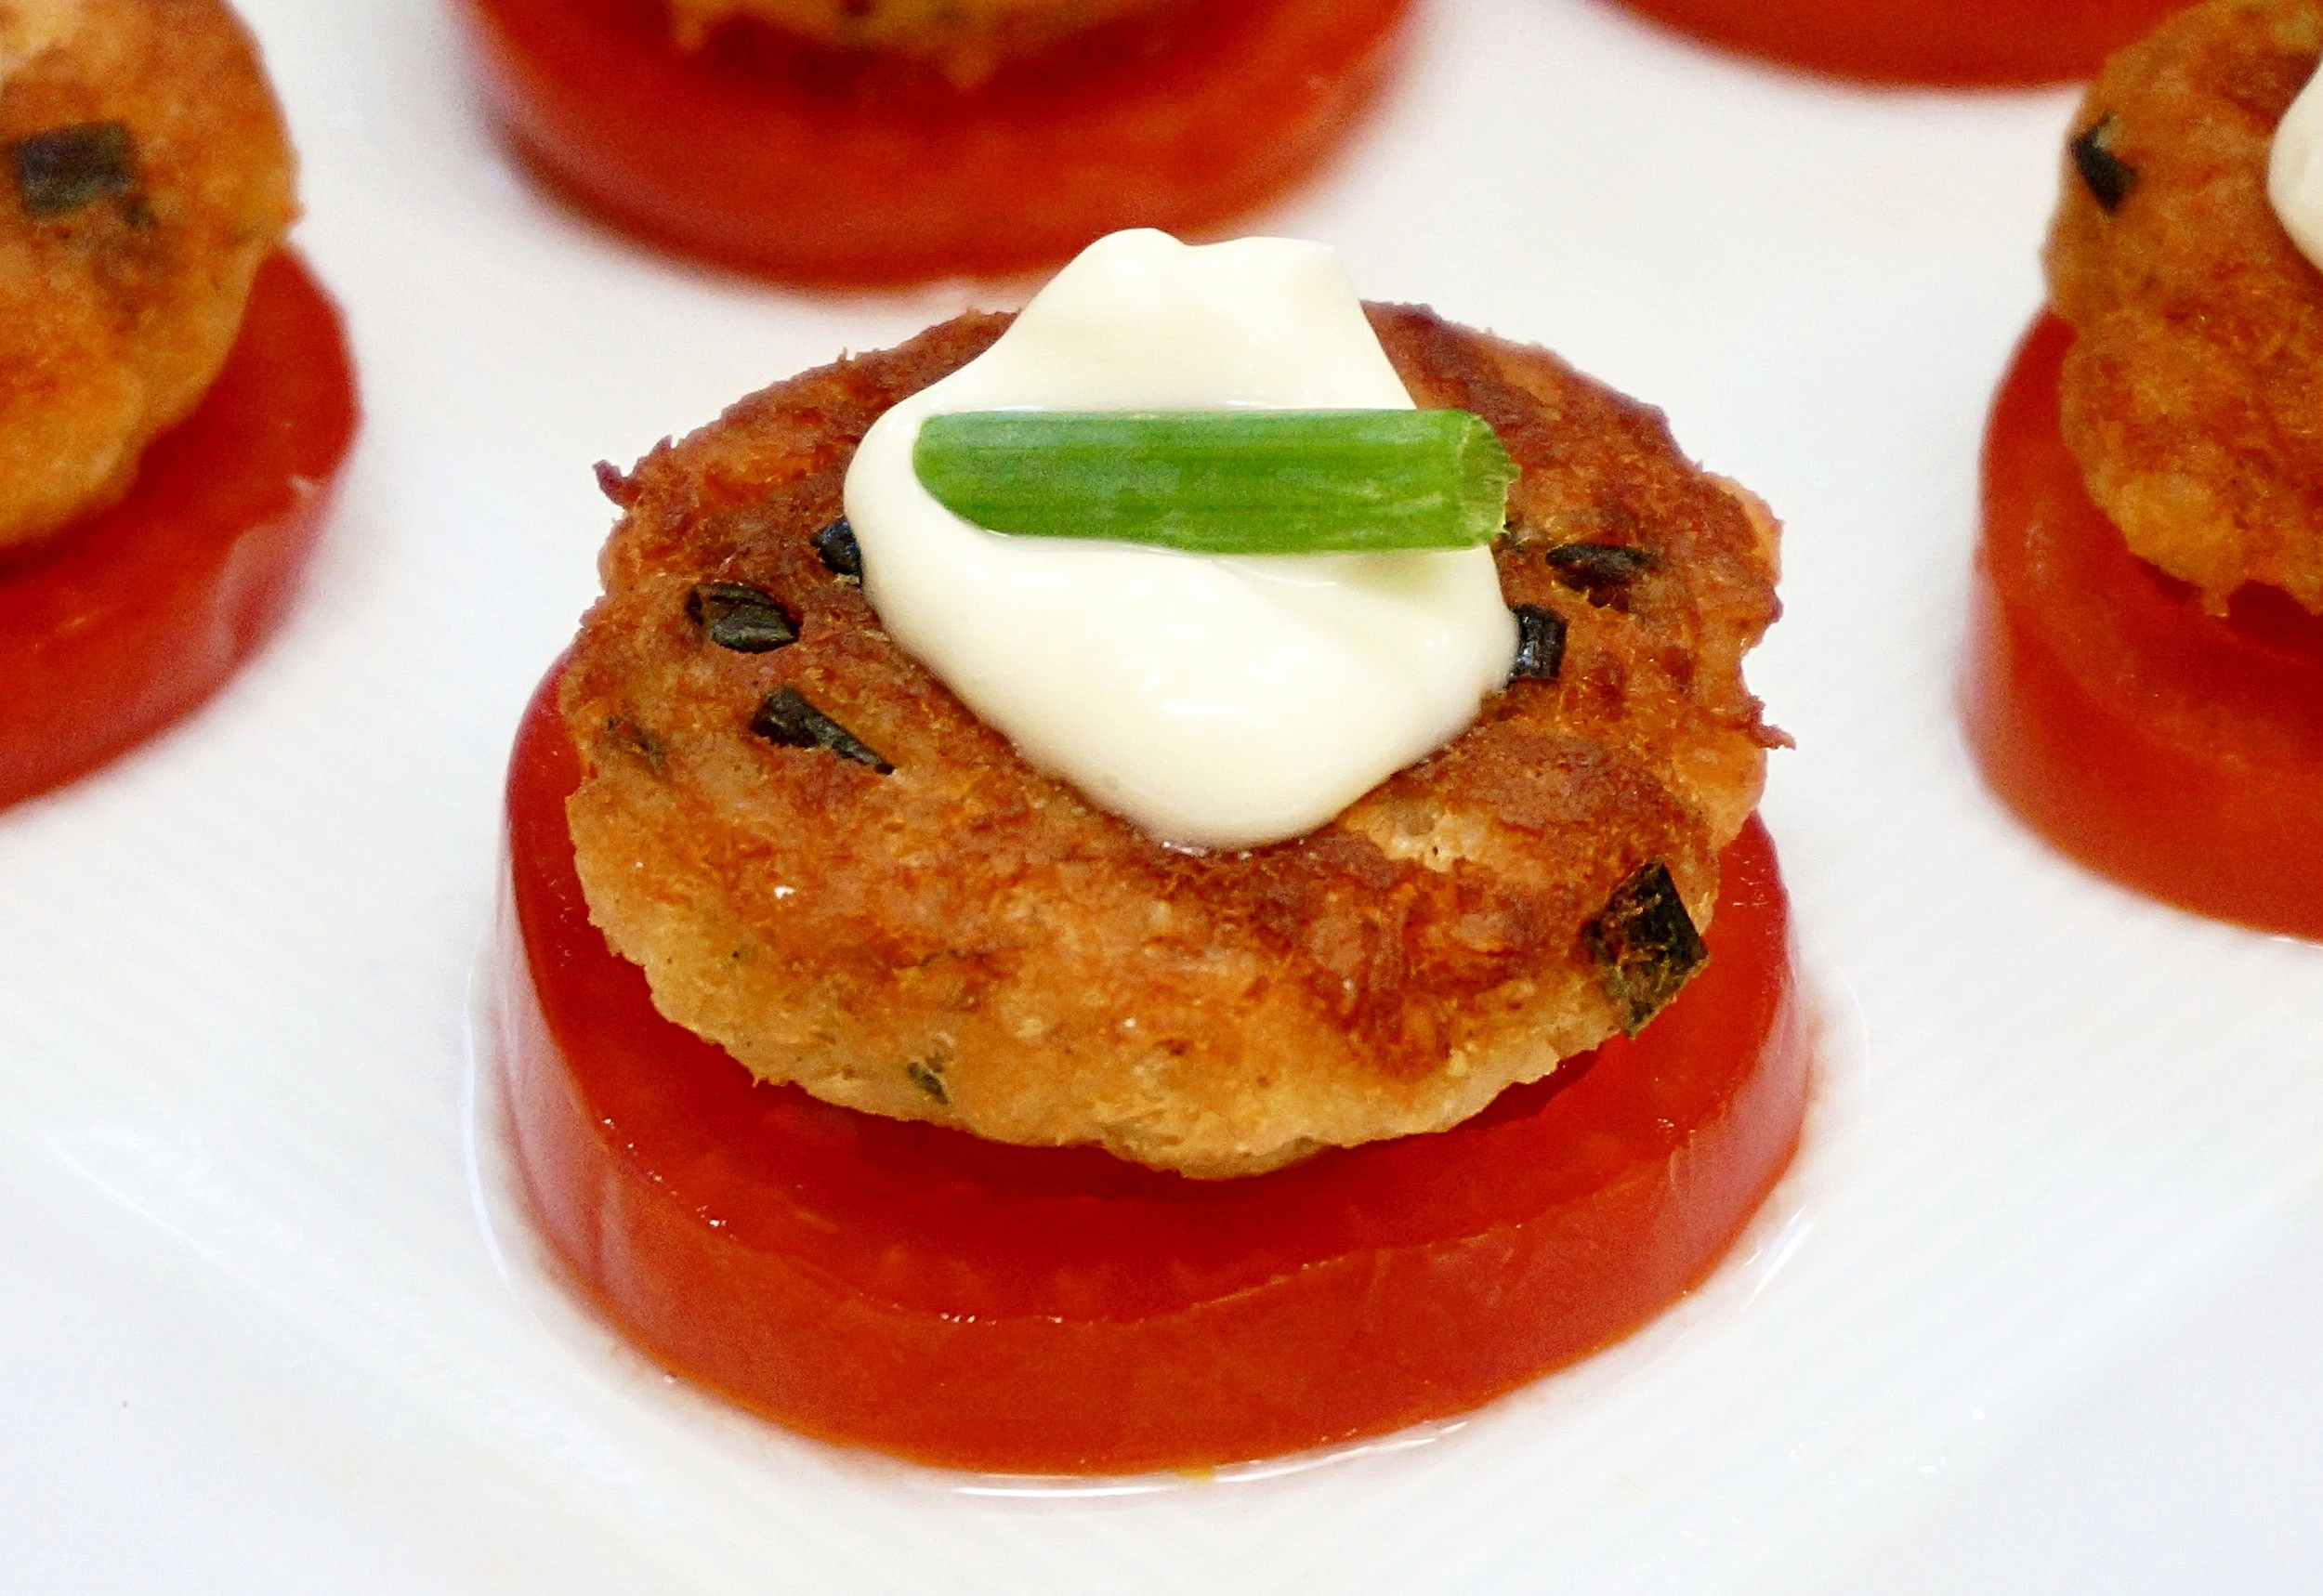
Salmon latkes in mini form. Fried right? So perfect for Hanukkah. Make them small enough and put them on some sort of base and you’ve got a super morsel for cocktail hour.

You can put the latkes on crackers or toasted bread, but I like using small tomatoes (campari tomatoes in the photo) as a base because it makes the hors d’oeuvre colorful. They are less crunchy but much juicier.

The latkes are freezable. Isn’t that nice?!

Mini Salmon Latkes

  • 2 cups mashed cooked salmon

  • 2 large eggs

  • 1/2 cup matzo meal

  • 2 tablespoons chopped chives

  • vegetable oil

  • 12 campari tomatoes (approximately) (or other small tomatoes)

  • 3 tablespoons mayonnaise

  • chives or fresh dill for garnish

In a bowl, mix the salmon, eggs, matzo meal and chives until well combined. Heat about 1/8-inch vegetable oil in a saute pan over medium heat. Shape the salmon mixture into 36 small disks. Fry, a few at a time, for 2-3 minutes per side or until crispy. Drain on paper towels. Before serving, slice the tomatoes about 1/2-inch thick. Place the latkes on top of the tomato slices. Spoon a small amount of mayonnaise onto the tops. Sprinkle with chopped chives for garnish (or use a tiny leaf of fresh dill).

Makes 36

Stuffed Zucchini Boats

fullsizeoutput_ac92.jpeg

There’s no particular food associated with the holiday of Simchat Torah, which begins on Sunday night (October 20, 2019), but lots of people make food that resemble torah scrolls.

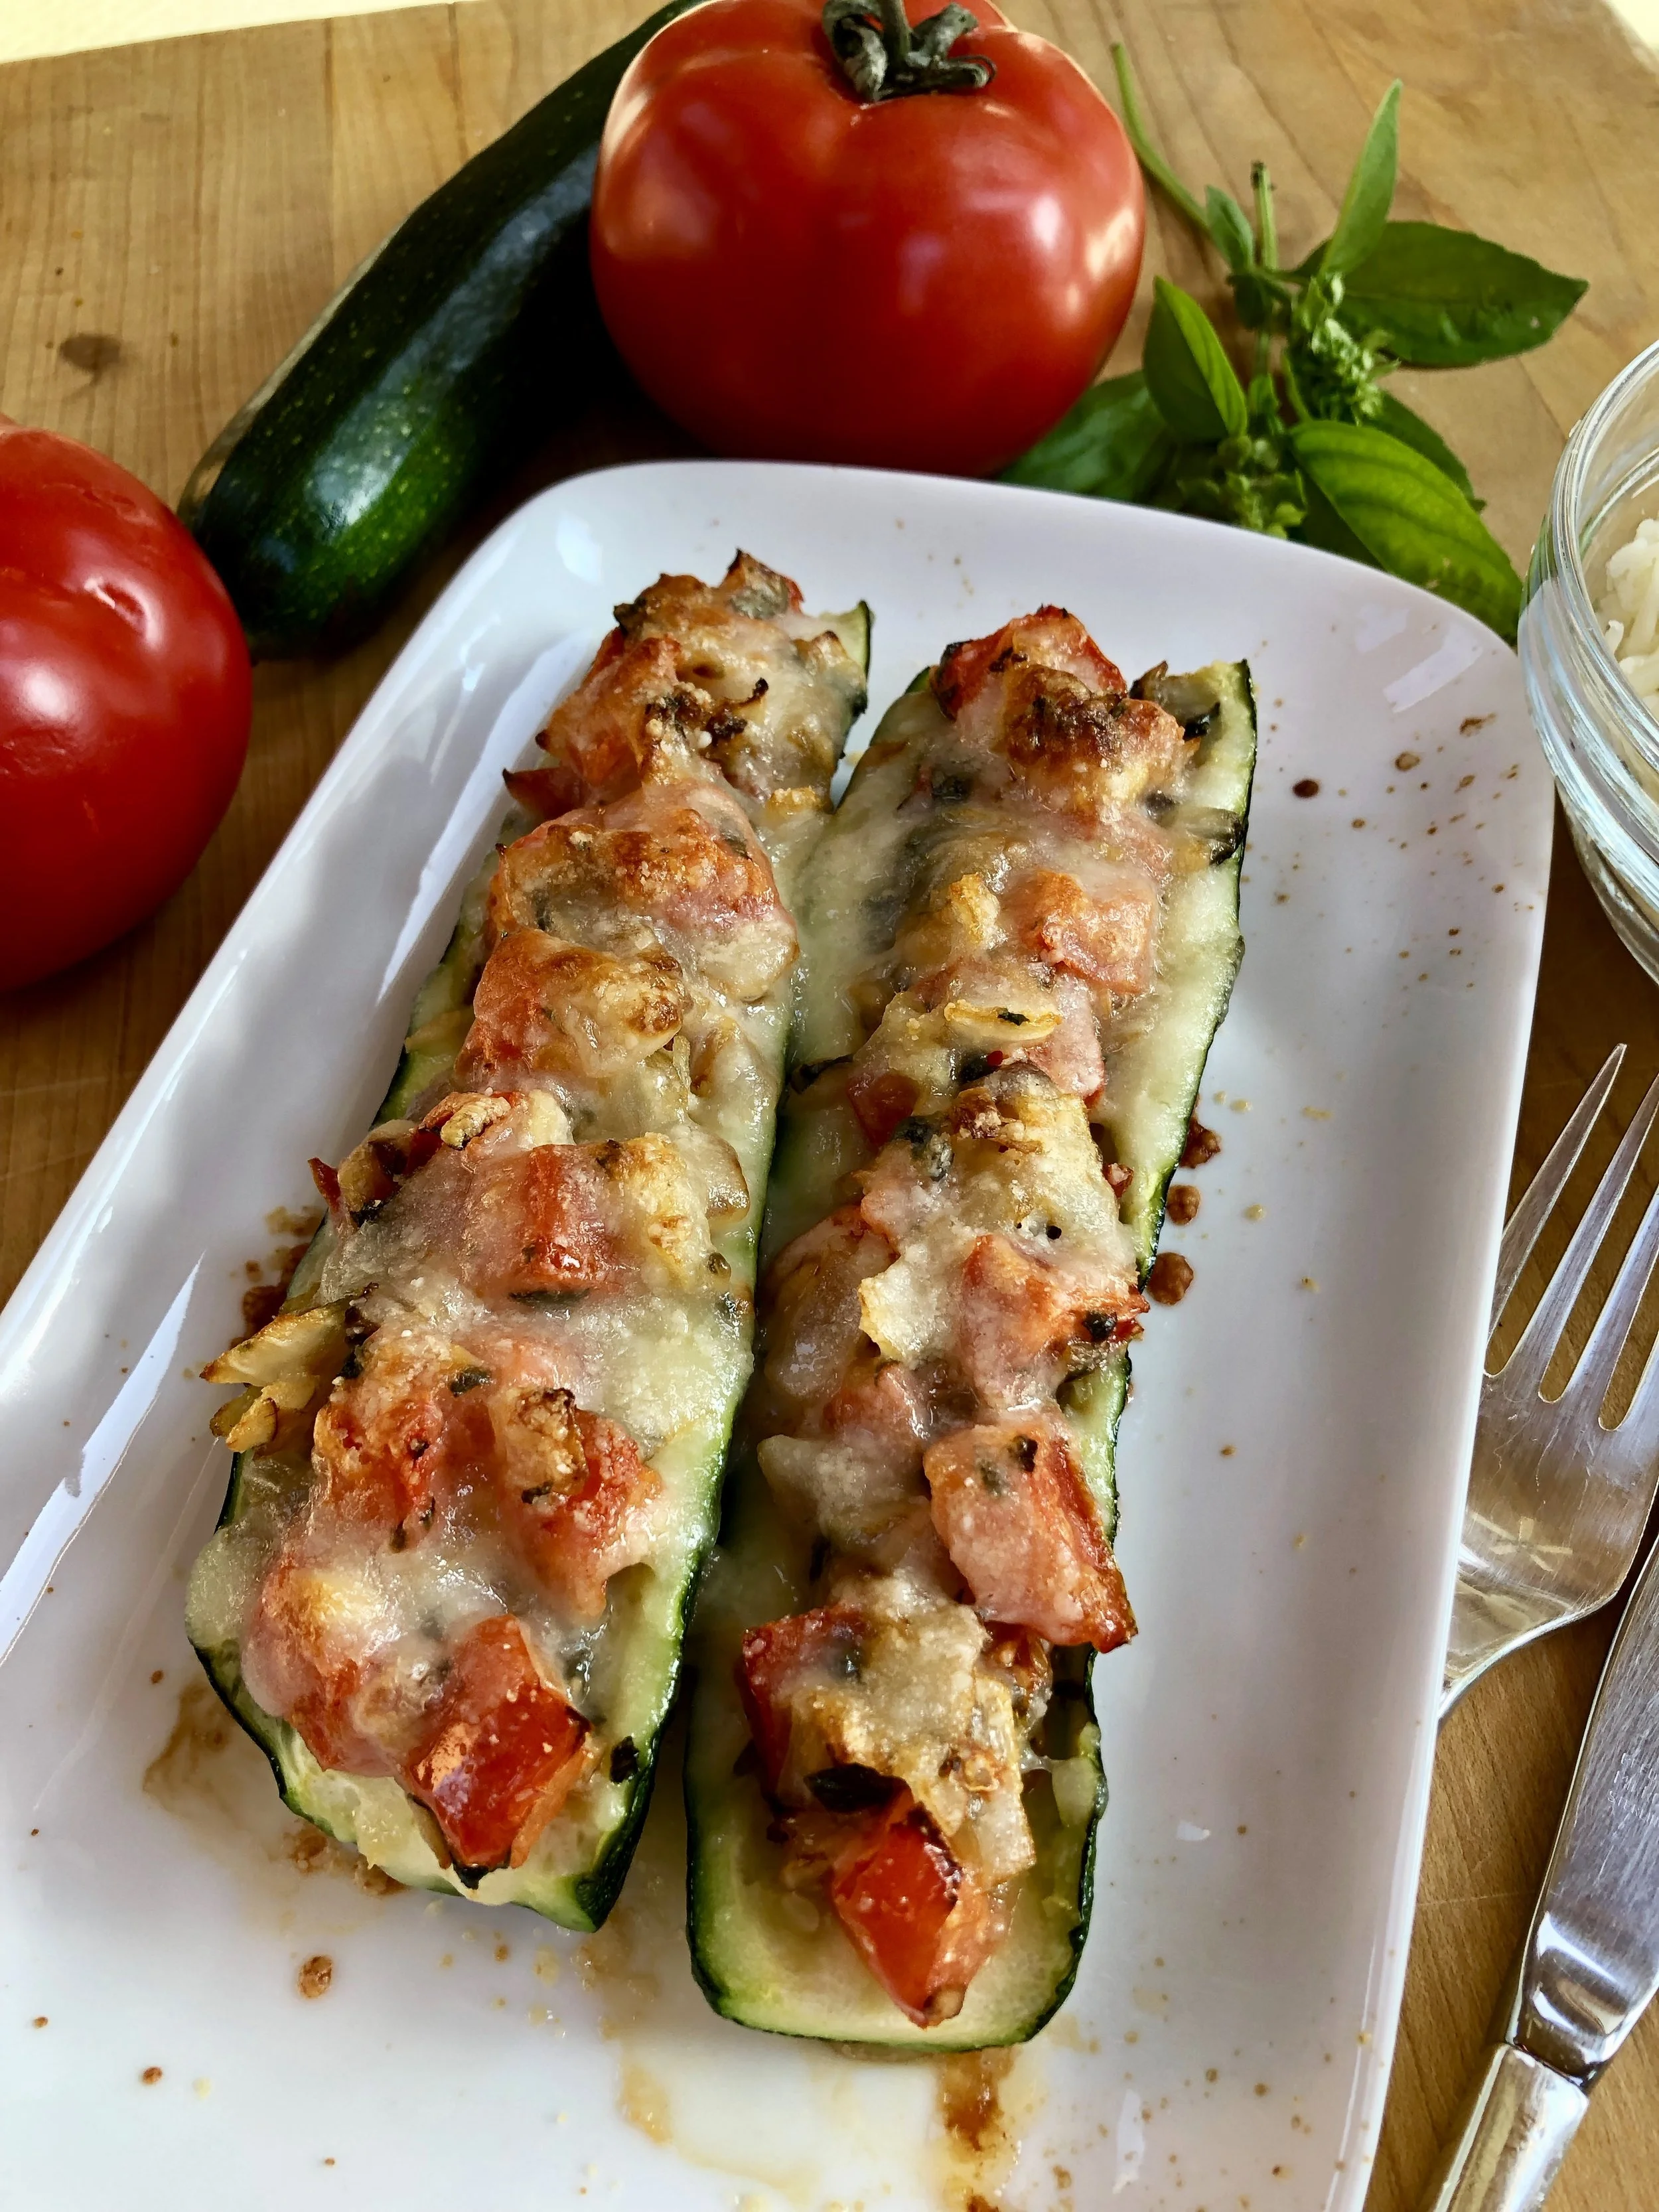
Stuffed cabbage is a classic. But when I used up the last of my home garden zucchini and stuffed it with tomatoes and cheese I thought these look somewhat like torah scrolls too!

So, for me: Stuffed Zucchini boats are the order of the day for the holiday (or any other time).

Stuffed Zucchini Boats 

  • 2 medium zucchini

  • 2 tablespoons olive oil

  • 1 medium onion, chopped

  • 1 large clove garlic, chopped

  • 2 tomatoes, chopped

  • 2 tablespoons chopped fresh basil

  • 6-8 tablespoons shredded mozzarella

  • 2 tablespoons grated Parmesan

Preheat the oven to 400 degrees. Cut the zucchini in half lengthwise. Scoop out the seeds and part of the flesh, leaving a wall of at least ¼-inch next to the skin. Coat the outside surface of the zucchinis with a film of olive oil. Place them in a baking dish and bake for 15-20 minutes, depending on size, or until barely tender (use the tip of a sharp knife to test tenderness). While the zucchini boats are baking, pour the remaining olive oil in a saute pan over medium heat. Add the onion and garlic and cook, stirring occasionally, for 2-3 minutes, to soften the vegetables slightly. Add the tomatoes and basil, stir and remove the pan from the heat to cool slightly. When the zucchini boats are ready, remove them from the oven and fill the cavities with the tomato mixture. Sprinkle the mozzarella cheese evenly over the filling. Sprinkle the Parmesan cheese evenly over the filling. Bake for 12-15 minutes or until the cheese has melted and is beginning to brown.     

 Makes 4 servings

Beet and Chickpea Salad

fullsizeoutput_867c.jpeg

I realize beets are available throughout the year. We are a beet-loving family, so I buy them all the time. Throughout the year.

And yet, I still associate beets with autumn. In my memory, September, October, November — those months are the real “season” for harvesting beets. In fact, I remember them as an integral part of the meals during Jewish holidays.

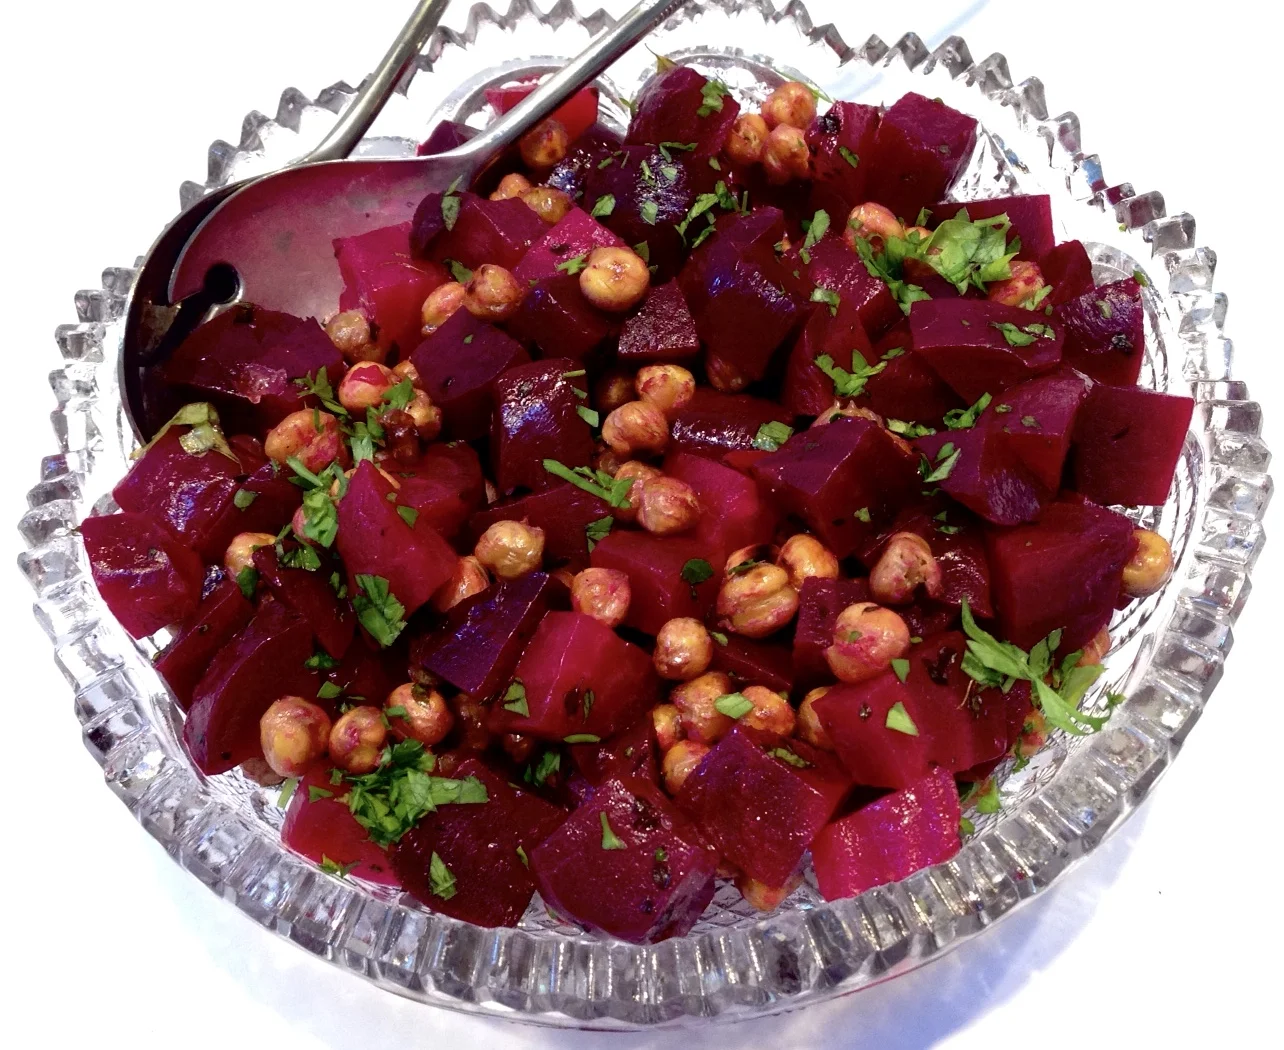
Sukkot, the “harvest holiday” is a good time to include beets on the menu. Look for beets with the greens still attached — they are from a current harvest. They are sweeter and tastier. Lovely however you cook them, including this salad, which you can make ahead. Serve it at room temperature.

Beet and Chickpea Salad

  • 4 large beets

  • 1 15-ounce can chickpeas, drained and rinsed

  • 1 tablespoon olive oil

  • 2 teaspoons fresh thyme leaves

  • sea salt

  • 3 tablespoons olive oil

  • 3 tablespoons white wine vinegar

  • 2-3 tablespoons chopped fresh parsley

  • salt and freshly ground black pepper to taste

Preheat the oven to 450 degrees. Trim the beets, cutting away the greens, if any, and discarding any hard, fibrous parts of the stem. Wash and drain the greens and use them for other purposes. Scrub the beets, wrap them in aluminum foil and roast for 50-60 minutes or until they are tender. Peel the beets when they are cool enough to handle. Cut the beets into bite size pieces and place in a bowl. While the beets are cooking, place the chickpeas on a foil-lined baking sheet. Pour the one tablespoon olive oil on top and shake the pan to coat all the chickpeas. Sprinkle with thyme and sea salt to taste. Shake the pan again. Roast for 20 minutes, shaking the pan every 5 minutes or so, or until golden brown and crispy. Add the roasted chickpeas to the beets. Pour the remaining olive oil over the vegetables and toss, then pour in the white wine vinegar and toss again. Sprinkle with parsley and salt and pepper to taste. Let rest for 10-15 minutes before serving.

Makes 8 servings


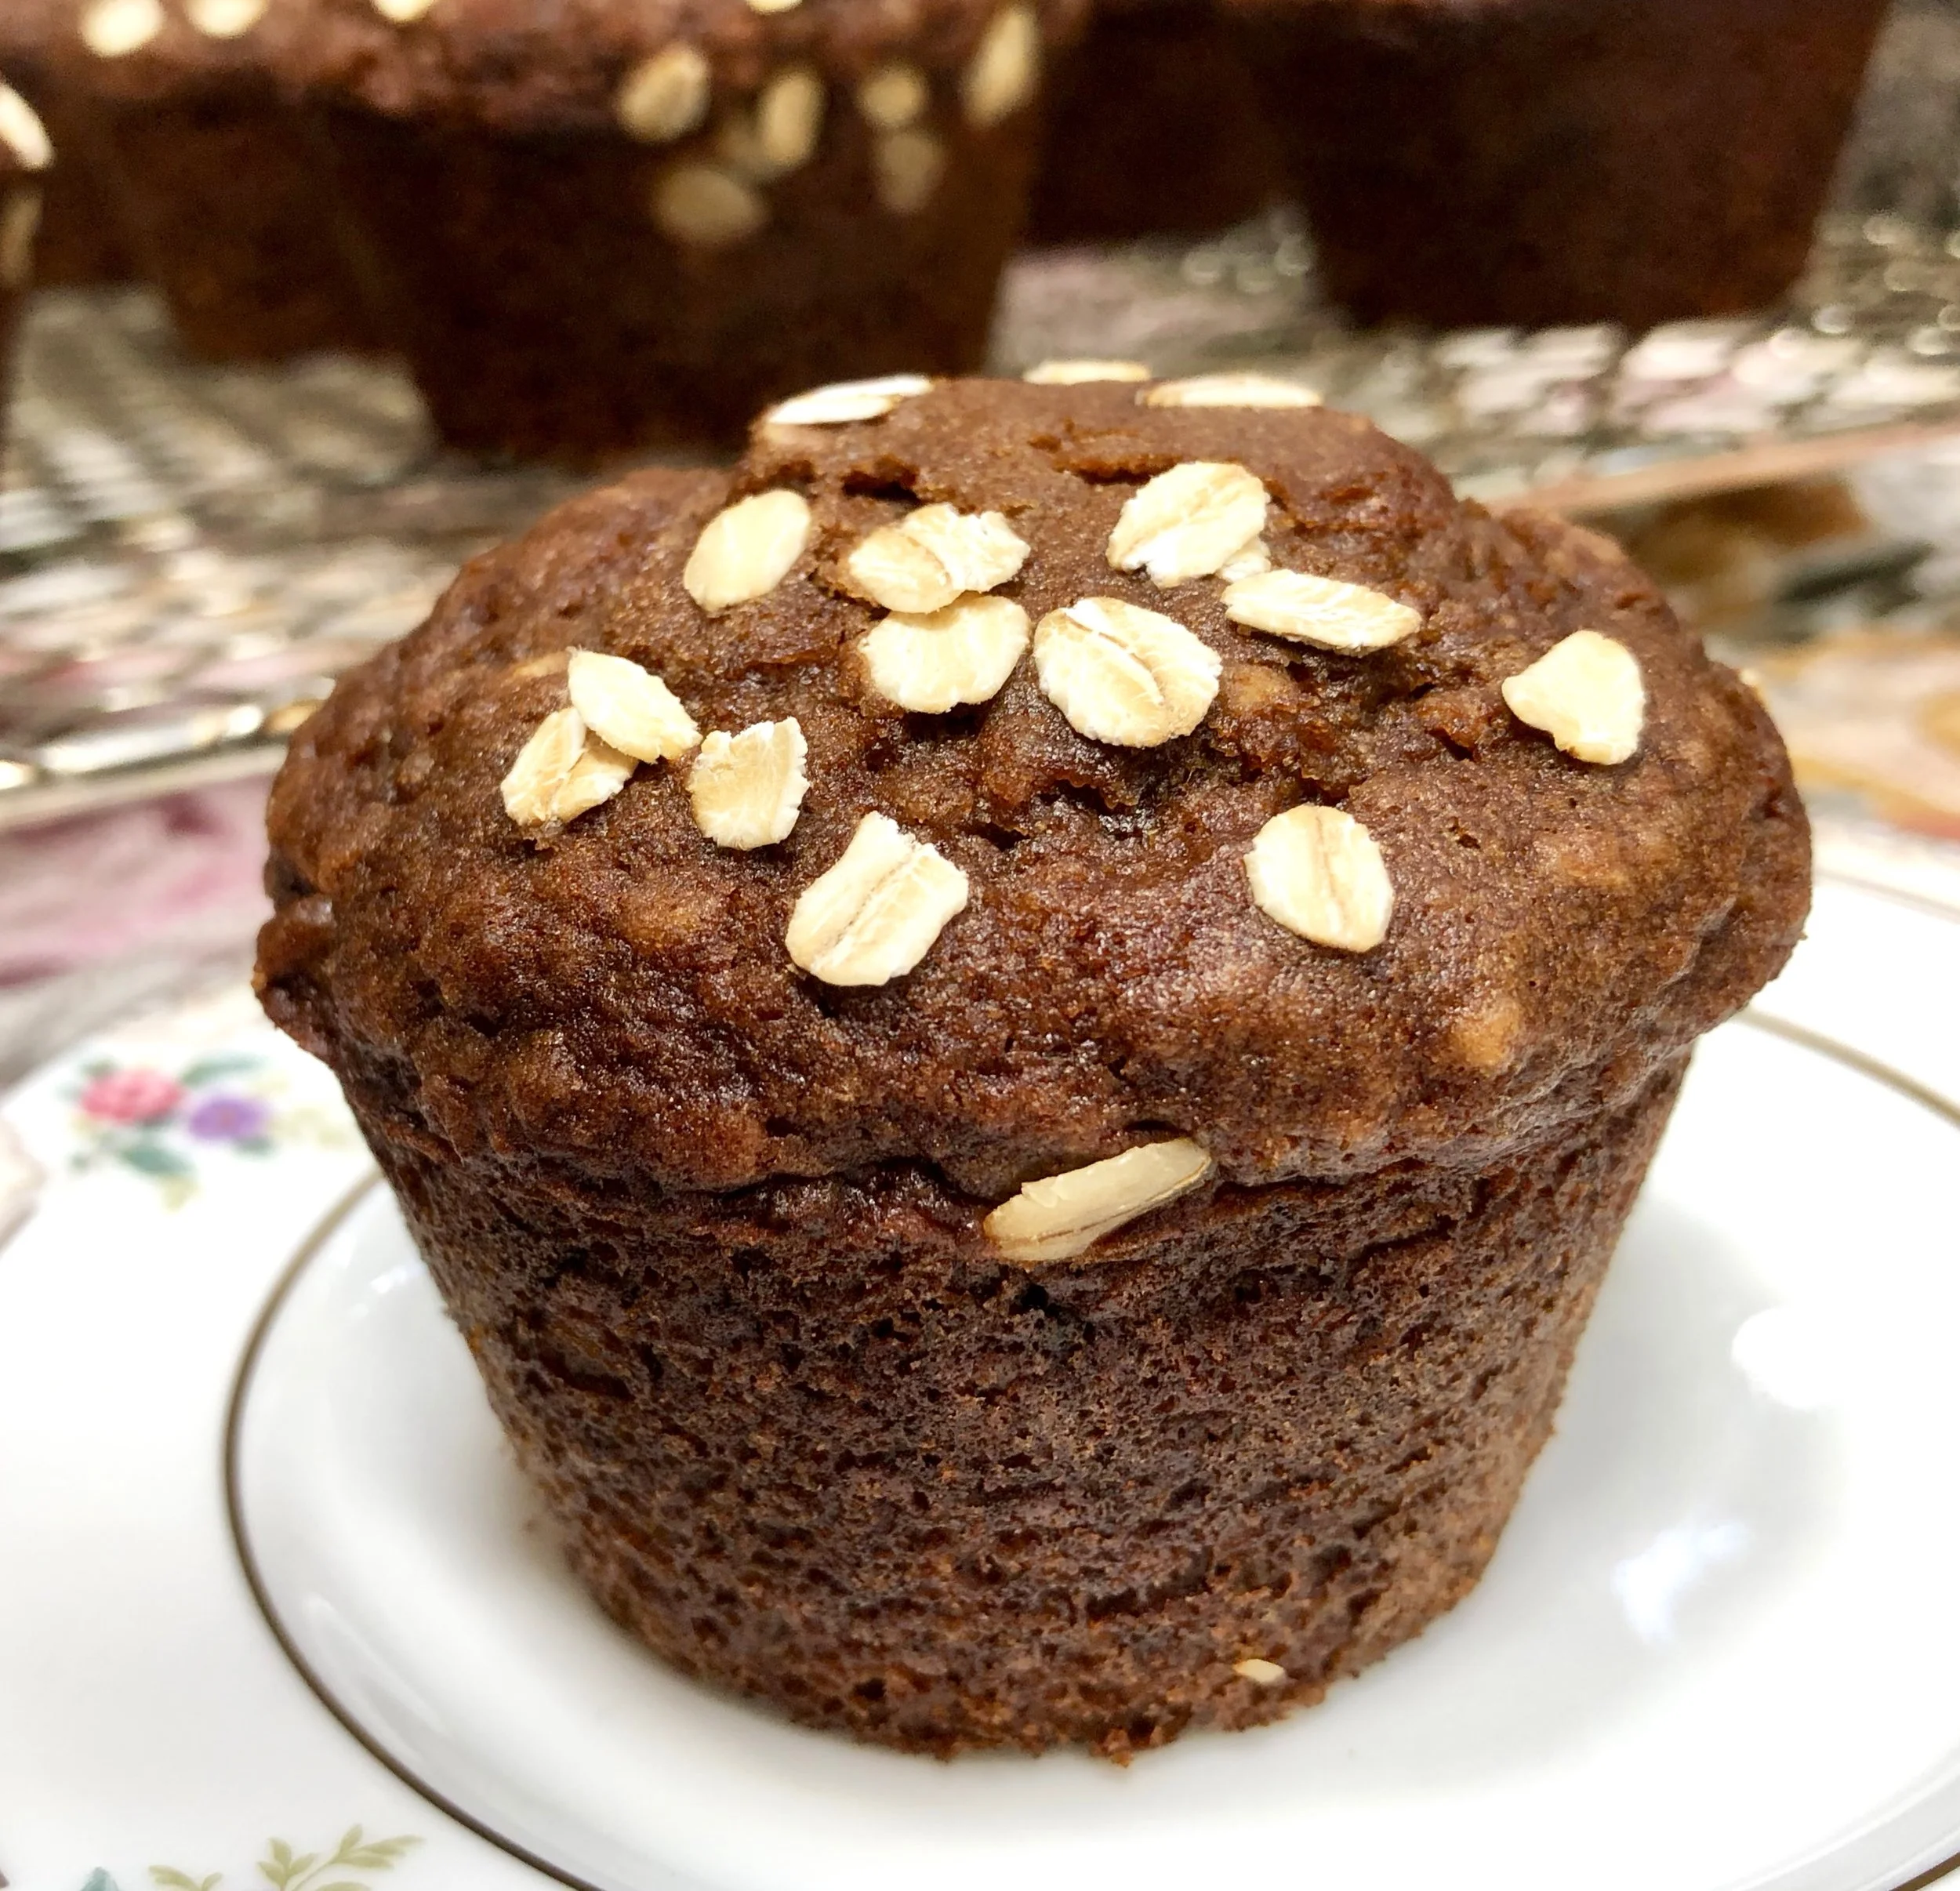
Honey Cake Muffins

fullsizeoutput_9422.jpeg

I make honey cake every year for Rosh Hashanah, using my Aunt Belle’s family-famous recipe.

Every once in a while I change the recipe — a different honey, an additional spice (or less seasoning), and so on, just to see if we like it better or I should just stick to the original. I’ve even adapted the recipe to make it with date honey.

They’re all delicious. I love honey cake and I look forward to it every year as a special holiday treat.

Last year I decided to make honey cake into muffins. So — breakfast or afternoon snack instead of for dessert. They are sweet — it is honey “cake” after all — but not as sweet as the recipe I use for dessert. The muffins are also mellowed a bit with oats.

During the year I made these muffins again, several times, using several different spice blends. The recipe below is the more traditional Rosh Hashanah flavor, but you could delete the cinnamon and nutmeg and use one teaspoon Hawaij spice instead. They’re a convenient riff on honey cake; freezable too.

Honey Cake Muffins

  • 1-1/3 cups all-purpose flour

  • 2/3 cup quick oats

  • 2 teaspoons baking powder

  • 1-1/2 teaspoons baking soda

  • 1/2 teaspoon salt

  • 2 teaspoon grated fresh orange peel

  • 1/2 teaspoon cinnamon

  • 1/2 teaspoon grated nutmeg

  • 3/4 cup honey

  • 1/2 cup cold coffee

  • 6 tablespoons vegetable oil

  • 2 large eggs

  • old fashioned oats, optional (or use chopped nuts)

Preheat the oven to 375 degrees. Grease 10 muffin tins. In a bowl, mix the flour, oats, baking powder, baking soda, salt, orange peel, cinnamon and nutmeg together until uniform in color. Heat the honey and coffee together over low heat briefly, so that they are easy to blend with a whisk. Add the vegetable oil and eggs and whisk the ingredients until they are uniform in color. Stir in the flour mixture and mix until thoroughly combined. Spoon the batter into the greased muffin tins. Top, if desired, with old fashioned oats or chopped nuts. Bake for about 18 minutes or until a cake tester inserted into the center comes out clean.

Makes 10


Chick Pea and Carrot Salad

DSC08424.jpg

Of course, of course we will be slicing apples and dipping them in honey on Rosh Hashanah. (which begins at sunset on September 29th).

But chickpeas are on the menu too. In his Encyclopedia of Jewish Food, the late rabbi and food authority Gil Marks wrote that “chickpeas are a traditional Rosh Hashanah food, a symbol of fertility, abundance and a wish for a well-rounded year to come.”

I usually make chickpeas into hummus, but sometimes I serve them whole, as a snack, roasted, the way my mother made them when I was growing up – a recipe called nahit. She coated the chickpeas with vegetable oil, sprinkled them with salt and paprika and baked them until crispy.

I changed her recipe somewhat -- I use olive oil, kosher salt and fresh thyme, or sometimes za’atar, as seasonings. Nahit is a delicious snack and a healthy one too: chickpeas are a good source of protein, minerals (including calcium) and fiber.

For this coming holiday though I’ll be making a chickpea and carrot salad to serve with dinner. Carrots are another symbolic ingredient of the holiday, so this recipe is a double-up of special ingredients of festive food for the holiday table. It’s a dish that can be made in advance, which makes it a good choice at such a busy time. And it is colorful too, fit for any celebration, including Break-the-Fast. 

Chick Pea and Carrot Salad

  • 1 15-ounce can chickpeas

  • 4 medium carrots, sliced thin

  • 1/2 chopped red onion

  • 1/4 cup chopped fresh parsley

  • 1/4 cup chopped fresh mint

  • 1 teaspoon ground cumin

  • 1/8 teaspoon cayenne pepper

  • 1/4 cup olive oil

  • 3 tablespoons lemon juice

  • salt to taste

Rinse the chickpeas under cold running water; let drain and place in a bowl. Add the carrots, onion, parsley, mint, cumin and cayenne pepper and toss to distribute the ingredients evenly. Pour in the olive oil and lemon juice. Toss to coat the ingredients evenly. Taste for seasoning and add salt to taste.

Makes 6 servings

Bulgur Wheat Varnishkes

fullsizeoutput_86ca.jpg

Tisha B’av isn’t one of the better-known Jewish holidays. I’ve heard people say “oh yeah, I think that’s when you can’t get married.” Or, “you can’t get a haircut or listen to music.”

All true, and much more, and that’s because, unlike holidays when we celebrate joyful occasions such as a new year or deliverance from Pharaoh, Tisha B’av is when observant Jews mourn the destruction of the First and Second Temples. In addition, we remember the numerous times throughout history that the Jewish people were subjected to pogroms, exile and a multitude of other catastrophes. These are days that we don’t celebrate; we grieve.

Mournful times deserve respect and reflection. During the nine days leading up to the actual holiday (which begins at sundown on August 10th) many families will refrain from the usual pleasure-filled events and activities that make up our lives.

That includes getting married or getting a haircut or listening to music.

It also includes refraining from eating certain foods.

Tisha B’av is a full fast day, but during the days leading up to it many families don’t eat meat. Fish, dairy, vegetarian — is on the menu, and especially eggs and lentils, which are considered “mourner’s food.”

It’s just as well frankly. Skipping heavy meat meals during the hot weather makes good sense. It’s a whole lot smarter to eat fish, dairy and vegetarian.

Whether or not you follow the culinary guidelines during the Nine Days, this dish will do!

Anytime.

It’s my particular riff on classic kasha varnishkes. Our family really doesn’t like kasha, so I make the dish using bulgur wheat. Not only does it taste better, it’s easier to prepare and easier on the digestion.

Bulgur wheat or kasha varnishkes is usually a side dish, but it becomes a full meal if you add a fried egg or two on top.

Bulgur Wheat Varnishkes

  • 6 tablespoons vegetable oil

  • 1 cup bulgur wheat

  • 1-3/4 cup water, vegetable stock (can use chicken stock)

  • 2 large onions, chopped

  • Salt and freshly ground black pepper to taste

  • 6 ounces bow-tie pasta

  • 6 fried eggs

Heat 3 tablespoons of the vegetable oil in a sauté pan over medium heat. Add the bulgur wheat and cook, stirring occasionally, for about 3-4 minutes or until lightly toasted. Pour in the water or stock, bring to a boil, lower the heat and cover the pan. Cook for about 20 minutes or until all the liquid has been absorbed. Heat the remaining 3 tablespoons vegetable oil in a sauté pan over medium heat. Add the onions, sprinkle with salt and pepper and cook for about 20 minutes, stirring often, or until the onions are soft and browned. Cook the pasta according to directions on the package. Combine the bulgur wheat, pasta and onions in a large bowl. Sprinkle with salt and pepper. Keep warm while you fry 6 eggs, sunnyside-up style.

Makes 6 servings