make ahead dish

Soup for When you are Sick

Everyone knows you're supposed to have chicken soup when you're sick. 

However, recently, when I had a cold that lingered and lingered and really needed soup I didn't feel like going out to buy a chicken. Or peel carrots. Or rinse the fresh dill.

I didn't feel like doing much of anything frankly, but I did want homemade soup.

So I made some from what I had in the house.

It was an amazing dish. Hearty, tasty, nourishing. Also EASY. 

I did feel much better the next day.

The recipe is extremely forgiving, so here it is with a bunch of ways you can vary the recipe depending on what you have in your house.

Freeze some for the next time you don't feel great and need some soup. Or want some wonderful, thick and filling dish for dinner.

Soup for When you are Sick

  • 3-4 meaty marrow bones
  • water
  • one package of bean soup mix or vegetable soup mix (I used Manischewitz but any is fine)
  • one large onion, chopped or sliced
  • one cup of split peas (green or yellow)
  • 3/4 cup lentils
  • 1/2 cup any whole grain (such as farro, barley, wheatberries, kamut)
  • salt and freshly ground black pepper to taste

Place the bones in a pot, cover with water (about 8-10 cups) and bring to a boil. Lower the heat to a simmer and skim the stuff that comes to the top for about 10 minutes. Add the whole package of soup mix, the onion, split peas, lentils and whole grain, plus salt and pepper to taste. Partially cover the pan and simmer for hours, stirring occasionally, until the dried vegetables are very soft. I sometimes add more water if the soup is too thick.

Additions:

  • 3 carrots, sliced
  • 3 stalks celery, sliced
  • 4-6 soaked and chopped dried shiitake mushrooms, coarsely cut
  • Frozen corn kernels and/or lima beans (add about 1/2 hour before soup is done)
  • Whatever else you like (I sometimes add chicken bones in addition to meat bones)

Makes about 6 servings of soup (you have to fight over the bones or make it with 6 bones)


No Easier Cranberry Sauce than this one

Sometimes all you have to do is change one ingredient in a recipe and the entire dish tastes different. Like this one. I've made cranberries the same way for years -- bake them with sugar, let them cool, then add brandy.

This year I added some freshly grated orange peel. Huge difference! If you like the orange-cranberry duo, this recipe is for you. Plus -- this recipe is the next easiest thing after opening a can.

Baked Orange Scented Cranberries

  • 12 ounces fresh cranberries (3 cups)
  • 1-1/2 cups sugar
  • 2 teaspoons grated fresh orange peel
  • 3 tablespoons orange juice (or use brandy or rum)

Preheat the oven to 350 degrees. Wash and drain the berries and place them in a single layer in a baking dish. Add the sugar and orange peel and toss to coat all the berries. Cover the dish tightly with a lid or aluminum foil. Bake for 45-50 minutes. Remove the cover and stir thoroughly. Let the berries cool. Stir in the juice. Chill thoroughly.

Makes 6-8 servings

The Brisket

fdb3f3_8815169e0dfc4d5eb856d5432cda7743.png_srz_p_215_106_75_22_0.50_1.20_0.png

Yesterday I wrote about the un-brisket. You know, why I usually don't make brisket for the holidays.

But I do make brisket on occasion and I realize it is THE specialty for Rosh Hashanah.

And I also know that no matter how many recipes there are out there for brisket, there are always thousands of people wanting more. Not just recipes, but information on how to make brisket so that your family wants it again and remembers your brisket as the ultimate dinner.

So here's what you might want to do: not only learn a good recipe, but also get instruction from the world's premiere kosher cookbook author: Jamie Geller.

Here's how: Jamie is giving video courses called HOME in which she and other culinary experts will teach you the best methods and tips for making the best brisket.

There are other courses too. Challah and Do-it-Yourself Rosh Hashanah (with recipes PLUS crafts).

You can get one or get them all. The price is $19.99/course.

But take a look yourself, watch the trailer and get the skills, the tools, the encouragement and confidence you need to cook it right.

Here's where: HOME by Jamie Geller.

Chicken Fricassee, the Un-Brisket Choice for Rosh Hashanah

Chicken Fricassee

Chicken Fricassee

My friends are always surprised that I don't usually serve brisket on Rosh Hashanah. In fact, they used to tell me it is heresy. Everyone knows that brisket is the big, big, popular, festive and impressive-looking main course for the New Year! So they ask -- how come it's not what I do?

Well, my grandma always made turkey. So did my mother. So I guess turkey is the tradition in our family and I just follow suit.

But I have to confess, after all the teasing I've gotten over the years I began to think that turkey was kind of strange and that I was doing something bizarre.

Until recently.

Because I read an article by Joan Nathan in Tablet about this very thing. 

She said that before the Civil War, brisket was not the usual Rosh Hashanah specialty, and that it was only after refrigerated trains could carry meat more quickly and easily across the country that this big hunk of meat became a holiday specialty. Before that, she said, Jewish home cooks might prepare dishes such as chicken fricassee for the occasion.

YESYESYES!

It conjured up glorious memories of my mother's (and grandmother's) chicken fricassee. Did they serve that also during the holidays? I don't remember. All I know is that after I read the article I went out and bought the necessary items for chicken fricassee and made a big batch. I was going to freeze it in portions for the holidays but my daughter Gillian and her kids came for a surprise visit and my fricassee was cooling down before the big freeze.

We ate it for dinner. At first Gillian was reluctant because she and my other daughter, Meredith, refused to eat chicken fricassee when they were girls. "Too soft!" "Too wet!"

They used to make fun of me for loving it.

But that's what I had in the fridge the day of the surprise visit so that's what we ate for dinner that night.

Guess what? Gillian loved it! And said she changed her mind.

Tastes do change over the years.

That's why people eat brisket for Rosh Hashanah now, rather than fricassee. And for some terrific ideas about preparing the best brisket ever, click here.

But maybe it's time to reconsider Chicken Fricassee for the holidays? I will offer it as an option when my family comes.

Chicken Fricassee

  • 16-20 ounces chopped beef, veal, turkey or a combination
  • 1/2 cup plain dry bread crumbs or matzo meal
  • 1 large egg
  • 2 tablespoons vegetable oil
  • 12 chicken wings, cut into sections
  • 3 medium onions, sliced
  • 1 pound chicken gizzards
  • 1 tablespoon paprika
  • salt and freshly ground black pepper to taste
  • 2 cups water, approximately
  • 4 medium all purpose potatoes, peeled and cut into small chunks, optional
  • 4 carrots, cut into chunks, optional
  • 10 ounces coarsely cut mushrooms, optional


In a large bowl, combine the chopped meat, bread crumbs and egg and mix thoroughly. Shape the meat mixture into 1-1/2 inch balls and set aside. Pour the vegetable oil into a large saute pan over medium heat. Cook the meatballs for 6-8 minutes, turning them occasionally, or until lightly browned on all sides. Remove the meatballs from the pan and set aside. Add the wings and cook them for 6-8 minutes, turning them occasionally, or until lightly browned. Remove the wings from the pan and set aside. Add the onions and gizzards to the pan and cook, stirring occasionally, for 4-5 minutes or until golden and softened. Return the wings and meatballs to the pan. Sprinkle the ingredients with the paprika, salt and pepper. Toss the ingredients gently to season the meats evenly. Pour in 1-1/2 cups water. Turn the heat to low, cover the pan and cook for 35-40 minutes. Add the optional ingredients if desired, cover the pan and cook an additional 50-60 minutes. Check the pan occasionally and turn the ingredients gently. Check fluid levels and add more water if needed.

Makes 8 servings


Roasted Halibut with Cherry Tomatoes and Dill

_DSC8285.jpg

Whether you are about to mourn the end of summer or celebrate the Jewish New Year, it's the right time to take advantage of local tomatoes, still at their glorious peak-of-the-season and soon to disappear until next year.

Here's a scrumptious way. Sure, you can make this dish anytime, but it's so much better with end-of-summer tomatoes.

This easy, easy recipe takes almost no time to prepare, is quick to cook and can be set up to the point of actual cooking several hours ahead.

Perfect for last minute dinners. Busy week dinners. Rosh Hashanah fish course.


Roasted Halibut with Cherry Tomatoes and Dill

  • 1-1/2 to 2 pounds halibut
  • 2 tablespoons olive oil
  • salt and freshly ground black pepper to taste
  • 2 cups halved cherry tomatoes
  • 2 tablespoons chopped fresh dill
  • 2-3 scallions or 3-4 tablespoons chopped red onion

Preheat the oven to 450 degrees. Place the fish in a baking dish. Brush the olive oil over the surface of the fish. Sprinkle with salt and pepper to taste. Scatter the tomatoes on top of the fish. Scatter the dill and scallions on top. Roast the fish for 15-18 minutes, depending on thickness of the fish, or until just cooked through.

Makes 4 servings

Mamaliga with Creamy Mushroom Ragout

Today is one of those days when I don't feel like eating meat. I don't even feel like removing the grill cover to cook up an easy burger or hot dog. I don't want fish or chicken either. It's just one of those days.

But I do want something substantial, filling and savory. For this kind of mood, nothing fills the bill better than something with mushrooms. 

Mushroom Pot Pie is one of our family favorites. But today I decided on a creamy mushroom ragout served over cooked cornmeal -- also known as polenta, but which my grandma called mamaliga (and my father called cornmeal mush).

Bonus: it can be reheated either in the microwave or preheated 350 degree oven.

Dinner's done. Maybe some sliced tomatoes on the side.


Mamaliga with Mushrooms in Sour Cream Sauce

  • 4 cups water
  • 1 cup cornmeal
  • salt, approximately one teaspoon
  • 3 tablespoons butter
  • 2 tablespoons olive oil
  • 1 medium onion, chopped
  • 1-1/2 pounds mixed fresh mushrooms, sliced
  • 2/3 cup dairy sour cream or plain, Greek style yogurt
  • freshly ground black pepper to taste
  • 3 tablespoons chopped fresh chives

Pour the 4 cups of water into a large saucepan and bring to a boil over high heat. Gradually add the cornmeal and about one teaspoon salt, while also stirring constantly. Continue to cook over medium-high heat, stirring constantly, for about 15 minutes or until the mixture is thick. Stir in 2 tablespoons butter. Cover the pan and set it aside. Heat the olive oil and the remaining one tablespoon of butter in a sauté pan over medium heat. When the butter has melted and looks foamy, add the onions and mushrooms and cook, stirring occasionally, for 8-10 minutes or until the vegetables are tender and all the juices have evaporated from the pan. Stir in the sour cream, sprinkle with salt and pepper to taste and remove from the heat. Spoon the mamaliga into serving bowls, spoon the mushrooms on top, sprinkle with chives and serve.


Makes 4 servings


How to Make Fish More Appealing

My Mom, good cook though she was, was not an ace at making fish. Her broiled salmon was delicious, but beyond that, well, .... let's just say she didn't love fish, didn't want to experiment with it and so we didn't have a lot of fresh fish for dinner.

Same for my grandmother, except for once a summer when my father, uncles and assorted other men would go for their once a year fishing trip and come back with either mackerel or bluefish.

Now, everyone knows that if you come from a family that doesn't particularly love fish, mackerel and bluefish are not the ones you would pick for the once-in-a-while fish dinner. But that's what the men caught during the summer (when we would always be at my grandmother's place).

My grandma did her best with what -- and who -- she had to work with. I was -- and remain -- a devout fish lover, along with my cousin Leslie, but we were the only ones. 

For everyone else, grandma had to be creative.  Even as a child I realized that what she did to make the fish more palatable was to smother it with other ingredients that would not only distract from the strong flavor of those oily fish, but also make the dish more attractive so that we would all want to eat the dish placed in front of us.

It worked every summer. Everyone regarded that fish dinner as a winner.

You can make this recipe for the darker, oilier fish such as mackerel and bluefish, but it's also wonderful with plain old mild cod, which most people prefer.

Roasted Cod

  • 4 6-8 ounce chunks of fresh cod
  • 1 tablespoon vegetable oil
  • salt and freshly ground black pepper to taste
  • 2 large cloves garlic, finely chopped
  • 1 large shallot, chopped
  • 4 plum tomatoes, chopped
  • 12 pitted olives (green or black), cut in half
  • 2 tablespoons chopped parsley
  • 2 tablespoons chopped fresh dill
  • 1/2 cup matzo meal or bread crumbs


Preheat the oven to 450 degrees. Place the fish in a lightly oiled casserole dish. Pour the vegetable oil over the fish chunks and rub to spread the oil on the top surface of each chunk. Sprinkle with salt and pepper. Scatter the garlic and shallot on top. Scatter the plum tomatoes and olives on top, then sprinkle with parsley and dill. Finally, scatter the matzo meal or bread crumbs on top. Roast for 12-15 minutes, depending on the thickness of the fish, or until the fish is cooked through.

Makes 4 servings

Mashed Potato, Kale and Feta Cheese Pancakes

See these pancakes? I actually try not to make them too often, because, like the old Lay's ad said: you can't eat just one.

These pancakes are soft and creamy inside, fabulously crispy on the surface and have an earthy, vaguely mineral-y potato flavor plus the tang of cheese. They are among my favorite things to eat ever

Also, they are perfect for Passover because they contain matzo farfel, not bread or bread crumbs. 

They are perfect for Hanukkah when you might want a different kind of latke.

They are perfect for vegetarian meals anytime.

They are perfect as a brunch dish for company because you can make them ahead and reheat (preheat oven to 425 degrees F).

Try one! And maybe freeze the rest to keep yourself from overeating. They store nicely in the freezer (wrapped twice in plastic) for up to two months.

The recipe comes from my book, The Modern Kosher Kitchen. The photo is courtesy Glenn Scott Photography.

Mashed Potato, Kale and Feta Cheese Pancakes

  • 2 cups matzo farfel
  • 2 tablespoons olive oil
  • 1 tablespoon butter
  • 1 medium onion, chopped
  • 2 cups chopped fresh kale
  • 2 cups mashed potatoes
  • 6 ounces crumbled feta cheese
  • 1 large egg
  • salt and freshly ground pepper to taste
  • vegetable oil for frying

Place the matzo farfel in a bowl, cover with very hot water and let soak for a few minutes until soft. Drain the farfel and squeeze out as much water as possible. Return the drained farfel to the bowl. While the matzo farfel is soaking, heat the olive oil and butter in a sauté pan over medium heat. When the butter has melted and looks foamy, add the onion and cook for a minute. Add the kale, cover the pan and continue to cook, stirring occasionally, for 5-6 minutes, or until the kale has wilted. Spoon the mixture into a strainer and squeeze out as much liquid as possible from the vegetables. Add to the matzo farfel and mix ingredient s to distribute them evenly. Add the mashed potatoes, feta cheese and egg and mix ingredients thoroughly. Season to taste with salt and pepper. Heat about 1/2-inch vegetable oil in a large sauté pan over medium-high heat. Shape the potato mixture into patties and fry for 2-3 minutes per side, or until golden brown. Drain on paper towels.  

 Makes about 16-18 pancakes, 6-8 servings


Passover Rhubarb Crisp

We are big rhubarb fans in our family. And unlike many rhubarb lovers, we like the stuff on the sour side, without the sugar overload. It's the way we got used to it as kids, the way my Mom made it.

I suppose she cut down on sweetening food as part of the need during World War II to ration sugar, and then just never went back to the old ways. In any event, she used to cook rhubarb all the time and serve it like applesauce. It was always kind of tart and wonderfully refreshing as a side dish to roasted chicken or turkey. 

Rhubarb is a natural for Passover because that's when the first of the new crop appears. You can get fresh stalks everywhere. We always have so many side dishes at our Seder that I don't cook it up the way my Mom did, to serve with dinner. But it does make a good dessert. Like in this recipe for Rhubarb Crisp.

I usually add a little less sugar than the recipe calls for, just because that's the way we like it. You can cut the sugar to 1/2 cup OR, if you have a real sweet tooth, add a bit more.

You can make this dessert a day or so ahead. It's a nice choice after a typical meat Seder meal, because it's parve (unless you switch to butter), but is also a good choice throughout the holiday.


PASSOVER RHUBARB CRISP

  • 2 pounds rhubarb

  • 3/4 cup sugar

  • 2 tablespoons potato starch

  • 1 teaspoon grated lemon peel

  • 3/4 teaspoon cinnamon

  • 2 cups crumbled coconut macaroons

  • 1/2 cup chopped almonds

  • 1/3 cup matzo meal

  • 1/4 cup brown sugar

  • 1/4 coconut oil or butter

Preheat the oven to 375 degrees. Cut the rhubarb into 1/2-inch thick slices and place in a bowl. Add the sugar, potato starch, lemon peel and cinnamon and toss the ingredients to distribute them evenly. Spoon the mixture into a baking dish. In a bowl combine the coconut macaroons, almonds, matzo meal and brown sugar. Add the coconut oil and work it into the dry ingredients until the mixture is crumbly. Place on top of the fruit. Bake for 40 minutes or until the crust is golden brown.

Makes 8-10 servings

A Vegetarian, Gluten Free Side Dish

_DSC6681.JPG

My freezer broke last week.

Fortunately I still have my original, trusted, reliable old freezer from the stone age in my basement. I transferred the meat and soups, casseroles and other goodies that I had cooked. Anything that could be saved.

Unfortunately quite a lot wasn't worth saving, so I threw away lots of stuff. Half a cake that no one liked and made me wonder why I had saved it anyway. Breads with 2 slices left that were stuck together with ice crystals. A chicken leg, freezer burned because the plastic wrap had fallen off. Like that.

It felt so good to get that freezer empty and clean, ready for the repairman, that I started on the cabinets. I discarded anything out of the sell-by date; open boxes of cereal, crackers that I had placed in plastic bins who knows when, 2/3 eaten jars of peanut butter. Like that.

I also cooked some of the stuff that was still good.

The sorghum for example.

In case you haven't cooked with it or know what it is, sorghum is a cereal grain. Easy to use, tasty and gluten free. I had tried some at the Wondergrain booth at the Fancy Food Show last year and then used some for stuffing. I love the texture and the fact that it is so versatile I can use it for so many different kinds of dishes.

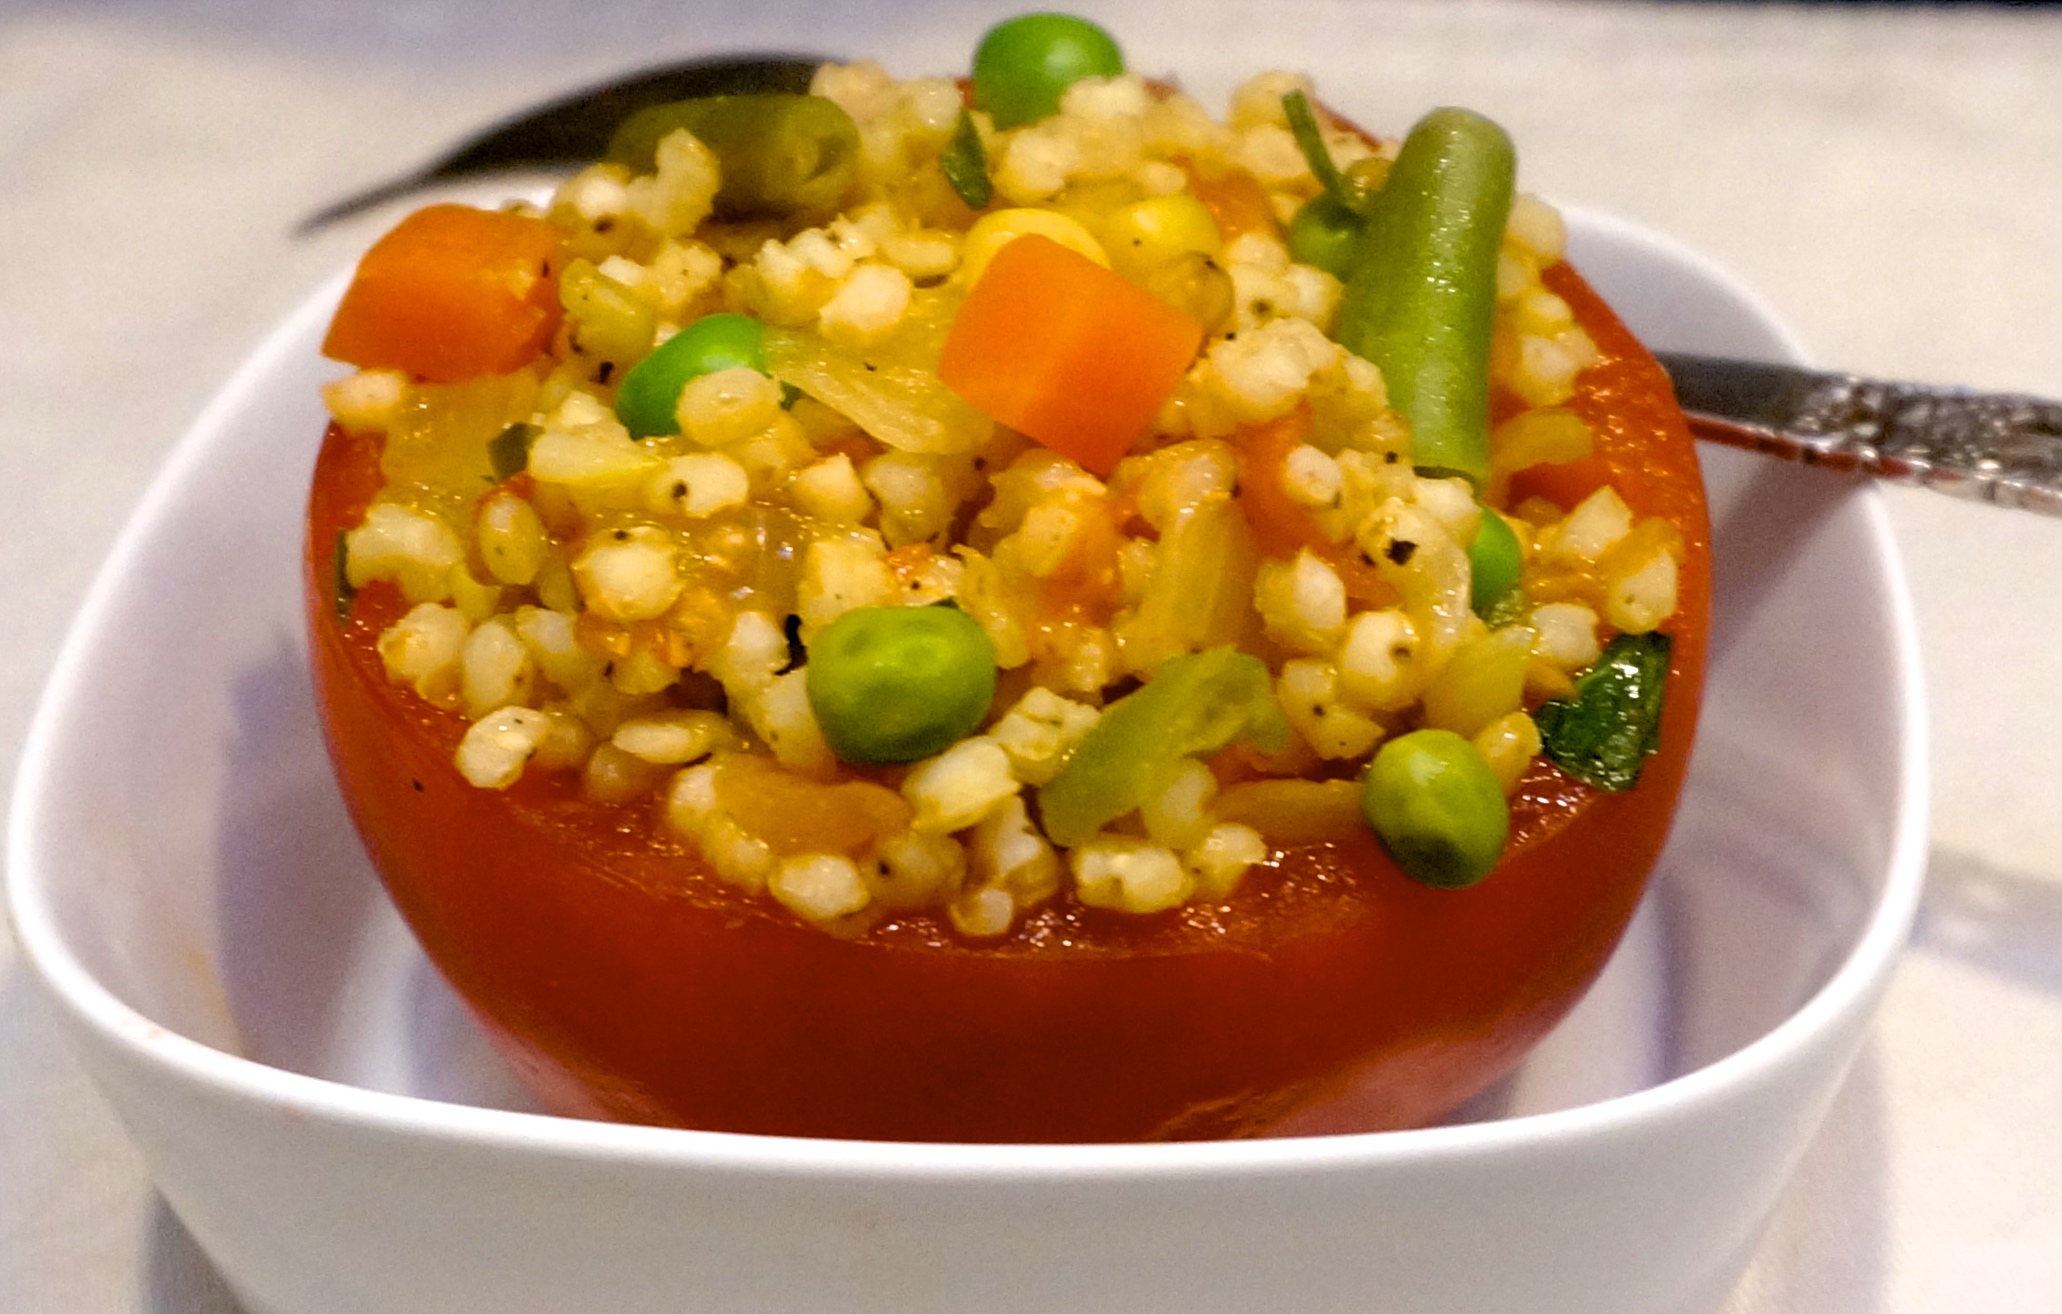
Last night I mixed it with vegetables to use as a side dish with dinner. Not only did it taste good, it was colorful and lovely to look at on the plate, which always makes dinner much nicer. Early in the day I stuffed the sorghum-veggie mix into hollowed out tomatoes and baked them several hours later, so this is a good make-ahead dish.

Sorghum Stuffed Tomatoes

  • 8 large tomatoes
  • 1 cup sorghum grain
  • 3 cups vegetable stock and/or water
  • 3 tablespoons vegetable oil
  • 2 medium onions, sliced
  • 1 small chili pepper, deseeded and chopped
  • 1 large clove garlic, chopped
  • 1 cup chopped cooked vegetables
  • 2 tablespoons chopped fresh parsley
  • salt and freshly ground black pepper to taste


Slice a cap off each tomato and scoop out the insides. Chop the insides and set aside. Place the hollowed out tomatoes upside down on paper towels to drain off excess liquid. Place the sorghum in a saucepan, pour in the stock and bring to a boil over high heat. Reduce the heat to low, cover the pan and cook for 35-40 minutes or until the sorghum is tender and the liquid has been absorbed. (If the liquid has not been absorbed and the grains are tender, strain off the liquid.) Set the cooked sorghum aside. Preheat the oven to 375 degrees. Heat the vegetable oil in a sauté pan over medium heat. Add the onions and cook, stirring occasionally, for 3-4 minutes or until slightly softened. Add the chili pepper, garlic and tomato insides and cook for 1-2 minutes. Add the cooked vegetables and stir them in. Spoon the vegetables and any cooking fluids into the pan with the sorghum. Stir to distribute the ingredients evenly. Stir in the parsley and salt and pepper. Place the tomatoes on a baking sheet. Spoon the ingredients into the hollowed out tomatoes. Bake for about 20 minutes or until hot.

Makes 8 servings