dessert

Pear Torte

Creative People aren’t usually creative just about one thing. They think in unusual and varied ways about a lot.
Like my niece Rachel, who writes children’s books (such as Sometimes I’m Bombaloo and Justin Case) and young adult fic…

Creative People aren’t usually creative just about one thing. They think in unusual and varied ways about a lot.

Like my niece Rachel, who writes children’s books (such as Sometimes I’m Bombaloo and Justin Case) and young adult fiction (such as Lucky and Brilliant).

She decided she wanted to bake the Plum Torte recipe I posted a few months back. But plums aren’t in season now. So she made the cake with pears, and added a little vanilla to the batter, because pears and vanilla, well, it’s a perfect duo.

So here’s her recipe. We had this as one of the MANY desserts on Saturday night at her mother and father’s (my brother) annual Hanukkah party. It was DE-LISH!

Pear Torte

1/2 cup unsalted butter

3/4 cup plus one tablespoon sugar

1 cup all-purpose flour

1 teaspoon baking powder

1 teaspoon finely grated lemon peel

1/4 teaspoon salt

2 large eggs

1 teaspoon vanilla extract

2 ripe pears, unpeeled, cored, sliced

lemon juice (about one tablespoon)

cinnamon (about 1/4 teaspoon)

Preheat the oven to 350 degrees. Lightly grease a 9-inch springform pan. In the bowl of an electric mixer, cream the butter and 3/4 cup sugar on medium speed for 3-4 minutes or until creamy and well blended. Add the flour, baking powder, lemon peel and salt and mix briefly to blend ingredients slightly. Add the eggs and vanilla extract beat at medium speed for 2-3 minutes or until smooth and creamy. Spoon the batter into the prepared springform pan. Arrange the pear slices on top, pressing them slightly into the batter. Sprinkle the cake with the remaining tablespoon sugar. Squeeze some lemon juice over the cake and sprinkle with cinnamon. Bake for 55-60 minutes or until browned, set and crispy. Let cool. Makes 8 servings

Gingersnaps

IMG_5640.jpeg

Does Santa bring Hanukkah gifts?

A few years ago I was driving my granddaughter Lila home from preschool and I heard her tiny little voice say “you know grandma, I want Santa Claus to get me something for Hanukkah. He’s coming to town, don’tcha know?”

Wow, how do you keep yourself from chuckling at a statement like that?

And also, what do you say to a 2-1/2-year old kid from a Jewish family that doesn’t celebrate Christmas?

And also, I’m only the grandma. This is best left to the parents isn’t it? The old Jewish December Dilemma about what to tell your children about why we don’t have a tree or stockings or even Santa Claus.

But Lila’s question was a little different. She already knew that her family celebrates Hanukkah, not Christmas. She just placed Santa into the event. You know, the menorah, the latkes, the driedels and Santa.

I know all these issues get worked out in every family. Parents tell their children about Hanukkah/Christmas in the way that’s comfortable for them and at the age they feel it appropriate for their kids. I was just surprised it came up this way with Lila and at that age, because I suspected her parents hadn’t gotten to that yet.

When I asked Lila who told her that Santa comes on Hanukkah she said it was her nanny, who is Hindu.

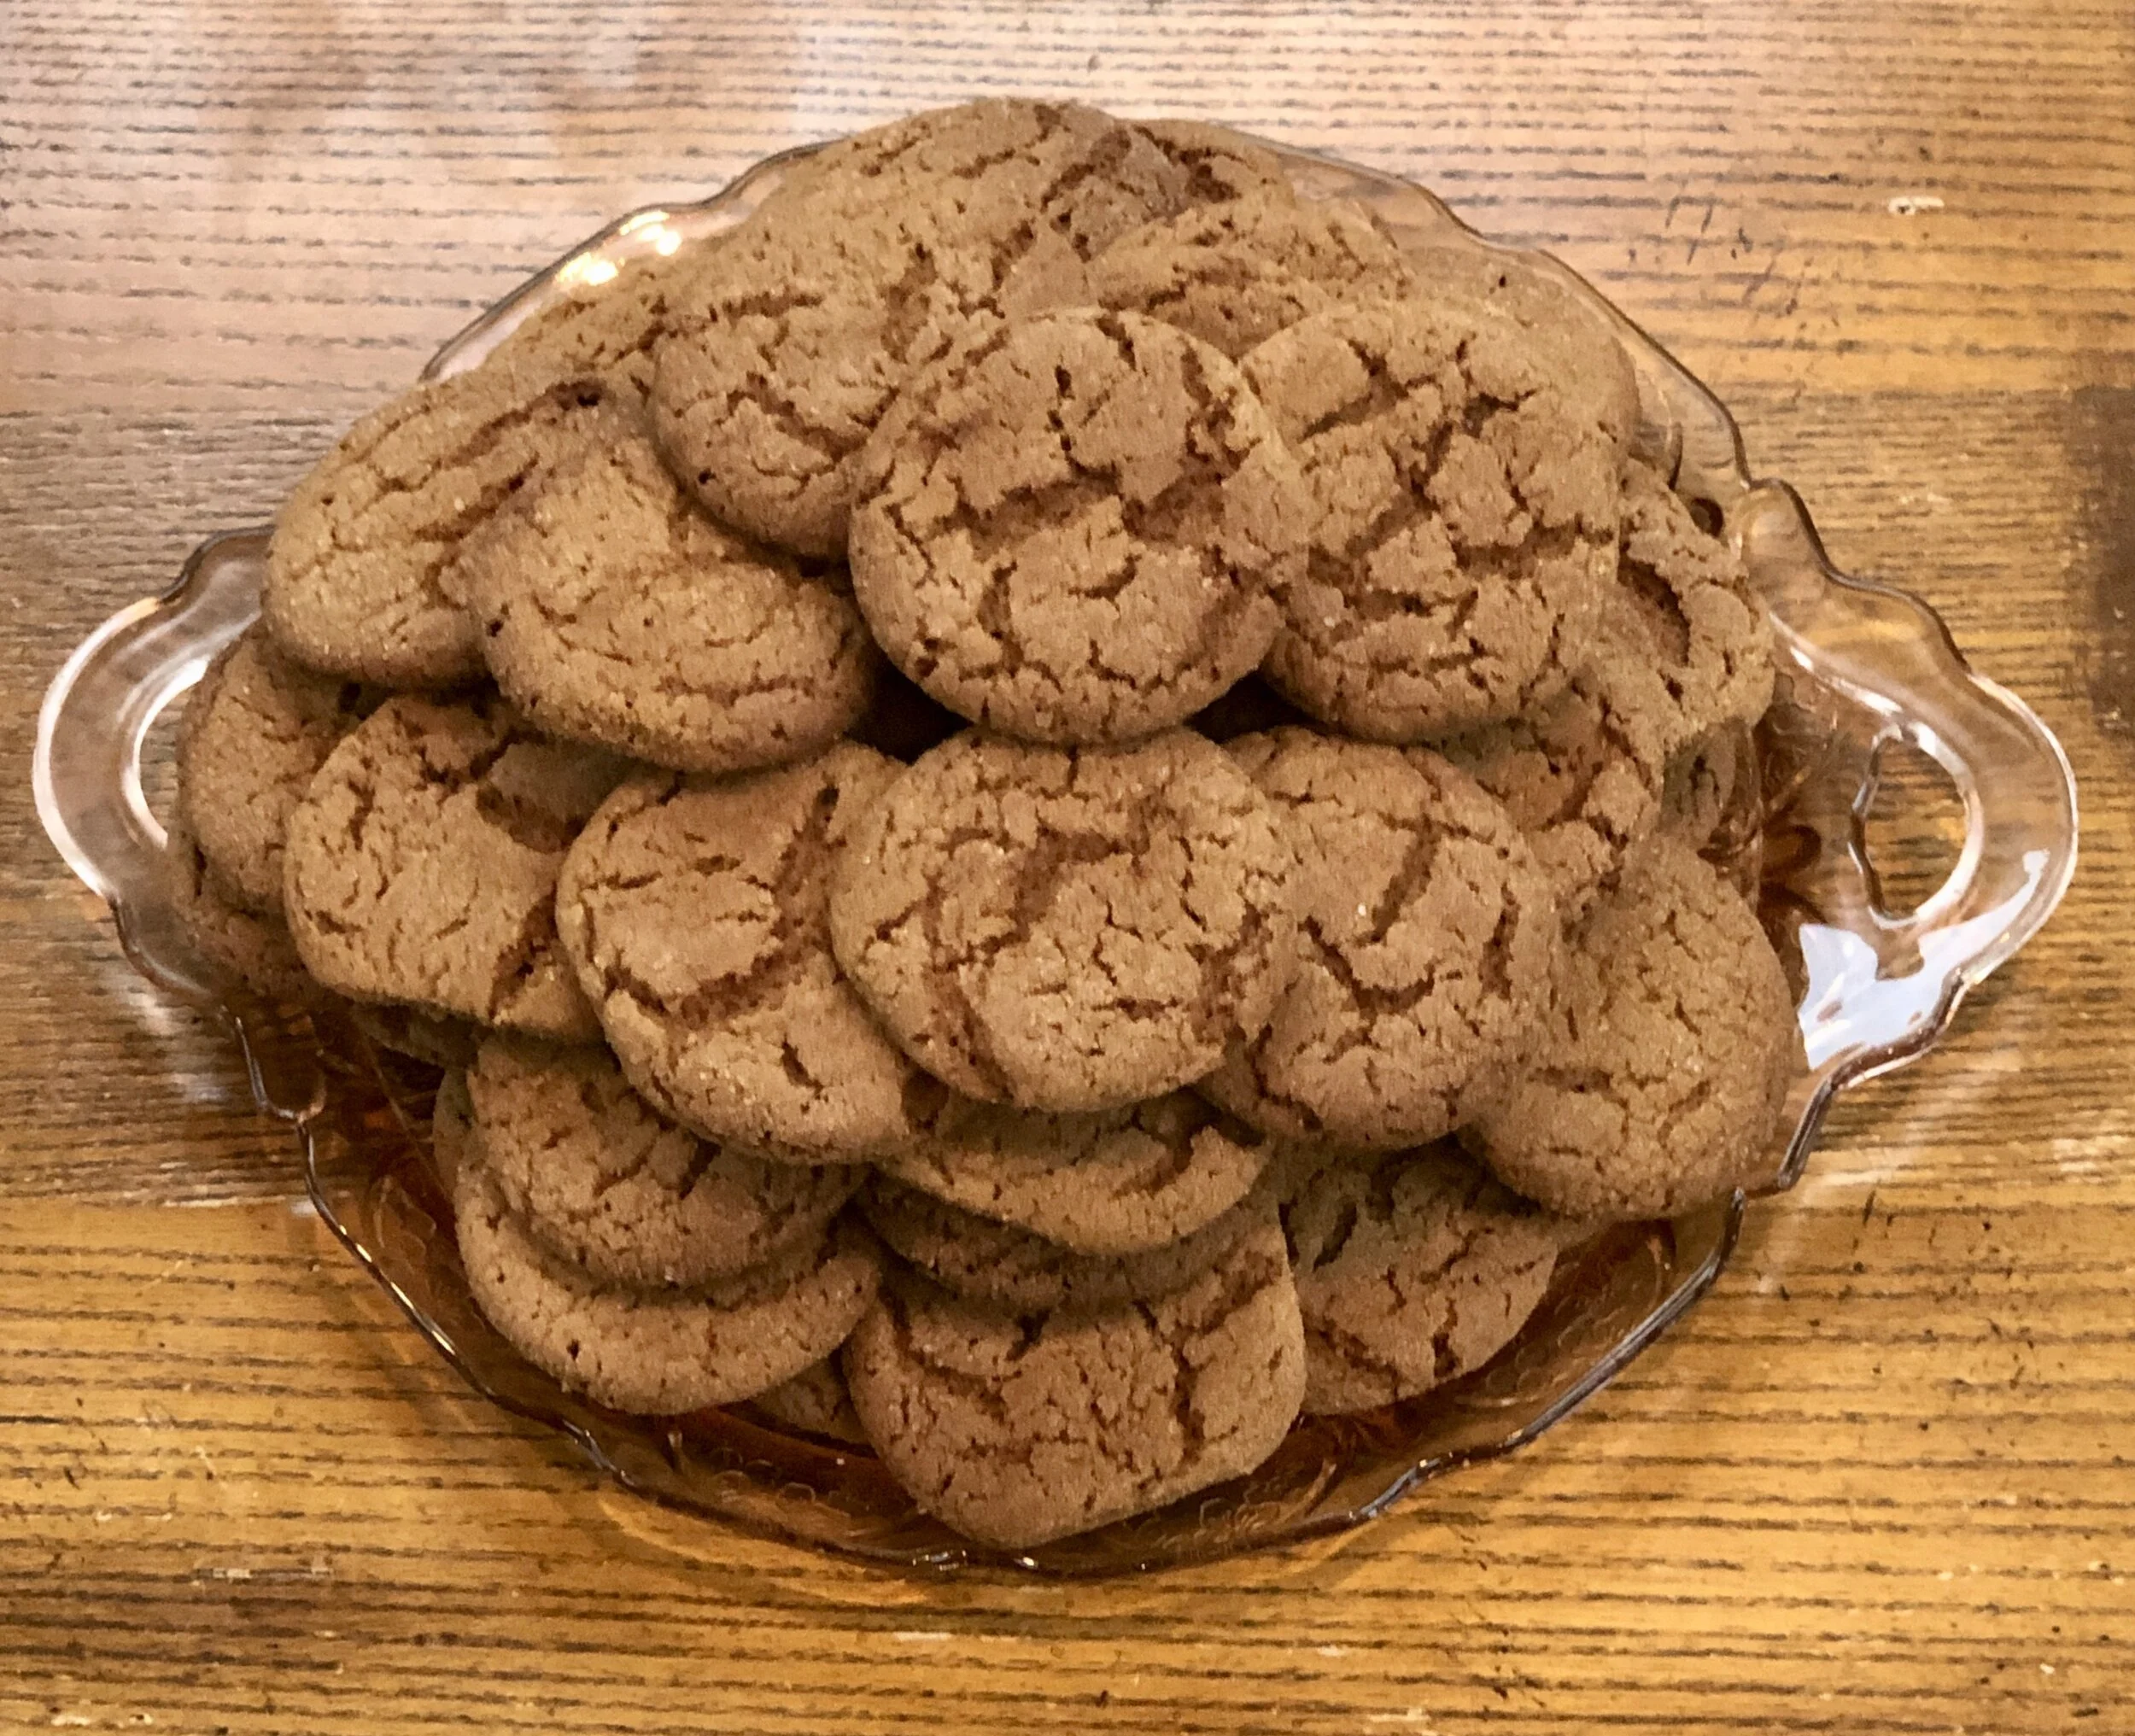
Anyway, it’s 3 years later and all those issues are behind us. Lila and all my other grandchildren are thrilled with the 8-day Hanukkah celebration with its candles and chocolate coins and potato pancakes and gifts. And cookies too. We bake cookies at my house. Not to leave by the fireplace for Santa, but for us to all enjoy with a glass of milk.

Gingersnaps

  • 1 cup vegetable shortening

  • 1 cup sugar

  • 1 egg

  • 1/4 cup molasses

  • 2 cups all-purpose flour

  • 1 tablespoon baking soda

  • 1/4 teaspoon salt

  • 1 teaspoon ground cinnamon

  • 3/4 teaspoon ground ginger

  • 3/4 teaspoon ground cloves

  • 1/8 teaspoon grated nutmeg

  • 3 tablespoons sugar

Preheat the oven to 350 degrees. Lightly grease a cookie sheet. Combine the shortening and sugar in the bowl of an electric mixer and beat at medium speed until well combined. Add the egg and molasses and beat until well blended. Add the flour, baking soda, salt, cinnamon, ginger, cloves and nutmeg and beat until the dough is well blended, smooth and uniform in color. Take off small pieces of dough and shape into small balls about one-inch in diameter. Roll the balls in the remaining sugar to coat the surface. Place the balls on the prepared cookie sheet, leaving an inch space between each ball. Bake cookies for about 12 minutes or until the cookies have spread and are flat and crispy, with lines on the surface. Repeat with remaining dough.

Makes about 6 dozen

Tagged: gingersnapscookiesHanukkah

Chocolate Truffles

DSC09699.jpg

Chocolate instead of broccoli to stay healthy?

No, not really. But in a recent study the results indicated that eating chocolate might cut a woman’s risk for stroke. Read about it here.

This is not the first time I’ve heard that chocolate is healthy (it has flavanoids, which have anti-oxidant properties, which in turn help lower LDL (bad) cholesterol).

But this is the one of the only times I’ve heard someone caution women not to over-interpret the results. Like, do not substitute chocolate for broccoli. And a cardiologist who was interviewed said that although chocolate may be good for you, maybe the study results would have been similar if they used apple skins or grapes.

I’ve always wondered about some of these studies. I wonder whether you can prove whatever you want depending on how you go about the study.

Well, I am no scientist, so I don’t know.

But I do remember, many years ago, when the information regarding dietary fat was still in its infancy and Nabisco came out with SnackWells, the so-called “healthy” cookies because they were lower fat. And people started eating SnackWells because they thought it was okay. And judging from the number of people I met (and watched at the supermarket) who ate boxes and boxes of those cookies, most didn’t seem to realize that it’s way too many calories and that it might be more harmful than if you ate a butter cookie or two.

So the broccoli warning makes sense.

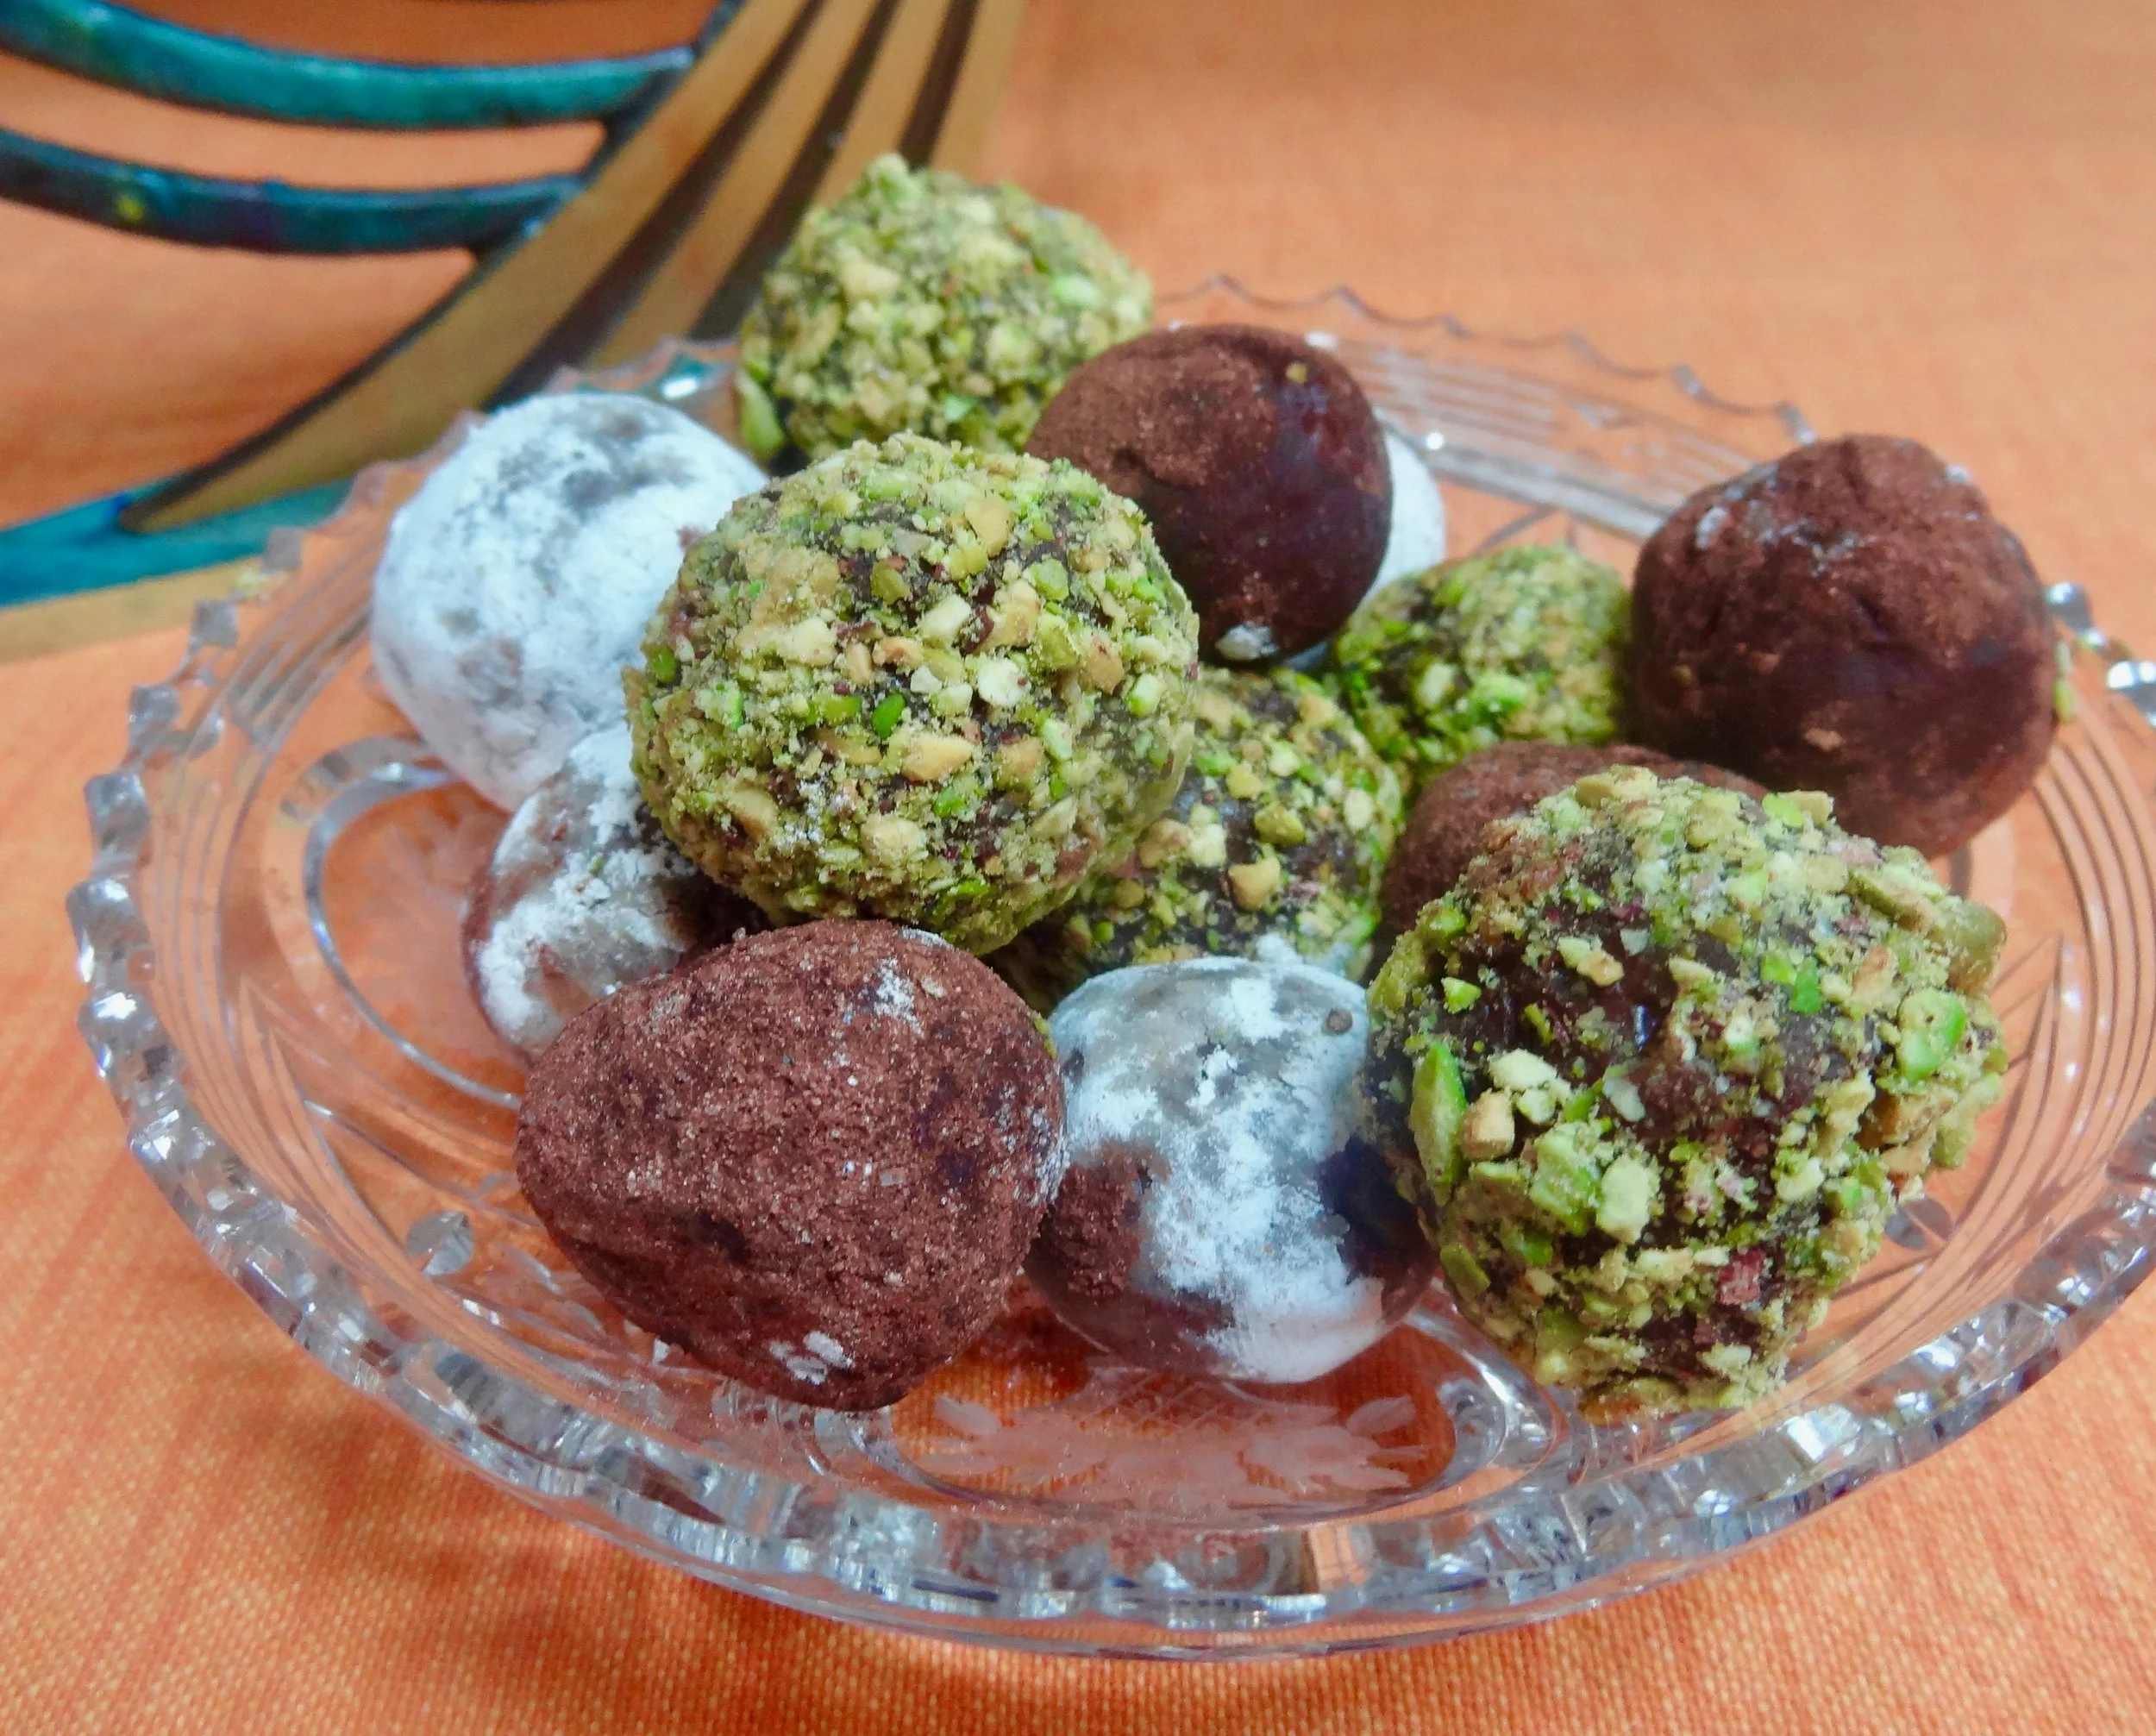
But if you want to eat something delicious and chocolate-y — for your health — try these truffles. They are amazingly easy to make and you can give them away as gifts so they’re good for the upcoming holiday season.

But don’t eat the whole batch at once.

Chocolate Truffles

  • 1/2 pound semisweet or bittersweet chocolate
  • 3/4 cup heavy cream
  • 4 teaspoons brandy or rum or 1 teaspoon vanilla extract
  • 5 tablespoons butter at room temperature
  • 1/2 cup unsweetened cocoa powder, sprinkles, toasted coconut, ground nuts, etc. (approximately)

Chop the chocolate in a food processor into small bits. Heat the cream over medium heat until it is hot and bubbles form around the edges of the pan. With the processor on, pour in the cream through the feed tube and process  until well blended (you may have to scrape the sides of the bowl once or twice). Refrigerate the mixture for 30 minutes. Add the brandy or rum and the softened butter and blend them in thoroughly. Spoon the mixture into a bowl and refrigerate for at least one hour or until the mixture has firmed enough to form a soft “dough.” Take small pieces of the dough and shape into small balls. Place the balls on waxed paper or aluminum foil on cookie sheets. Refrigerate until firm, at least 30 minutes. Roll the balls in cocoa, sprinkles, etc.

Makes about 3 dozen. 

Honey Cookies

Still thinking honey. This time, more or less, a sweet little treat to greet people when they come to my house for the Break-the-fast on Saturday night. I’ve noticed over the years that when people haven’t eaten for a long time they can’t just go at it and shovel in food. They need to nibble first. 

For a few years I served homemade hummus as a starter food. But somehow so many people went right over to the dessert trays and took a cookie or two that now I keep the hummus for the main meal buffet and have a plate of sweet cookies available before we actually have dinner.

My friend Susan always brought cookies, but as I mentioned, she isn’t coming this year. So, I’ll serve crescent cookies and plum torte. My friend Barbara’s daughter-in-law Karen will bring chocolate chip cookies and my daughter Gillian will bake an apple cake.

But because I also still have honey on my mind, in hopes for a sweet new year, I will also bake honey cookies today.

Honey Cookies

1/2 cup melted butter or margarine, cooled

1/4 cup honey

1/4 cup sugar

1 teaspoon baking soda

1 large egg yolk

1/2 teaspoon grated fresh orange peel

1/2 teaspoon vanilla extract

1/4 teaspoon salt

1-1/2 cups all-purpose flour

1 large egg white

crystal sugar

Preheat the oven to 350 degrees. Lightly grease a cookie sheet. In the bowl of an electric mixer combine the melted butter, honey, sugar, baking soda, egg yolk, orange peel, vanilla extract and salt. Beat at medium speed for about one minute or until the ingredients are thoroughly blended. Add the flour and blend it in to make a soft dough. Pinch off heaping teaspoons of dough and roll them on a floured surface to make balls about 1-inch in diameter. Beat the egg white until it is thick and foamy. Dip the balls into the egg white to coat the entire surface. Press the balls on one side in some crystal sugar (or sprinkle the crystal sugar on top). Place the balls (sugared side up) on the cookie sheet, leaving some space (about an inch) between them. Bake for 8-10 minutes or until golden brown. Let cool for 10 minutes, then place on a cookie rack to cool completely. Makes about 36

Another Plum Torte

Another recipe for Plum Torte?Yeah. Why not?! Because it’s one of the best of the best cakes to eat. No, don’t say you like chocolate cake or coconut cake better. Plum Torte serves an entirely different purpose. You can’t compare it to any othe…

Another recipe for Plum Torte?

Yeah. Why not?! 

Because it’s one of the best of the best cakes to eat. No, don’t say you like chocolate cake or coconut cake better. Plum Torte serves an entirely different purpose. You can’t compare it to any other cake. It’s its own thing.

I have no idea why Plum Torte is a typical Rosh Hashanah-Yom Kippur Break-the-Fast dessert. Maybe it’s because those lovely little Italian prune plums needed for the recipe are in season at about the same time as the Jewish High Holidays. All I know is that this was one of THE desserts for the holidays even when I was a little girl.

There are dozens of recipes for it. Plum Torte is one of those recipes like apple pie. Everyone who bakes one does a little something different. The New York Times used to print their tried-and-true recipe every September. I’ve made that one and it is quite good. This one is even better. I just made two to freeze and reheat for my annual Break-the-Fast Saturday night:

Plum Torte

  • 1/2 cup unsalted butter

  • 3/4 cup plus one tablespoon sugar

  • 1 cup all-purpose flour

  • 1 teaspoon baking powder

  • 1/2 teaspoon finely grated lemon peel

  • 1/4 teaspoon salt

  • 2 large eggs

  • 15 prune plums, pit removed, quartered

  • lemon juice (about one tablespoon)

  • cinnamon (about 1/4 teaspoon)

Preheat the oven to 350 degrees. Lightly grease a 9-inch springform pan. In the bowl of an electric mixer, cream the butter and 3/4 cup sugar on medium speed for 3-4 minutes or until creamy and well blended. Add the flour, baking powder, lemon peel and salt and mix briefly to blend ingredients slightly. Add the eggs and beat at medium speed for 2-3 minutes or until smooth and creamy. Spoon the batter into the prepared springform pan. Arrange the plum quarters on top, pressing them slightly into the batter. Sprinkle the cake with the remaining tablespoon sugar. Squeeze some lemon juice over the cake and sprinkle with cinnamon. Bake for 55-60 minutes or until browned, set and crispy. Let cool.

Makes 8 servings


Almond/Hazelnut Crescent Cookies

My Break-the-fast plans have changed. One of my friends, the woman who always brings dessert, isn’t able to come this year.Guess what that means?Yep. Dessert’s on me. Okay, my friend Barbara just offered her daughter-in-law’s services for some …

My Break-the-fast plans have changed. One of my friends, the woman who always brings dessert, isn’t able to come this year.

Guess what that means?

Yep. Dessert’s on me. 

Okay, my friend Barbara just offered her daughter-in-law’s services for some chocolate chip cookies. Everybody likes those so I said a quick yes.

I would love some homemade rugelach but don’t think I have time to make those this year, so I’m going to make a couple of plum tortes and also these fabulously rich and tender almond crescents (you can use hazelnuts), which melt in your mouth and are completely freezable (so I can actually do that today! Hurrah.

Almond/Hazelnut Crescents

1/2 pound unsalted butter

1/3 cup confectioner’s sugar

2 large egg yolks

1/2 teaspoon salt

1-1/2 teaspoons vanilla extract

1-3/4 cups all-purpose flour

2/3 cup finely ground almonds or hazelnuts

1/2 cup confectioner’s sugar, approximately

Preheat the oven to 325 degrees. Beat the butter and 1/3 cup confectioner’s sugar in the bowl of an electric mixer set at medium speed for one minute or until fluffy and well blended. Add the egg yolks, salt and vanilla extract and blend them in thoroughly. Add the flour and nuts and blend them in thoroughly. Wrap the dough and refrigerate it for at least one hour or until well chilled. Take off pieces of dough and shape them into 3-inch long cylinders, then into crescents with tapered ends. Place the crescents on ungreased cookie sheets about one-inch apart. Bake for about 25 minutes or until they are lightly browned. Let cool. Press the cookies into the remaining confectioner’s sugar or sift extra confectioner’s sugar on top of the cookies for serving.

Makes about 30 cookies

Aunt Beck's Apple Cake; Sibling Rivalry, part 2

static1.squarespace.jpg

Sibling Rivalry Part 2

Yesterday I mentioned the apple-baking rivalry between my Mom and her sister, my Aunt Beck. It was a really fascinating thing for them to be competitive about because although my mother loved to cook and was really good at it, Aunt Beck wasn’t much of a food person and never thought of herself as much of a cook. In fact, my grandma lived with that family and she did most of the cooking.

Somehow the sisters got themselves into this apple thing though. Aunt Beck figured that her little sister could star in the kitchen but, well, with this one exception.

Aunt Beck’s family, the Cohens, raved about the apple cake.

My family, the Vails, raved about the apple pie.

To tell you the truth, both were really delicious. I make both and am in competition with no one.

So, Aunt Beck, you may not have thought of yourself as a stellar cook, but you did let me and Leslie play with all your snazzy clothes and open toe high heels and you did actually make a fabulous apple cake.

So, here’s to you. I miss you.

Your recipe:

Aunt Beck’s Famous Two-Crust Apple CakeCrust:

Crust:

  • 2 large eggs

  • 3/4 cup sugar

  • 3/4 cup vegetable oil

  • 1/4 cup orange juice

  • 4 cups all-purpose flour

  • 1 tablespoon baking powder

  • 1 teaspoon salt

  • 2 teaspoon grated fresh orange peel, optional

Filling:

  • 3 pounds tart apples, peeled and sliced

  • 1 cup sugar

  • 1/2 teaspoon cinnamon if desired

  • 2-3 tablespoons all-purpose flour

  • 2 tablespoons butter or margarine, cut into tiny pieces

Preheat the oven to 350 degrees. To make the crust, beat the eggs, sugar, vegetable oil and orange juice together in a mixer set at medium speed for 1-2 minutes or until well mixed. Add the flour, baking powder, salt and orange peel, if used, and mix until a smooth, soft, uniform dough has formed, about 2-3 minutes. Cut the dough into two pieces, one piece twice as large as the other. Press the larger piece into the bottom and halfway up the sides of a 13”x9” pan (or roll the dough and fit it inside the pan). Mix the apples, sugar, cinnamon if used, and flour together in a bowl (the amount of flour depending on juiciness of the apples) and place the mixture over the dough. Dot the surface with butter. Roll the smaller piece of dough and place it on top. Press the edges to seal them. Bake for 50-60 minutes or until well browned.

Makes 12 servings

Lily Vail's Apple Pie; Sibling Rivalry, part 1

fullsizeoutput_97f0.jpeg

Sibling Rivalry, Part I

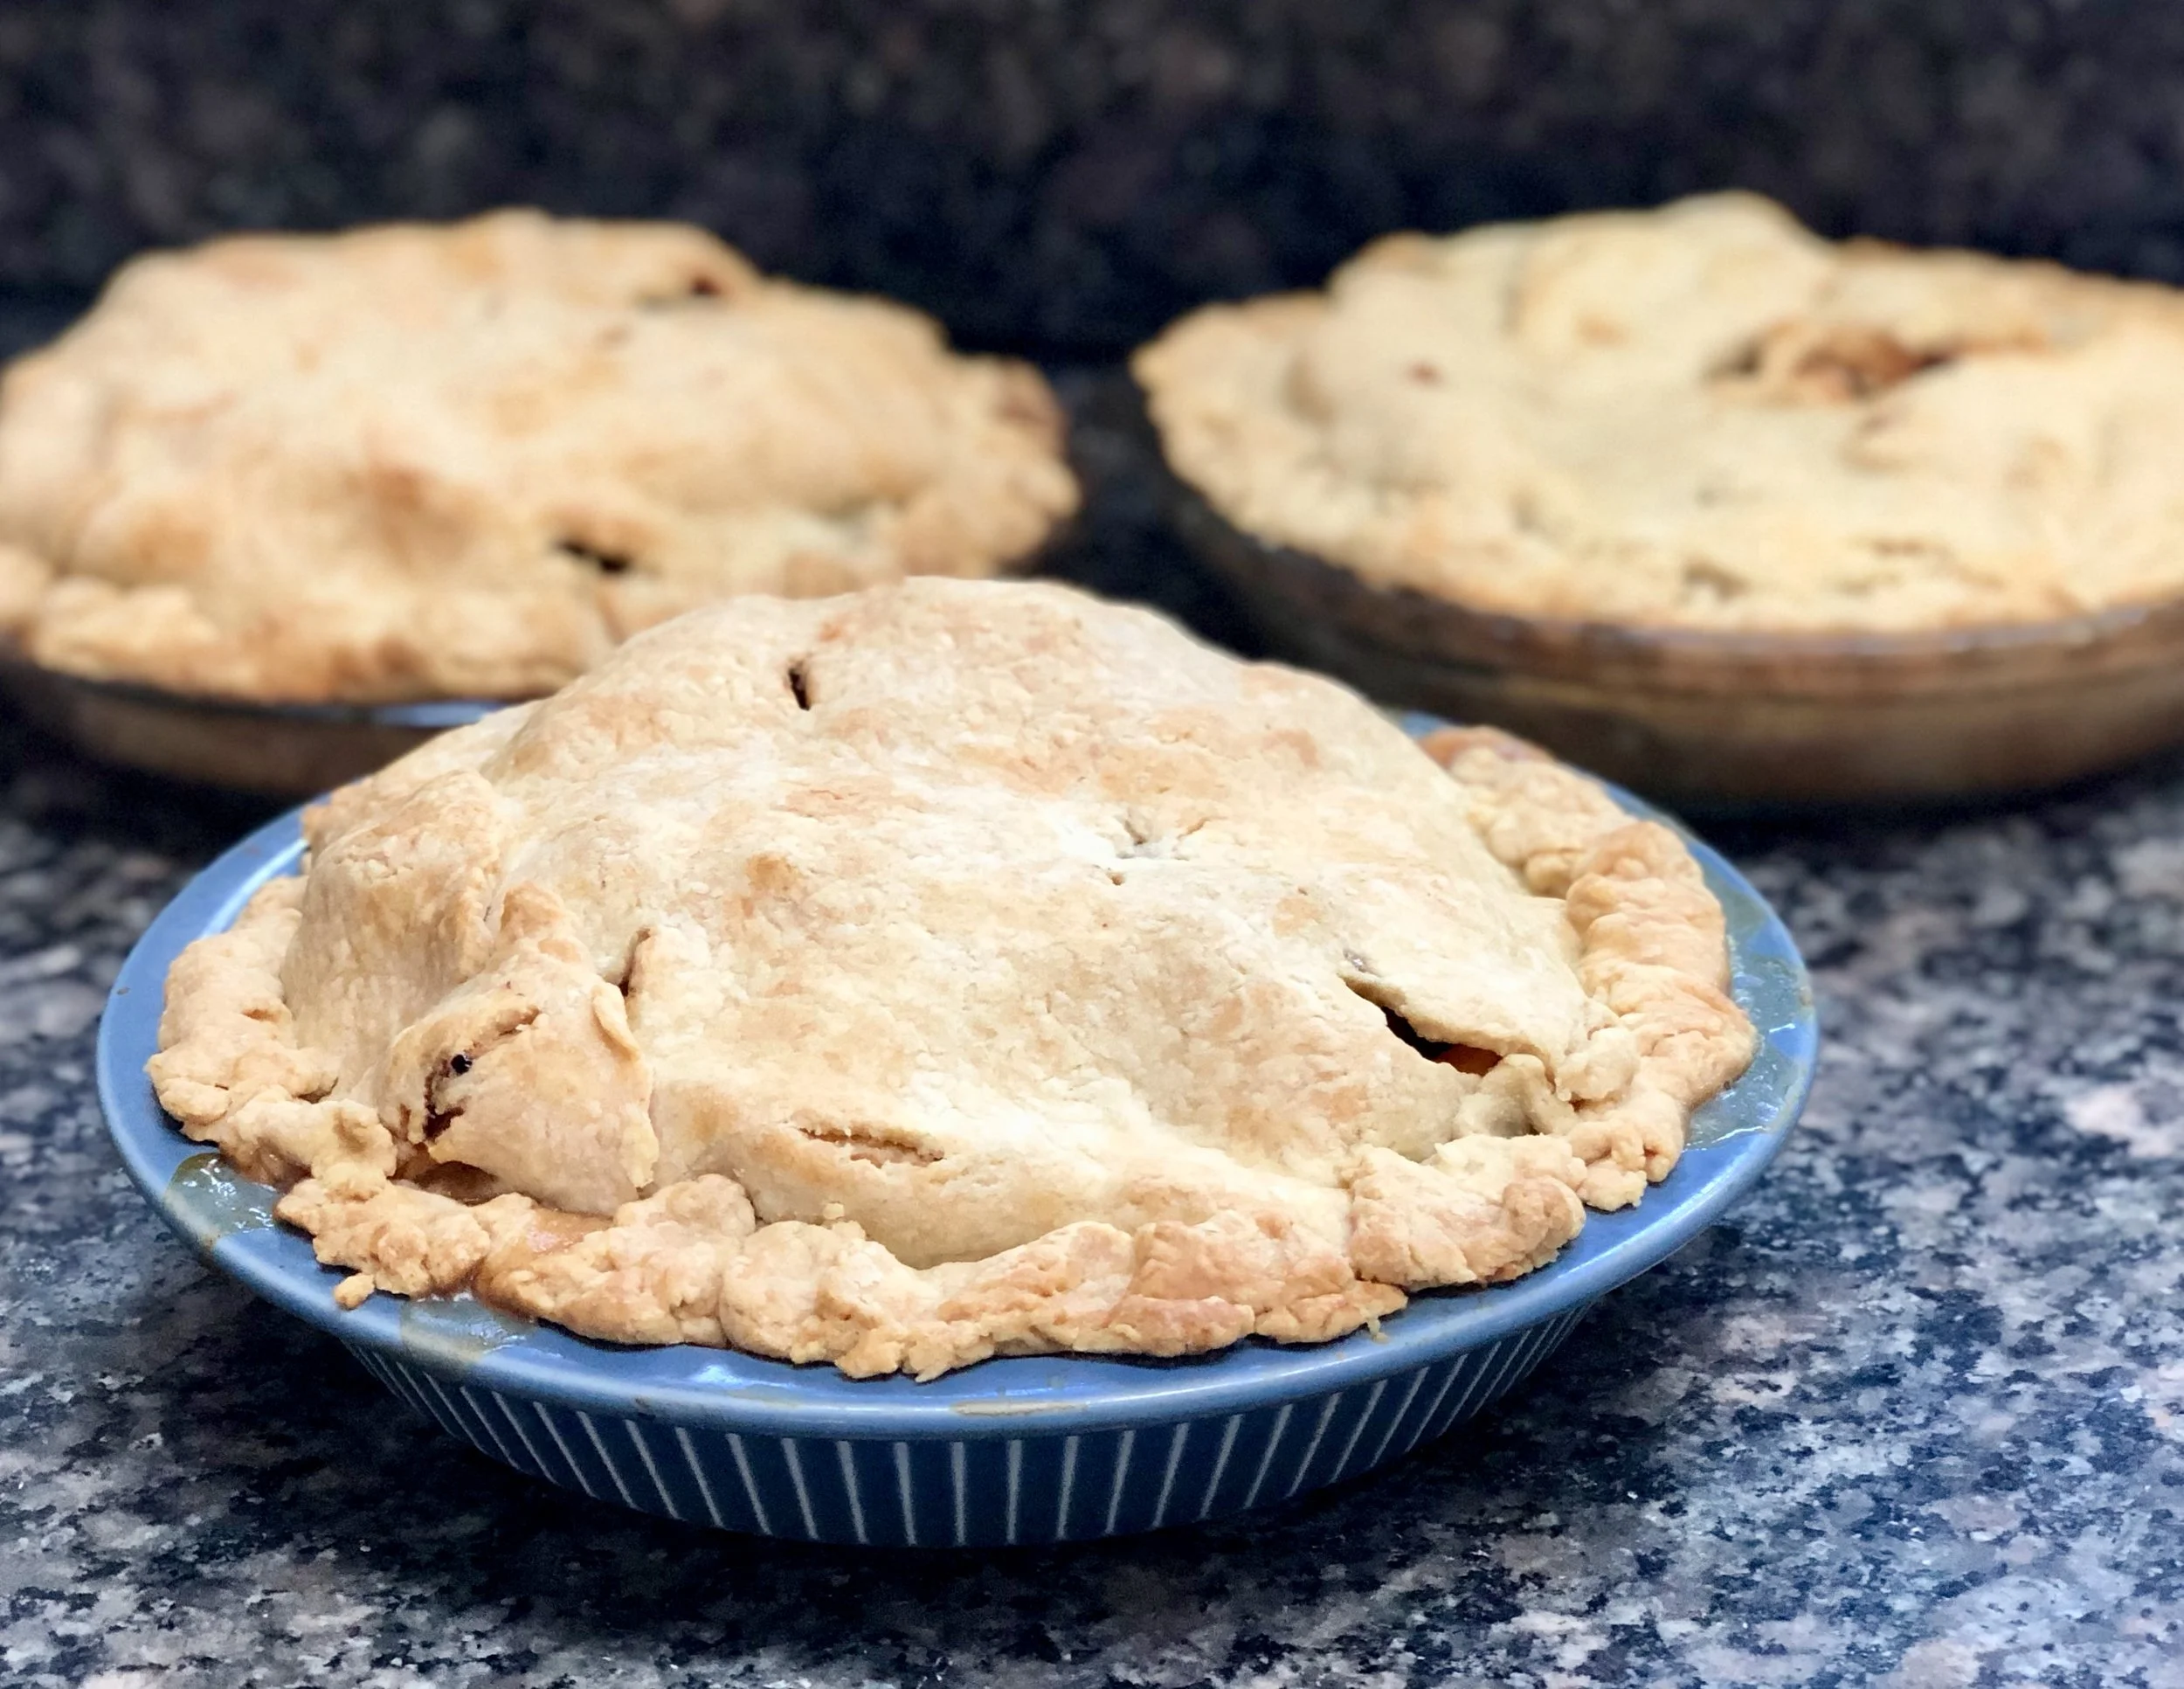
I timed last year’s apple pies perfectly. Every September I call Blue Jay Orchards in Bethel, Connecticut and order a bushel of Rhode Island Greening apples. They are one of the only orchards that I know who still grows this stupendously wonderful apple variety that is the absolutely best apple for pie no matter what anyone else, even the most expert of experts in the food business, says.

I make 12 apple pies every year and then, as the months go by, eat them down when company or my eldest grand child (who eats almost nothing but likes my apple pie) comes.

So now I have one pie left, which we will have this week because I just called Blue Jay and put in my order for this year.

When I called them last week they weren’t sure they would have the apples this year because of all the rain and hurricanes, especially Hurricane Irene. Ohmyohmyohmy, that sounded like terrible news at the time and I actually began to think about other apples I could bake into a pie.

But they told me to call back in a day or so and sure enough, when I did they told me that they have some! So I am in luck.

I never did decide on what apples I would have used.

Anyway, my Mom made apple pie every year too. Her sister, my Aunt Beck, made apple cake. And, you know, sisters will be sisters. They loved each other lots but they had this kind of apple-baking rivalry come September, when the new apples came out. They each not-so-secretly let everyone in the family know that the pie or cake was much better than the cake or pie.

And so it went. I liked both, but, being daughter to the pie baker, I learned to bake the pie.

My mother was the one who clued me into the Rhode Island Greening apples. And she showed me how to make the dough and how to cut the butter and shortening into the flour so the crust would be crumbly and how not to add too much liquid because that makes the dough rubbery. She also taught me how to roll the dough gently, so it would be tender. “Don’t murder the dough!,” she used to caution.

Her apple pies were the best of the best and I use her recipe, so, well, I don’t want to brag but —- everyone says mine are the best of the best.

Here’s the recipe., You might not be able to find Rhode Island Greening apples. So you’re on your own here. If you use a sweeter apple, cut back on the sugar.

Apple Pie

crust:

  • 2-1/2 cups all-purpose flour

  • 1 teaspoon sugar

  • 3/4 teaspoon salt

  • 1 teaspoon grated fresh lemon peel, optional

  • 1/2 cup cold butter

  • 1/3 cup cold vegetable shortening

  • 4-6 tablespoons cold milk, juice, water or melted ice cream

  • apple filling

  • 1 tablespoon butter

To make the crust: Combine the flour, sugar, salt, and lemon peel, if used, in a large bowl. Cut the butter and shortening into chunks and add the chunks to the flour mixture. Work the fat into the flour mixture until the ingredients resemble crumbs (use your hands, a pastry blender or the pulse feature of a food processor). Add the liquid, using only enough to gather pastry into a soft ball of dough (start with 4 tablespoons). Cut the dough in half and flatten each half to make a disk shape. Wrap the dough in plastic wrap and let it stand at least 30 minutes.

Preheat the oven to 350 degrees. Lightly flour a pastry board or clean work surface. With a rolling pin, roll one half of the dough on the floured surface into a circle about 1/8-inch thick, making sure the circle is larger than the pie pan by about 1 inch. Place the dough in a 9” or 10” pie pan. Pour the apple filling into the pastry-lined pan. Cut the butter into small pieces and place on top of the filling. Roll out the remaining dough and place it over the filling. Gently press the bottom and top crusts together along the flared edge of the pie pan. For a fluted rim, press your thumb and index finger against the outside of the rim, or crimp it with the tines of a fork or the blunt side of a knife. Cut steam vents in the top crust with the tip of a sharp knife or the tines of a fork. Bake the pie for 50-60 minutes or until golden brown.

Apple Filling:

  • 3 pounds pie apples (Rhode Island Greenings, Granny Smith, Gravenstein, Northern Spy, Golden Delicious, Idared, Stayman, Winesap, Baldwin, Jonagold, Braeburn

  • 1/2 cup sugar, approximately

  • 2 tablespoons lemon juice

  • 3/4 teaspoon ground cinnamon

  • 2 tablespoons all-purpose flour

Peel and core the apples then cut them into slices. Place the slices in a bowl. Add the sugar, lemon juice, cinnamon and flour and toss the ingredients to coat the apple slices evenly.

Passover Birthday Cake

Passover Birthday CakeMy daughter Meredith’s birthday sometimes falls during Passover, which means that in certain years she isn’t able to have a “traditional” birthday cake.Which didn’t bother her one bit when she was a kid because she absolutely l…

Passover Birthday Cake

My daughter Meredith’s birthday sometimes falls during Passover, which means that in certain years she isn’t able to have a “traditional” birthday cake.

Which didn’t bother her one bit when she was a kid because she absolutely loved the flourless chocolate jelly roll cake I made for her and for years this is what she asked me to bake even when it wasn’t Passover. I always thought it was an interesting and glamorous choice considering her age.

Guess it all comes down to how it tastes. Mer was never one to pick something just because it was “the thing” or because someone else liked or wanted it. She liked how this chocolate roll tasted and I don’t blame her. It’s de-lish. Passover-friendly too. But you can make this any old time.

Here’s the recipe.


Flourless Chocolate Jelly Roll Cake


6 ounces semisweet chocolate

3 tablespoons cooled coffee (or brandy or rum)

5 large eggs 

1 cup sugar

1-1/2 cups heavy cream

1-1/2 teaspoons vanilla extract

1 pint strawberries, sliced

cocoa powder or (Passover) confectioner’s sugar


Preheat the oven to 350 degrees. Butter a 15-1/2”x10-1/2” jelly roll pan. Line the pan with parchment paper, leaving several inches hanging over each of the short edges. Butter the portion of the paper that fits inside the pan. 

Melt the chocolate and coffee together in the top part of a double boiler set over barely simmering water. Mix the ingredients well and remove the top part of the pan from the heat. Let cool. In the bowl of an electric mixer set at medium speed (or use a hand mixer), beat the egg yolks and all but 2 teaspoons of the sugar together for 3-4 minutes or until thick and pale. Add the cooled chocolate mixture and blend it in thoroughly. In another bowl, beat the egg whites until they stand in stiff peaks. Mix about 1/4 of the beaten whites into the chocolate mixture. Fold the remaining whites into the chocolate mixture. Spoon the batter into the prepared pan, smoothing it to make it even. Bake for about 10 minutes or until “set.” Remove the cake from the oven. Cover it with a slightly dampened kitchen towel. Let cool.

Loosen the cake by pulling the overlapping ends of parchment paper. Invert the cake onto a clean sheet of parchment paper or kitchen towel and roll it up starting with one of the long sides. Set aside. 

Whip the cream and remaining 2 teaspoons sugar and vanilla extract until thick (use an electric mixer or hand mixer). Unroll the cake and spread the whipped cream on top of the cake, leaving about 1-inch at the edges. Top with the strawberries. Roll the cake starting on the long side. Place on a serving platter, seam side down. Dust (using a strainer) with cocoa or confectioner’s sugar.

Makes 10-12 servings

Vanilla Ice Cream

Anyone who thinks vanilla is boring, should read this column that appeared in the Guardian (U.K.) last week (I heard about this article from Sprinklefingers). 

http://www.guardian.co.uk/lifeandstyle/wordofmouth/2011/mar/01/consider-vanilla

The author, Oliver Thring rightly concludes that if you say that vanilla is boring, you probably haven’t tasted the real thing.

The real thing is a long, slender, pliable brown pod filled with teeny seeds. It has a bright, distinctive taste, but it never tramples your taste buds. Split the pod and plop it, or part of it, into custard and taste how it transforms the flavor into something sweet and floral but subtle. Use it for ice cream or to flavor a canister full of sugar. Use real vanilla in cake batter. Or to infuse vinegar, rum or vodka. 

I could go on and on. I’ve always loved vanilla, even back in the old days when my cousin Leslie told me that the little specks in the ice cream I was eating were dirt.

She always chose chocolate.

But as any vanilla aficionado knows, anything made with chocolate is nowhere unless it contains some vanilla to give it a boost. Hot chocolate, for example — make it without a bit of vanilla and you’ll notice it’s missing. Ditto brownies and chocolate cake.

For those who know the truth — and those who want to understand what the vanilla thing is all about — try this recipe for Vanilla Ice Cream.

Vanilla Ice Cream

  • 2 cups whole milk

  • 2 cups heavy or whipping cream

  • one vanilla bean, split open

  • 2 1-inch strips lemon peel

  • 3 large eggs

  • 3 large egg yolks

  • 2/3 cup sugar

Place the milk, cream, vanilla bean and lemon peel in a small saucepan and cook over medium heat until the liquid is hot and bubbles have formed around the sides of the pan. Set aside to cool. Beat the eggs, egg yolks and sugar together with an electric mixer set at medium speed until the mixture is thick and pale (4-5 minutes). Gradually add the milk mixture to the egg mixture, stirring to blend ingredients to a uniform color. Remove the vanilla bean (you can wipe it off and use it to flavor sugar, vinegar, rum or vodka). Heat the mixture, stirring frequently, until it has thickened, but do not let the mixture come to a boil. Let the mixture cool, then freeze in an ice cream maker according to manufacturer’s instructions. Makes 1-quart+