birthday

Roasted Strawberry Ice Cream

Roasted Strawberry Ice Cream

Many years ago Ed and I were on a cruise with our cousins and there we were, lounging on a public deck, when we overheard a woman consoling another woman whose husband had died on board the night before.

It was so shocking that we still talk about it. I felt sorry for the widow of course and something she told the other woman has haunted me ever since.

She said “I told him not to eat the ice cream!” — as if that one dessert was responsible for the heart attack that killed him.

My first thought was “at least he had the ice cream.”

Next week I celebrate a big birthday. I mean big as in round numbers. I mean I have passed my grandparents round numbers. I’m about the age of that widow and her poor husband. And I now say:

Eat the ice cream!”

Because you never know.

For most of my married life, the food we usually eat at home — with indulgences here and there — is healthy. I make fresh food, have cut down on meat, fat and salt over the years, don’t serve processed foods or junk.

We’ve reached the age that an occasional ice cream — especially on vacation — won’t be the thing that kills us. And if it is, well, at least we had the ice cream.

So, for my big round birthday I am going to eat some ice cream.

I love strawberry ice cream so I already made some for the occasion. I would normally have preferred fresh strawberries but I haven’t found a good source yet for real strawberries, the kind I remember from the old days that were small, sweet and smelled like caramelizing sugar. So I roasted the best looking ones I could find with a bit of orange zest and brown sugar and this combo turned out to be absolutely scrumptious for ice cream.

Roasted Strawberry birthday Ice Cream

  • 1 pint strawberries

  • 1/4 cup orange juice

  • 2 tablespoons brown sugar

  • 2 teaspoons finely grated orange zest

  • 3 cups half and half, light cream or whipping cream

  • 1/2 cup sugar

  • 3 large egg yolks

  • 1/8 teaspoon salt

  • 1/2 teaspoon vanilla extract

Preheat the oven to 450 degrees F. Line a baking pan with parchment paper. Rinse the berries, remove the hulls and chop the berries into smaller pieces. Place the berries on the parchment. In a small saucepan, combine the orange juice, brown sugar and orange zest. Bring to a boil over high heat and cook for 2-3 minutes or until the liquid has thickened slightly. Pour the liquid over the berries and toss the fruit to coat all sides. Roast the berries for about 10 minutes or until softened and glazed. Remove from the heat and let cool. Heat 2 cups of the cream over medium heat until bubbles appear around the edges of the pan. Set aside. While the cream is heating, beat the sugar, egg yolks and salt at medium speed in an electric mixer (or with a hand mixer) for 3-5 minutes or until light and thick. Gradually add the heated cream and mix the ingredients until the mixture is uniform. Return the mixture to the saucepan and cook over medium heat, stirring constantly, for 5-6 minutes or until thickened enough to coat the back of a spoon. Pour in the remaining cream and blend it in thoroughly. Pour into a container and refrigerate until cold. Stir in the vanilla extract. Freeze in an ice cream freezer according to manufacturer’s directions, until almost firm. Add the strawberries plus any juices that have accumulated. Continue to freeze until firm.

Makes about 6 cups

Sauteed Strawberry Strawberry Shortcake

fullsizeoutput_a678.jpeg

My birthday is in a few days and usually we get together with the kids and grandkids to celebrate at my house. There’s always an apple pie for dessert at some point because I prefer homemade apple pie to birthday cake. And I always have apple pies in the freezer.

But this is an unusual year for our family: graduation and bat mitzvah celebrations, along with several birthdays, Father’s Day and so on — and so — no birthday get-together at my place.

(Actually, at some point during the week I will invite my sister-in-law Eileen and brother Jeff — and I’ll take out some pie for us to enjoy.)

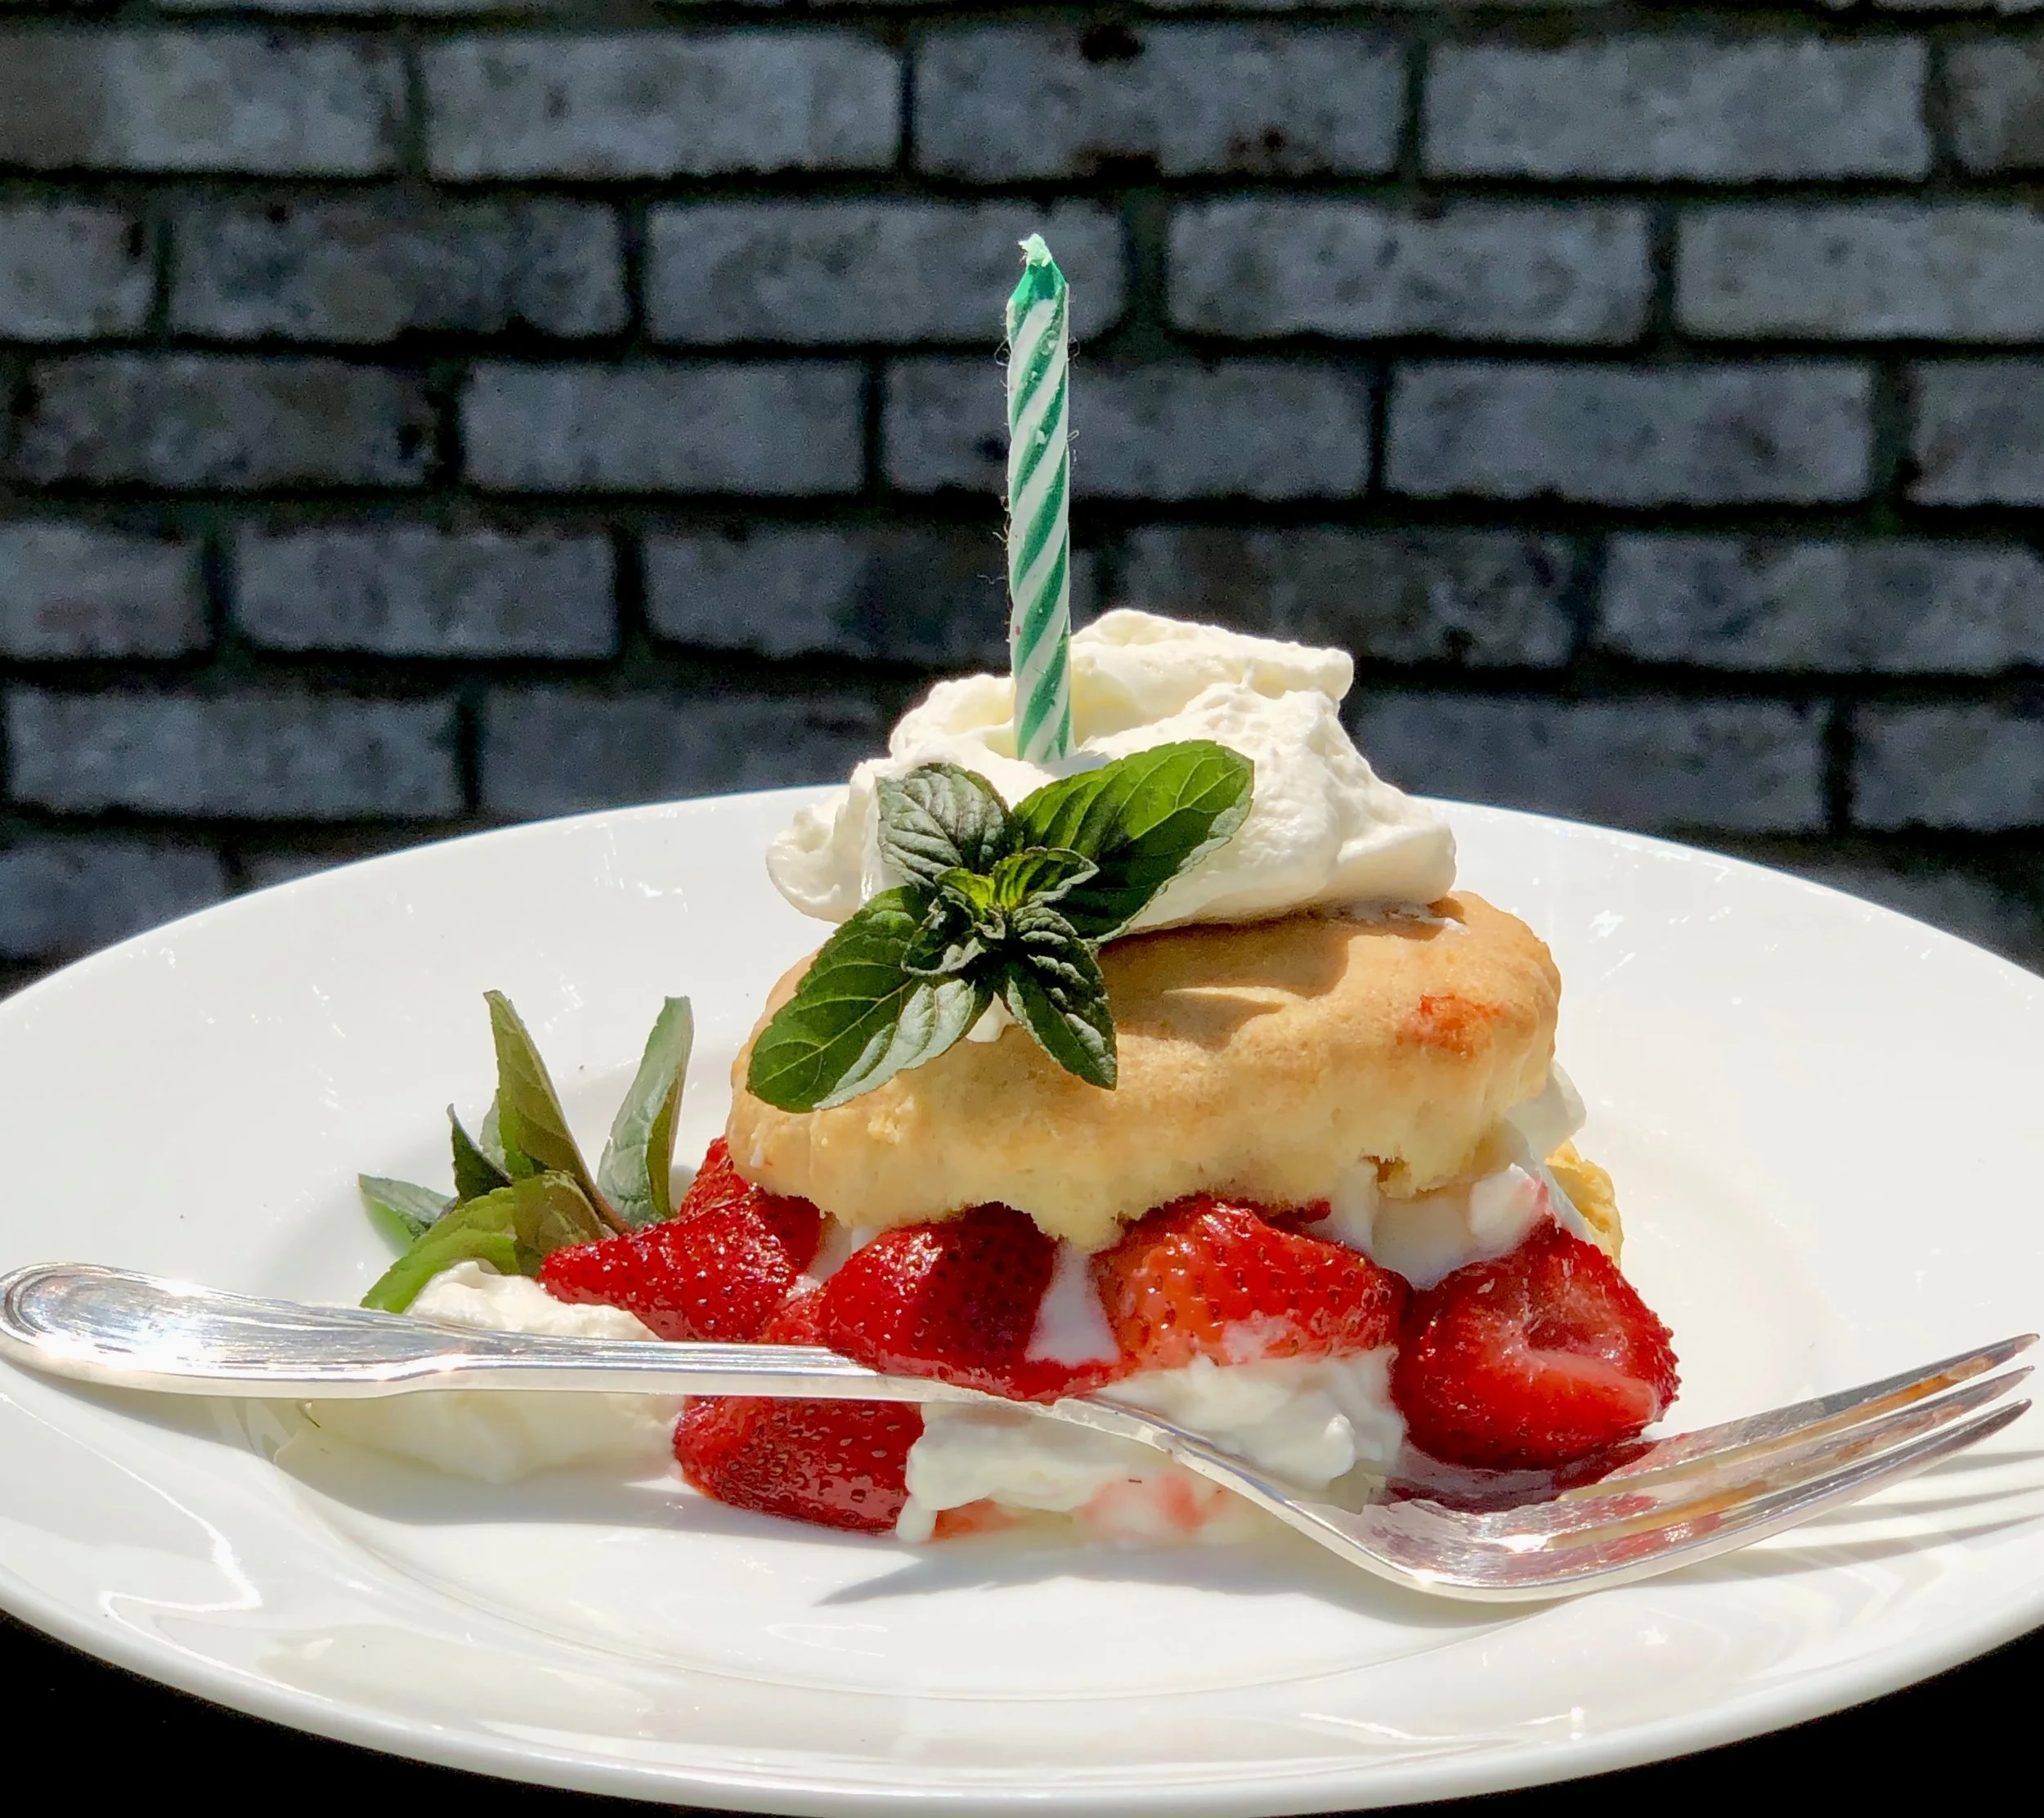
In the meantime, for the two of us, I will celebrate with individual strawberry shortcakes. I made the biscuits already (they’re frozen). Whipped cream takes about 2 minutes in the mixer. I am hoping to find great strawberries — they are in season, so it should be easy.

Last week I actually couldn’t find wonderful berries, even at the Farmer’s market.

So I bought what they had and gave them a quick saute.

Which is what I will do again if the berries aren’t perfect.

This was quite delicious. Here’s the recipe, for strawberry shortcake when you can’t get the best berries.

Sauteed Strawberry Shortcake 

  • 2 tablespoons butter

  • 4 cups cut up fresh strawberries

  • 1 teaspoon sugar

  • 2 tablespoons orange flavored brandy or rum

  • Shortcake biscuits

  • Sweetened whipped cream

  • Fresh mint for garnish

Heat the butter in a saute pan over medium heat. When the butter has melted and looks foamy, add the berries, stir to coat them with butter and cook for one minute. Sprinkle with the sugar, toss and pour in the brandy. Stir, cook briefly and set aside. Cut the biscuits in half. Place the bottoms of each on dessert plates. Layer with some of the berries and some of the whipped cream (reserve some whipped cream for the top). Cover with the biscuit tops. Garnish with a blob of whipped cream and some mint leaves.

 Makes 8 servings


Biscuits 

  • 1-1/2 cups all-purpose flour

  • 1/2 cup cake flour

  • 2 teaspoons baking powder

  • 3/4 teaspoon salt

  • 1/2 teaspoon baking soda

  • 1 teaspoon finely grated lemon peel, optional

  • 8 tablespoons cold butter

  • 2/3 cup buttermilk

Preheat the oven to 400 degrees. Lightly grease a cookie sheet. Mix the flour, cake flour, baking powder, salt and baking soda into a bowl. Stir in the lemon peel, if used. Cut the butter into chunks and add it to the bowl. Work the butter into the flour mixture with your fingers or a pastry blender until the mixture resembles coarse crumbs (or use a food processor on pulse). Pour in the buttermilk and mix until you can form a soft ball of dough. The dough will be slightly sticky. Place the dough on a floured surface and knead a couple of times. Roll the dough gently to 1/2-inch thickness. Cut out circles with a doughnut cutter or the bottom of a glass. Place the circles on the cookie sheet. Bake for about 20-23 minutes or until they have risen and are lightly browned.

 Makes 8

Baked, Stuffed Potatoes

Some people eat out on their birthday and that’s fine, but I prefer to be in my casual clothes and eat exactly what I want (over the course of the entire day) rather than in a chair all dressed up at a restaurant having to choose from a menu s…

Some people eat out on their birthday and that’s fine, but I prefer to be in my casual clothes and eat exactly what I want (over the course of the entire day) rather than in a chair all dressed up at a restaurant having to choose from a menu someone else planned.

What I like could vary, depending on my mood, but often the birthday food has something to do with fried chicken. Or anything made with a potato. And, most especially, homemade apple pie the way my mom made it.

I already have the pie in my freezer. So, I am getting ready for my birthday (in a few days) by making baked stuffed potatoes: organic Russets baked to a crisp, the insides removed and mashed with plenty of butter and cream cheese (maybe even a little dairy sour cream), salt and freshly ground black pepper before being stuffed back into the potato skins and baked until the top is crusty.

Please don’t tell me that white potatoes are unhealthy and fattening. I know. The flesh is high on the glycemic index and that’s not good But potato skins contain good supplies of vitamins, minerals and fiber. 

And of course I am aware that adding butter and cream cheese adds fat and calories. That’s what makes this recipe so awesome. Besides, I am a big believer that if you eat healthy most of the time — we do — then indulging occasionally is not only good but important for one’s emotional well being.

By the way, if it turns out I don’t eat these baked stuffed potatoes on the day, they freeze well and I know I’m gonna want them sometime soon.


Baked, Stuffed Potatoes 

4 Russet type potatoes, scrubbed

2 tablespoons butter

3 ounces cream cheese

4-5 tablespoons milk or dairy sour cream

salt and freshly ground black pepper to taste

paprika

Place an oven rack in the center of the oven. Preheat the oven to 400 degrees. Scrub the potatoes, place them in the oven and bake for 15 minutes. Prick the potatoes with the tip of a sharp knife. Bake for another 45 minutes or until the knife can easily pierce through the potato. When the potatoes are cooked and cool enough to handle, slice them in half lengthwise and scoop the flesh into a bowl. Add the butter and mash it into the potatoes. Add the cream cheese and blend it in thoroughly. Mix in enough of the milk or dairy sour cream to achieve a moist and tender consistency. Season to taste with salt and pepper. Spoon the mixture back in equal amounts inside the potato skins. Sprinkle the surface with paprika. When ready to bake, preheat the oven to 375 degrees. Place the filled potato skins on a cookie sheet and bake for 10-15 minutes or until hot, with the skins crispy.

Makes 4-8 servings

Roasted Cornish Hens with Baharat and Mango

The first time my then-boyfriend-now-husband Ed decided to buy a birthday gift for me he wanted it to be something very very special. We had been seeing each other for some time and things were now “serious.” The gift had to be good.
So he consulted…

The first time my then-boyfriend-now-husband Ed decided to buy a birthday gift for me he wanted it to be something very very special. We had been seeing each other for some time and things were now “serious.” The gift had to be good.

So he consulted with his older, married sister who advised him to get something “personal.”

Which he did.

He gave me two spice racks filled with spice bottles (27 for each rack, which equals 54 bottles of spice).

His sister was appalled.

I was thrilled beyond belief.

To me, the spice racks plus 54 bottles was personal. Even then I loved to cook and invent new recipes and taste new ingredients and use all sorts of seasonings.

He knew me. 

That was, still is, critical to any lasting relationship.

I can’t remember all the spices (and dried herbs) he chose, but of course there were the usual cinnamon, ginger and cloves; rosemary, thyme and oregano.

These days, years later, my spice racks are still filled. And I still use many of the “usual” — freshly grated nutmeg for cake, ground cumin to jazz up lamburgers and such.

But the bottles number way more than 54 (I have a whole “seasonings” cabinet now). Because there’s a world of spices, herbs and interesting blends to try that we didn’t know about then and that I want to experiment with.

Like Za’atar. I have 3 or 4 different versions of commercial blends. Same goes for Ras el Hanout, Dukkah and Baharat. And others.

I also have many other spice blends that are homemade (I spoon them in a small spice bottles so they look store-bought).

Today is my birthday. I don’t know what birthday gift is in store for me this year.

I do know that the older you get the more you think about birthdays past.

So I am remembering that first one with Ed. His gift, those spice racks and bottles, started us on a delicious culinary journey together.

We’re still travelling.

Mostly I am still enjoying the pleasure of knowing that Ed got that gift so right.


Roasted Cornish Hens with Baharat and Mango


2 large Rock Cornish hens (about 1-1/2 pounds each)

1 tablespoon vegetable oil

salt and freshly ground black pepper to taste

1-1/2 teaspoons Baharat

1 cup mango juice 

Preheat the oven to 350 degrees. Rinse and dry the hens. Rub the skin with the vegetable oil and sprinkle them with salt, pepper and Baharat. Place the hens breast side down on a rack in a roasting pan. Place the pan in the oven and roast for 20 minutes. Pour the juice over the hens. Roast for another 15 minutes, baste and turn the hens breast side up. Raise the heat to 425 degrees. Roast for 15 minutes, baste the ingredients and roast for another 10 minutes or until the hens are cooked through and the skin is crispy. Makes 4 servings

Pearl Fein’s Standing Rib Roast

Today is my husband’s birthday. He’s an almost impossible person to buy a gift for. But he is the most possible, positive and terrific person to cook for.
He eats and enjoys whatever food I prepare. He is a good sport and will taste and …

Pearl Fein’s Standing Rib Roast

Today is my husband’s birthday. He’s an almost impossible person to buy a gift for. But he is the most possible, positive and terrific person to cook for.

He eats and enjoys whatever food I prepare. He is a good sport and will taste and comment on all the recipe creations and experiments I work on for my newspaper articles and blogging.

So, what to make him for him birthday dinner? (He prefers to stay at home instead of go out, especially ever since our favorite local restaurant closed.)

I thought about Chinese take-out but he nixed that (maybe because he knows it’s not my favorite).

He would be happy with anything he could pour ketchup over, so maybe hamburgers or beef stew? (But those don’t seem festive enough.)

He would really love a corned beef sandwich on rye bread but our local deli’s stuff is awful and I don’t feel like driving into New York City and downtown to Katz’s to get one (even though they have some of the best corned beef sandwiches in the world).

He isn’t much of a dessert eater, so even though I make decent pie and cake, none of that would do it for him (although he does like European style, dense chocolate cake with apricot filling …).

He adores candy, but I usually don’t make my own, so I bought him his favorite dark chocolate-almond bark and a bagful of red-colored, chocolate coated candies filled with pomegranate.

After thinking it all over, I decided I’ll make Rib Roast. The way his mama made it. He really really loves that. It was his mother, Pearl Fein, who taught me how to make a Rib Roast. She would always make this dish for special family occasions. They were always so wonderful (the beef and the occasions).

So, that’s it. And here is her recipe, which I’ve posted before, but it’s worth doing again:

Pearl Fein’s Standing Rib Roast

  • 1 2-3 rib beef roast

  • kitchen string

  • 1 tablespoon paprika

  • 1-1/2 to 2 teaspoons salt

  • 1 teaspoon freshly ground black pepper

  • 1 to 1-1/2 teaspoons garlic powder

  • water

Preheat the oven to 450 degrees. Carve the meat from the bones as close to the bone as possible so that you are left with a round beef roast and L-shaped bones. Tie the meat back onto the bones with kitchen string. (This procedure makes it much easier to carve the cooked meat.) In a small bowl, combine the paprika, salt, pepper and garlic powder plus enough water to form a paste. Brush the paste on all of the meat and bone surfaces. Place the roast bone side down in a roasting pan. Roast for 20 minutes. Lower the heat to 350 degrees and cook for about 15 minutes per pound or until it is cooked to the doneness you like. Use a meat thermometer (place it in the middle of the meat) and remove the meat from the oven when it reaches 115 degrees F for rare and 130 degrees F for medium. Let the roast rest for 15-20 minutes before you carve it (the temperature will rise a bit during that time). Snip the strings and place the now-boneless roast on a carving board to slice.

Makes 4-6 servings

For My Birthday: Lily Vail’s Apple Pie

Today’s my birthday! And to celebrate there’s … no, not cake.I like pie. Specifically Apple pie. Specifically the way my mother used to bake them and always made one for me for my birthday. And after she died I made one for myself for every birthday…

Today’s my birthday! And to celebrate there’s … no, not cake.

I like pie. Specifically Apple pie. Specifically the way my mother used to bake them and always made one for me for my birthday. And after she died I made one for myself for every birthday.

Actually, I make a dozen pies every October when the Greening apples are harvested, because those are the apples I like best for pie. I freeze the pies and we eat about one per month so that when the next October comes around again I make a new batch for the year to come.

But you can make apple pie with any apple, just adjust the sugar level accordingly, depending on the apple you use. I prefer a tart-tasting filling, not too sweet that is. That’s why I like Rhode Island Greenings. If you like a tart tasting apple pie, you can use Granny Smith apples (cut the slices thin because they cook better to tenderness that way). Golden Delicious are good pie apples now too, but use a little less sugar and a little more lemon juice. Don’t use McIntosh, they’re too watery. Fuji and Braeburn are better eating apples. They don’t hold up well in a pie. And please, don’t bother with Red Delicious because they have no flavor. 

Here’s my Mom’s recipe. I am already humming with anticipation.

Lily Vail’s Apple Pie

crust:

2-1/2 cups all-purpose flour

1 teaspoon sugar

3/4 teaspoon salt

1 teaspoon grated fresh lemon peel, optional

1/2 cup cold butter

1/3 cup cold vegetable shortening

4-6 tablespoons cold milk, juice, water or melted ice cream

apple filling

To make the crust: Combine the flour, sugar, salt and lemon peel, if used, in a large bowl. Cut the butter and shortening into chunks and add the chunks to the flour mixture. Work the fat into the flour mixture until the ingredients resemble crumbs (use your hands, a pastry blender or the pulse feature of a food processor). Add the liquid, using only enough to gather pastry into a soft ball of dough (start with 4 tablespoons). Cut the dough in half and flatten each half to make a disk shape. Wrap the dough in plastic wrap and let it stand at least 30 minutes.

Preheat the oven to 350 degrees. Lightly flour a pastry board or clean work surface. With a rolling pin, roll one half of the dough on the floured surface into a circle about 1/8-inch thick, making sure the circle is larger than the pie pan by about 1 inch. Place the dough in a 9” or 10” pie pan. Pour the apple filling into the pastry-lined pan. Cut the butter into small pieces and place on top of the filling. Roll out the remaining dough and place it over the filling. Gently press the bottom and top crusts together along the flared edge of the pie pan. For a fluted rim, press your thumb and index finger against the outside of the rim, or crimp it with the tines of a fork or the blunt side of a knife. Cut steam vents in the top crust with the tip of a sharp knife or the tines of a fork. Bake the pie for 50-60 minutes or until golden brown.

Apple Filling:

3 pounds pie apples (Rhode Island Greenings, Granny Smith, Gravenstein, Northern Spy, Golden Delicious, Idared, Stayman, Winesap, Baldwin, Jonagold)

1/2 cup sugar

2 tablespoons lemon juice

3/4 teaspoon ground cinnamon

2 tablespoons all-purpose flour

1 tablespoon butter

Peel and core the apples then cut them into slices. Place the slices in a bowl. Add the 1/2 cup sugar, lemon juice, cinnamon and flour and toss the ingredients to coat the apple slices evenly.