Bread

Pumpkin Muffins with Kefir and Pumpkin Seeds

As soon as I see that pumpkins have replaced the corn and tomatoes at the market I start hungering for food that’s autumn-like. Mostly pumpkin bread and muffins to snack on when I need a little something in the late afternoon with my last cup of cof…

Pumpkin Muffins with Kefir and Pepitas 

As soon as I see that pumpkins have replaced the corn and tomatoes at the market I start hungering for food that’s autumn-like. Mostly pumpkin bread and muffins to snack on when I need a little something in the late afternoon with my last cup of coffee for the day. 

I don’t make pumpkin muffins as often as I do banana bread, but almost. This is my latest version, which has kefir because I happened to have some in the fridge. But buttermilk is fine too. 

Reheat leftovers in a toaster oven for a few minutes if you need a quick breakfast. 

Btw, I used to bake and mash the pumpkin insides to get the puree, but most of the time I use canned pumpkin or squash. NOT pumpkin pie mix. I want to mix in the spices of my choice, not theirs.

Pumpkin Muffins with Kefir and Pumpkin Seeds

  • 3  tablespoons butter

  • 1-3/4 cups flour

  • 1 teaspoon baking soda

  • 1/2 teaspoon baking powder

  • 1/2 teaspoon salt

  • 1 teaspoon cinnamon

  • 1 teaspoon freshly grated nutmeg

  • 1/8 teaspoon ground cloves

  • 2 tablespoons brown sugar

  • 1 cup mashed pumpkin (not pumpkin pie mix)

  • 3/4 cup kefir

  • 1/4 cup molasses

  • 1 large egg

  • 2-3 tablespoons crushed pumpkin seeds 

Preheat the oven to 400 degrees. Lightly grease 9 muffin tin cups. Melt the butter and set it aside to cool. Sift together the flour, baking soda, baking powder, salt, cinnamon, nutmeg, cloves and brown sugar. In a separate bowl, combine the pumpkin, kefir, molasses, egg and cooled, melted butter. Add the liquid ingredients to the dry ones and mix only long enough to combine. Spoon the batter into the prepared muffin tin cups. Scatter the pumpkin seeds evenly on top of each muffin. Bake for 22-25 minutes or until a cake tester inserted into the center comes out clean.

Makes 9


Squash Muffins

It only took two months to gain about 10 pounds after I started my first full-time job.
Back then, even back then, in the dinosaur era, when the only yogurt you could find easily was Dannon (in maybe 6-7 flavors), I brought a yogurt to the office. I…

It only took two months to gain about 10 pounds after I started my first full-time job.

Back then, even back then, in the dinosaur era, when the only yogurt you could find easily was Dannon (in maybe 6-7 flavors), I brought a yogurt to the office. I was a freshman attorney in a big, bustling law office on Wall Street. I was so clueless then I didn’t realize that the proper office hours were NOT from 8:00 a.m., when I liked to get in (so I could also leave early and have a life), but 10:00 or 10:30 (and then have dinner with the team and come home late).

I brought in my yogurt and ate it early, but then, when the rest of the lawyers came to work, they would bring like a full American breakfast: eggs, hash browns, bacon, toast.

So, in order to try to be part of the team and a little less clueless, I ordered in breakfast too. Usually it was a blueberry muffin and some juice. Those blueberry muffins cost me 10 pounds.

But I did learn three things. One, I could never consume an “American breakfast” at my desk. It always reminded me of how bad your car smells when you have french fries wrapped up in a paper bag getting all soft and steamy.

Two, that food writing pays a lot less but has been an infinitely better career for me than working day and night as a lawyer.

Three, that I love, love, love muffins. Blueberry muffins sometimes, pumpkin or squash muffins now, when the scent of autumn spices is so alluring.

Squash Muffins

  • 4 tablespoons butter

  • 1-3/4 cups all-purpose flour

  • 1/2 cup sugar

  • 1-1/2 teaspoons baking powder

  • 3/4 teaspoon salt

  • 1/2 teaspoon baking soda

  • 1 teaspoon ground cinnamon

  • 1 teaspoon grated nutmeg

  • 1/2 teaspoon powdered ginger

  • 1 cup buttermilk

  • 1 cup mashed cooked squash

  • 1 large egg

  • 1/2 cup golden raisins, optional

Preheat the oven to 400 degrees. Lightly grease 10 muffin tin cups. Melt the butter and set it aside to cool. Combine the flour, sugar, baking powder, salt, baking soda, cinnamon, nutmeg and ginger in a bowl. Place the buttermilk, squash, egg and melted butter in a second bowl and beat to blend ingredients thoroughly. Add the wet ingredients to the dry ones and mix just until combined. Fold in the raisins if used. Fill muffin cups evenly with the batter. Bake for 20-25 minutes or until a cake tester inserted into the center comes out clean. Let the muffins cool for 15 minutes. Remove the muffins from the pan and serve warm or let cool to room temperature.

Makes 10

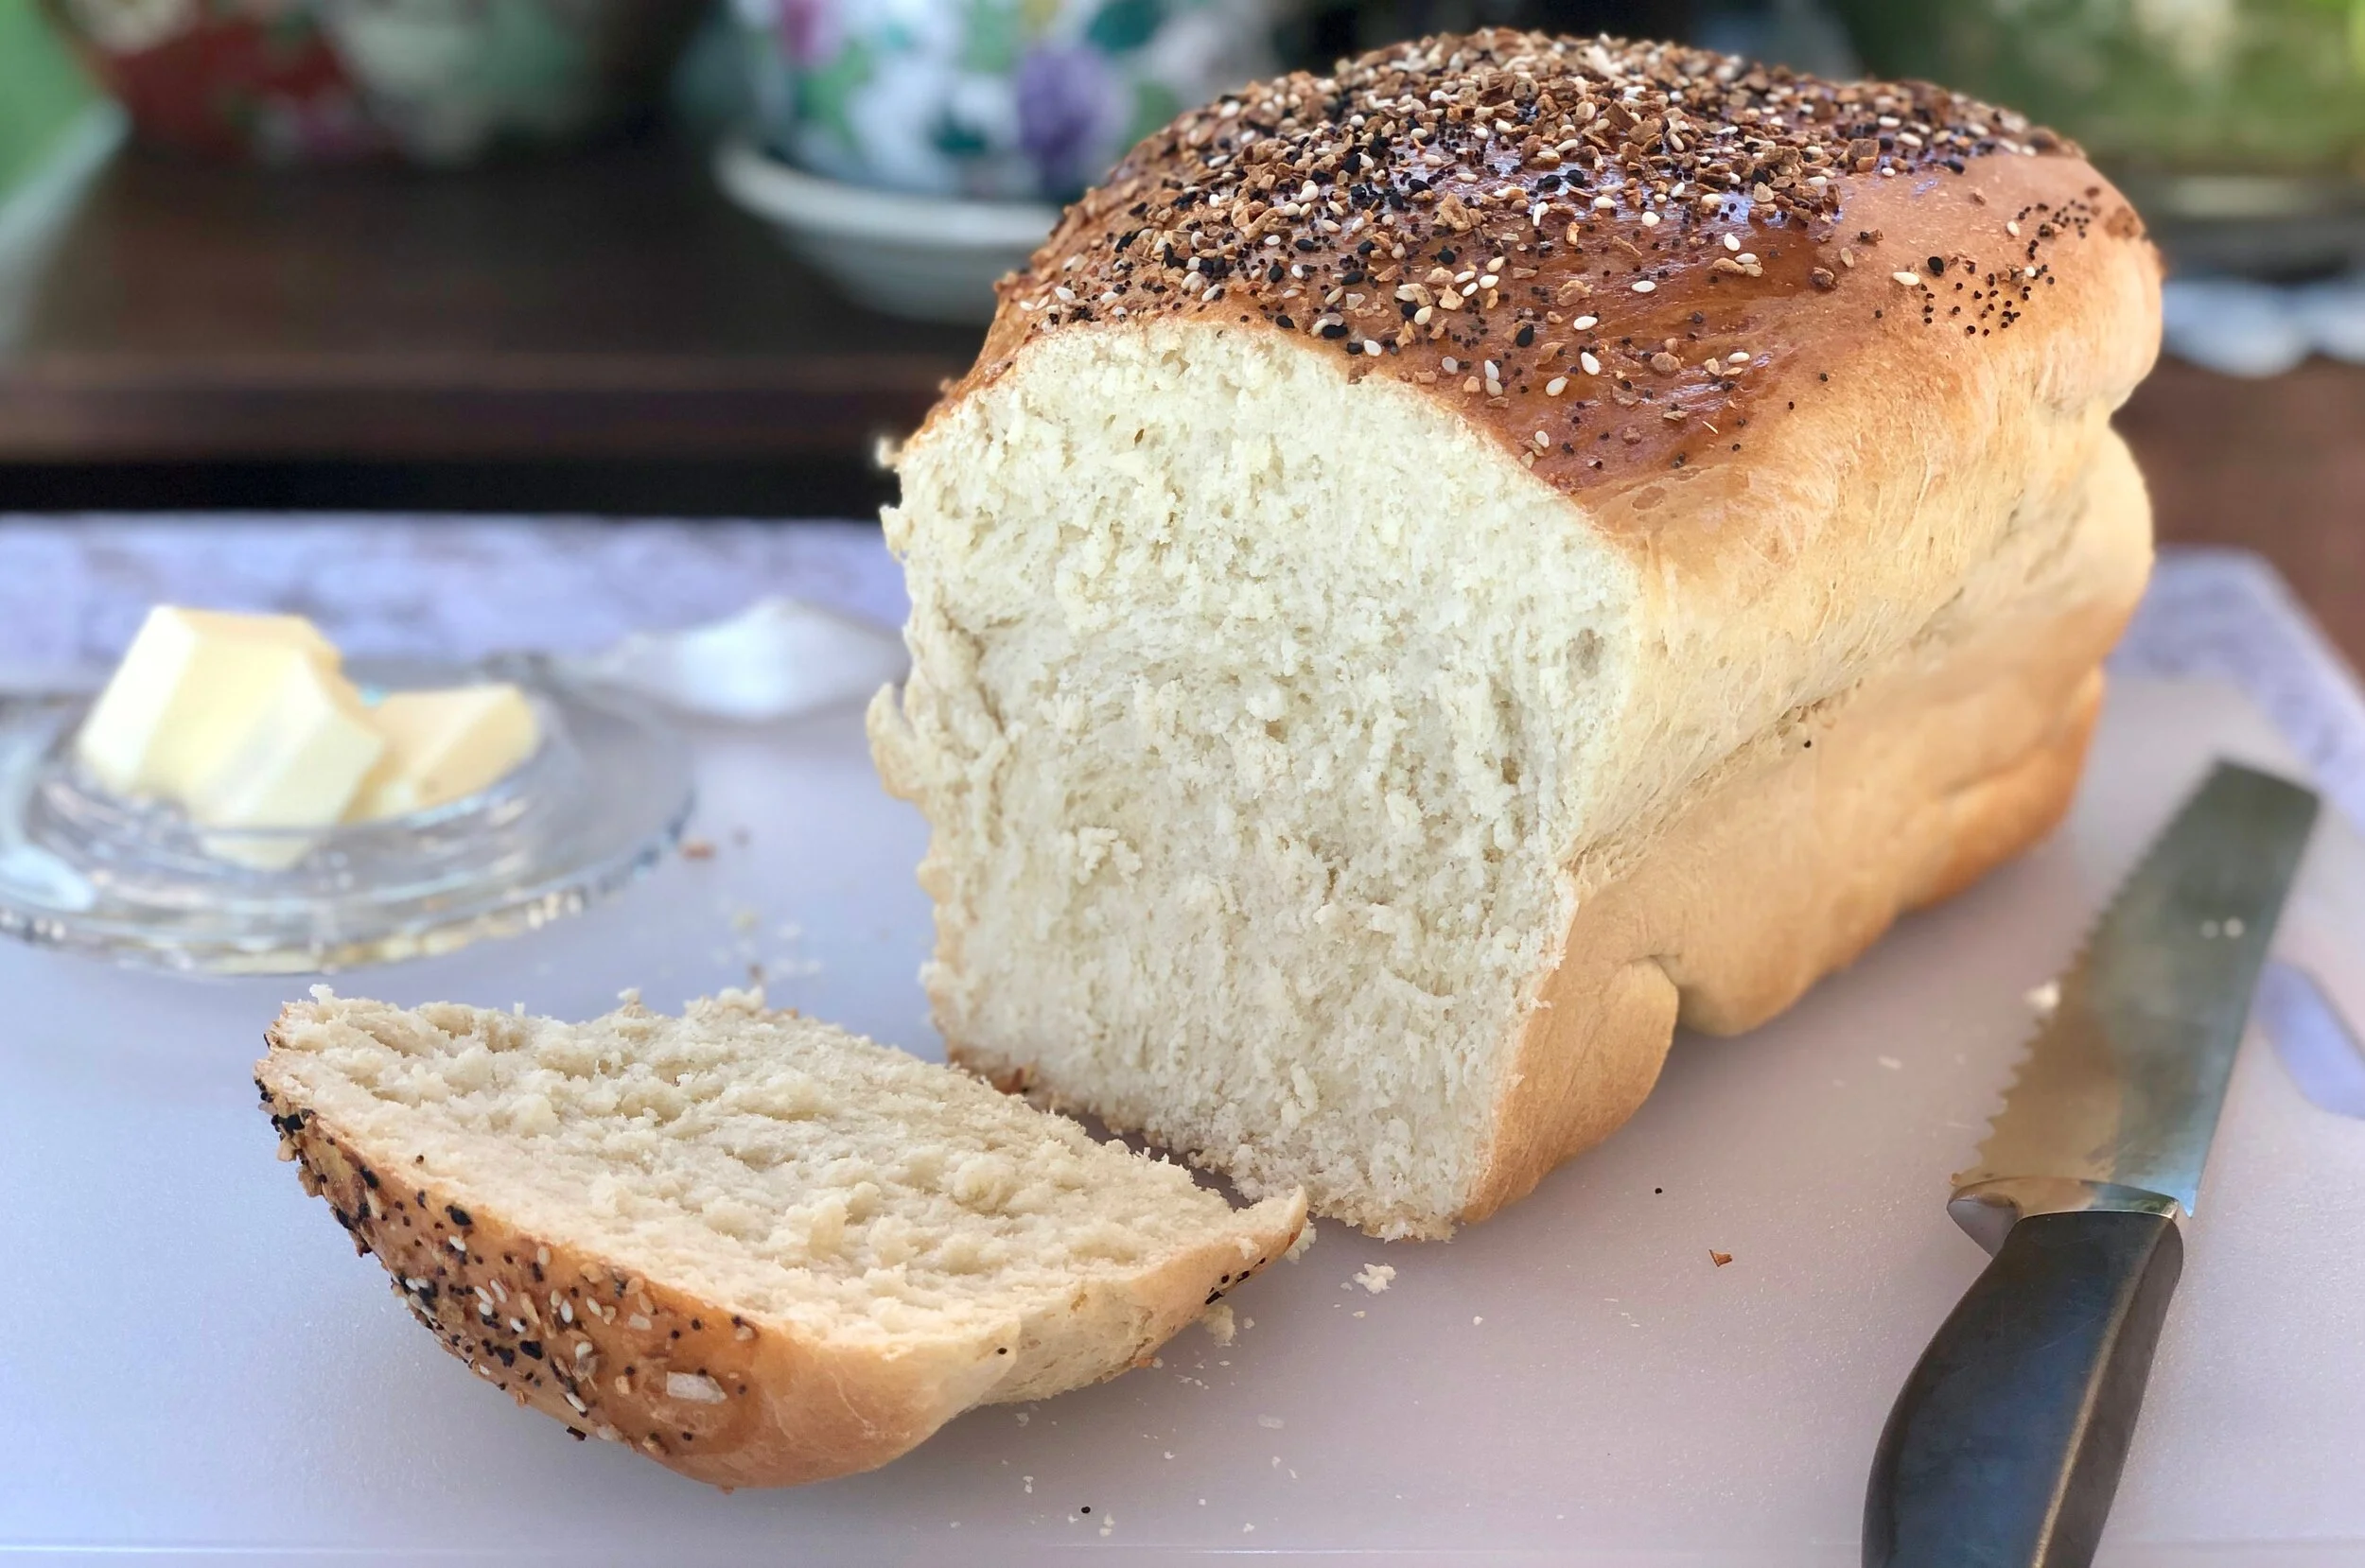
Milk and Honey White Bread

95954099_2581425922125465_2398630099697008640_n.jpg
Milk and Honey Bread

Milk and Honey Bread

Sometimes I’m just bored with all food. It frequently happens after a summer’s worth of grilling and when roasting a turkey or making a hearty stew doesn’t seem right yet.

Also, the tomatoes are coming in now. Real tomatoes. Red, red ones. Aromatic, juicy, sweet, oozing seeds tomatoes. Late August tomatoes.

Then, for dinner, at least one night, I can make tomato sandwiches. Nothing special. I have no need for $40 olive oil or rare, aged Balsamic vinegar. No chili pepper additions. No teriyaki or hummus. No fusion version.

Just white bread, mayo and sliced tomatoes.

Nothing more. Life is sweet.

Packaged (not soft white) or bakery white bread will do. But if you like to bake and have a few moments, here’s a recipe for a spectacular bread that measures up to a good tomato.

Milk and Honey White Bread

  • 1 package active dry yeast

  • 1/4 cup warm water (105-110 degrees)

  • 1/4 teaspoon sugar

  • 4 cups all purpose flour, approximately

  • 1-1/2 teaspoons salt

  • 2 large eggs

  • 2 tablespoons softened butter or vegetable oil

  • 3/4 cup warm milk

  • 2 tablespoons honey

In a small bowl, mix the yeast, water, sugar and 1/2 teaspoon flour. Stir, set aside and let rest for 5 minutes or until the mixture is bubbly. In a bowl of an electric mixer, combine the remaining flour and salt. Add the eggs, butter, milk and honey. Add the yeast mixture. Blend ingredients thoroughly, then knead using the kneading hook, for 4-5 minutes or until the dough is smooth and elastic (or knead by hand for about 10 minutes). Add more flour as necessary to keep the dough from being sticky. (Dough may be made in a food processor). Cover the bowl of dough and put it in a warm place to rise for about 1-1/2 hours or until doubled in bulk. Punch down the dough, cover the bowl and let rise again for about 30 minutes or until doubled. Lightly oil a 9” loaf pan. Place the dough in the pan. Let rise in a warm place for 30 minutes. Preheat the oven to 350 degrees. Bake for about 25 minutes or until firm and golden brown.

Makes one

Milk and Honey White Bread

IMG_4602.jpeg

Would you believe — there’s a book entirely devoted to white bread. It’s called, (of course), “White Bread” and has a cover reminiscent of a loaf of packaged Wonder Bread.

I thought the scorn for white bread was something new. But according to the author, Aaron Bobrow-Sprain, apparently there’s been a lot of controversy about this stuff on and off for centuries. Some of it had to do with food safety issues. But some of it had to do with racism (one health advocate apparently thought white bread was “threatening white racial superiority”).

Who knew?

When I was growing up my Mom would buy bakery rye bread and something called “corn bread” which isn’t that yellow, cakey Southern style stuff but more like sour-dough rye bread and was known in Jewish neighborhoods as “Jewish corn bread.” Those were for having with dinner. Or toasting for breakfast. Or for deli sandwiches.

But she bought packaged white bread too. It was the modern thing. The help-the-little-lady convenience food. It was too convenient not to buy. And there weren’t very many choices in packaged bread anyway. Maybe whole wheat, but I didn’t know anyone whose mother bought packaged whole wheat bread.

My mother bought packaged white bread for this reason (which Bobrow-Sprain also acknowledges), and that is, there are certain kinds of sandwiches that just don’t work with rye, corn bread or any kind of fancy artisinal loaves.

Like peanut butter and jelly and mostly, my mother’s fried-to-a-crisp kosher salami with yellow mustard. That salami was hot and sizzling, right out of the pan when she put it on the mustard-slathered slices and when you held the sandwich to take a bite, your fingers would make such deep indentations in the soft bread that sometimes it made a hole in the sandwich. Never mind. That’s the way it was supposed to be with packaged white bread.

I could actually have one of those sandwiches now. It’s been years.

No, decades.

Generations.

I don’t remember when I last bought packaged white bread. 

I do bake white bread though. With one of my help-the-little-lady convenience machines like my KitchenAid mixer and my Cuisinart food processor. With either of those it’s not that difficult to make a good loaf of bread.

I don’t agree with those who say white bread is bland. Sometimes it’s the ingredients on the bread that you want to give a starring role, not the bread itself. Like that fried salami.

So, for any of you who would like to have a good white bread, try this recipe.

Milk and Honey White Bread

  • 1 package active dry yeast

  • 1/4 cup warm water

  • 4 cups all-purpose flour, approximately

  • 1/4 teaspoon sugar

  • 1-1/2 teaspoons salt

  • 2 large eggs

  • 2 tablespoons softened butter

  • 3/4 cup warm milk

  • 2 tablespoons honey

  • 1 egg beaten with 1 teaspoon water

Place the yeast and 1/4 cup water in a small bowl. Add 1 teaspoon flour and the sugar. Mix well and set aside for about 5 minutes. In the bowl of an electric mixer, combine the remaining flour and salt. Add the 2 eggs, butter, milk, honey and the yeast mixture. Blend ingredients thoroughly. Knead until the dough is smooth and elastic, adding more flour if the dough seems too sticky. Dough should be soft but not sticky. Place the dough in a bowl, cover and let rise in a warm place for about 1-1/2 hours or until doubled in bulk. Punch down the dough, knead briefly and let rise again for 20 minutes.

Preheat the oven to 350 degrees. 

Lightly grease a 9” loaf pan. Place the dough inside the pan. Let rise for another 30 minutes. Brush the surface of the bread with the beaten egg. Bake for about 30 minutes or until golden brown and well risen.

Makes one loaf

How to Braid a 6-strand Challah

Baking challah? I posted my recipe last week and later realized that a lot of people don’t know how to braid a challah. A cousin of mine called a while ago to confirm that fact. She had wanted to make a challah but didn’t know how to make the bread …

Baking challah? I posted my recipe last week and later realized that a lot of people don’t know how to braid a challah. A cousin of mine called a while ago to confirm that fact. She had wanted to make a challah but didn’t know how to make the bread look professional.

Btw, her name is Jenny Rosenstrach and she is a food writer and blogger, with a terrific book about getting dinner to the table every day (Time for Dinner) and book coming in June called Dinner: a Love Story and a wonderful, family-oriented blog with the same name: Dinner: a Love Story.

She wasn’t the first to consider the whole braiding issue (plus how to make a round challah at holiday time).

So I decided to tell you all how to do it.

I myself became a “pro” not to long ago, I should confess. I had been to a bakery on a tour with one of the women’s groups I belong to. The baker zipped through the braiding so fast it reminded me of those old time black and white movies where people are walking but they look as if they’re running. So we asked him to show us again but of course it was a “show” not a real instruction lesson so he went even faster the next time and no one figured it out.

I always made challah with a standard three-strand braid.

Then I found someone who showed how to do it on Youtube. I don’t remember which version it was or I would mention it here. But my eldest grand child and I were watching and trying to braid the challah as we watched. We had to stop the computer after each step so we could write it all down (and of course we got flour crumbs all over the keyboard) but we finally did get it right.

The next time we made a challah together he remembered it all.

I had to get my instruction sheet out and do it step by step.

I finally got it (after several times).

Okay, you can make a regular three-strand braided challah, the way I had done for years and years. The challah is still delicious. That kind of braid is like braiding someone’s hair. Left over middle, right over middle, left over middle, right over middle, etc.

But, making a 6-strand braid is a little more complicated.

Here’s how:

Lay the six strands alongside each other and press the strands together at the top to seal the top edge. Then braid the strands as follows:

1. far right strand all the way over to the left

2. former far left strand all the way over to the right

3. the now far left strand into the middle

4. the second from right strand all the way over to the left

5. the now far right into the middle

6. the second from the left all the way over to the right

7. the now far left into the middle

8. repeat 4 through 7 as many times as necessary to use up the strands

9. press the strands together at the bottom

Good luck! And enjoy.

Eggless Lemon-Blueberry Tea Bread

Even the most experienced home cooks make mistakes.Like the one I made yesterday. I decided to bake a Lemon-Blueberry Tea Bread and as soon as I put the pan in the oven I realized I had left the eggs out of the batter.Wow! That’s a biggie.I did that…

Eggless Lemon Blueberry Bread

Even the most experienced home cooks make mistakes.

Like the one I made yesterday. I decided to bake a Lemon-Blueberry Tea Bread and as soon as I put the pan in the oven I realized I had left the eggs out of the batter.

Wow! That’s a biggie.

I did that once before, many years ago and made the big mistake of retrieving the loaf pan, scooping the batter back into a bowl, mixing in the eggs and then baking the bread as if nothing had happened.

Unfortunately, after the bread baked and cooled down, biting into a slice was like chewing day-old used bubble gum.

This time I just let the bread bake with a “let’s see what happens” kind of attitude.

The results were astonishingly surprising. What a boon for people who can’t eat eggs! This Lemon-Blueberry Tea Bread is delicious. Firmer, denser than one made with eggs, but tasty and tender without them.

So, here’s the recipe, including the eggs, but for egg-free diets — just leave the eggs out.

Lemon-Blueberry Tea Bread

  • 4 tablespoons butter

  • 3/4 cup sugar

  • 2 large eggs (optional)

  • 2 cups all-purpose flour

  • 2-1/2 teaspoons baking powder

  • 3/4 teaspoon salt

  • 1 tablespoon finely grated fresh lemon zest

  • 1 cup milk

  • 1 cup blueberries

  • 1/4 cup fresh lemon juice

  • 1-1/2 tablespoons sugar

Preheat the oven to 350 degrees. Grease a 9”x5”x3” loaf pan. In the bowl of an electric mixer, beat the butter and 3/4 cup sugar at medium speed for 1-2 minutes or until well combined. (Add the eggs and beat them in). Mix the flour, baking powder, salt and lemon zest in a small bowl. Add the dry ingredients to the creamed mixture in thirds, alternating with the milk. Beat to blend the ingredients to a smooth, even batter. Fold in the berries. Spoon the batter into the prepared pan. Bake for about 55 minutes or until a cake tester inserted into the center comes out clean. While the bread is baking, combine the lemon juice and 1-1/2 tablespoons sugar in a small saucepan and cook over medium heat for 1-2 minutes or until the sugar has dissolved. When the bread comes out of the oven, pour the lemon juice mixture on top. Cool the bread in the pan for 10 minutes. Invert onto a cake rack to cool completely.

Makes one bread

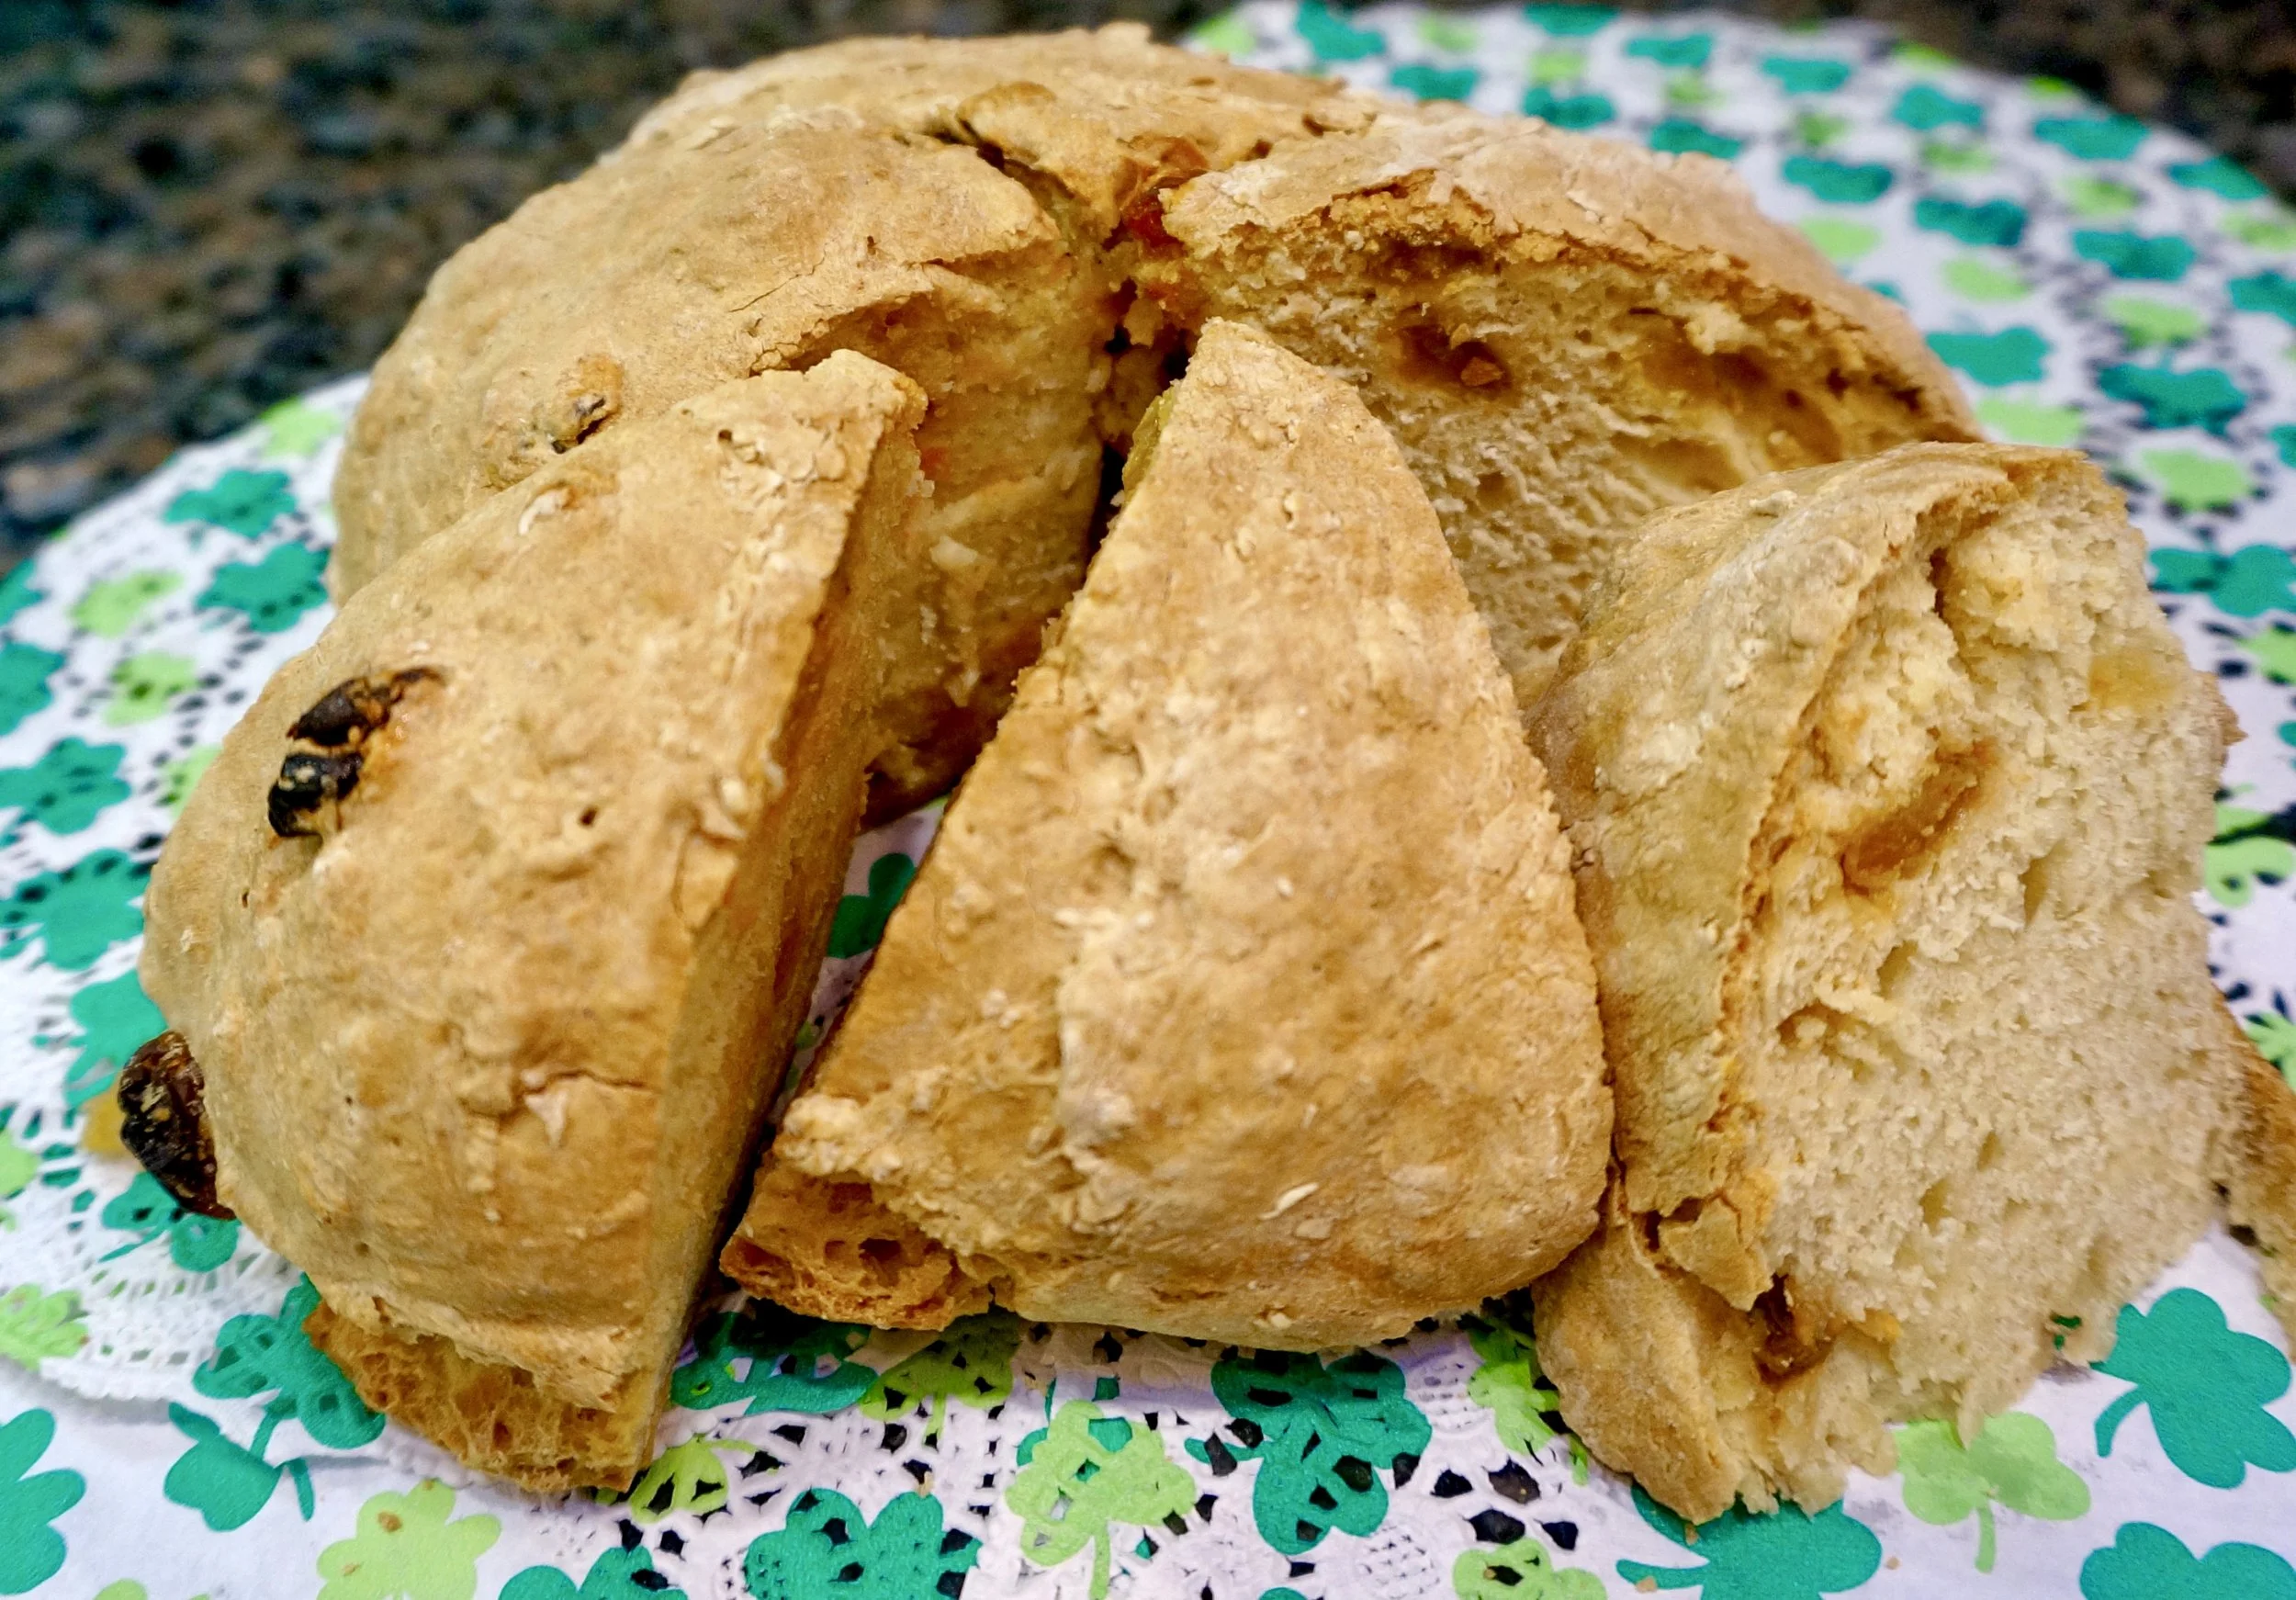
Pareve Irish Soda Bread

I don’t know why I wait for St. Patrick’s Day to make and eat Irish Soda Bread. It’s a really nice treat for breakfast together with my usual yogurt. It isn’t sweet and it has a compelling, moist, dense texture that makes you feel as if you aren’t going to be hungry again in an hour but also isn’t heavy at all. 

And yet I never think to make it until now.

Silly. This is too good for once-a-year.

Here’s a pareve version, which you can use if you’re kosher and want to have some delicious bread with corned beef and cabbage (or any other meat). It tastes just like the dairy version, made with buttermilk (there’s a note on how to substitute just below the recipe).

Irish Soda Bread (pareve version)

  • 3-1/2 cups all-purpose flour

  • 1 tablespoon brown sugar

  • 3/4 teaspoon salt

  • 1 teaspoon baking soda

  • 1-1/2 cups water

  • 1 tablespoon cider vinegar

  • 1/2 cup raisins

  • 1 teaspoon caraway seeds, optional

Preheat the oven to 350 degrees. Lightly grease a baking sheet. Combine the flour, brown sugar, salt and baking soda in a bowl. Mix the water and cider vinegar together and pour over the flour mixture. Mix the ingredients until you can form a soft dough. Work in the raisins and caraway seeds, if used. Sprinkle some flour on a work surface and knead the dough 18-20 times. Shape the dough into a ball, then flatten the ball slightly. Cut a small X on top with the tip of a sharp knife. Place the dough on the baking sheet. Bake for 40-45 minutes or until golden brown. Makes one

NOTE: For a more traditional, dairy version use 1-1/2 cups buttermilk in place of the water and cider vinegar