vegetarian

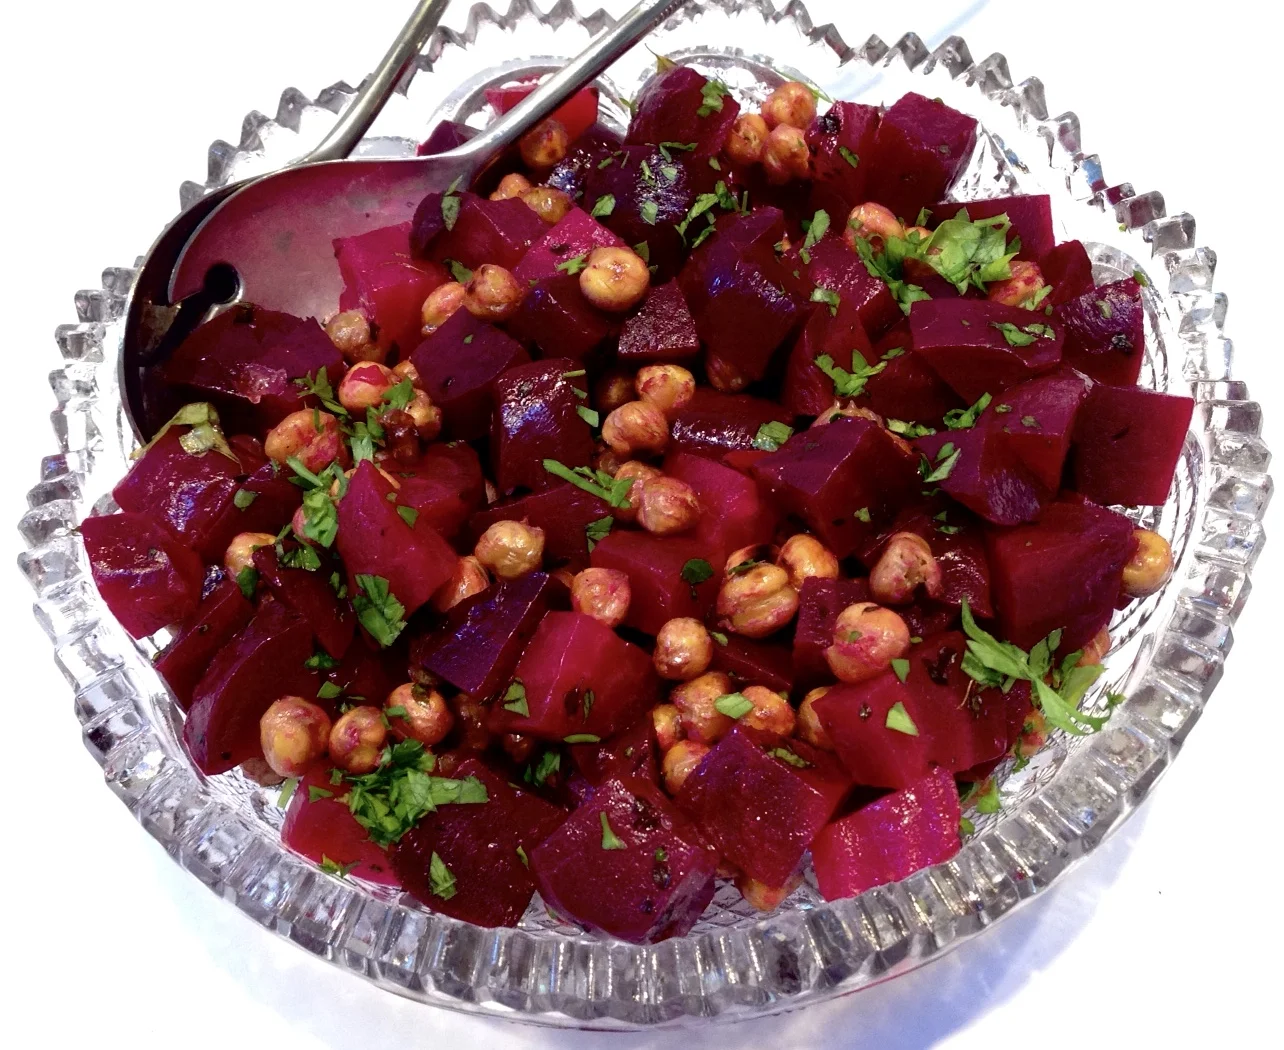
Beet and Chickpea Salad

fullsizeoutput_867c.jpeg

I realize beets are available throughout the year. We are a beet-loving family, so I buy them all the time. Throughout the year.

And yet, I still associate beets with autumn. In my memory, September, October, November — those months are the real “season” for harvesting beets. In fact, I remember them as an integral part of the meals during Jewish holidays.

Sukkot, the “harvest holiday” is a good time to include beets on the menu. Look for beets with the greens still attached — they are from a current harvest. They are sweeter and tastier. Lovely however you cook them, including this salad, which you can make ahead. Serve it at room temperature.

Beet and Chickpea Salad

  • 4 large beets

  • 1 15-ounce can chickpeas, drained and rinsed

  • 1 tablespoon olive oil

  • 2 teaspoons fresh thyme leaves

  • sea salt

  • 3 tablespoons olive oil

  • 3 tablespoons white wine vinegar

  • 2-3 tablespoons chopped fresh parsley

  • salt and freshly ground black pepper to taste

Preheat the oven to 450 degrees. Trim the beets, cutting away the greens, if any, and discarding any hard, fibrous parts of the stem. Wash and drain the greens and use them for other purposes. Scrub the beets, wrap them in aluminum foil and roast for 50-60 minutes or until they are tender. Peel the beets when they are cool enough to handle. Cut the beets into bite size pieces and place in a bowl. While the beets are cooking, place the chickpeas on a foil-lined baking sheet. Pour the one tablespoon olive oil on top and shake the pan to coat all the chickpeas. Sprinkle with thyme and sea salt to taste. Shake the pan again. Roast for 20 minutes, shaking the pan every 5 minutes or so, or until golden brown and crispy. Add the roasted chickpeas to the beets. Pour the remaining olive oil over the vegetables and toss, then pour in the white wine vinegar and toss again. Sprinkle with parsley and salt and pepper to taste. Let rest for 10-15 minutes before serving.

Makes 8 servings


Chick Pea and Carrot Salad

DSC08424.jpg

Of course, of course we will be slicing apples and dipping them in honey on Rosh Hashanah. (which begins at sunset on September 29th).

But chickpeas are on the menu too. In his Encyclopedia of Jewish Food, the late rabbi and food authority Gil Marks wrote that “chickpeas are a traditional Rosh Hashanah food, a symbol of fertility, abundance and a wish for a well-rounded year to come.”

I usually make chickpeas into hummus, but sometimes I serve them whole, as a snack, roasted, the way my mother made them when I was growing up – a recipe called nahit. She coated the chickpeas with vegetable oil, sprinkled them with salt and paprika and baked them until crispy.

I changed her recipe somewhat -- I use olive oil, kosher salt and fresh thyme, or sometimes za’atar, as seasonings. Nahit is a delicious snack and a healthy one too: chickpeas are a good source of protein, minerals (including calcium) and fiber.

For this coming holiday though I’ll be making a chickpea and carrot salad to serve with dinner. Carrots are another symbolic ingredient of the holiday, so this recipe is a double-up of special ingredients of festive food for the holiday table. It’s a dish that can be made in advance, which makes it a good choice at such a busy time. And it is colorful too, fit for any celebration, including Break-the-Fast. 

Chick Pea and Carrot Salad

  • 1 15-ounce can chickpeas

  • 4 medium carrots, sliced thin

  • 1/2 chopped red onion

  • 1/4 cup chopped fresh parsley

  • 1/4 cup chopped fresh mint

  • 1 teaspoon ground cumin

  • 1/8 teaspoon cayenne pepper

  • 1/4 cup olive oil

  • 3 tablespoons lemon juice

  • salt to taste

Rinse the chickpeas under cold running water; let drain and place in a bowl. Add the carrots, onion, parsley, mint, cumin and cayenne pepper and toss to distribute the ingredients evenly. Pour in the olive oil and lemon juice. Toss to coat the ingredients evenly. Taste for seasoning and add salt to taste.

Makes 6 servings

Blue Salad (with green): Berries and Cheese

I love blueberries and I love blue cheese, so I figured they might go together well.

They did!

In this light, refreshing summer salad.

Nice for a full lunch — add a crust of bread. Or as a first course for dinner.

I bought the blueberries and the cheese. But the greens? Right from my garden! What a joy!

Blue Salad (with green)

  • 1 head leaf lettuce or 6 cups mixed greens

  • 1 cup blueberries

  • 1 cup crumbled blue cheese

  • 3 tablespoons chopped chives or scallion tops

  • 1/3 cup olive oil (or use avocado oil)

  • 3-4 tablespoons Balsamic vinegar

  • 1/4 cup chopped toasted almonds, optional

Tear the lettuce into smaller pieces and place them in a salad bowl. Add the blueberries, cheese and chives and toss the ingredients. Pour in the olive oil and toss the ingredients again. Add 3 tablespoons of the Balsamic vinegar, toss and taste, add more Balsamic vinegar to taste. Serve and garnish with the toasted almonds if desired.

Makes 4-6 servings

Vegetable Salad

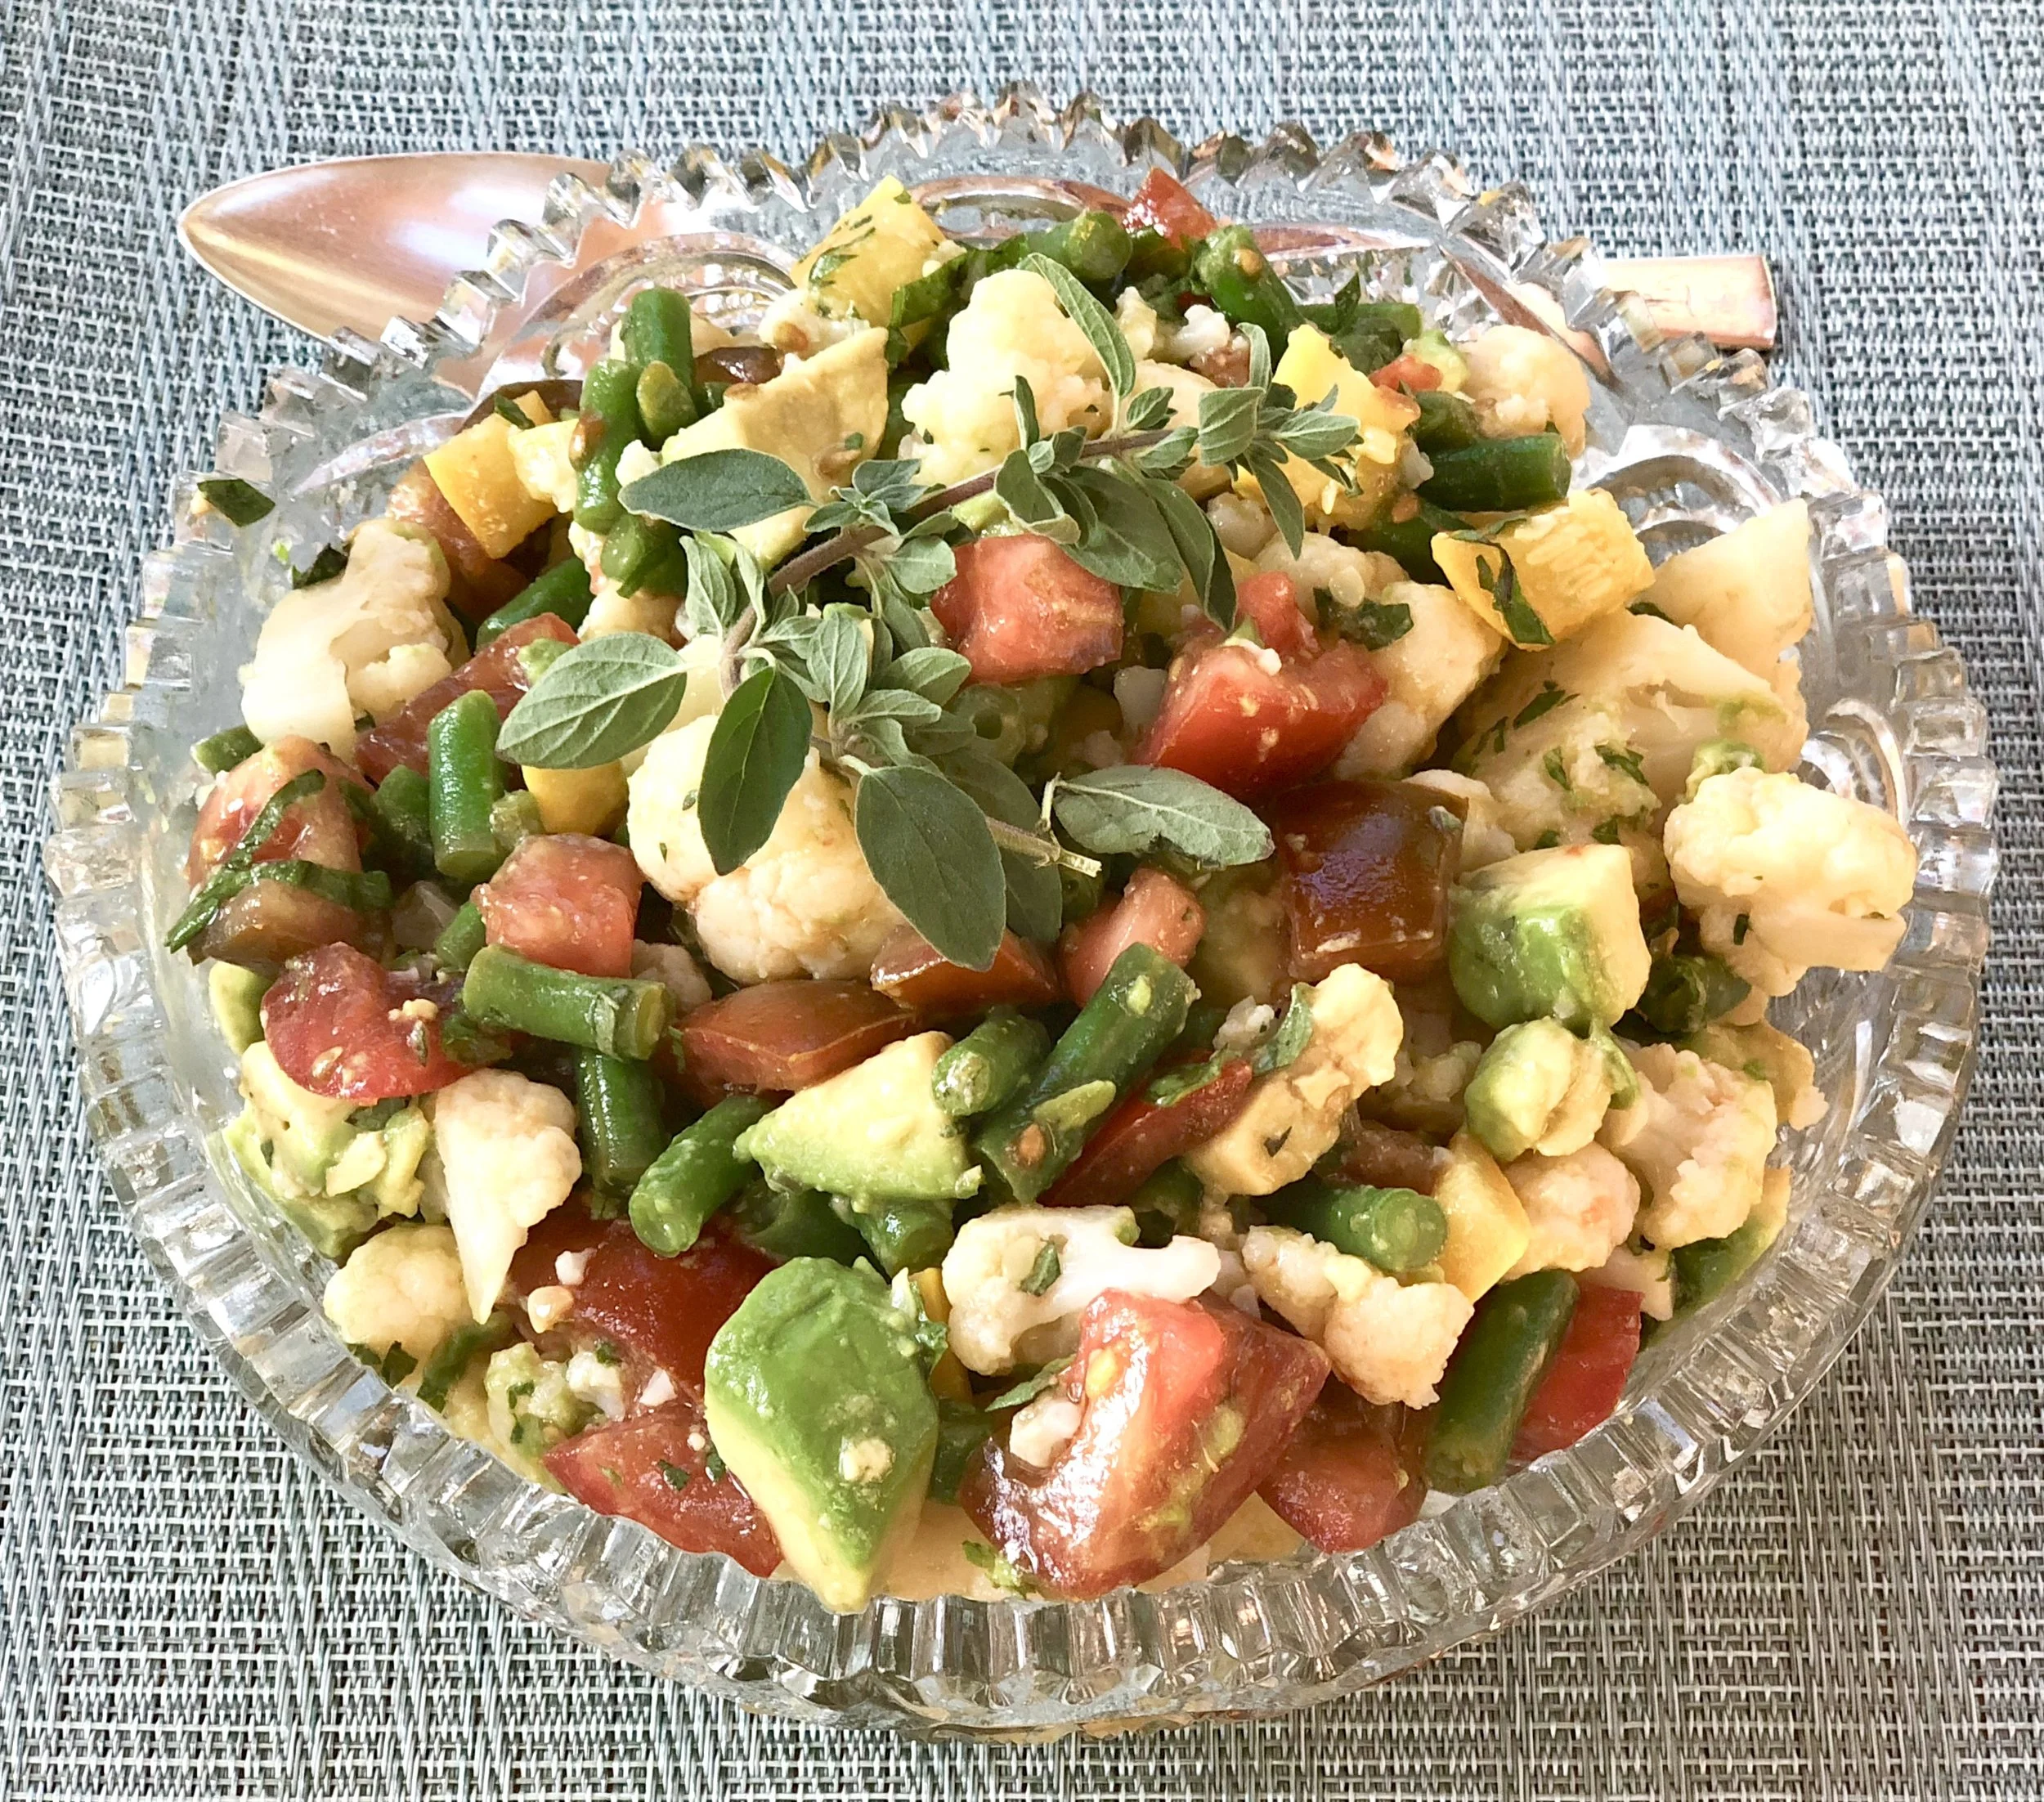
fullsizeoutput_a6ee.jpeg

Light, refreshing food. That’s what we want during the summer.

Also, easy to make. And as quick as possible.

I made this vegetable salad using leftovers from the veggies we had over a couple of meals. Added some fresh tomatoes, an avocado and some herbs. Not only did I get to use up stuff from the fridge, the dish took less than 10 minutes to make.

It’s a side dish. But you can add some tofu, cheese or hard-cooked eggs and make it into a main course (or add leftover fish, meat or poultry).

Add crusty bread and it’s a sandwich filling.

Mix it into cooked penne or ziti and it becomes pasta primavera.

Use whatever vegetables you have in proportions suggested. There’s no magic here, no actual recipe that will fail if you don’t have one of the ingredients.

Vegetable Salad

  • 3 cups cooked cut up cauliflower

  • 1 cup cooked, cut up green beans

  • 1 cup cooked cut up yellow squash

  • 3-4 cut up small tomatoes

  • 1 avocado, cut into small chunks

  • 3 tablespoons chopped fresh basil

  • 2 teaspoons chopped fresh oregano

  • 2 tablespoons olive oil

  • 2-3 tablespoons fresh lemon juice (or use white wine vinegar)

  • salt and freshly ground black pepper to taste

Place the cauliflower, green beans, yellow squash, tomatoes, avocado, basil and oregano in a bowl and toss the ingredients to distribute them evenly. Pour the olive oil over the vegetables and toss again. Pour 2 tablespoons of the lemon juice over the vegetables and toss again. Taste for seasoning and add more lemon juice and salt and pepper to taste.

Makes 4-6 servings

Bulgur Wheat Varnishkes

fullsizeoutput_86ca.jpg

Tisha B’av isn’t one of the better-known Jewish holidays. I’ve heard people say “oh yeah, I think that’s when you can’t get married.” Or, “you can’t get a haircut or listen to music.”

All true, and much more, and that’s because, unlike holidays when we celebrate joyful occasions such as a new year or deliverance from Pharaoh, Tisha B’av is when observant Jews mourn the destruction of the First and Second Temples. In addition, we remember the numerous times throughout history that the Jewish people were subjected to pogroms, exile and a multitude of other catastrophes. These are days that we don’t celebrate; we grieve.

Mournful times deserve respect and reflection. During the nine days leading up to the actual holiday (which begins at sundown on August 10th) many families will refrain from the usual pleasure-filled events and activities that make up our lives.

That includes getting married or getting a haircut or listening to music.

It also includes refraining from eating certain foods.

Tisha B’av is a full fast day, but during the days leading up to it many families don’t eat meat. Fish, dairy, vegetarian — is on the menu, and especially eggs and lentils, which are considered “mourner’s food.”

It’s just as well frankly. Skipping heavy meat meals during the hot weather makes good sense. It’s a whole lot smarter to eat fish, dairy and vegetarian.

Whether or not you follow the culinary guidelines during the Nine Days, this dish will do!

Anytime.

It’s my particular riff on classic kasha varnishkes. Our family really doesn’t like kasha, so I make the dish using bulgur wheat. Not only does it taste better, it’s easier to prepare and easier on the digestion.

Bulgur wheat or kasha varnishkes is usually a side dish, but it becomes a full meal if you add a fried egg or two on top.

Bulgur Wheat Varnishkes

  • 6 tablespoons vegetable oil

  • 1 cup bulgur wheat

  • 1-3/4 cup water, vegetable stock (can use chicken stock)

  • 2 large onions, chopped

  • Salt and freshly ground black pepper to taste

  • 6 ounces bow-tie pasta

  • 6 fried eggs

Heat 3 tablespoons of the vegetable oil in a sauté pan over medium heat. Add the bulgur wheat and cook, stirring occasionally, for about 3-4 minutes or until lightly toasted. Pour in the water or stock, bring to a boil, lower the heat and cover the pan. Cook for about 20 minutes or until all the liquid has been absorbed. Heat the remaining 3 tablespoons vegetable oil in a sauté pan over medium heat. Add the onions, sprinkle with salt and pepper and cook for about 20 minutes, stirring often, or until the onions are soft and browned. Cook the pasta according to directions on the package. Combine the bulgur wheat, pasta and onions in a large bowl. Sprinkle with salt and pepper. Keep warm while you fry 6 eggs, sunnyside-up style.

Makes 6 servings


Grilled Crispy Pineapple

Grilled Pineapple

Grilled Pineapple

If you’ve never tasted grilled pineapple, you’ve missed a real treat.

Cut into thick slices, it’s a fabulous side dish for dinners of grilled or roasted chicken, lamb, duck or fish.

But it has a sort of rum-like flavor, so I also think of it as a “solid cocktail.” Which makes it the perfect accompaniment to such items as grilled chicken wings and other savory nibbles. In that case, cut the large slices into cubes and skewer the chunks onto toothpicks.

OR — this dish is so versatile — top each slice with whipped cream, ice cream or sweetened mascarpone cheese (garnish with some chopped pistachios or mint) and use it as a dessert.

Any way at all — you can’t go wrong.

Grilled Pineapple

  • One whole pineapple

  • 2 tablespoons brown sugar

  • 2 tablespoons coconut oil, vegetable oil, melted butter or a mixture of these

  • 2 tablespoons orange juice

  • 1 teaspoon grated orange peel

  • sea salt

  • mint for garnish, optional

Cut the leaves off the pineapple. Remove the outer fibrous rind. Cut the peeled pineapple in slices about 3/4-inch thick. Set aside in a single layer in a pan. Heat the brown sugar, coconut oil, orange juice and orange peel in a saucepan over medium heat, stirring until the sugar is dissolved. Pour over the pineapple slices, turning the pieces to coat both sides. Let macerate for about 45 minutes. Preheat an outdoor grill to medium (or use a grill pan or the oven broiler). Grill the slices for about 4 minutes per side or until well glazed and tender, brushing occasionally with some of the liquid. Sprinkle lightly with sea salt. Garnish with fresh mint if desired.

Makes 6 servings

Two Color Cabbage Slaw

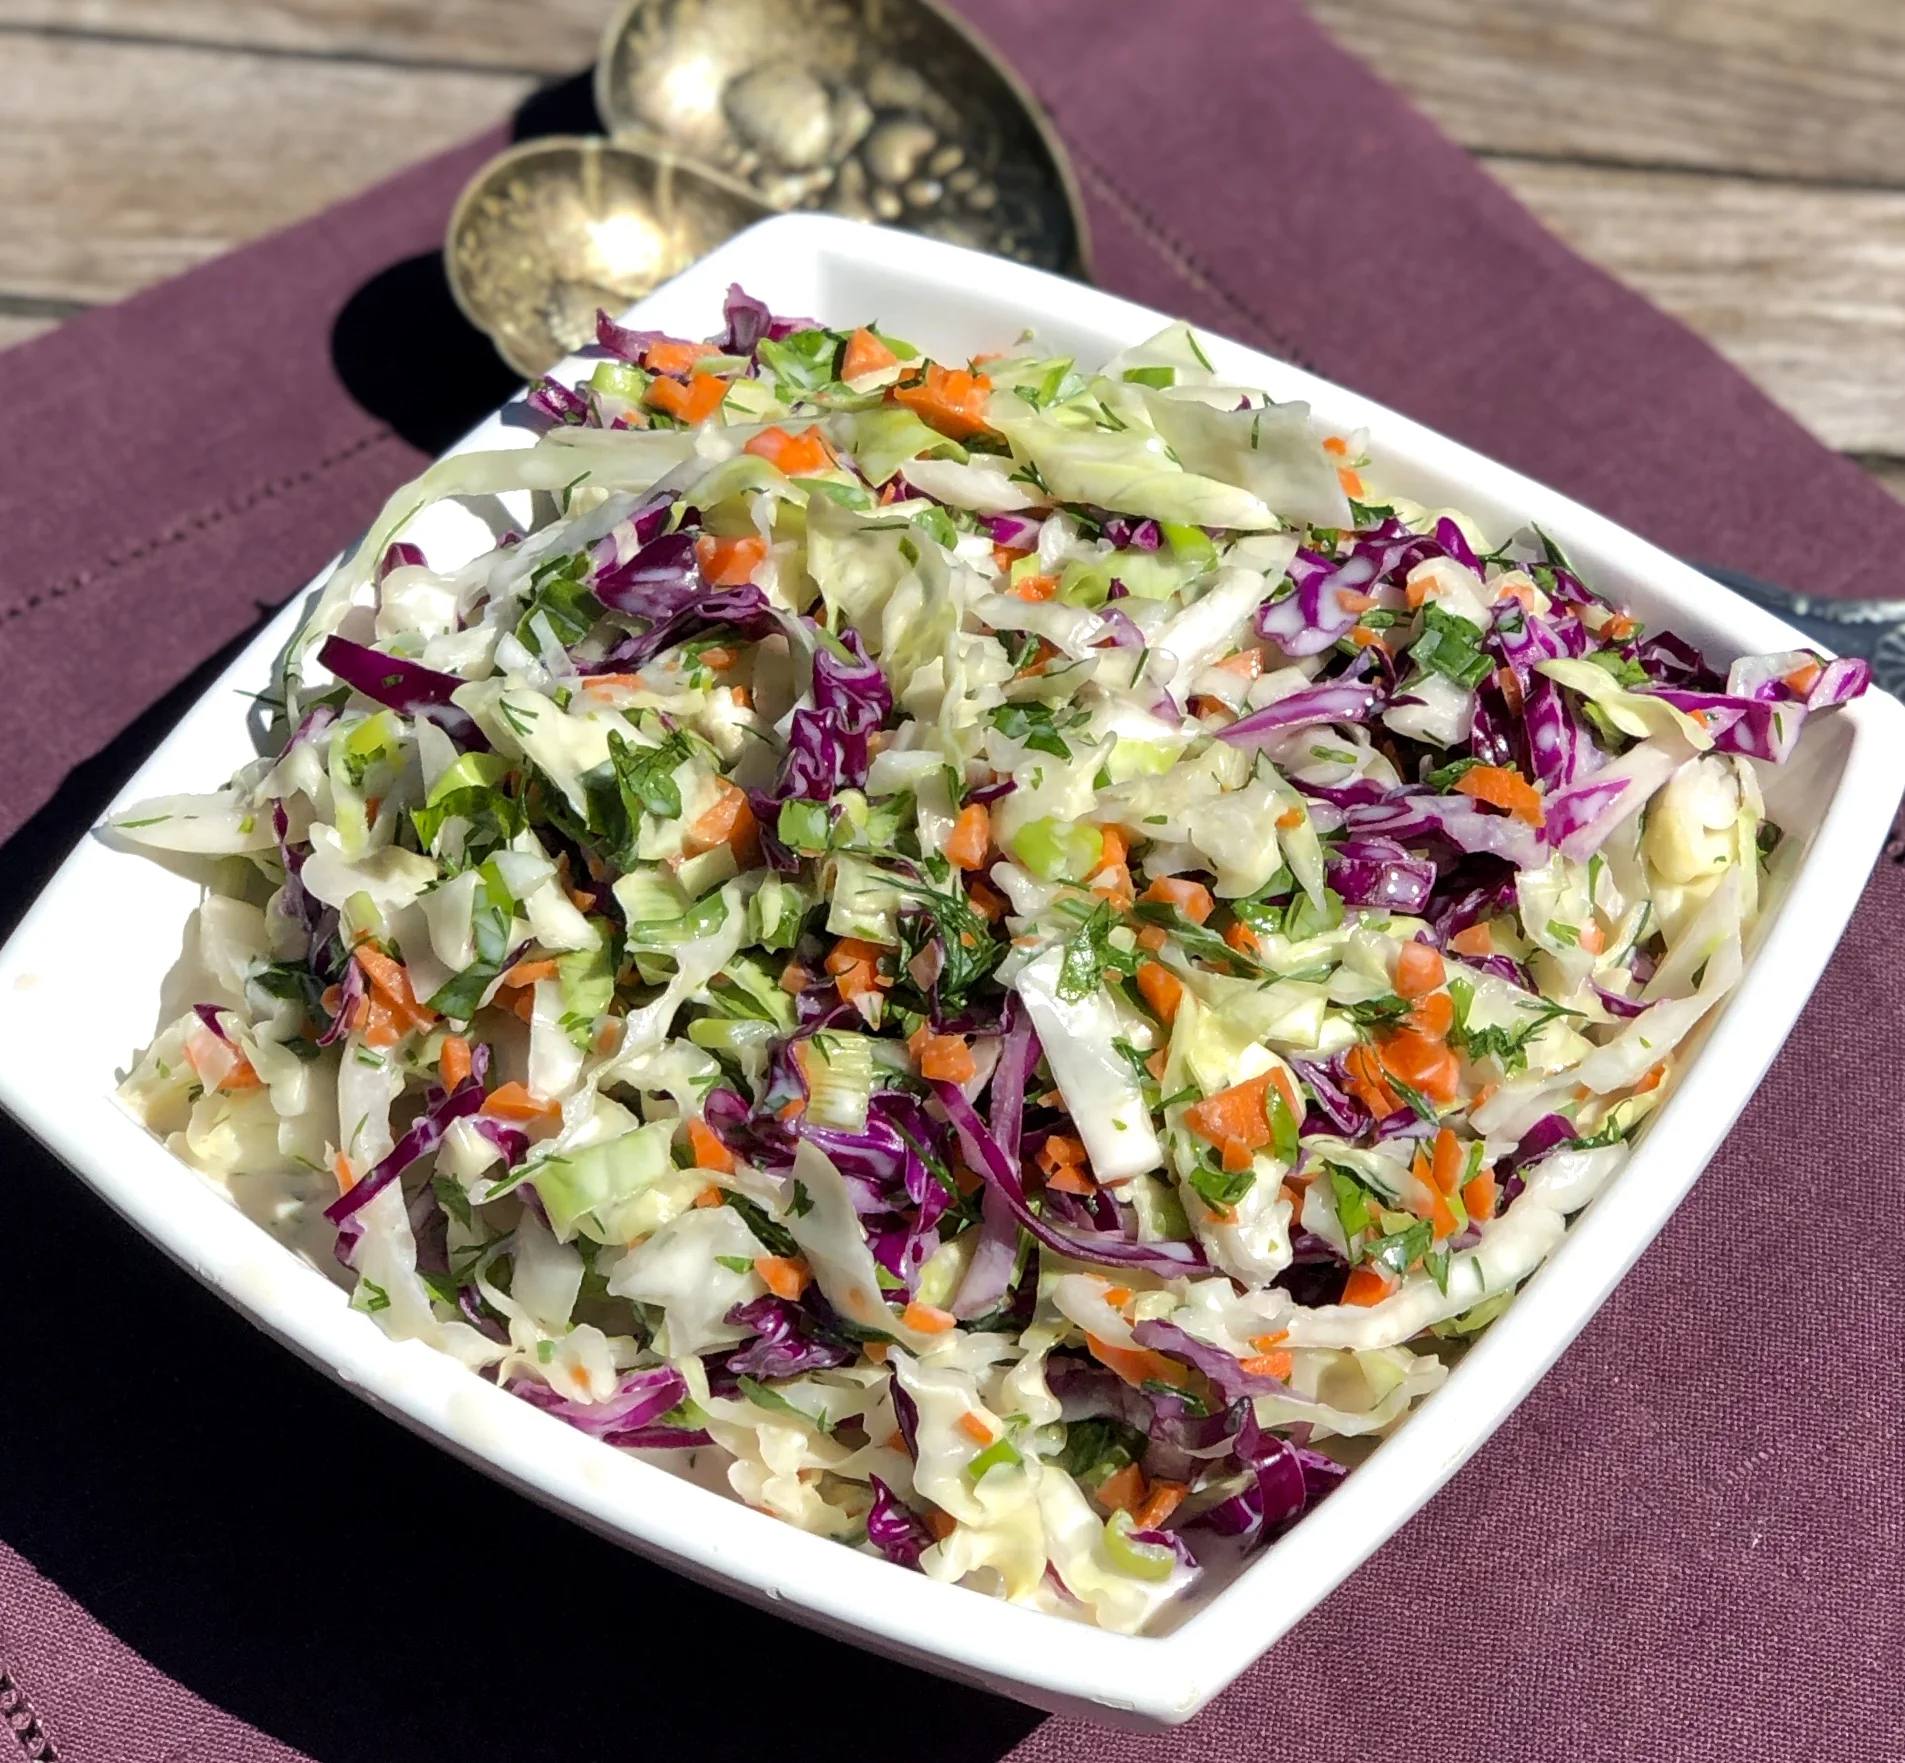
fullsizeoutput_a6e7.jpeg

Picnic on July 4th? Of course! It’s the American thing to do.

So of course, we need to bring typically American food.

Like cole slaw.

Which has become an iconic American picnic dish but is actually not an American recipe at all. Cole slaw (which means “cabbage salad”) was originally a Dutch specialty.

Nevertheless, we Americans love it so much we have claimed it as our own and it is therefore perfectly perfect for any Fourth of July celebration.

Two Color Cabbage Slaw

  • 4 cups packed shredded green cabbage

  • 2 cups packed shredded purple cabbage

  • salt

  • 2 finely chopped carrots

  • 3 chopped scallions

  • 1/4 cup chopped fresh parsley

  • 2 tablespoons chopped fresh dill

  • 1-1/4 cups buttermilk

  • 1/3 cup mayonnaise

  • 2 tablespoons cider vinegar

  • 1 tablespoon sugar

  • pinch or two of cayenne pepper, optional

Place the green and purple cabbage shreds in a large bowl, sprinkle with 1-2 teaspoons of kosher salt and toss to distribute the ingredients evenly. Let rest for 45 minutes. Rinse the cabbage and wipe the shreds dry on paper towels. Place the shreds in a large bowl. Add the carrots, scallions, parsley and dill and toss the ingredients. In another bowl, combine the buttermilk, mayonnaise, cider vinegar and sugar. Whisk the ingredients and pour over the vegetables. Toss the ingredients and let rest for at least 15 minutes. Before serving, taste for seasoning and add salt and cayenne pepper to taste.

Makes 8 servings

Chopped Salad with Chick Peas, Feta Cheese and Zatar Vinaigrette

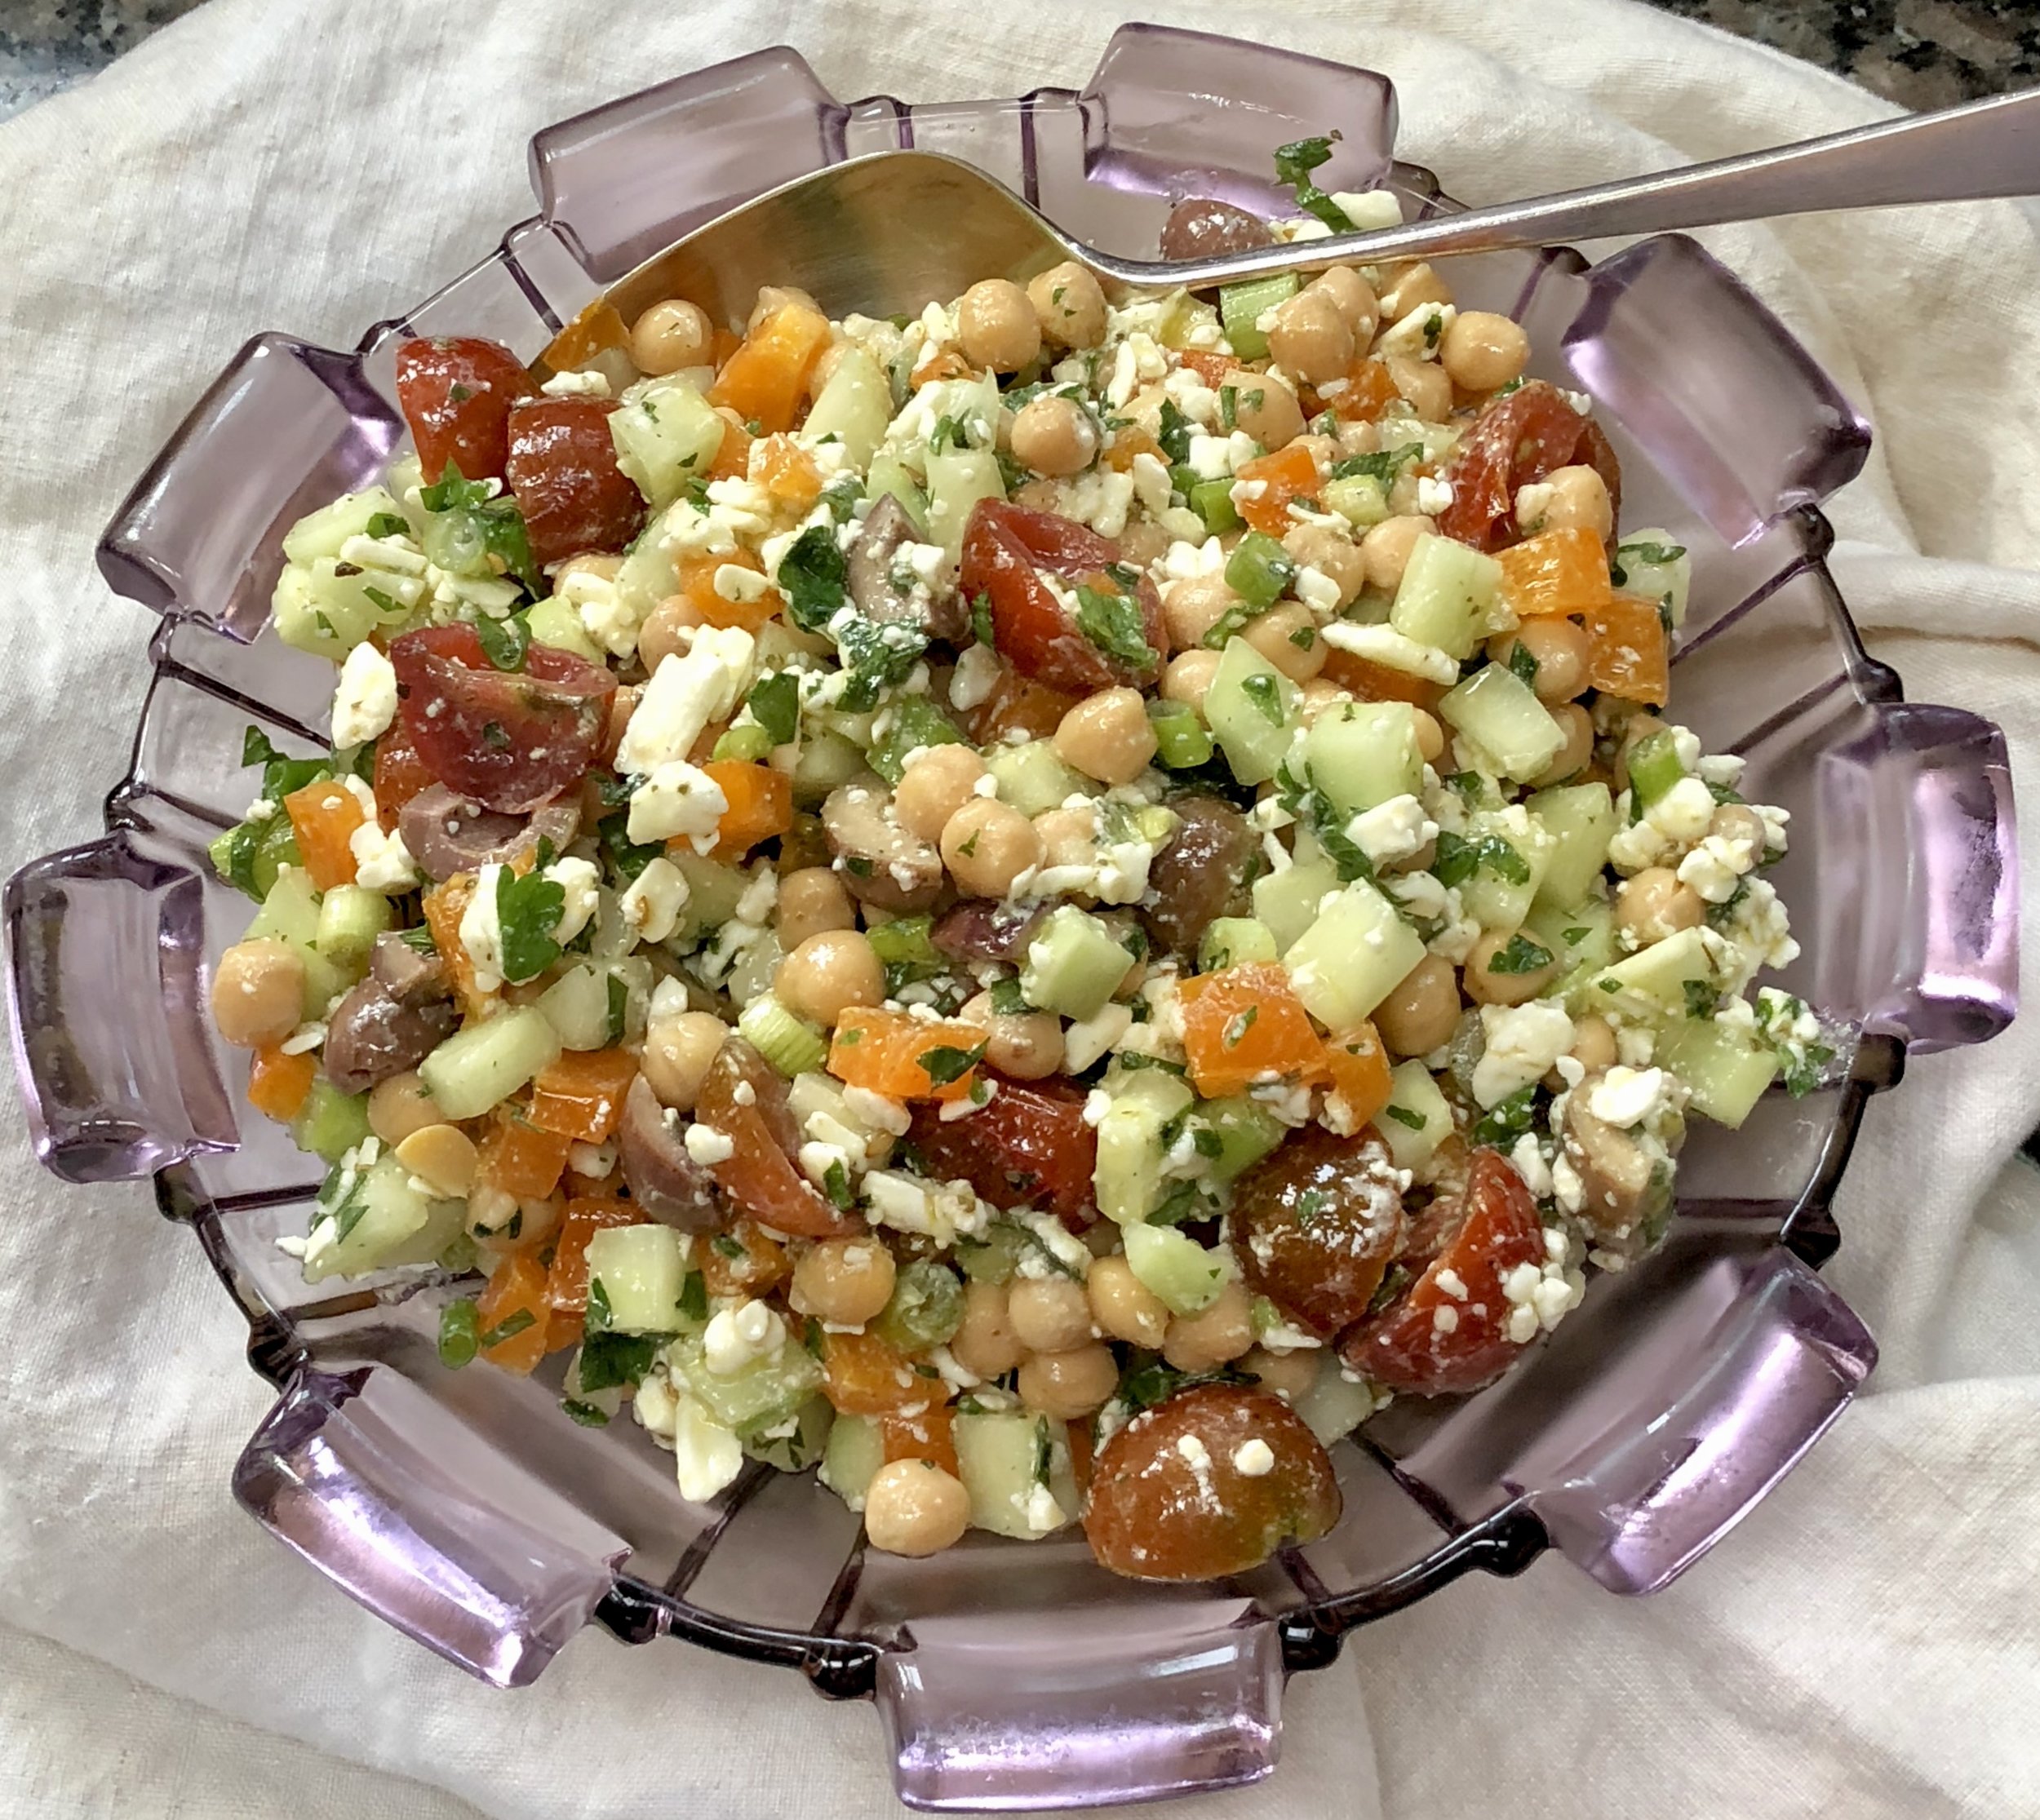
fullsizeoutput_96d0.jpeg

For us, summer means salad. Not just leafy greens and tomatoes for starters to a meal. We eat bulky filling salads for dinner. Like this chopped salad, which of course could be served with other salads or as a side dish to grilled fish. But it’s also satisfying on its own, just like this. Add a crust bread and some fabulous olive oil for dipping and that’s all you need (except for dessert of course).

Chopped Salad with Chickpeas, Feta Cheese and Zatar Vinaigrette

  • 1 large cucumber, peeled, deseeded, and chopped

  • 1 large red bell pepper, chopped

  • 2 large ripe tomatoes, chopped

  • 3–4 scallions, chopped

  • 1 (15-ounce) can chick peas, rinsed and drained

  • 1 cup crumbled feta cheese

  • 1/4 cup minced fresh parsley

  • 1/2 cup tangy black olives, pitted and halved

  • 3–4 tablespoons extra virgin olive oil

  • 2 tablespoons lemon juice

  • 1/2 teaspoon zatar

  • Salt and freshly ground black pepper to taste

  • Pita bread or crisps, optional

Place the cucumbers, bell pepper, tomatoes, scallions, chick peas, cheese, parsley, and olives in a bowl and toss ingredients gently. Just before serving, mix together the olive oil, lemon juice, and zatar. Pour over the salad. Season to taste with salt and pepper. Salad tastes good with Pita bread or crisps.

Makes 4 servings.


Food You Want

Cauliflower Crunch Tabouli from Food You Want by Nealy Fischer

Cauliflower Crunch Tabouli from Food You Want by Nealy Fischer

I don’t often write about cookbooks, but every once in a while I find one that I like so well that I want to spread the news. Agents and publishers do send me books for review from time to time but I only recommend the ones that I find truly useful. “Food You Want” by Nealy Fischer, The Flexible Chef (DaCapo 2019) is one of those.

Most of the time it’s the recipes that catch my eye and stimulate my taste buds. But I like “Food You Want” because it has much more than good recipes. It is more or less a book that helps any home cook — novice or experienced — become comfortable in the kitchen, be unafraid to cook, enjoy planning meals and preparing food.

That has always been one of my life’s goals. My Mom made me comfortable in the kitchen. I have passed the lessons on to my children, grandchildren and numerous students who have shown up over the years for cooking lessons.

Fischer’s book sets out several ways to make meals easier and to gear recipes to one’s particular tastes and lifestyle. Her goal is to make home cooks feel “unshackled” to recipes and to use one’s creativity to suit preferences and limitations. The recipes are gluten-free because that suits her diet, but of course, for those who can tolerate gluten, she tells you how to switch.

The “flexible flips” at the end of the recipes show various ways to add or leave out an ingredient or two — substitutions; changing a dish from dairy to parve; what to do with leftover ingredients, etc. “Nail this” tips offer strategies for cooking each recipe you choose — what can be done in advance; temperature guides; when to let food cool before storing; when to drizzle rather than smooth ingredients with a spoon, and so on.

There are lots of kitchen hacks, advice on pantry, fridge and freezer staples and even advice on essential kitchen gadgets.

There’s advice on how to make a plan so that cooking becomes less chore, more joyous. Recipes for side dishes that don’t require recipes! Quickie 10-minute dinners! How to make baking flops into successes!

Did you know you could substitute chopped green olives for capers?? The book is filled with stuff like that.

So many wonderful sounding recipes too. I especially love the salads, especially the Cauliflower-Crunch Tabouli, which is perfect for summer; Minted Pea Soup with Roasted Beetroot; Showstopping Herb-Crusted Salmon; Guiltless Zucchini Fritters; Date-Bar Bites.

All in all — this is a wonderful guide for how to enjoy cooking, how to become more creative, how to adapt recipes, how to find joy in preparing meals — plus some delicious recipes!

CAULIFLOWER-CRUNCH TABOULI

STEPS: CHOP, TOSS! / Serves 6

 There’s nothing ordinary about this stunning herb-specked, grain-free tabouli. Raw cauliflower and pine nuts take center stage and combine to add an unexpected and essential nuttiness and color that elevate the dish. This recipe takes just minutes to whip up and seconds to devour. It’s crunchy, fresh, and the very definition of craveable clean food that makes you want more. I really shouldn’t play favorites, but this salad may well be my favorite!

 Tools: Food processor (optional)


Ingredients:

·      1/2 head purple or white cauliflower, core removed

·      3 Persian cucumbers, chopped

·      2 medium tomatoes, chopped

·      1 cup loosely packed fresh mint leaves, chopped

·      1 cup loosely packed fresh parsley leaves, chopped

·      2 tablespoons finely diced red onion

·      3 tablespoons extra-virgin olive oil

·      3 tablespoons fresh lemon juice

·      1 garlic clove, pressed (optional)

·      Salt, to taste

·      Freshly ground black pepper, to taste

·      1/2 cup chopped pine nuts, toasted


Directions:

1.     In a food processor, chop the cauliflower into 1/4-inch pieces. Do not overprocess. Alternatively, chop it by hand.

2.     In a large bowl, stir together the cauliflower, cucumber, tomato, mint, parsley, and red onion.

3.     Toss the vegetables with the olive oil, lemon juice, and garlic (if desired). Season with salt and pepper to taste. Top with pine nuts just before serving.

4.     Serve immediately, or it may be made an hour ahead. If making in advance, toss the pine nuts in right before serving so they stay crunchy.


nail this:

·      Because the fresh, raw ingredients are the centerpiece here, only make this recipe when you have access to the freshest herbs and cauliflower.

·      Nuts are crucial. They add an essential favor and crunch that are unexpected and should be included.


flip it:

·      Use any color cauliflower you can find.

·      Substitute another nut for the pine nuts. Toasted would be yummiest.

Add chopped anything! Red bell peppers and olives are favorite flavor profiles.
Roasted Vegetable Galette

Roasted Vegetable Galette

Roasted Vegetable Galette

Everyone who knows me or has read a few Mother’s Day posts on my blog knows we don’t celebrate the usual way. We don’t go out to a restaurant or club.

We stay home and have a cookoff.

Yes, we cook and it’s work and a mess but we have the best time ever. Everyone participates (except that some years I am just in charge of the beverages).

We choose a theme, form into teams and each team chooses a recipe. I buy the ingredients a couple of days before and then, on Sunday, my two daughters, their husbands, my husband and my grandkids all get cooking.

Last year our theme was dips. I prepared a tropical salsa.

One year it was chocolate chip cookies.

We’ve done tomato sauce, eggs and so on.

This year we decided on PIE. Each team will make some sort of pie.

There are no rules. They interpret the word (pie) however they wish.

So — apple pie? Sure!

Pizza pie? Of course!

Pot pie? Yes!

The only limit: this will be a vegetarian/dairy meal. So, no beef pot pie.

But — quiche? Why not — it’s a type of open face pie, right?

How about a potato/olive/onion empanada? YUM!

Cabbage pastie? ok!

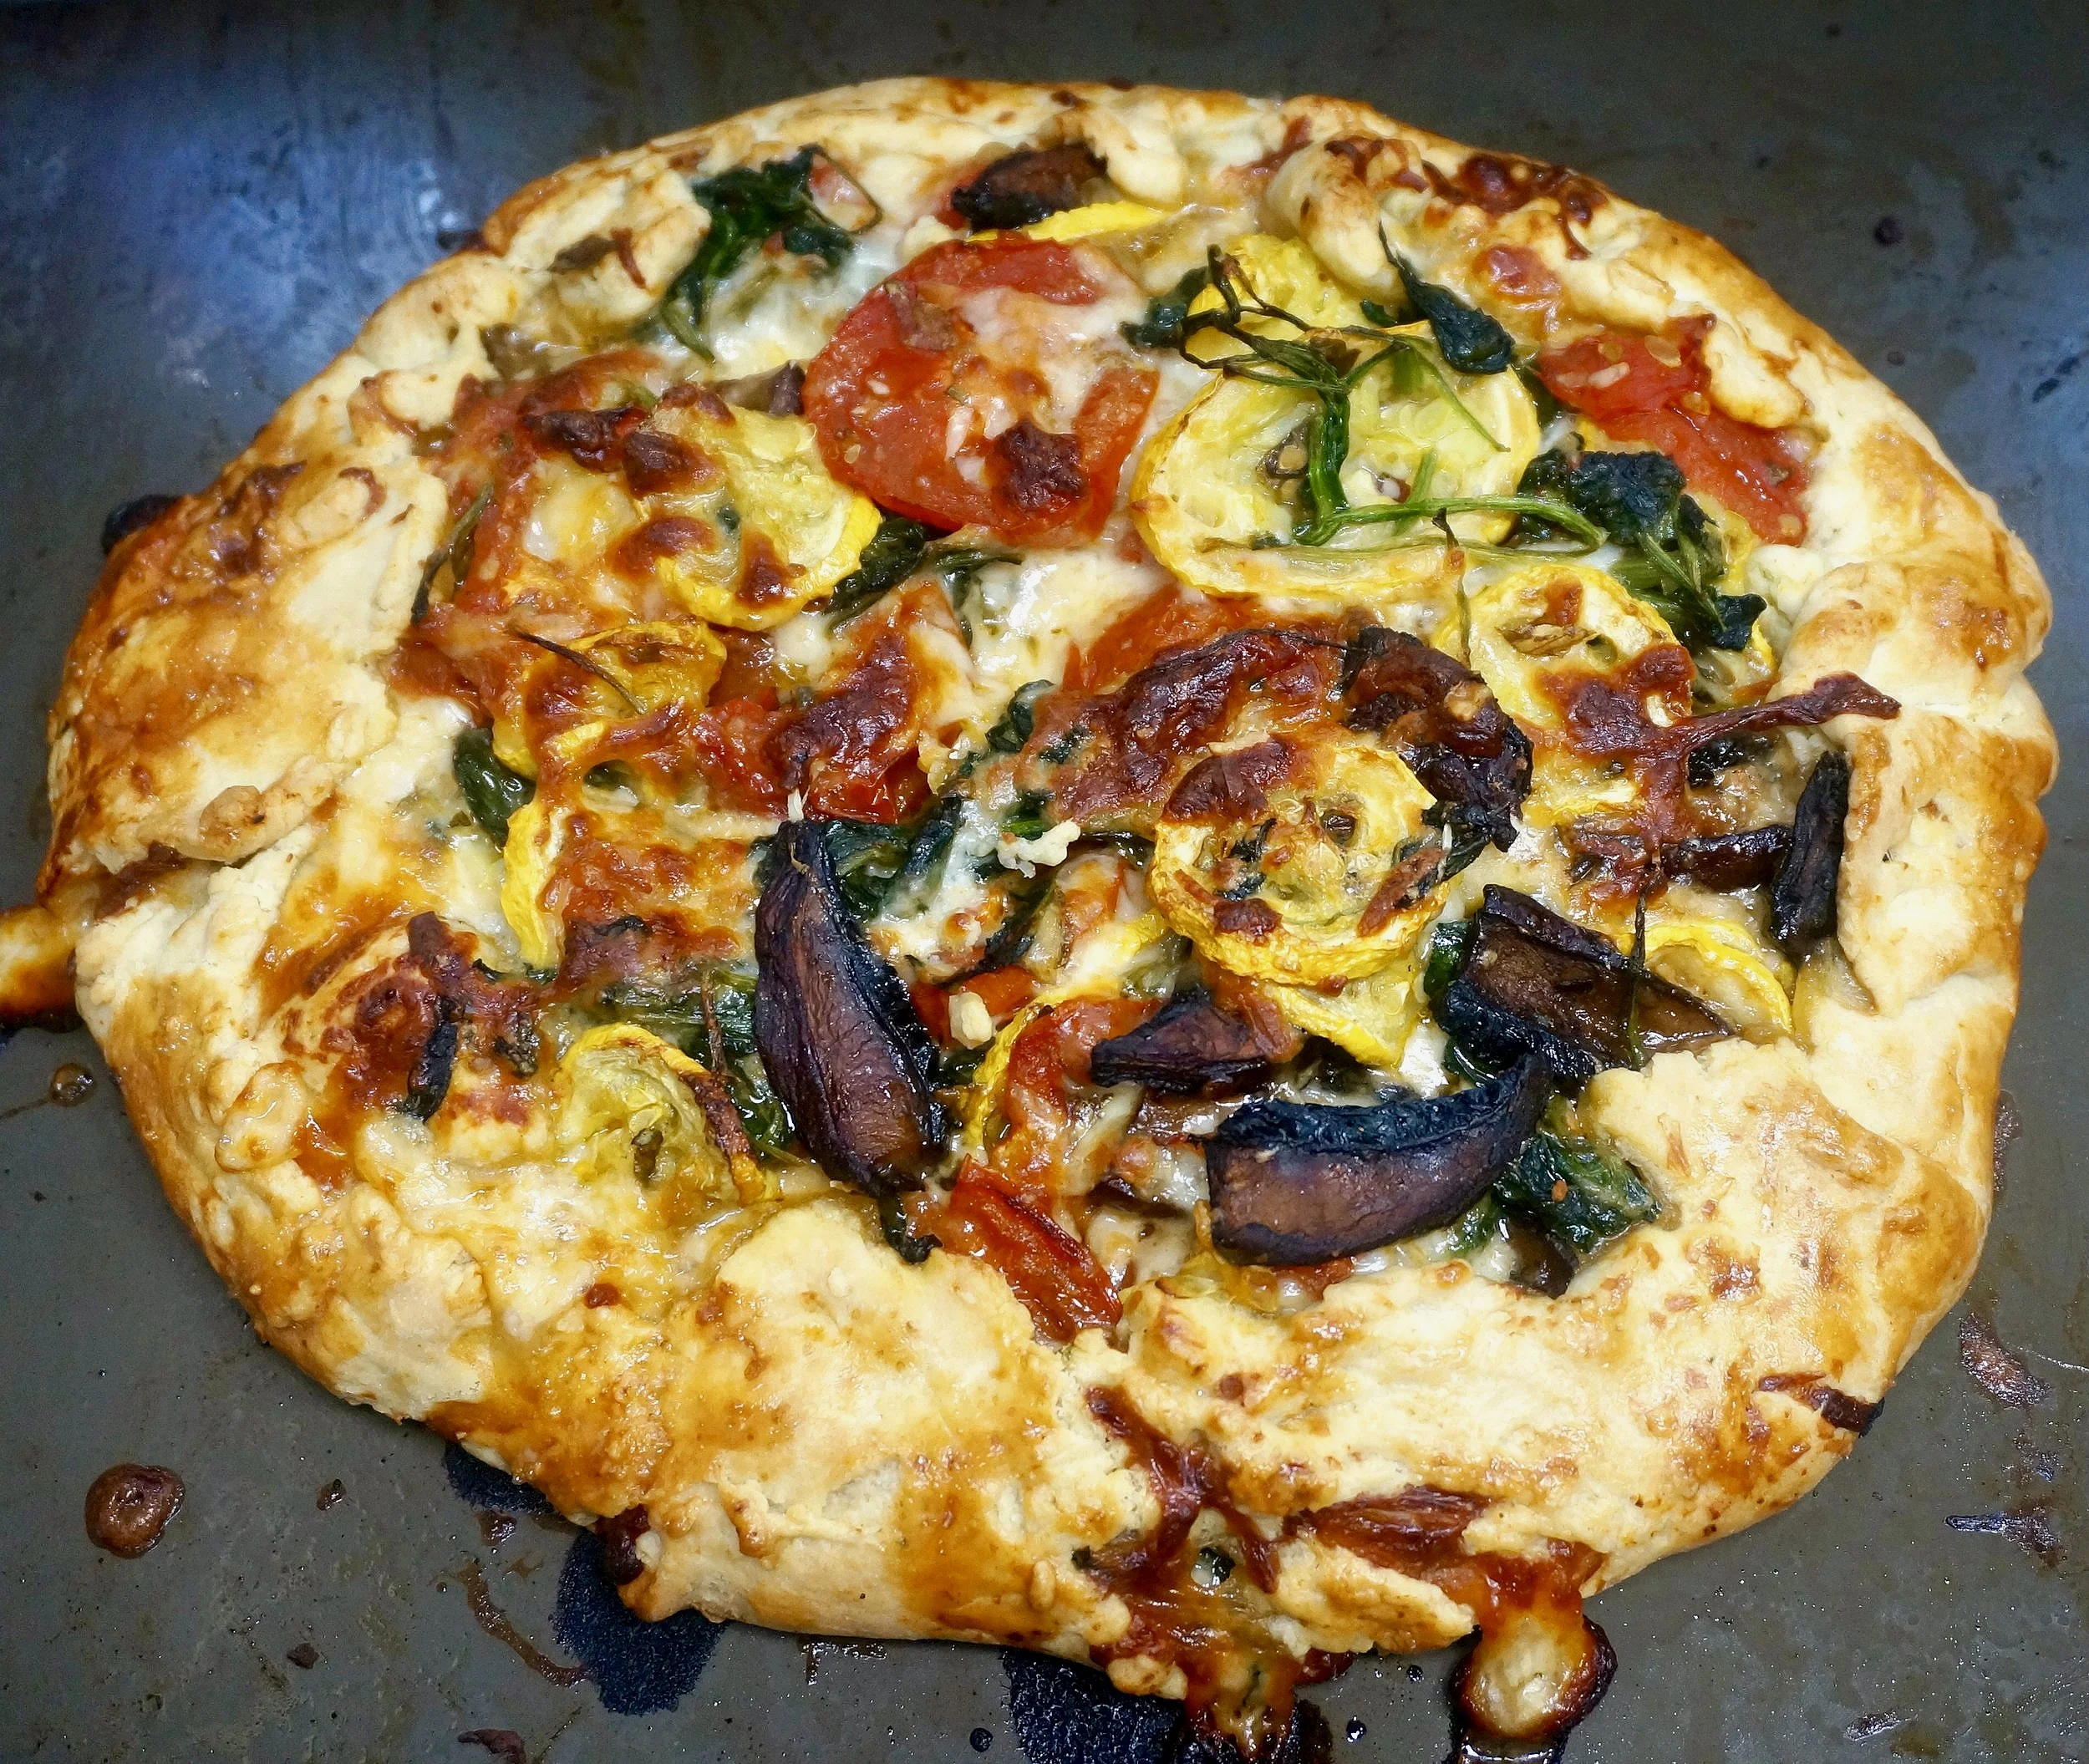
I am thinking of this though: roasted vegetable galette. I make it with pie dough so it qualifies, doesn’t it?

A good Meatless Monday (or any other day) choice.


Roasted Vegetable Galette

  • 1-1/2 cups all-purpose flour

  • 1/2 teaspoon salt

  • 1 tablespoon chopped chives or scallion tops

  • 6 tablespoons butter, cut into chunks

  • 2 tablespoons cold vegetable shortening

  • 3-4 tablespoons milk

  • 2 medium yellow squash, sliced

  • 4-5 plum tomatoes, sliced

  • 1 large Portobello mushroom, sliced

  • 4 tablespoons olive oil

  • salt to taste

  • 1 bunch spinach, washed and dried

  • 2 tablespoons chopped basil

  • 1-1/2 cups (6 ounces) shredded Mozzarella cheese

  • 2-3 tablespoons grated Parmesan cheese

  • 1 egg, beaten, optional

For the crust: mix the flour, salt and chives together in a bowl or food processor. Add the butter and shortening and cut the fat into the flour mixture with your hands or a pastry blender or by processing on pulse until the mixture looks like coarse crumbs. Gradually add 3 tablespoons milk and mix to form a soft dough, adding more milk as needed. Flatten the dough into a disk, wrap and let rest in the refrigerator for at least one hour. Line a large baking sheet with parchment paper. Roll the dough on a lightly floured board into a circle about 12-13 inches in diameter (about 1/8-inch thick) and transfer the circle to the prepared baking sheet.

For the filling: Preheat the oven to 425 degrees. Line a baking sheet with parchment paper. Place the squash, tomato and Portobello slices on the baking sheet and brush on both sides with 3 tablespoons of the olive oil. Roast for 20-22 minutes or until tender. Remove from the oven. Heat the remaining tablespoon olive oil in a sauté pan over medium heat. Add the spinach and cook for 2-3 minutes until softened. Drain any liquid, chop the spinach coarsely and set aside.

Reduce the oven heat to 400 degrees. Scatter the circle of dough with 1 cup of the mozzarella cheese, leaving a border of about 1-1/2 inches. Mix the vegetables together with the basil and place over the cheese. Scatter the remaining mozzarella cheese and the Parmesan cheese on top. Fold the dough over the vegetables but not completely; leave the center open, with 7-8 inches of the vegetables showing. Pleat the dough at the edge to give the galette a rustic look. Beat the egg and brush it onto the dough for a glazed look, if desired. Bake for 35-40 minutes or until the crust is golden brown.

Makes 8 servings